- Home /
- Resources /
- Learning center /
- Setting Up a Windo...
Setting Up a Windows Server
Set up a Windows Server on Equinix Metal, including provisioning, remote desktop access, SSH configuration, OOB console access, and networking adjustments.
On this page
Looking to run Windows on bare metal, either for a specific use-case or just for fun? Equinix Metal™ offers Windows Server on many of our standard servers for a licensing fee per core. This guide covers basic set up for configuring access to your Windows Server, as well as an introduction to configuring the networking in Windows to use Equinix Metal features.
You Will Need
- An Equinix Metal Account
- A VLAN in the Metro where you are provisioning your Windows Server. This guide uses a VLAN with VNID
3400. - Another server connected to the VLAN to test connectivity with. In this example, the server is using IP address
169.254.1.12on VNID3400. (Optional, but handy).
Deploying the Server
Deploy a fresh Windows server On Demand from the Equinix Metal console. Select the Location, Plan, and Windows as your Operating System.
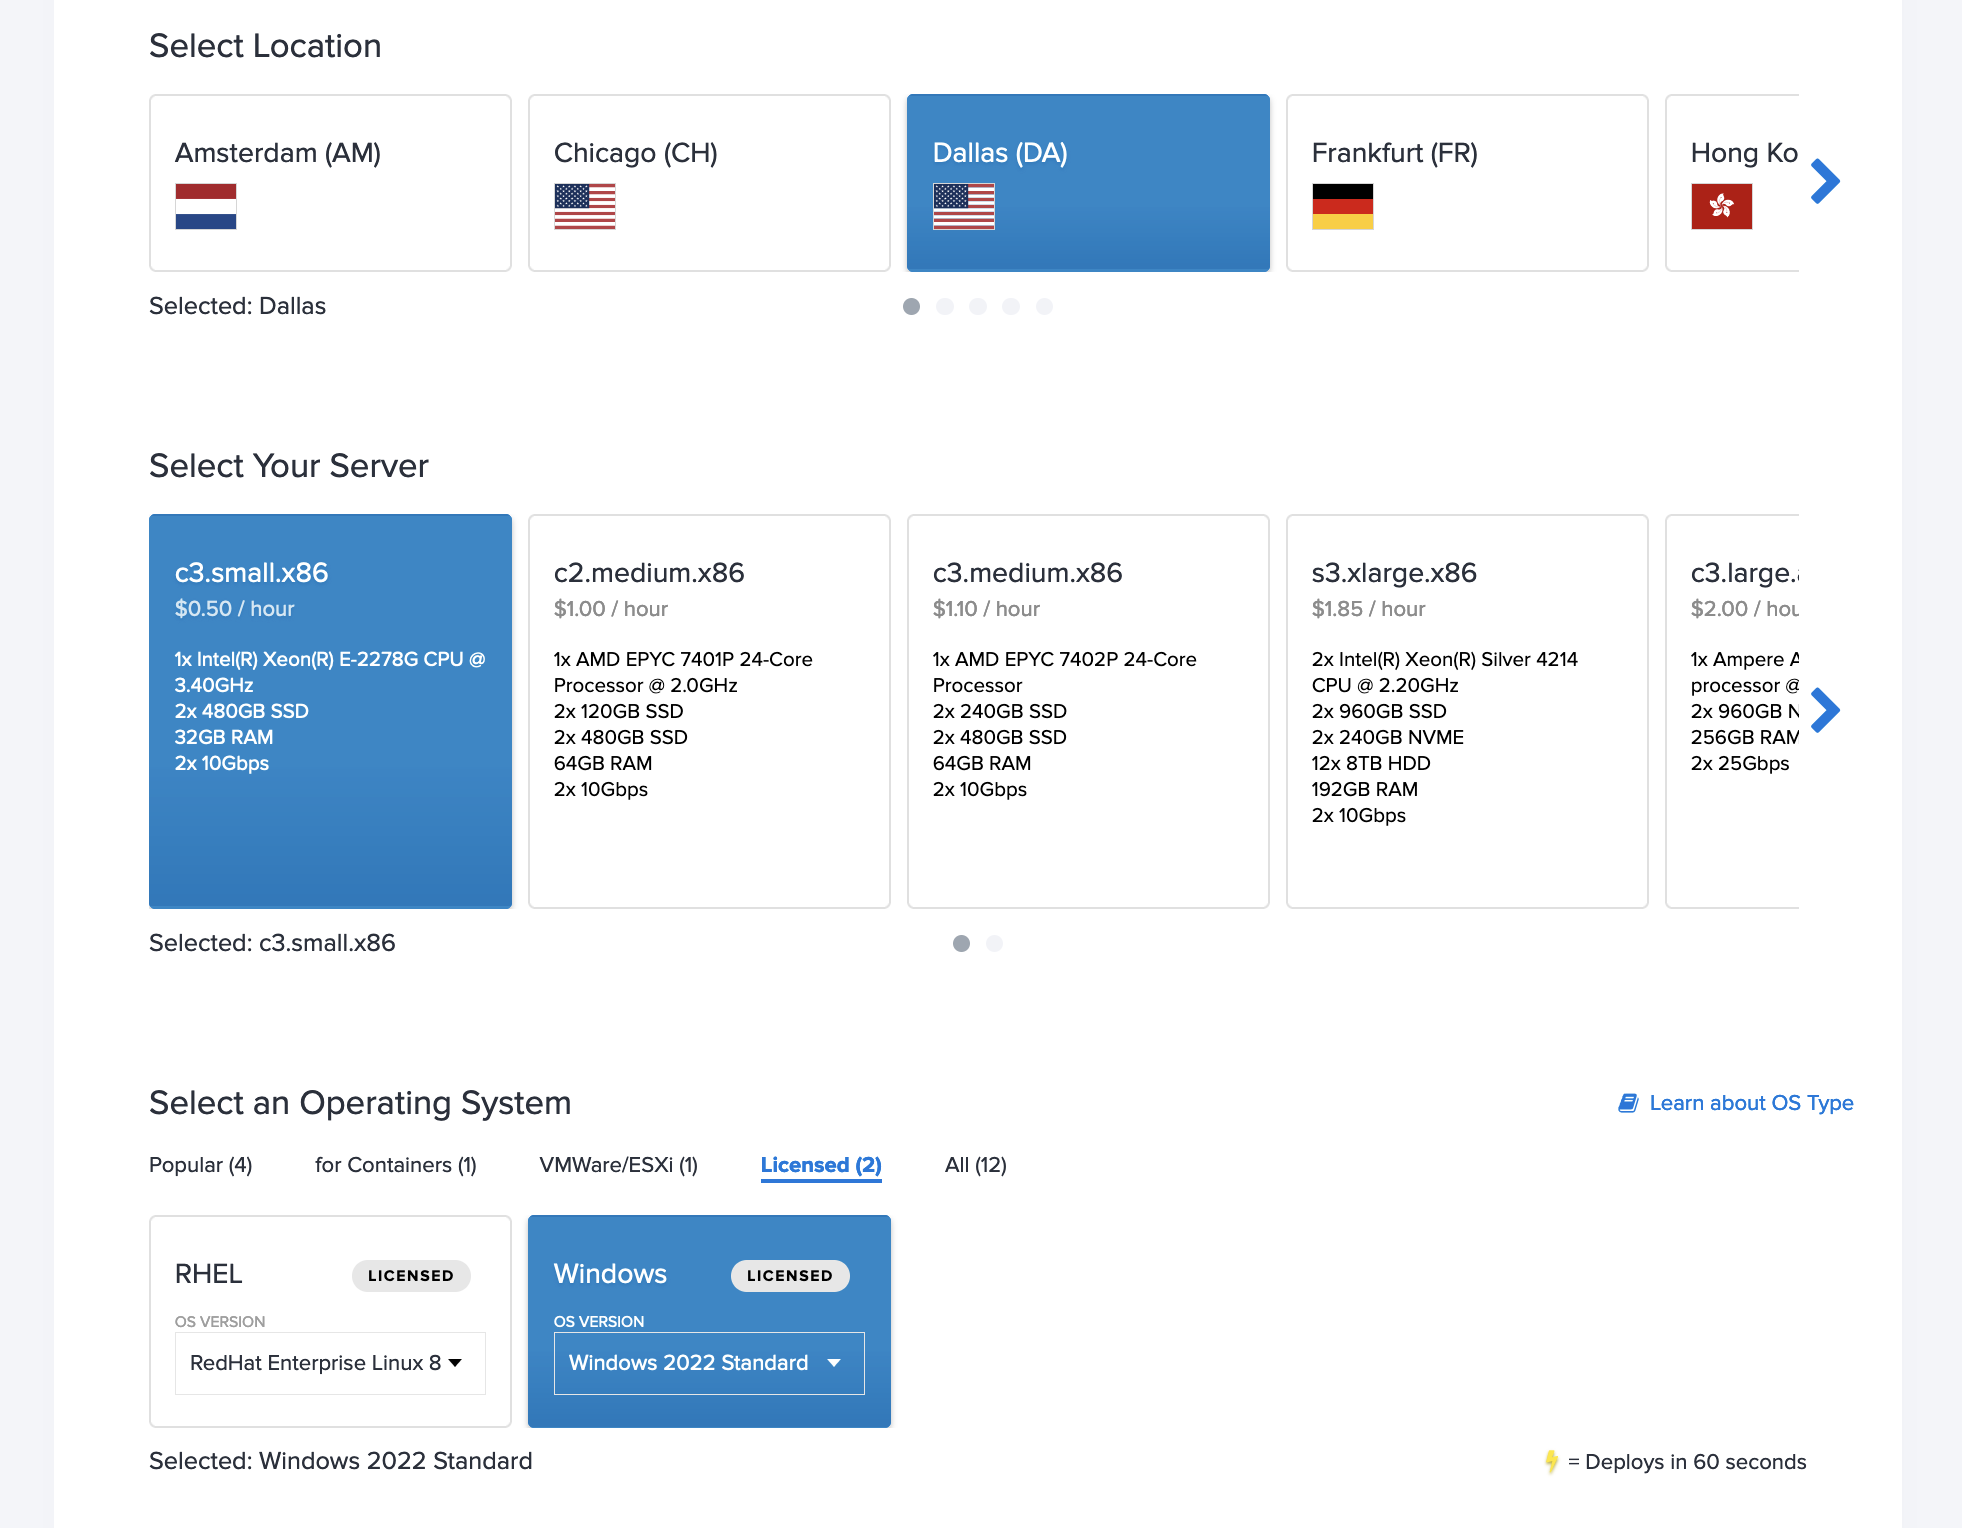
This guide uses Windows Server 2022 on a c3.small.x86 named "windows-server-setup" in its examples. The networking, SSH, and user data settings were all left as default.
Microsoft Remote Desktop Access
Microsoft Remote Desktop is a common way to access remote Windows servers and is available for many platforms. It is also the default experience for accessing a Windows server on Equinix Metal.
While your server is provisioning, grab the appropriate Remote Desktop client for your system from Microsoft.
After your server finishes provisioning, check out its Overview page.
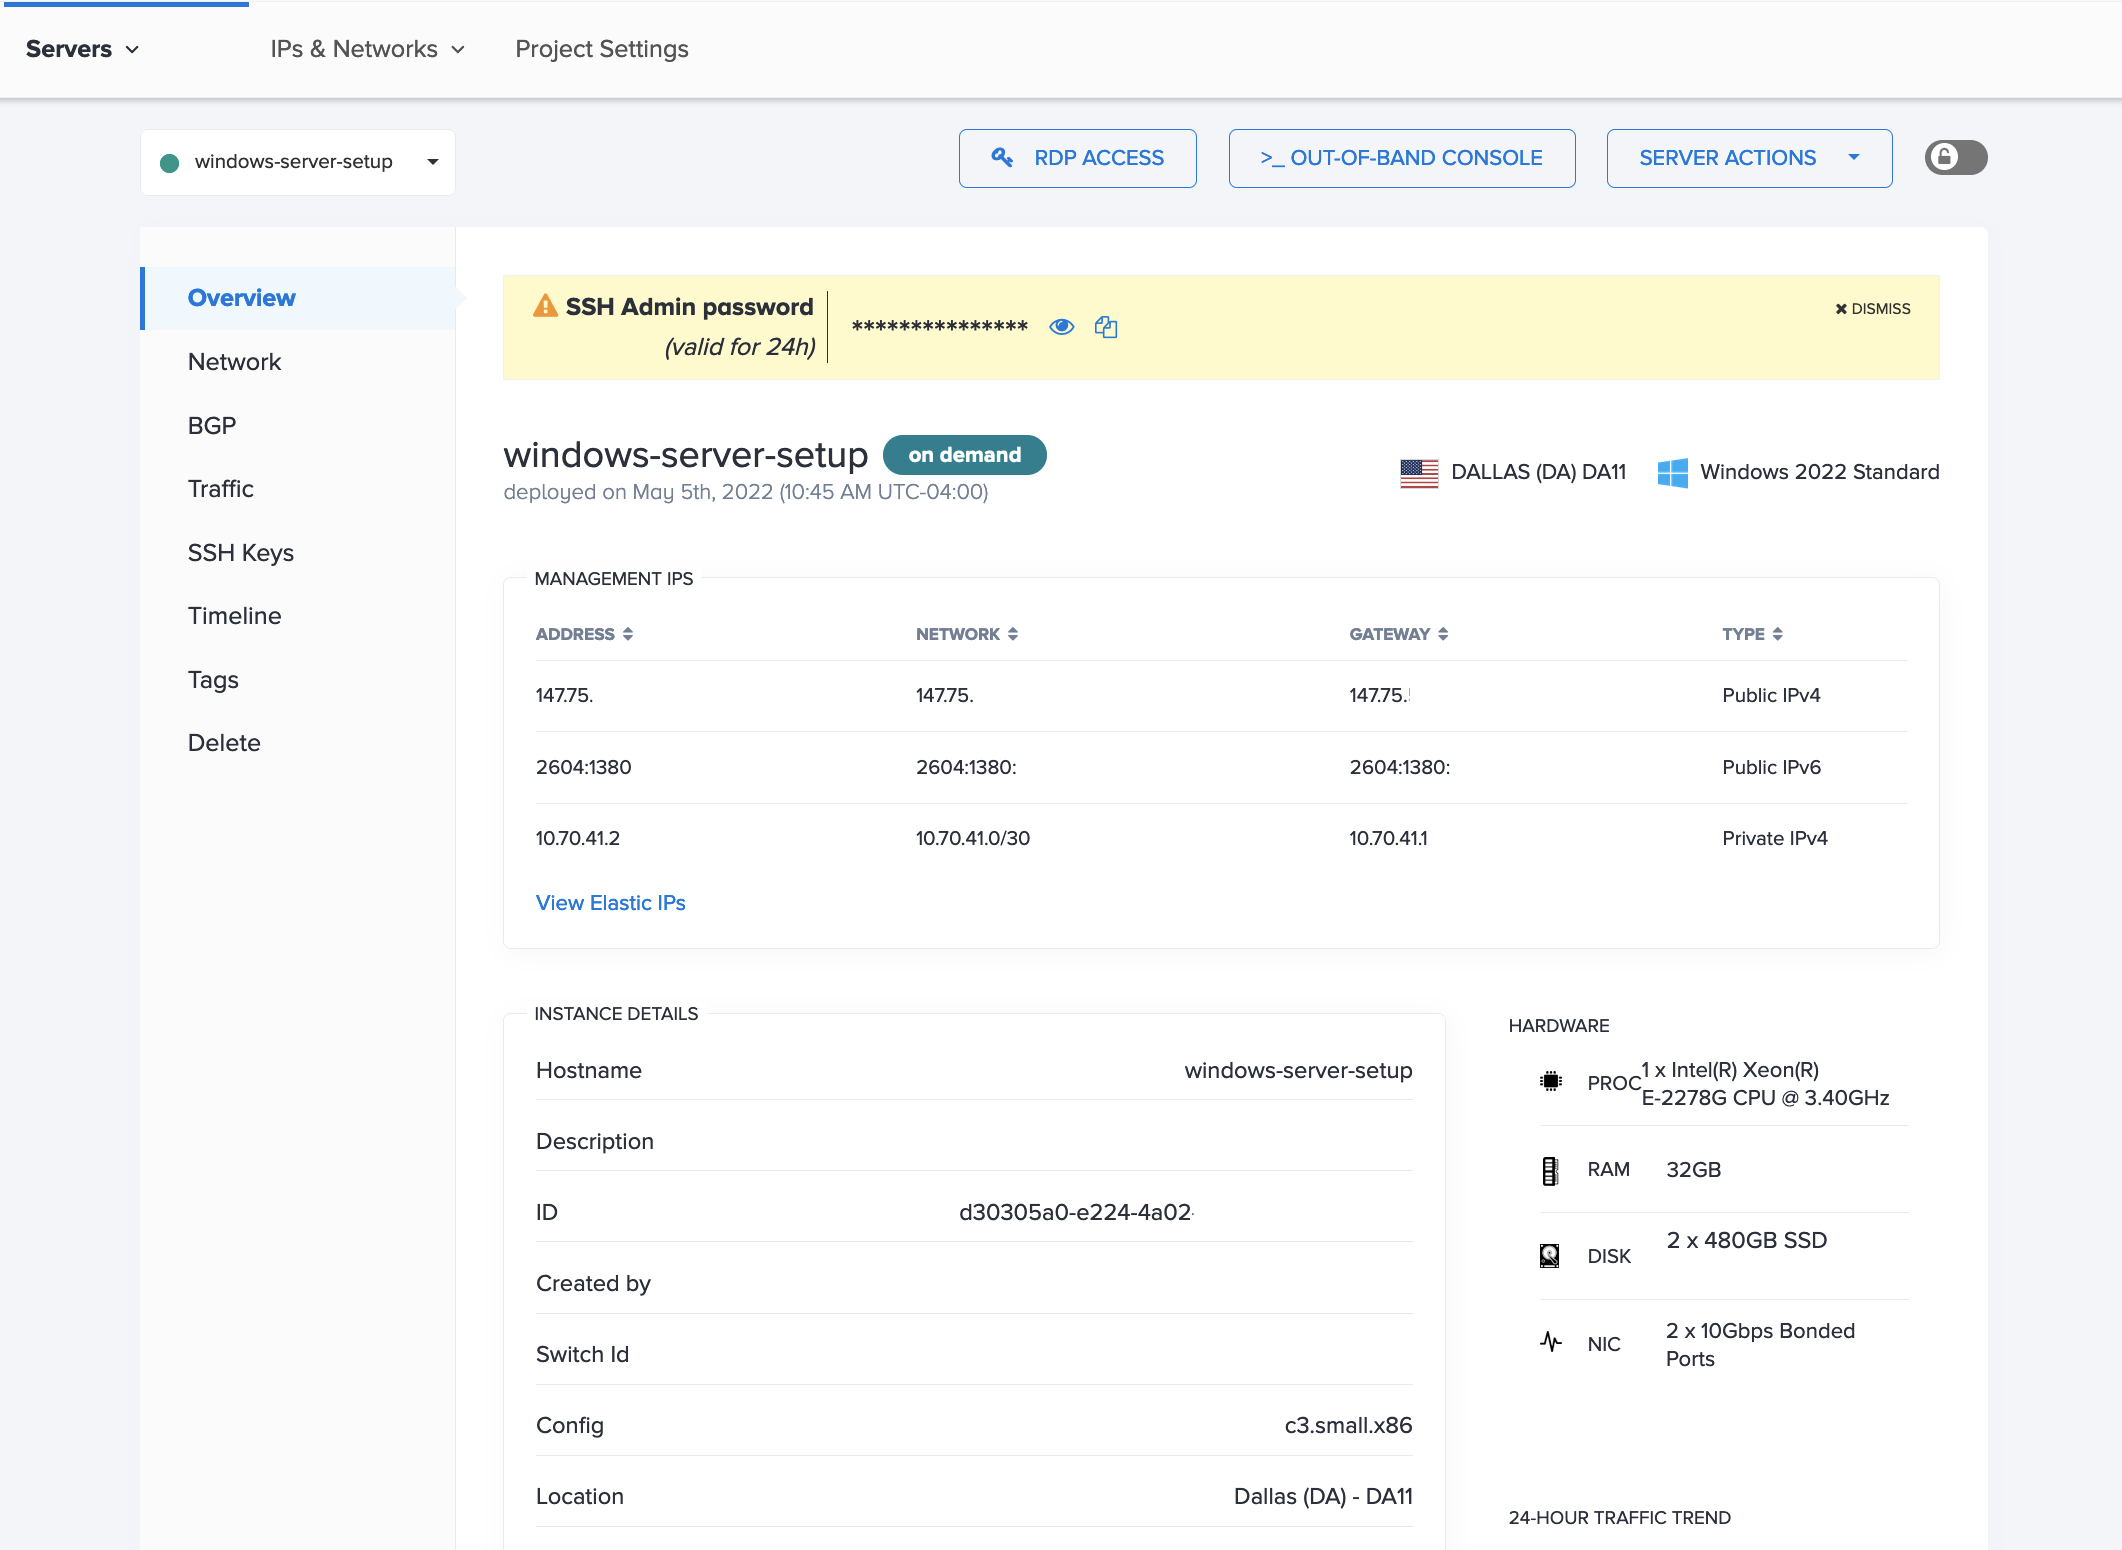
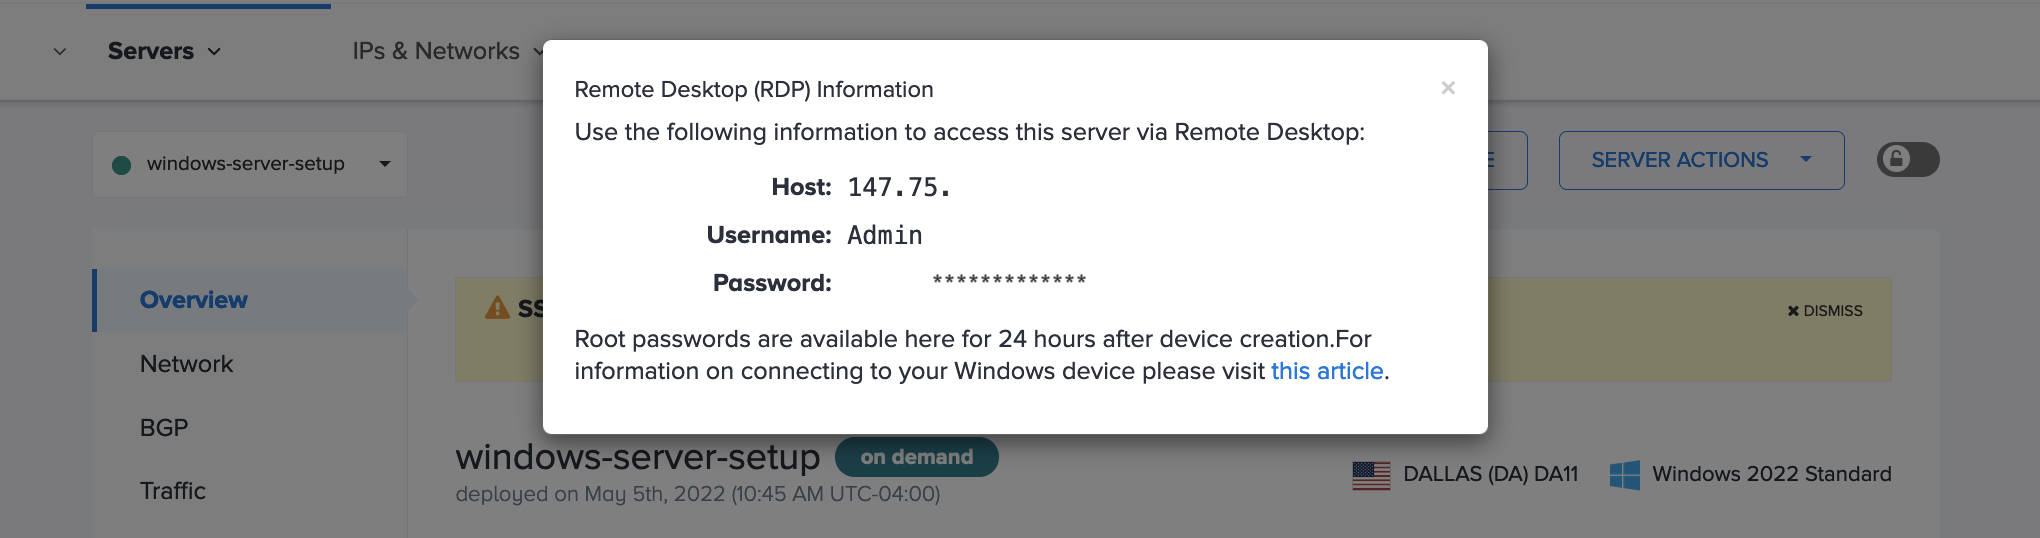
At the top, click RDP Access which will pop up the information that you need to enter into your Remote Desktop client to connect to your server.
The password will be available in the Equinix Metal console for the first 24 hours after provisioning. It will be automatically redacted from the console after that time.
In Remote Desktop, entering the server's IP Address and server name.
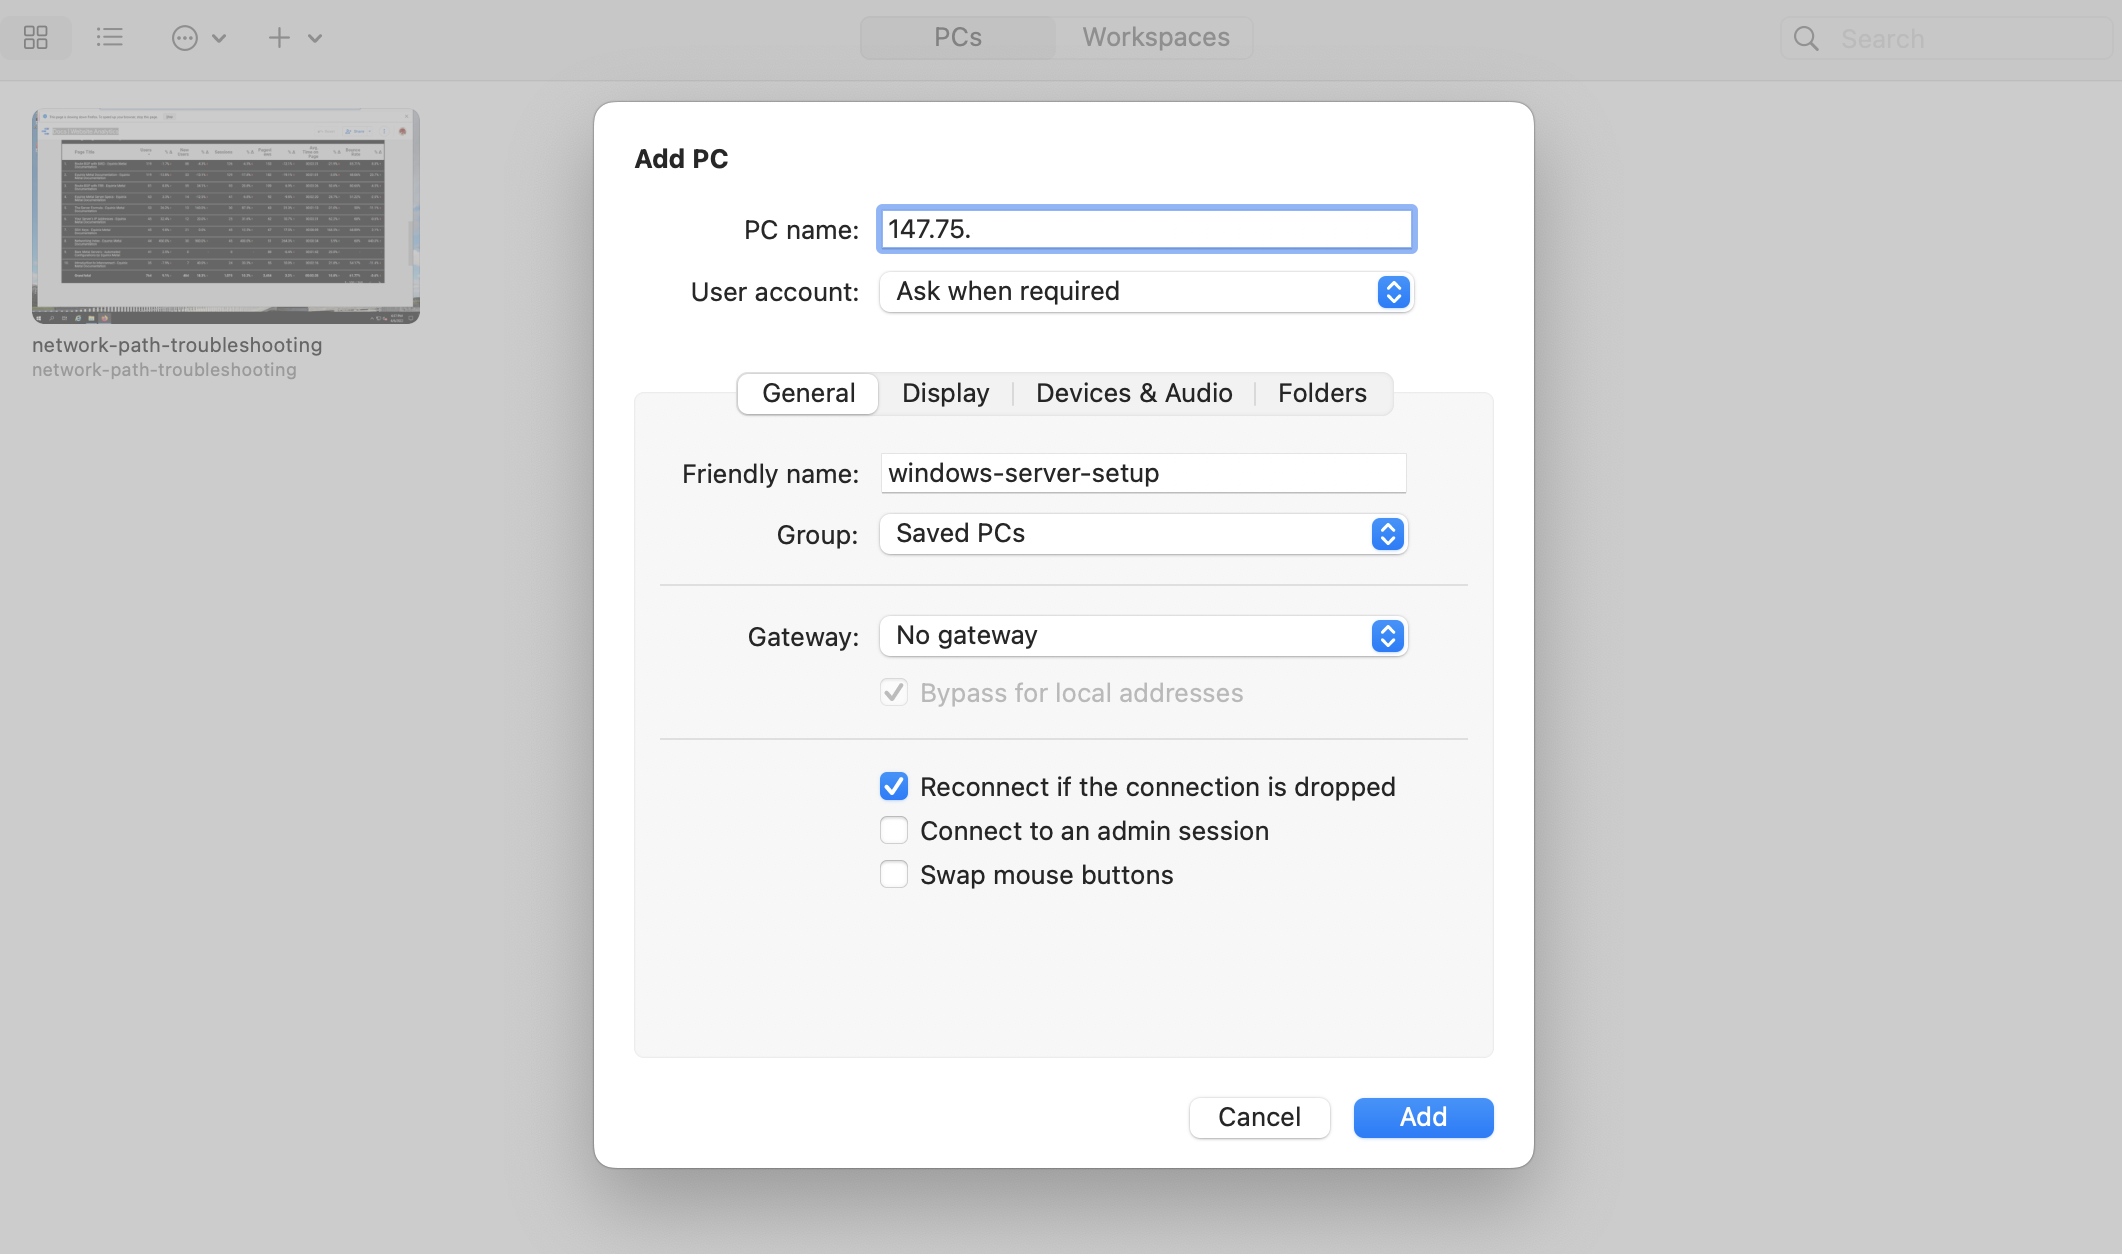
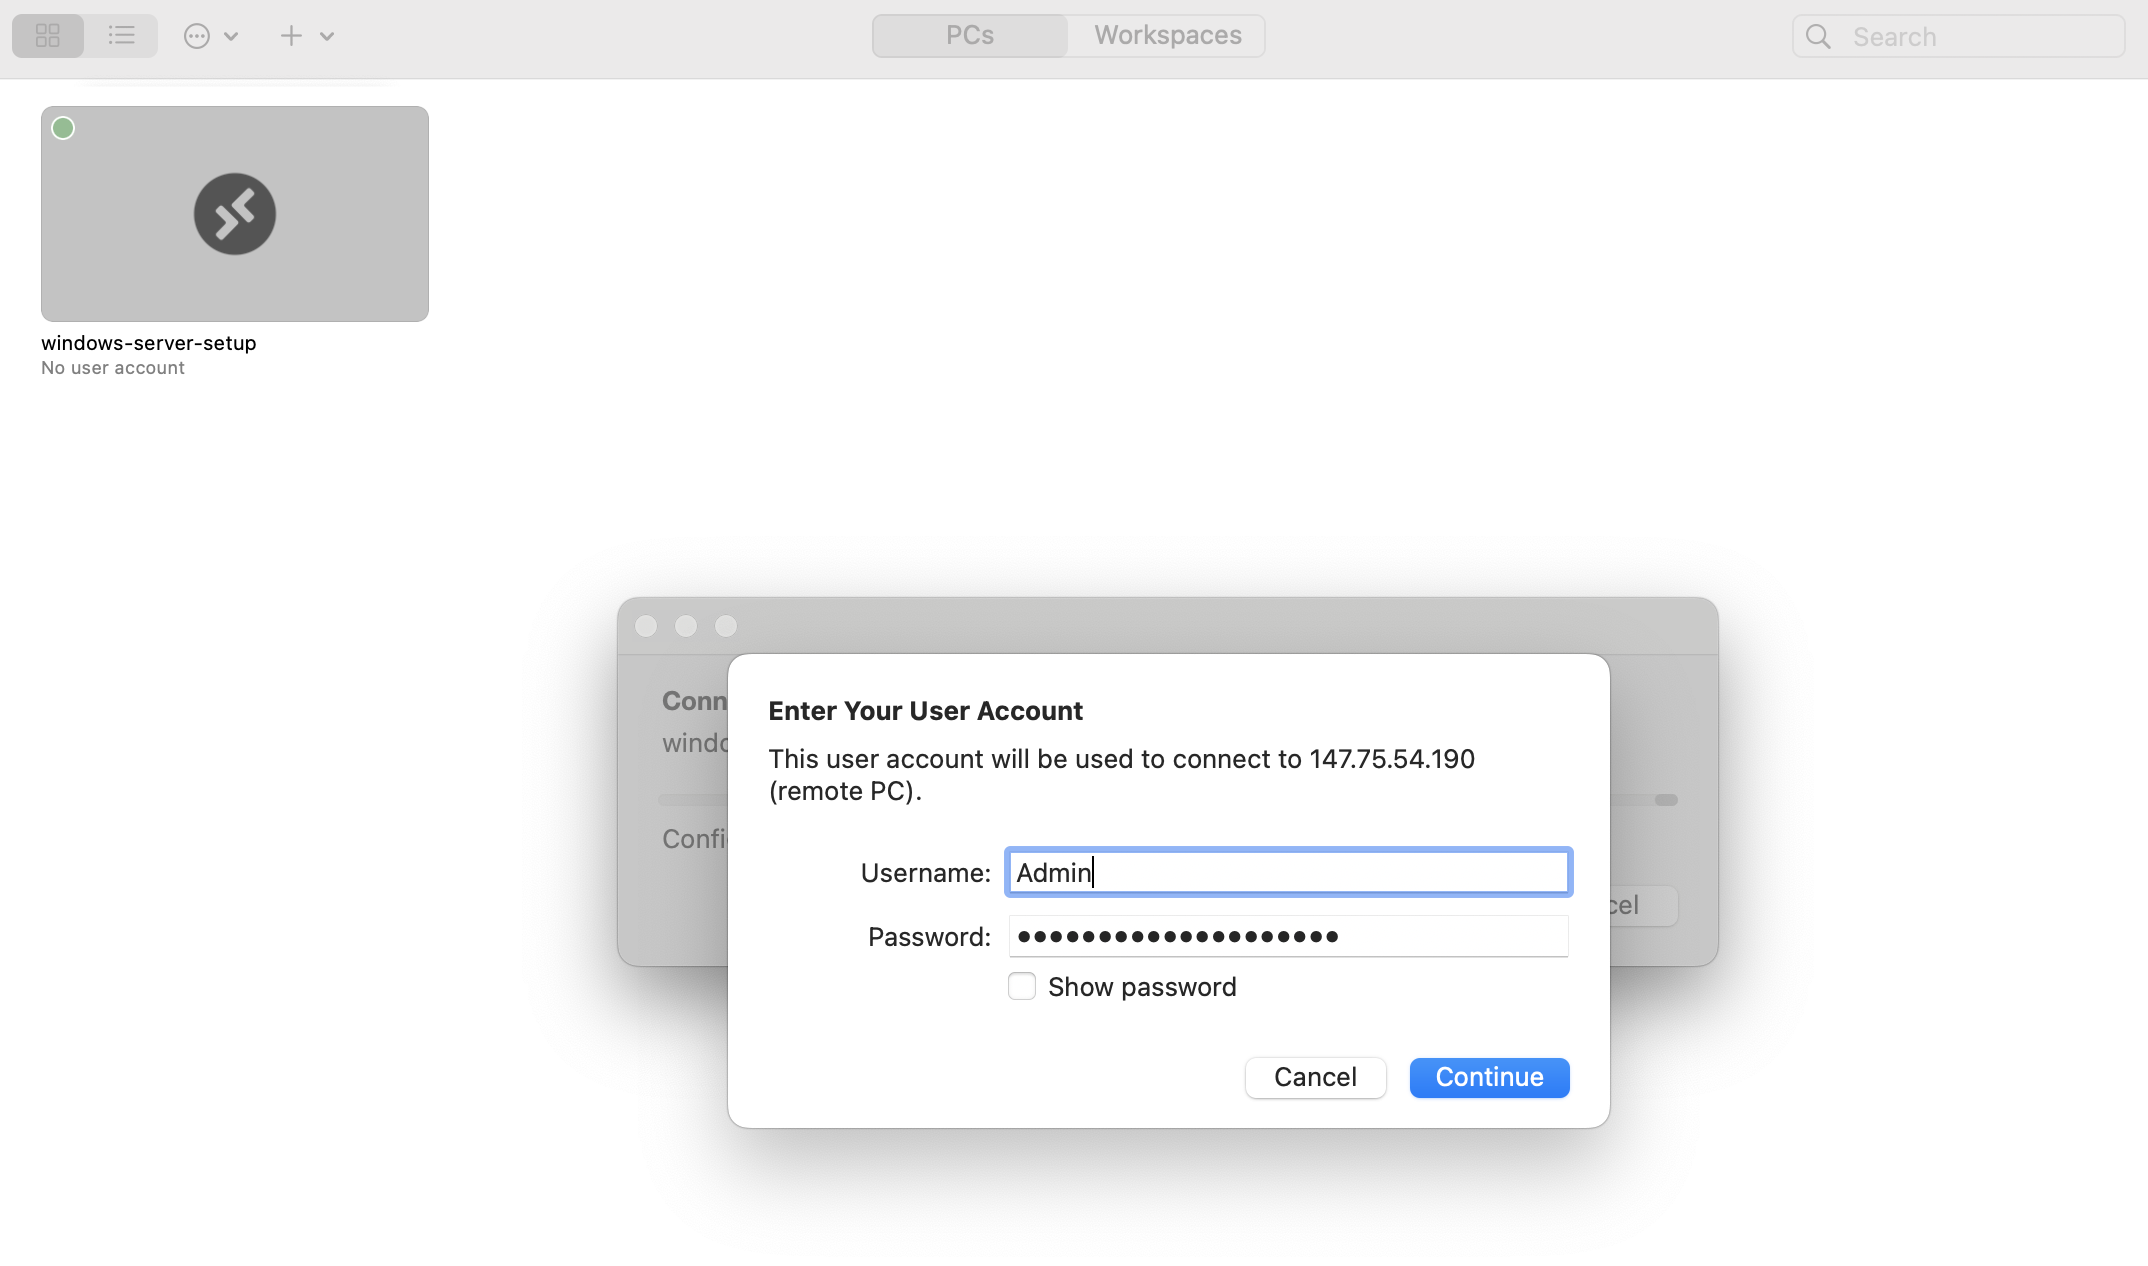
Double-click on the server entry in Remote Desktop and enter the User Account information from Equinix Metal.
You will probably encounter a certificate warning when trying to connect; your server uses a self-signed certificate. You can verify that the certificate is coming from the Equinix Metal server with the expected hostname, and continue.
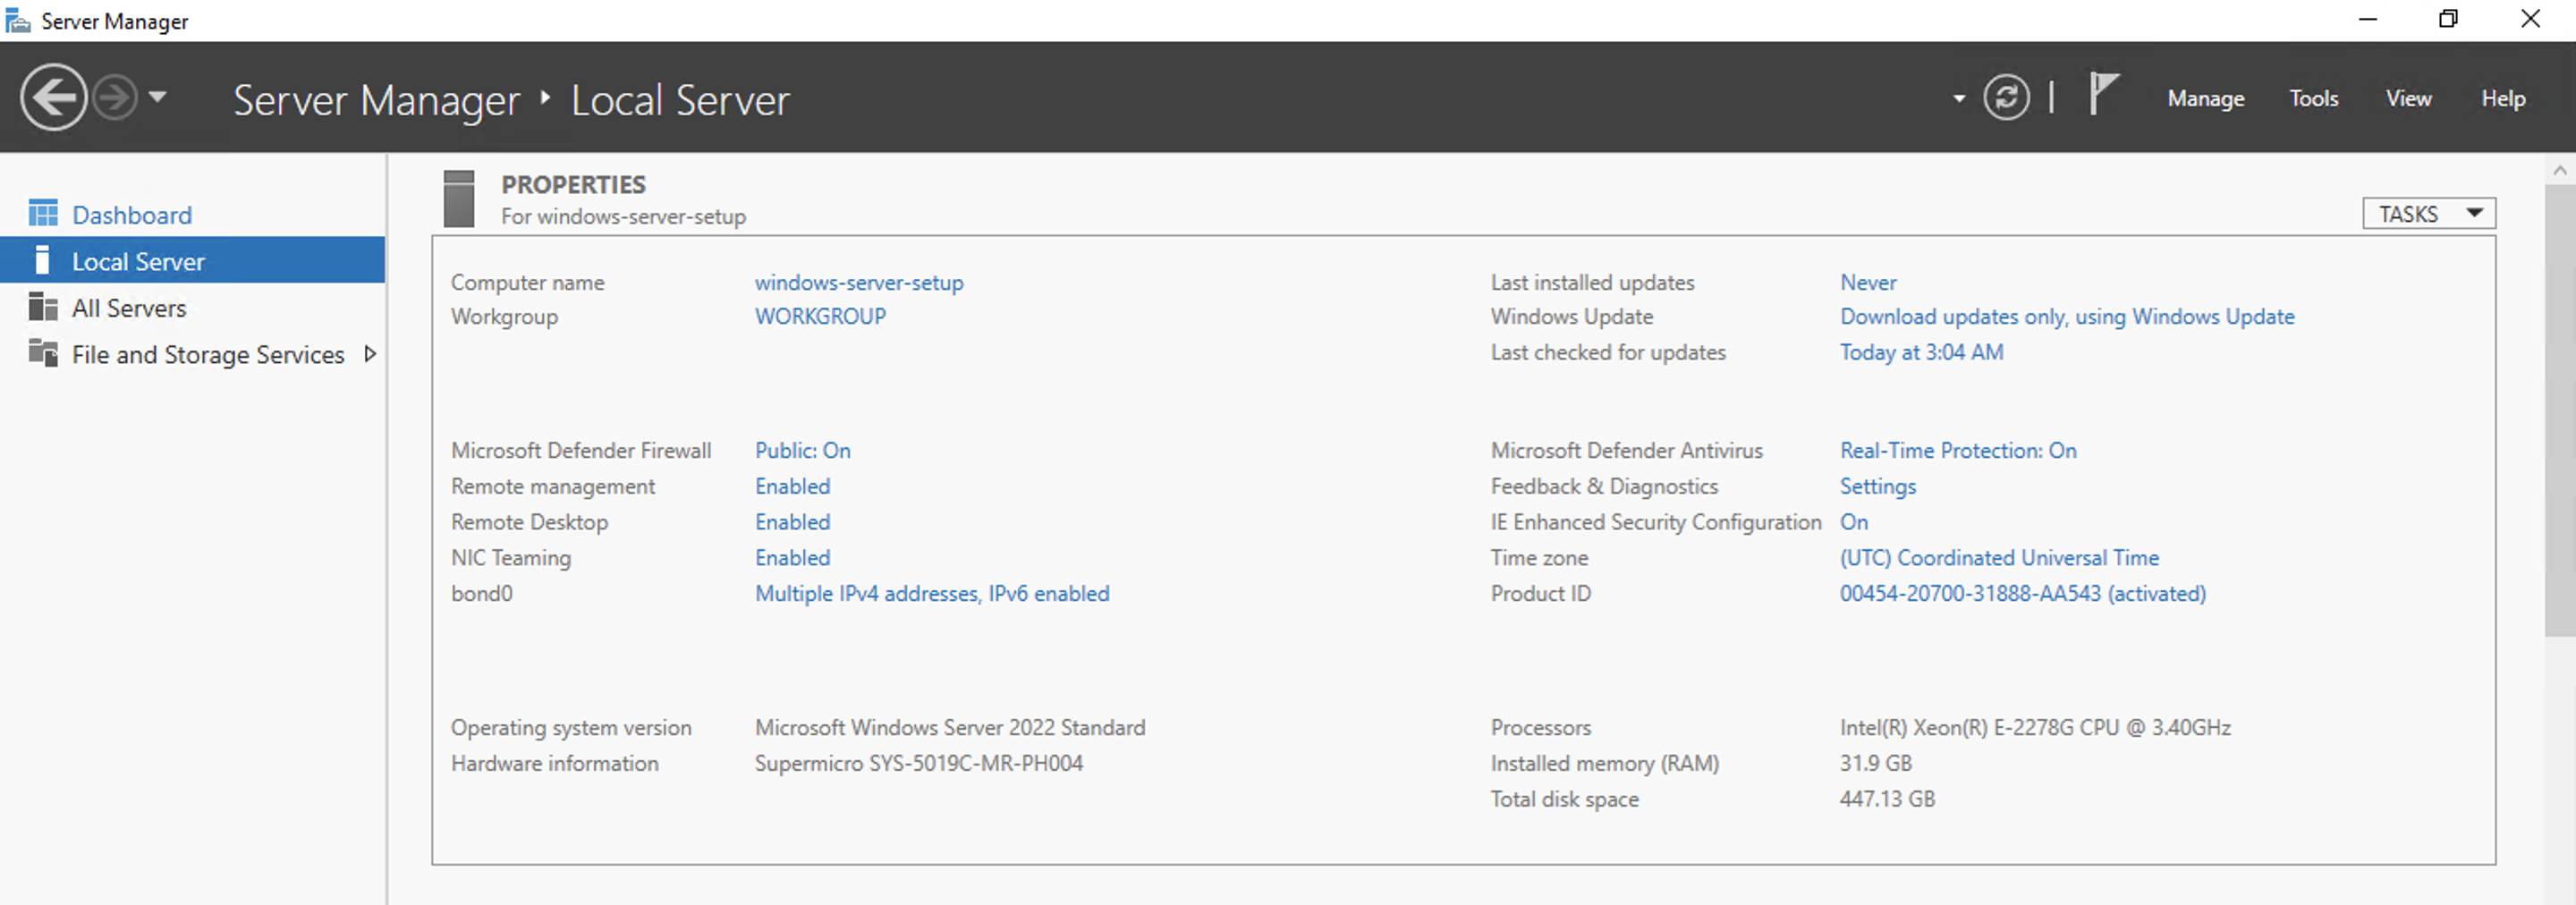
Once a connection is established, you should be at the Server Manager Dashboard of the Windows server.
SSH Access
Unlike our Linux servers, SSH access to your Windows server is not automatically enabled or configured. If you want to use SSH, you'll have to enable and configure it in Windows yourself. Following the Microsoft documentation, install the OpenSSH server components.
First, run PowerShell as an Administrator. Note: if you are using Remote Desktop on a Mac, you can simulate right-clicking with a two-finger click on the trackpad. Check to see which OpenSSH components are already installed.
Get-WindowsCapability -Online | Where-Object Name -like 'OpenSSH*'
Which should return:
Name  : OpenSSH.Client~~~~0.0.1.0
State : Installed

Name  : OpenSSH.Server~~~~0.0.1.0
State : NotPresent
Typically, Equinix Metal's images have the client component installed, but in order to reach this server via SSH, you'll also need the server component.
To install OpenSSH.Server run:
Add-WindowsCapability -Online -Name OpenSSH.Server~~~~0.0.1.0
When it's finished, it'll return:
Path          :
Online        : True
RestartNeeded : False
To enable SSH for just this session, start the SSH server.
Start-Service sshd
Upon enabling, you should be able to SSH into the Windows server with the User Account.
ssh Admin@147.75.xx.xxx
>
The authenticity of host '147.75.xx.xxx (147.75.xx.xxx)' can't be established.
ED25519 key fingerprint is SHA256:3eSZ.......
This key is not known by any other names
Are you sure you want to continue connecting (yes/no/[fingerprint])? yes
Warning: Permanently added '147.75.xx.xxx' (ED25519) to the list of known hosts.
Admin@147.75.xx.xxx's password:
>
Microsoft Windows [Version 10.0.20348.643]
(c) Microsoft Corporation. All rights reserved.

admin@WINDOWS-SERVER- C:\Users\Admin
More detailed documentation on OpenSSH for Windows Server is available from Microsoft, and includes things like configuring firewall rules, SSH configuration files, and uninstalling.
OOB Console Access
Similar to just general SSH, the Out-of-Band (OOB) Console is not enabled automatically on Windows. The purpose of the OOB console is to enable you to potentially recover your server should it become otherwise unresponsive or inaccessible.
In order for it to work with your server, you have to enable Windows Emergency Management Services (EMS), which allows the OOB console to access Windows when something goes wrong.
First, connect to your Windows server with Remote Desktop, and run PowerShell as an Administrator. Then, run the bcdedit command to turn EMS on.
bcdedit /ems ON
Another thing to note about connecting with the OOB console. When you open the channel, Windows defaults to an SAC shell, and you can create a command prompt channel using the cmd command.
~ ssh d30305a0@sos.da11.platformequinix.com
[SOS Session Ready. Use ~? for help.]
[Note: You may need to press RETURN or Ctrl+L to get a prompt.]

SAC>cmd
The Command Prompt session was successfully launched.
SAC>
EVENT:   A new channel has been created.  Use "ch -?" for channel help.
Channel: Cmd0001
Once you have created the channel, press Esc then Tab to bring up the channel description.
Name:                  Cmd0001
Description:           Command
Type:                  VT-UTF8
Channel GUID:          a45c61e9-d210-11ec-8a0a-0c42a17ea21d
Application Type GUID: 63d02271-8aa4-11d5-bccf-00b0d014a2d0

Press <esc><tab> for next channel.
Press <esc><tab>0 to return to the SAC channel.
Use any other key to view this channel.
Press any key from here to bring you to a login prompt for your cmd session. You can leave the Domain field empty.
Please enter login credentials.
Username: Admin
Domain:
Password: ****************
Once you have successfully authenticated, you will be at a command-line for your Windows Server.
Microsoft Windows [Version 10.0.20348.643]
(c) Microsoft Corporation. All rights reserved.

C:\windows\system32>
To exit cmd, type exit, which should bring you back to the SAC shell. To close the OOB console type ~. which will close the connection from your local machine to the OOB console.
Configuring Networking Modes
Having taken care of the ways in which you can connect to your Windows server, let's take a look at configuring Windows to use Equinix Metal VLANs.
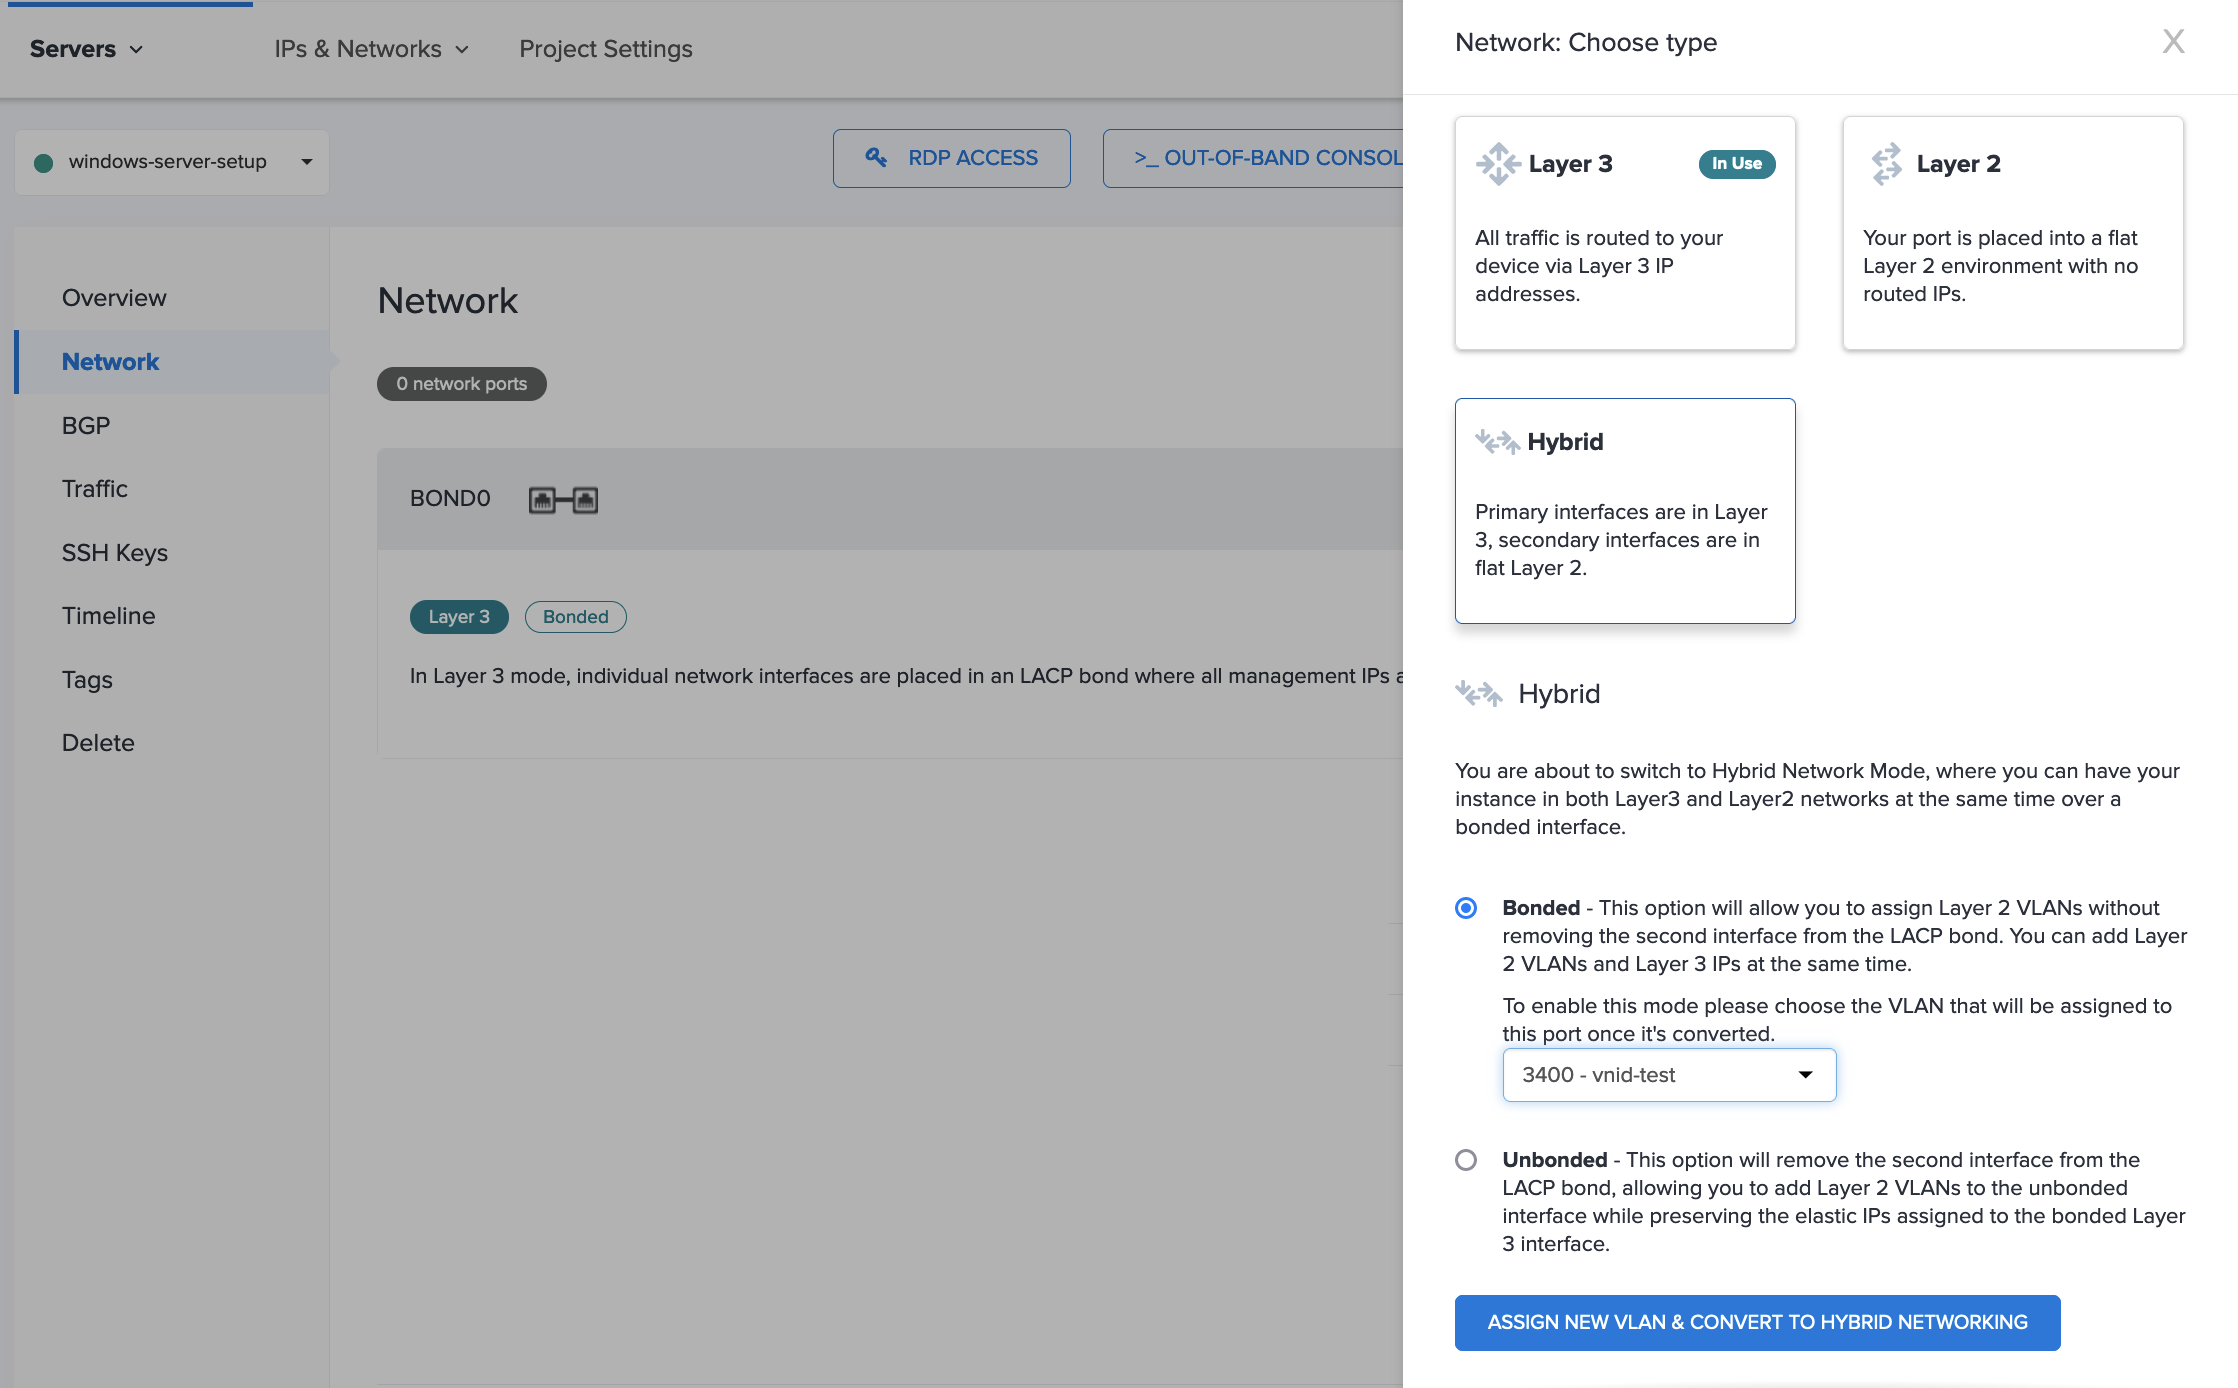
First, convert your Windows Server to the Hybrid Bonded networking mode and add it to the VLAN. This guide uses a VLAN in the same metro with VNID 3400.
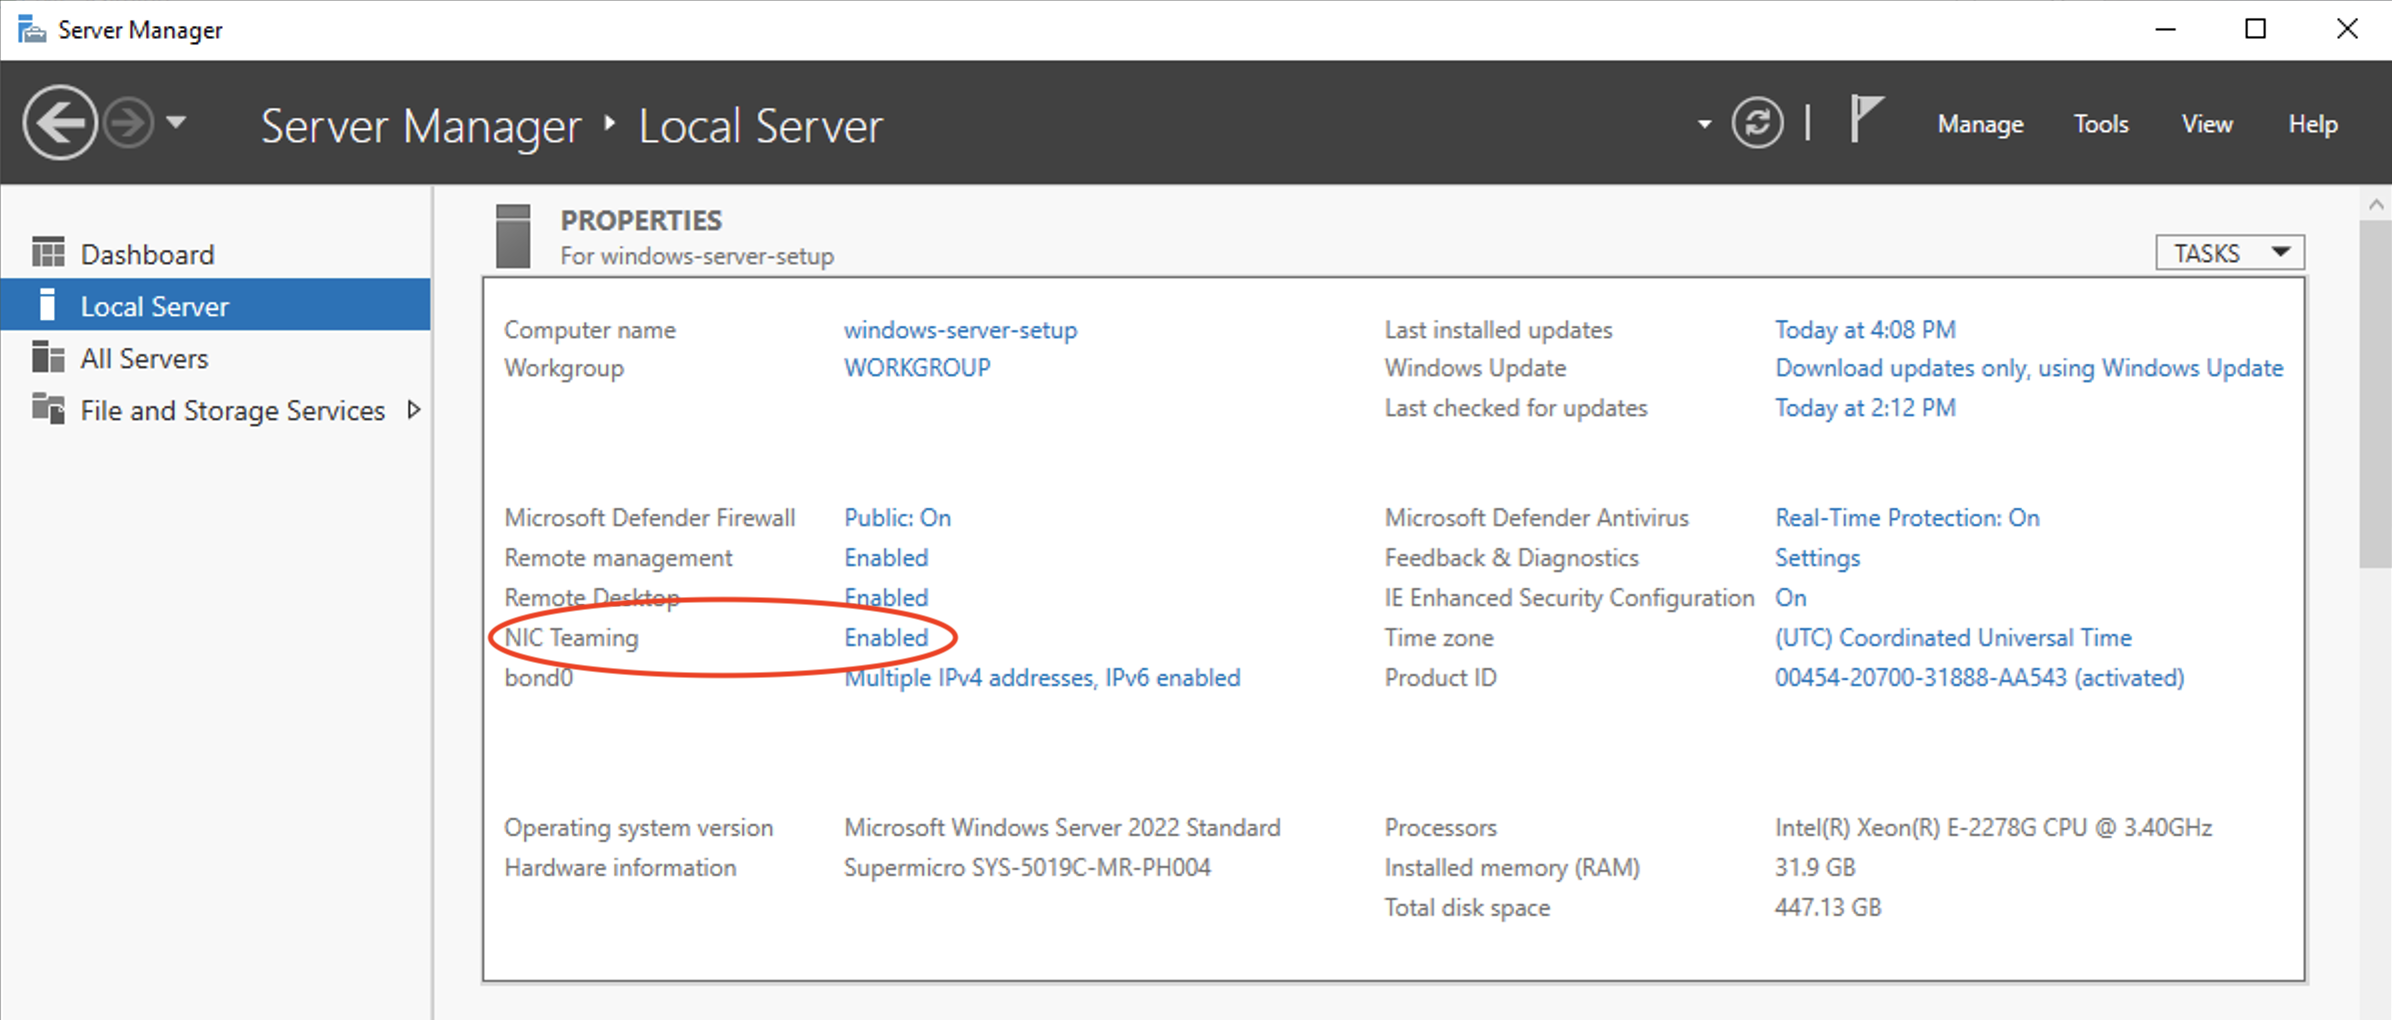
Then, configure Windows to be able to use the VLAN. Connect to the server with Remote Desktop and open the Server Manager. On the Local Server page, the is an entry for NIC Teaming that should be enabled. Click Enabled.
If your local server doesn't appear in the list as Online, you will have to add it. Click TASKS Add Server

On the DNS tab, use the search to find the name of your server, click the arrow in the center, and click OK to add it.

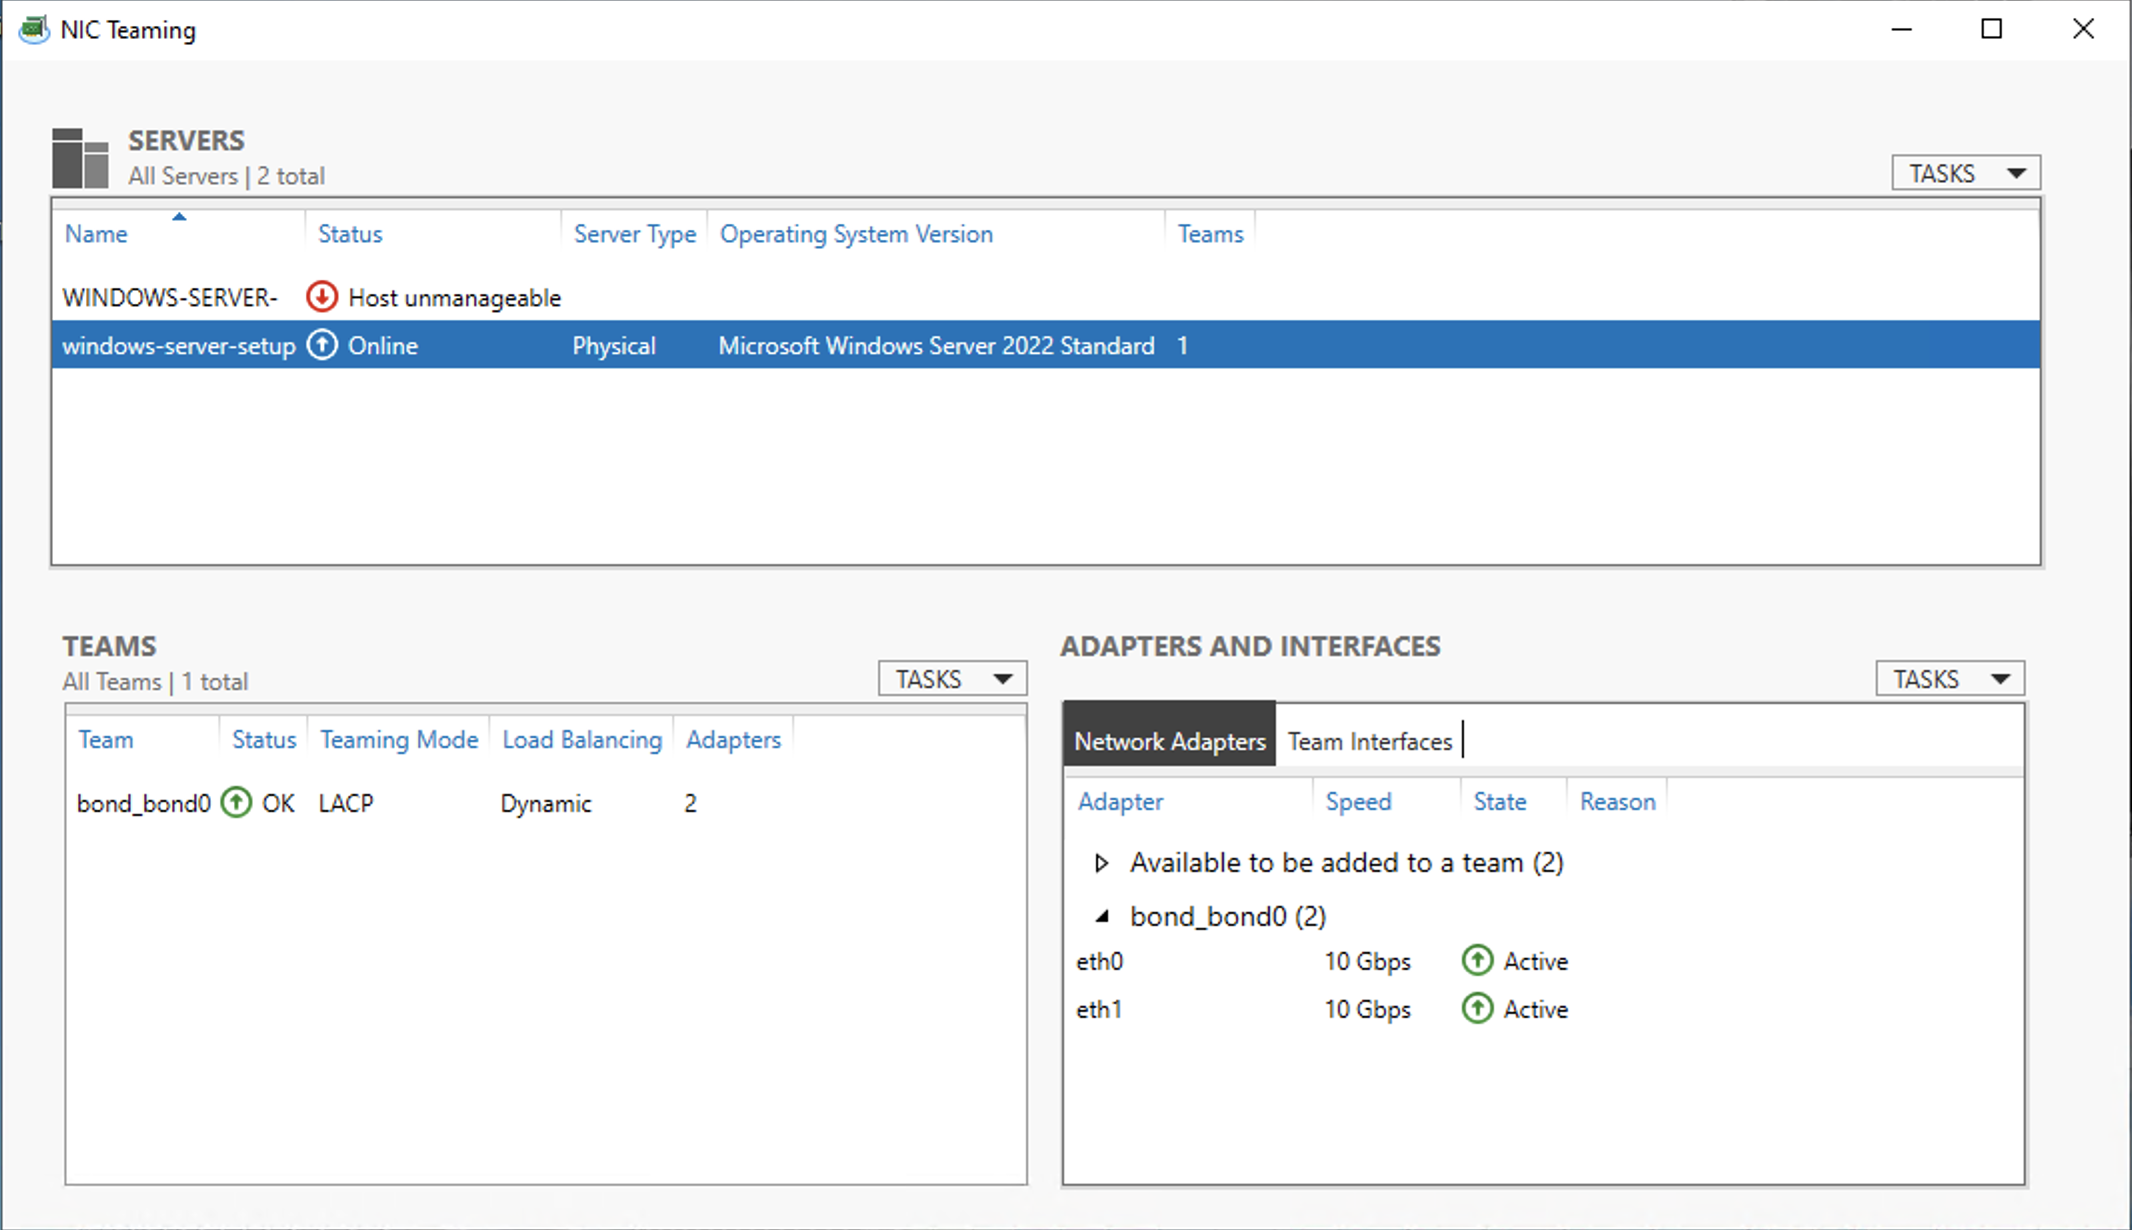
Now the network interfaces for your server ports, including bond0, should appear on the NIC Teaming page.
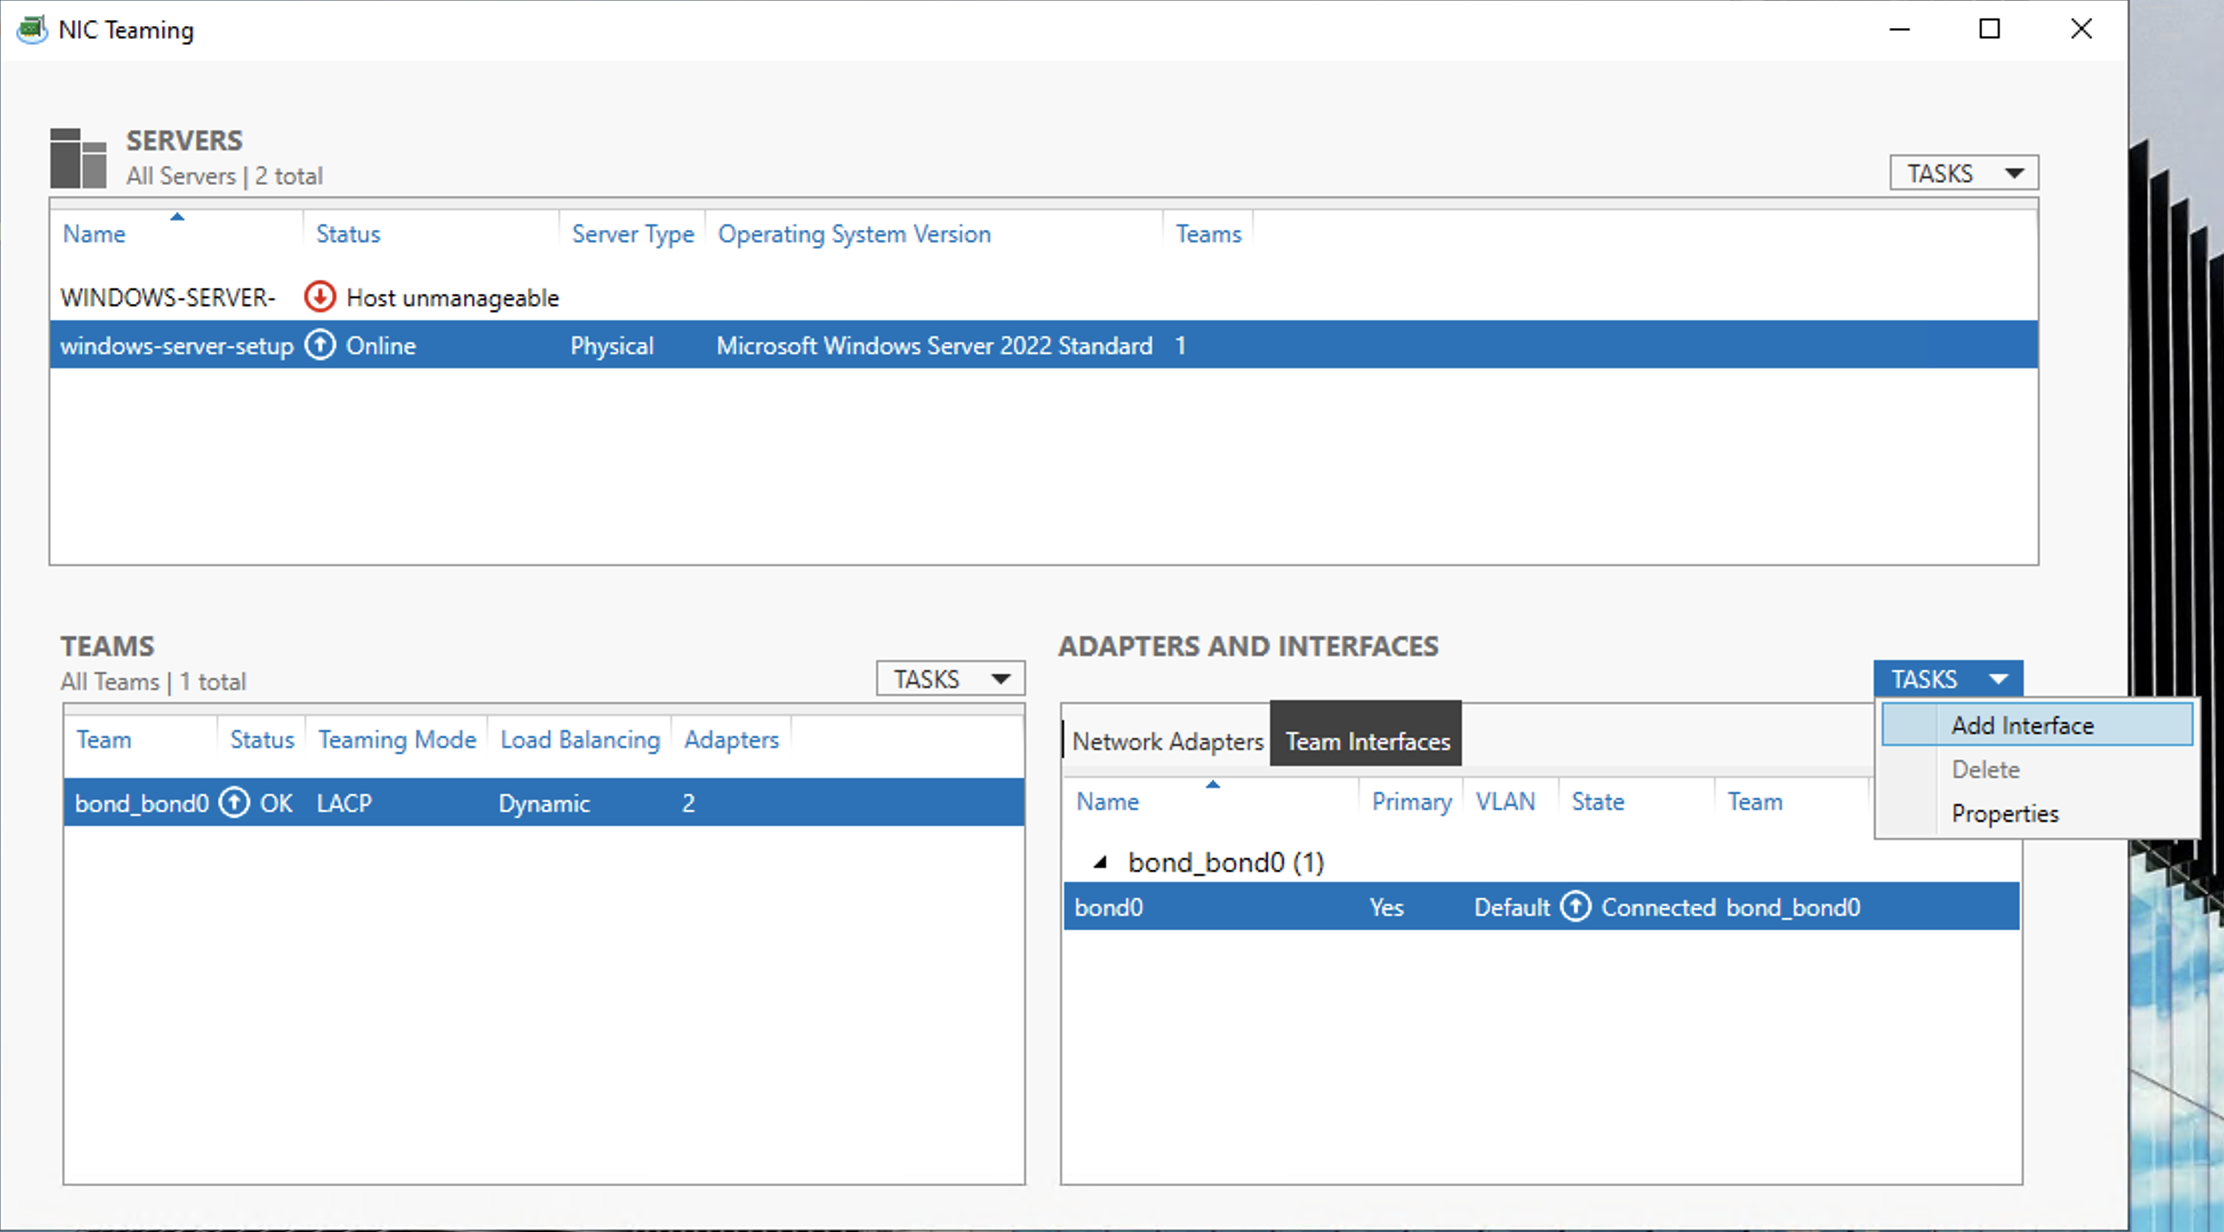
Now we can add an interface for the VLAN. Select bond0 in both the Teams panel and the Adapters and Interfaces panel. Click TASKS in Adapters and Interfaces, and Add Interface.
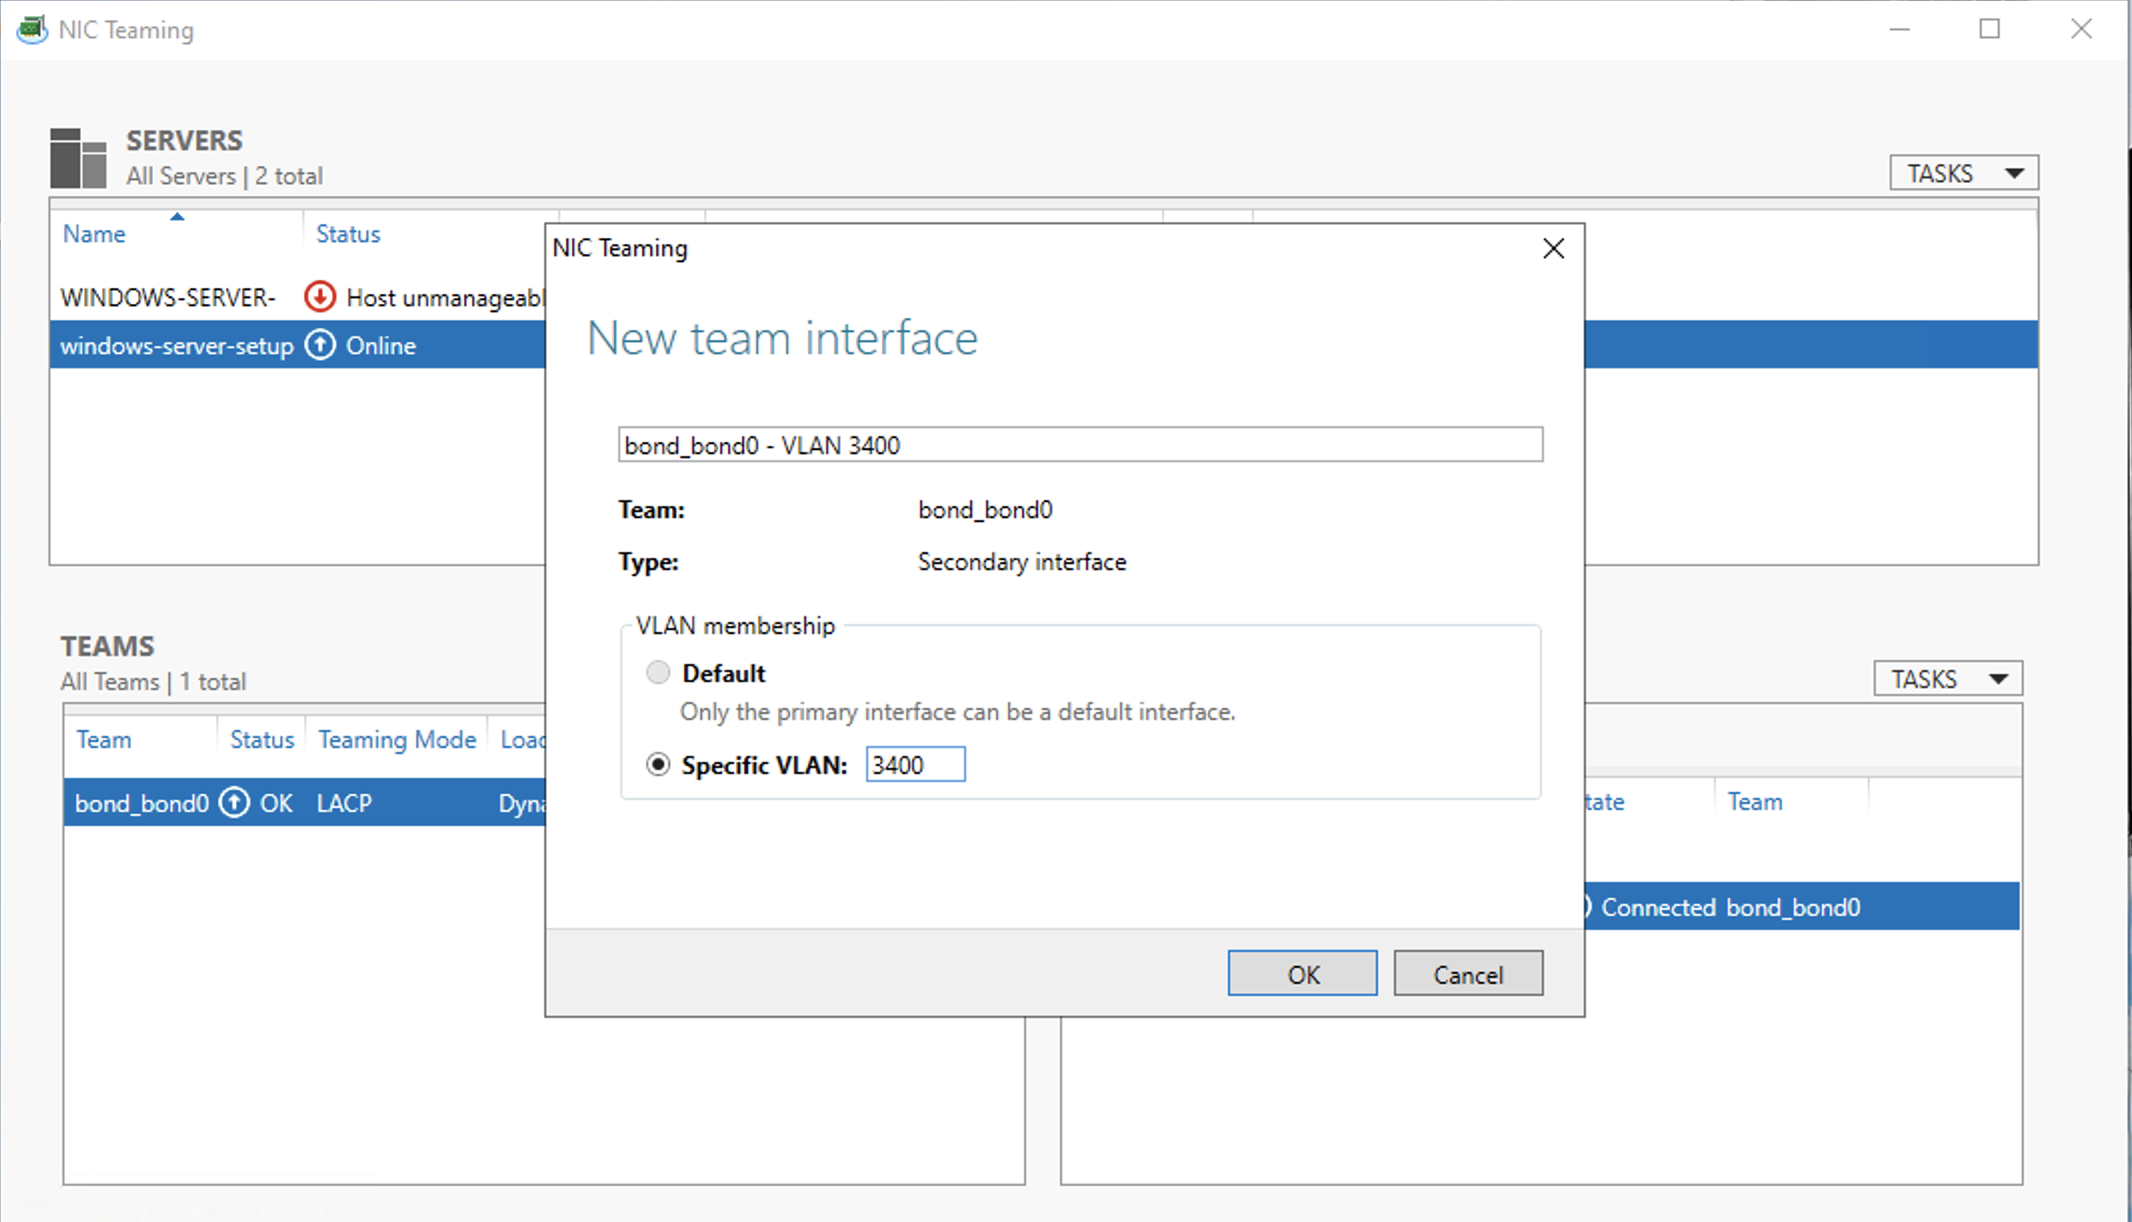
In the New Team Interface panel, make sure the Specific VLAN option is selected and fill in the VNID of the VLAN. Click OK.
Return to the Server Manager, and refresh the view. There should now be an entry for the new interface for bond0.
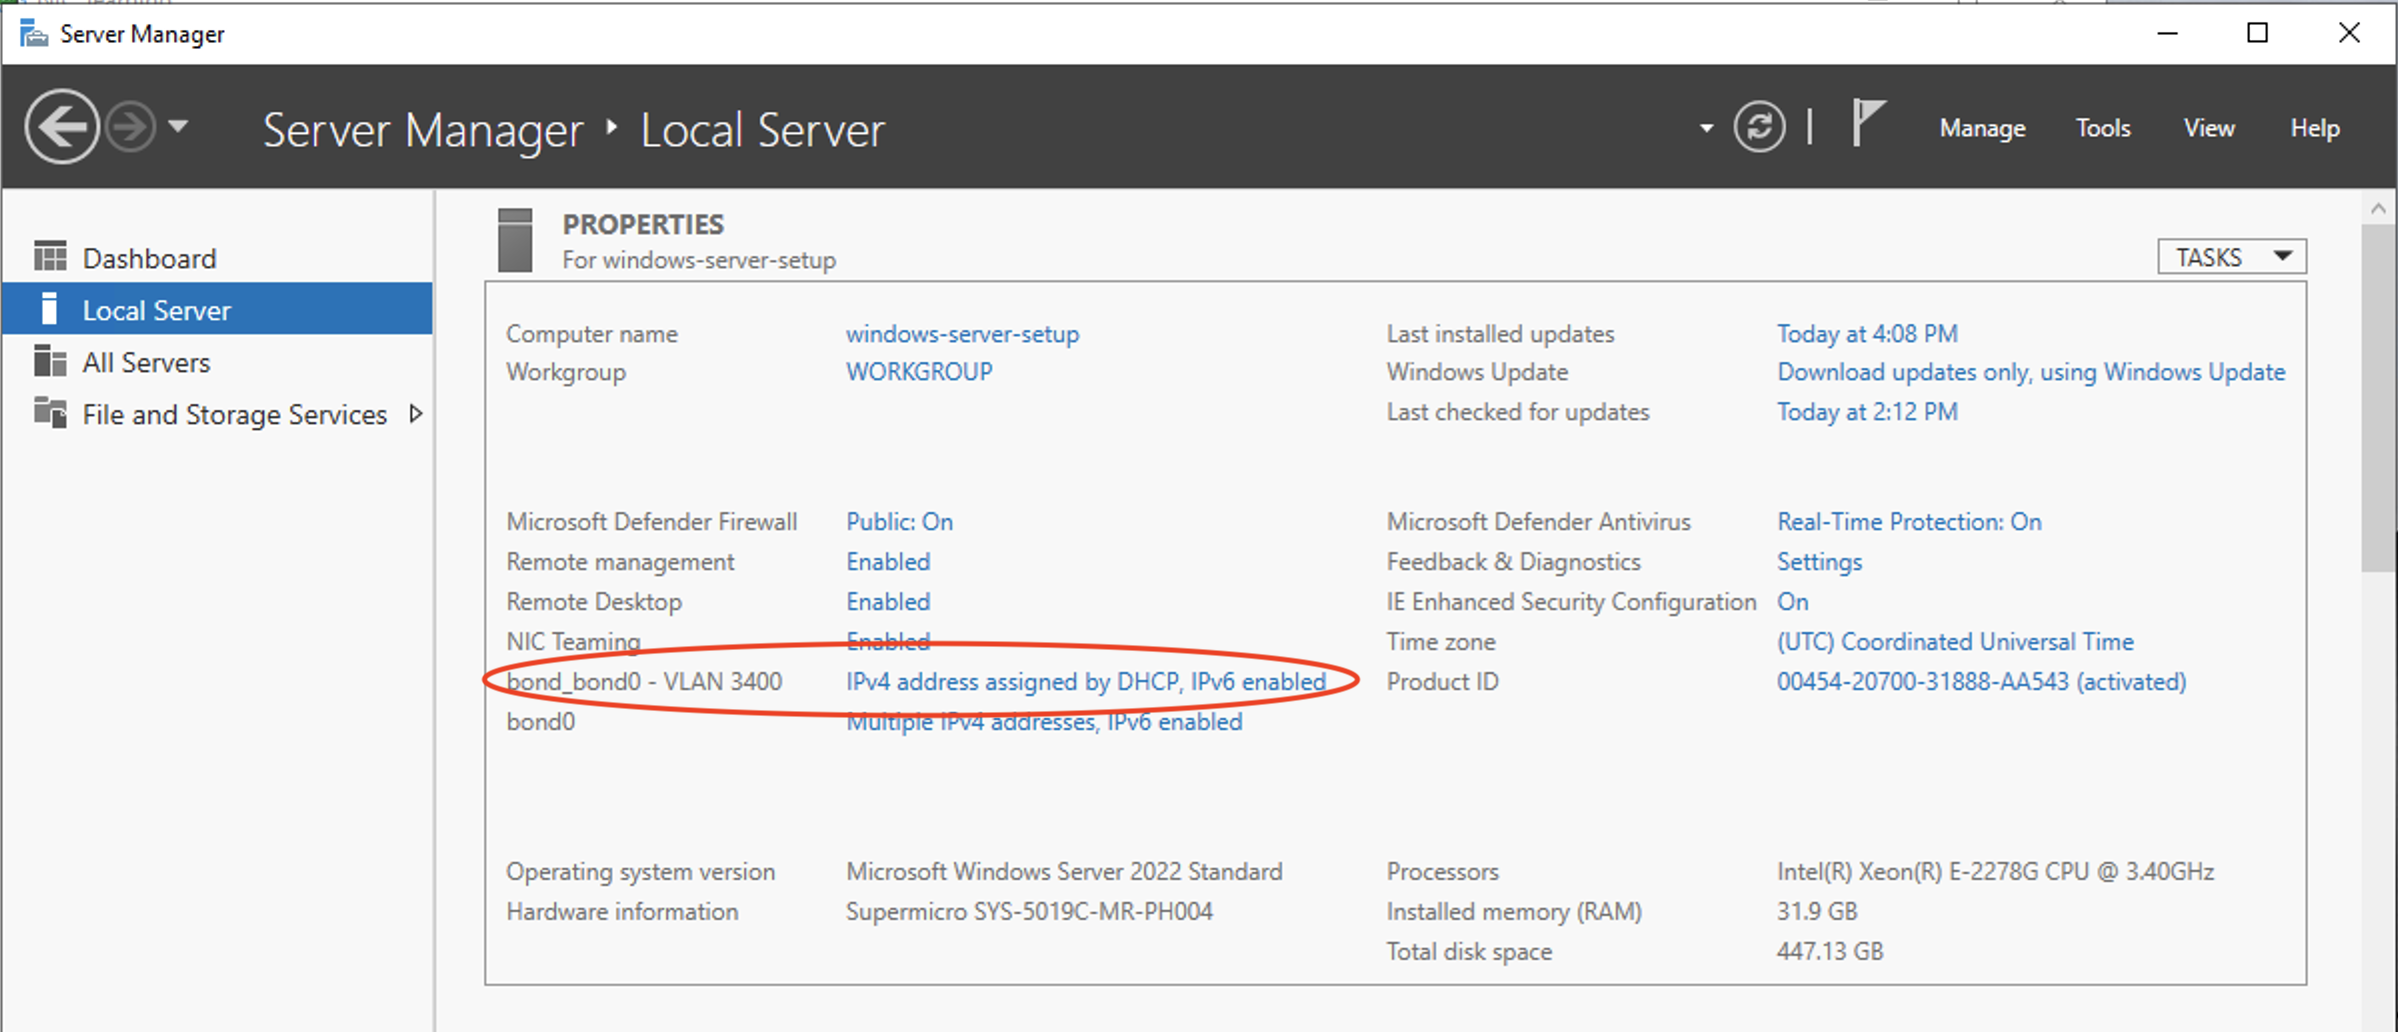
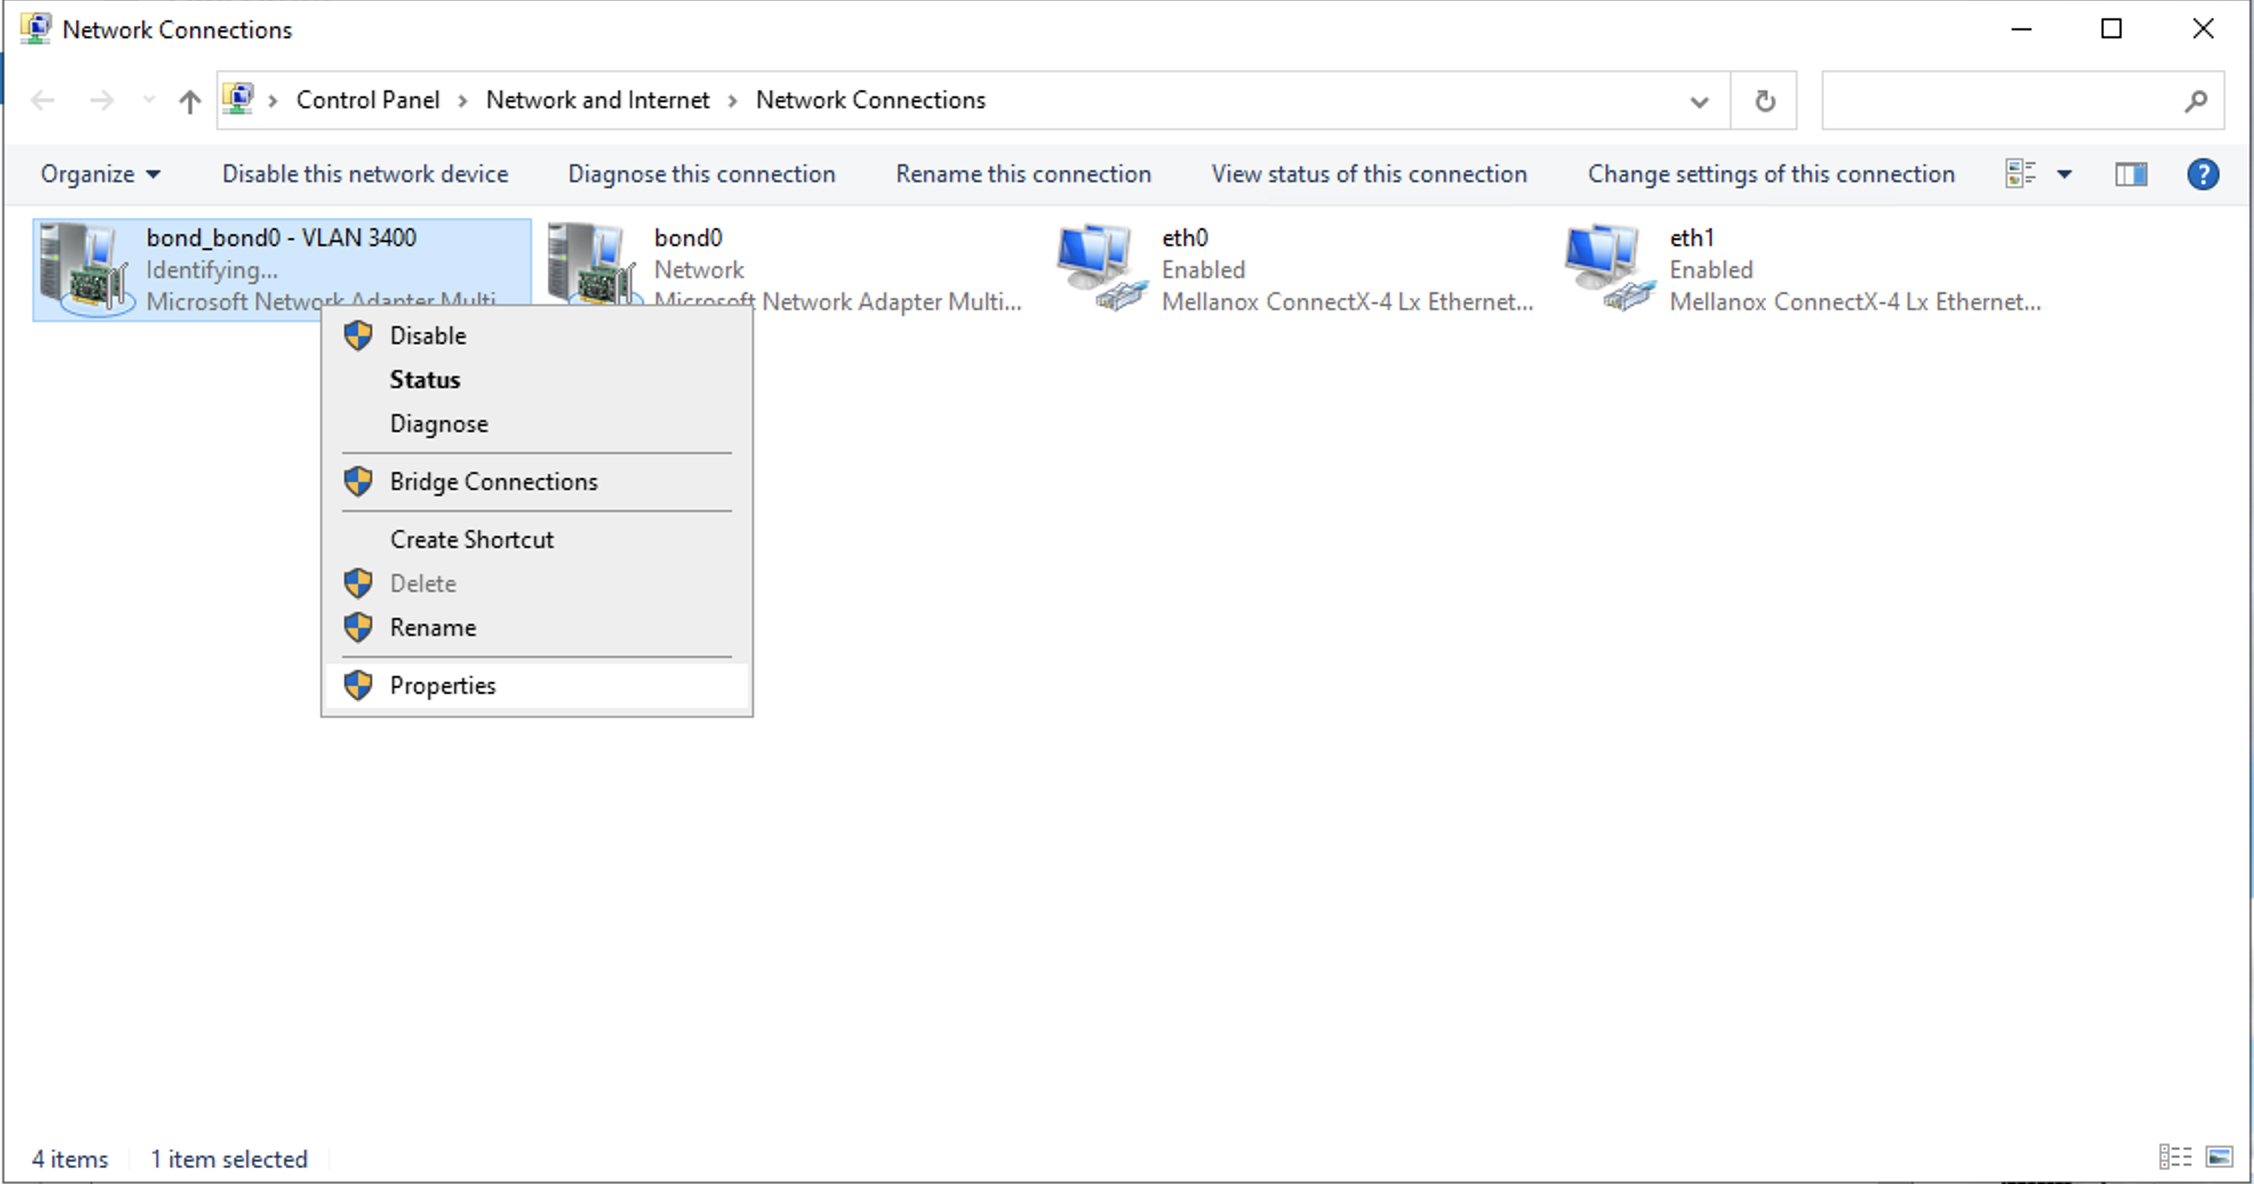
We still need to assign a IP address for this server on the VLAN, so click the IPV4 settings bond0_bond0 - VLAN 3440, which should take you to the Network Connections page in Windows. Right-click on the device for bond0_bond0 - VLAN 3440 and open its Properties.
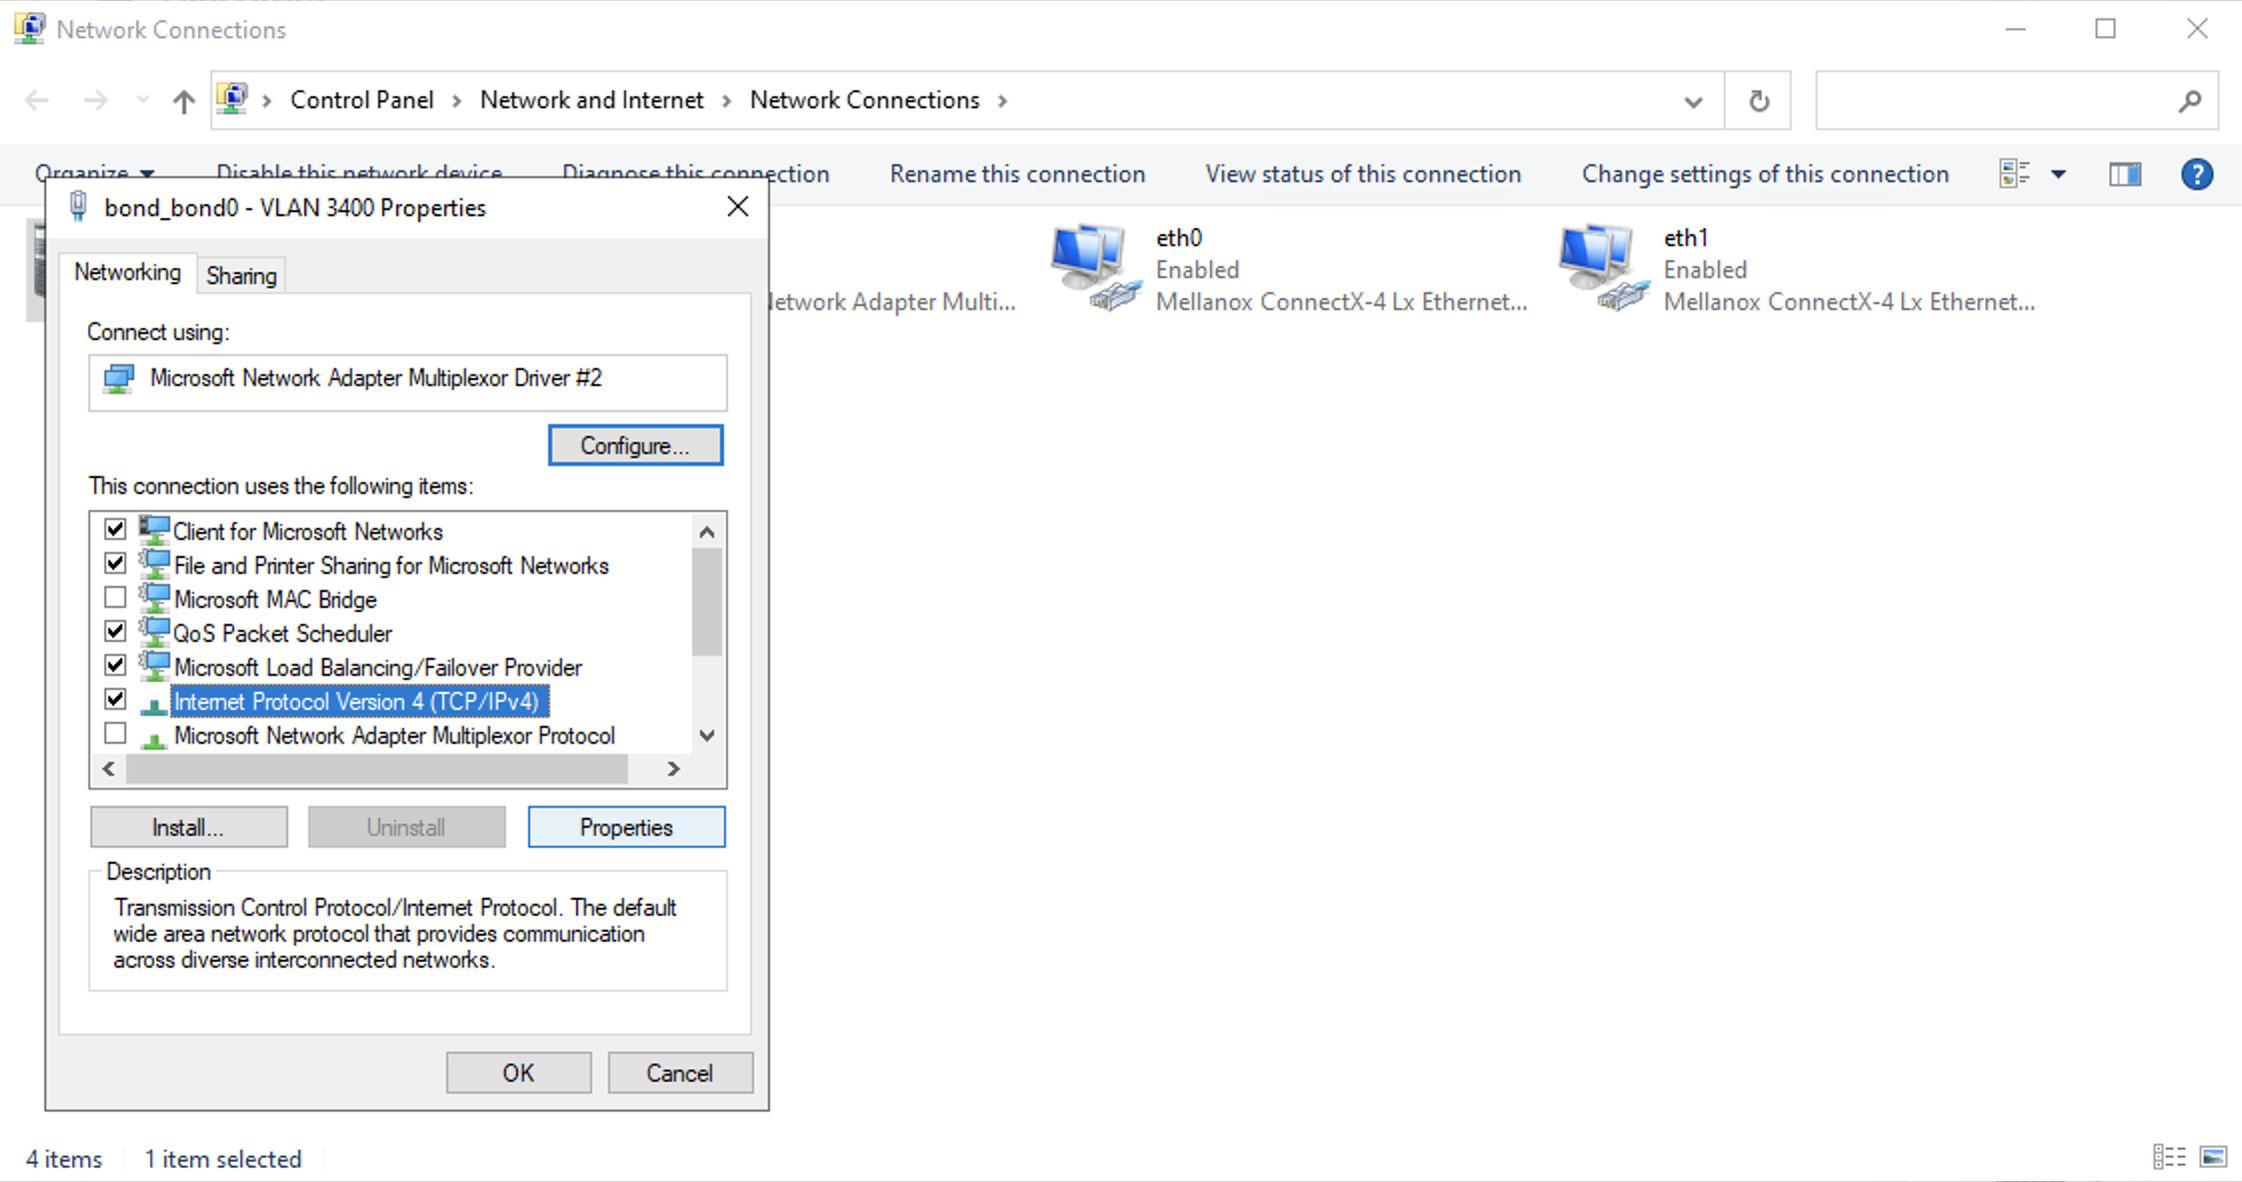
Select Internet Protocol Version4 (TCP/IPv4) from the menu and click Properties.
Now you can assign the IP address for the server to use on the VLAN. If you already have another server on the VLAN that you want to be able to connect to, give it an IP address in the same subnet. In this example, we already have another server using IP address 169.254.1.12, so the Windows server is getting 169.254.1.11.
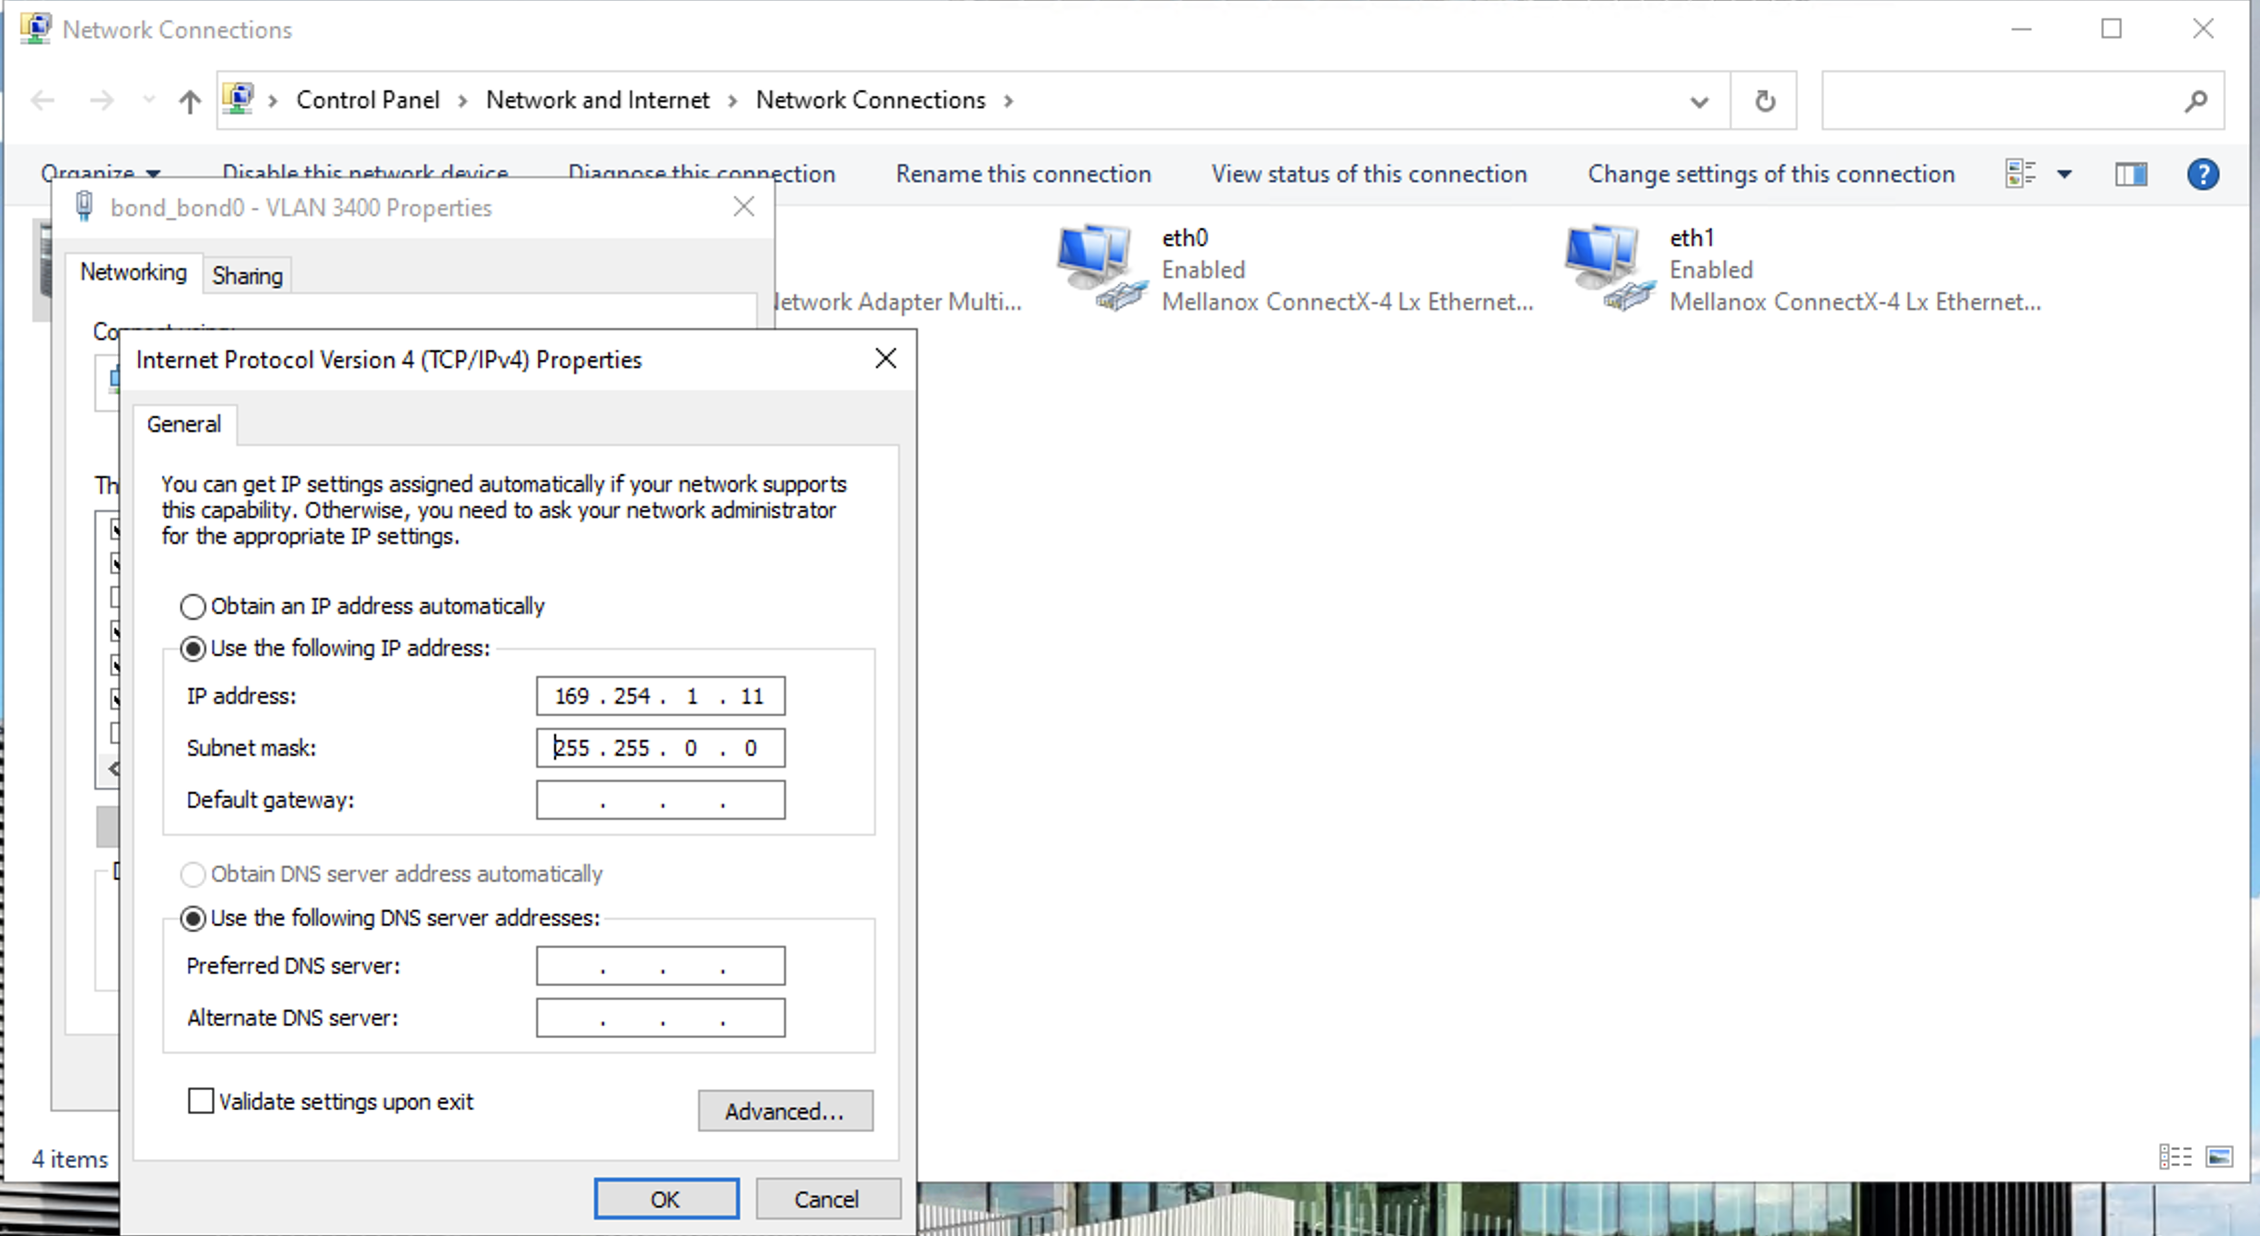
Click OK.
Should now be able to ping both servers from the other at the assigned IP addresses. From the Windows server:
C:\Users\Admin>ping 169.254.1.12

Pinging 169.254.1.12 with 32 bytes of data:
Reply from 169.254.1.12: bytes=32 time<1ms TTL=64
Reply from 169.254.1.12: bytes=32 time<1ms TTL=64
Reply from 169.254.1.12: bytes=32 time<1ms TTL=64
Reply from 169.254.1.12: bytes=32 time<1ms TTL=64

Ping statistics for 169.254.1.12:
    Packets: Sent = 4, Received = 4, Lost = 0 (0% loss),
Approximate round trip times in milli-seconds:
    Minimum = 0ms, Maximum = 0ms, Average = 0ms
And from the outside server:
root@da-c3-small-x86-01:~# ping 169.254.1.11

PING 169.254.1.11 (169.254.1.11) 56(84) bytes of data.
64 bytes from 169.254.1.11: icmp_seq=1 ttl=128 time=0.753 ms
64 bytes from 169.254.1.11: icmp_seq=2 ttl=128 time=0.871 ms
64 bytes from 169.254.1.11: icmp_seq=3 ttl=128 time=0.948 ms
64 bytes from 169.254.1.11: icmp_seq=4 ttl=128 time=0.789 ms
64 bytes from 169.254.1.11: icmp_seq=5 ttl=128 time=0.889 ms
64 bytes from 169.254.1.11: icmp_seq=6 ttl=128 time=0.829 ms
^C
--- 169.254.1.11 ping statistics ---
6 packets transmitted, 6 received, 0% packet loss, time 5028ms
rtt min/avg/max/mdev = 0.753/0.846/0.948/0.064 ms
Making a Network Configuration Permanent
There is a task in the Windows task scheduler that is set to run at boot that runs the cloudbase-init (cloud-init) function, configuring Windows to use the default Equinix Metal Layer 3 networking configuration.
Since it runs at boot, if you reboot your Windows server, it will also reset the networking back to the default Equinix Metal Layer 3 configuration.
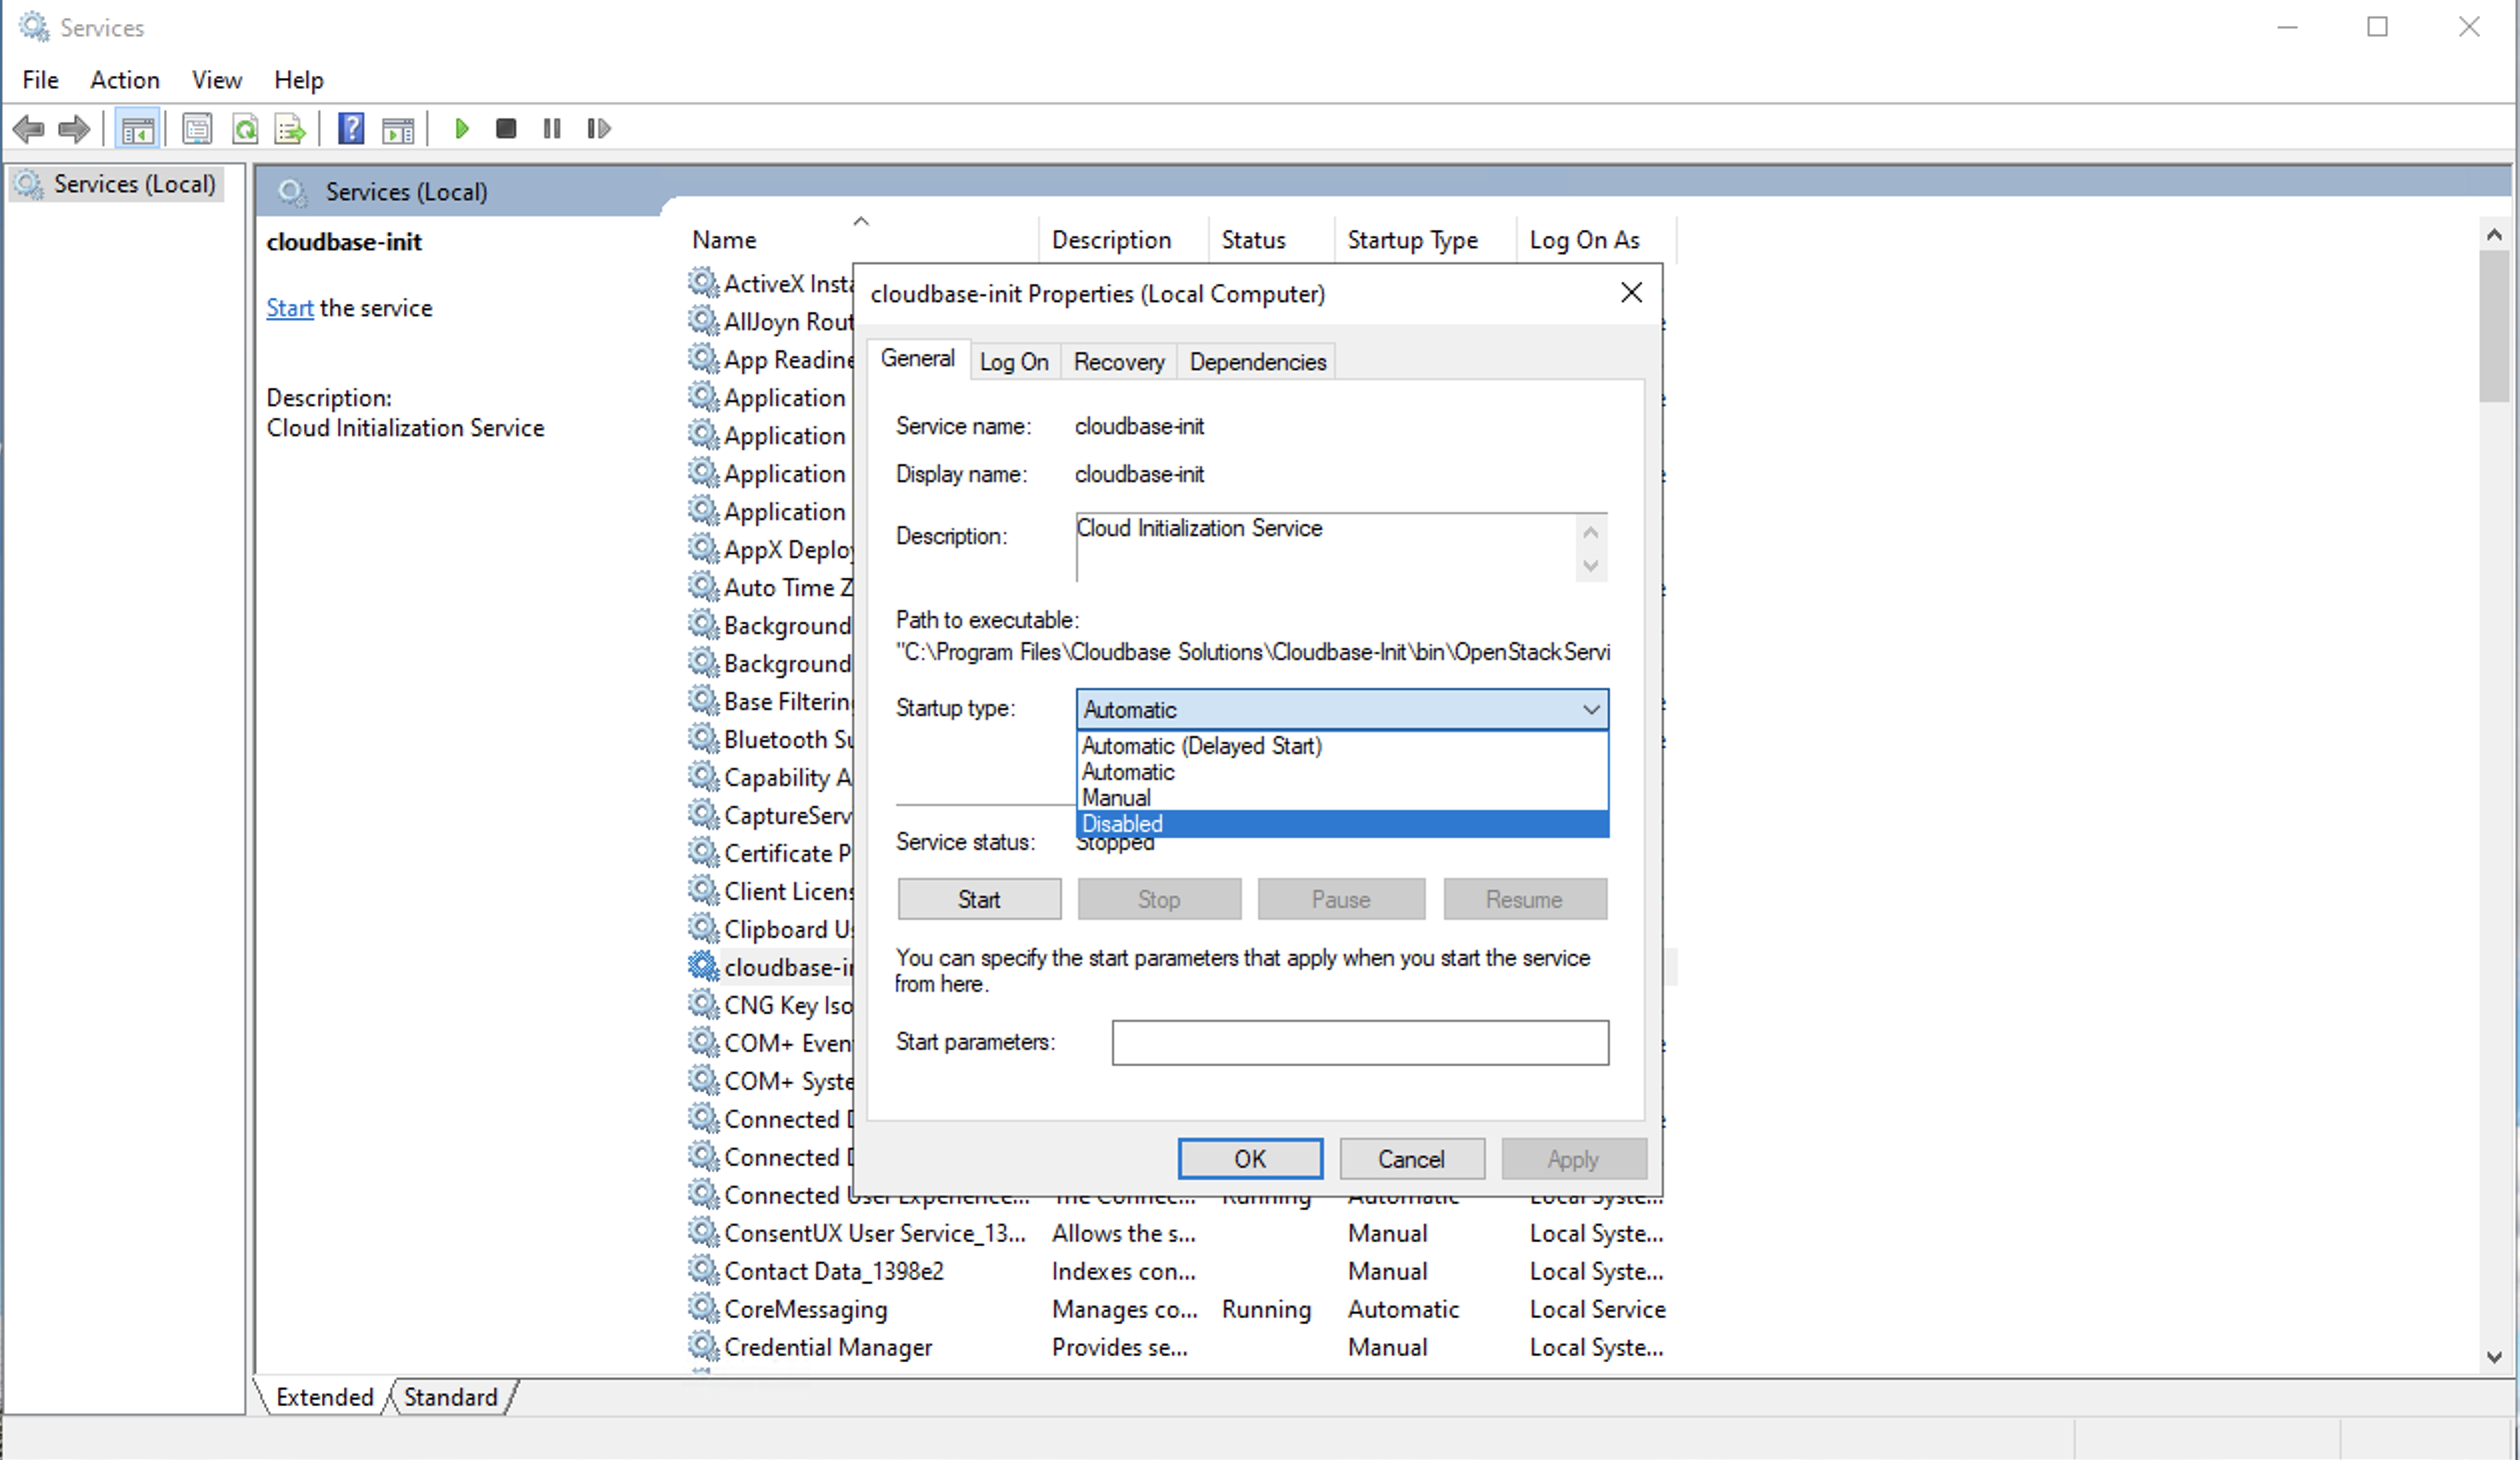
To disable this function the cloudbase-init service needs to be disabled, and the scheduled task needs to be disabled or removed.
Use Windows Services to disable the the cloudbase-init service.
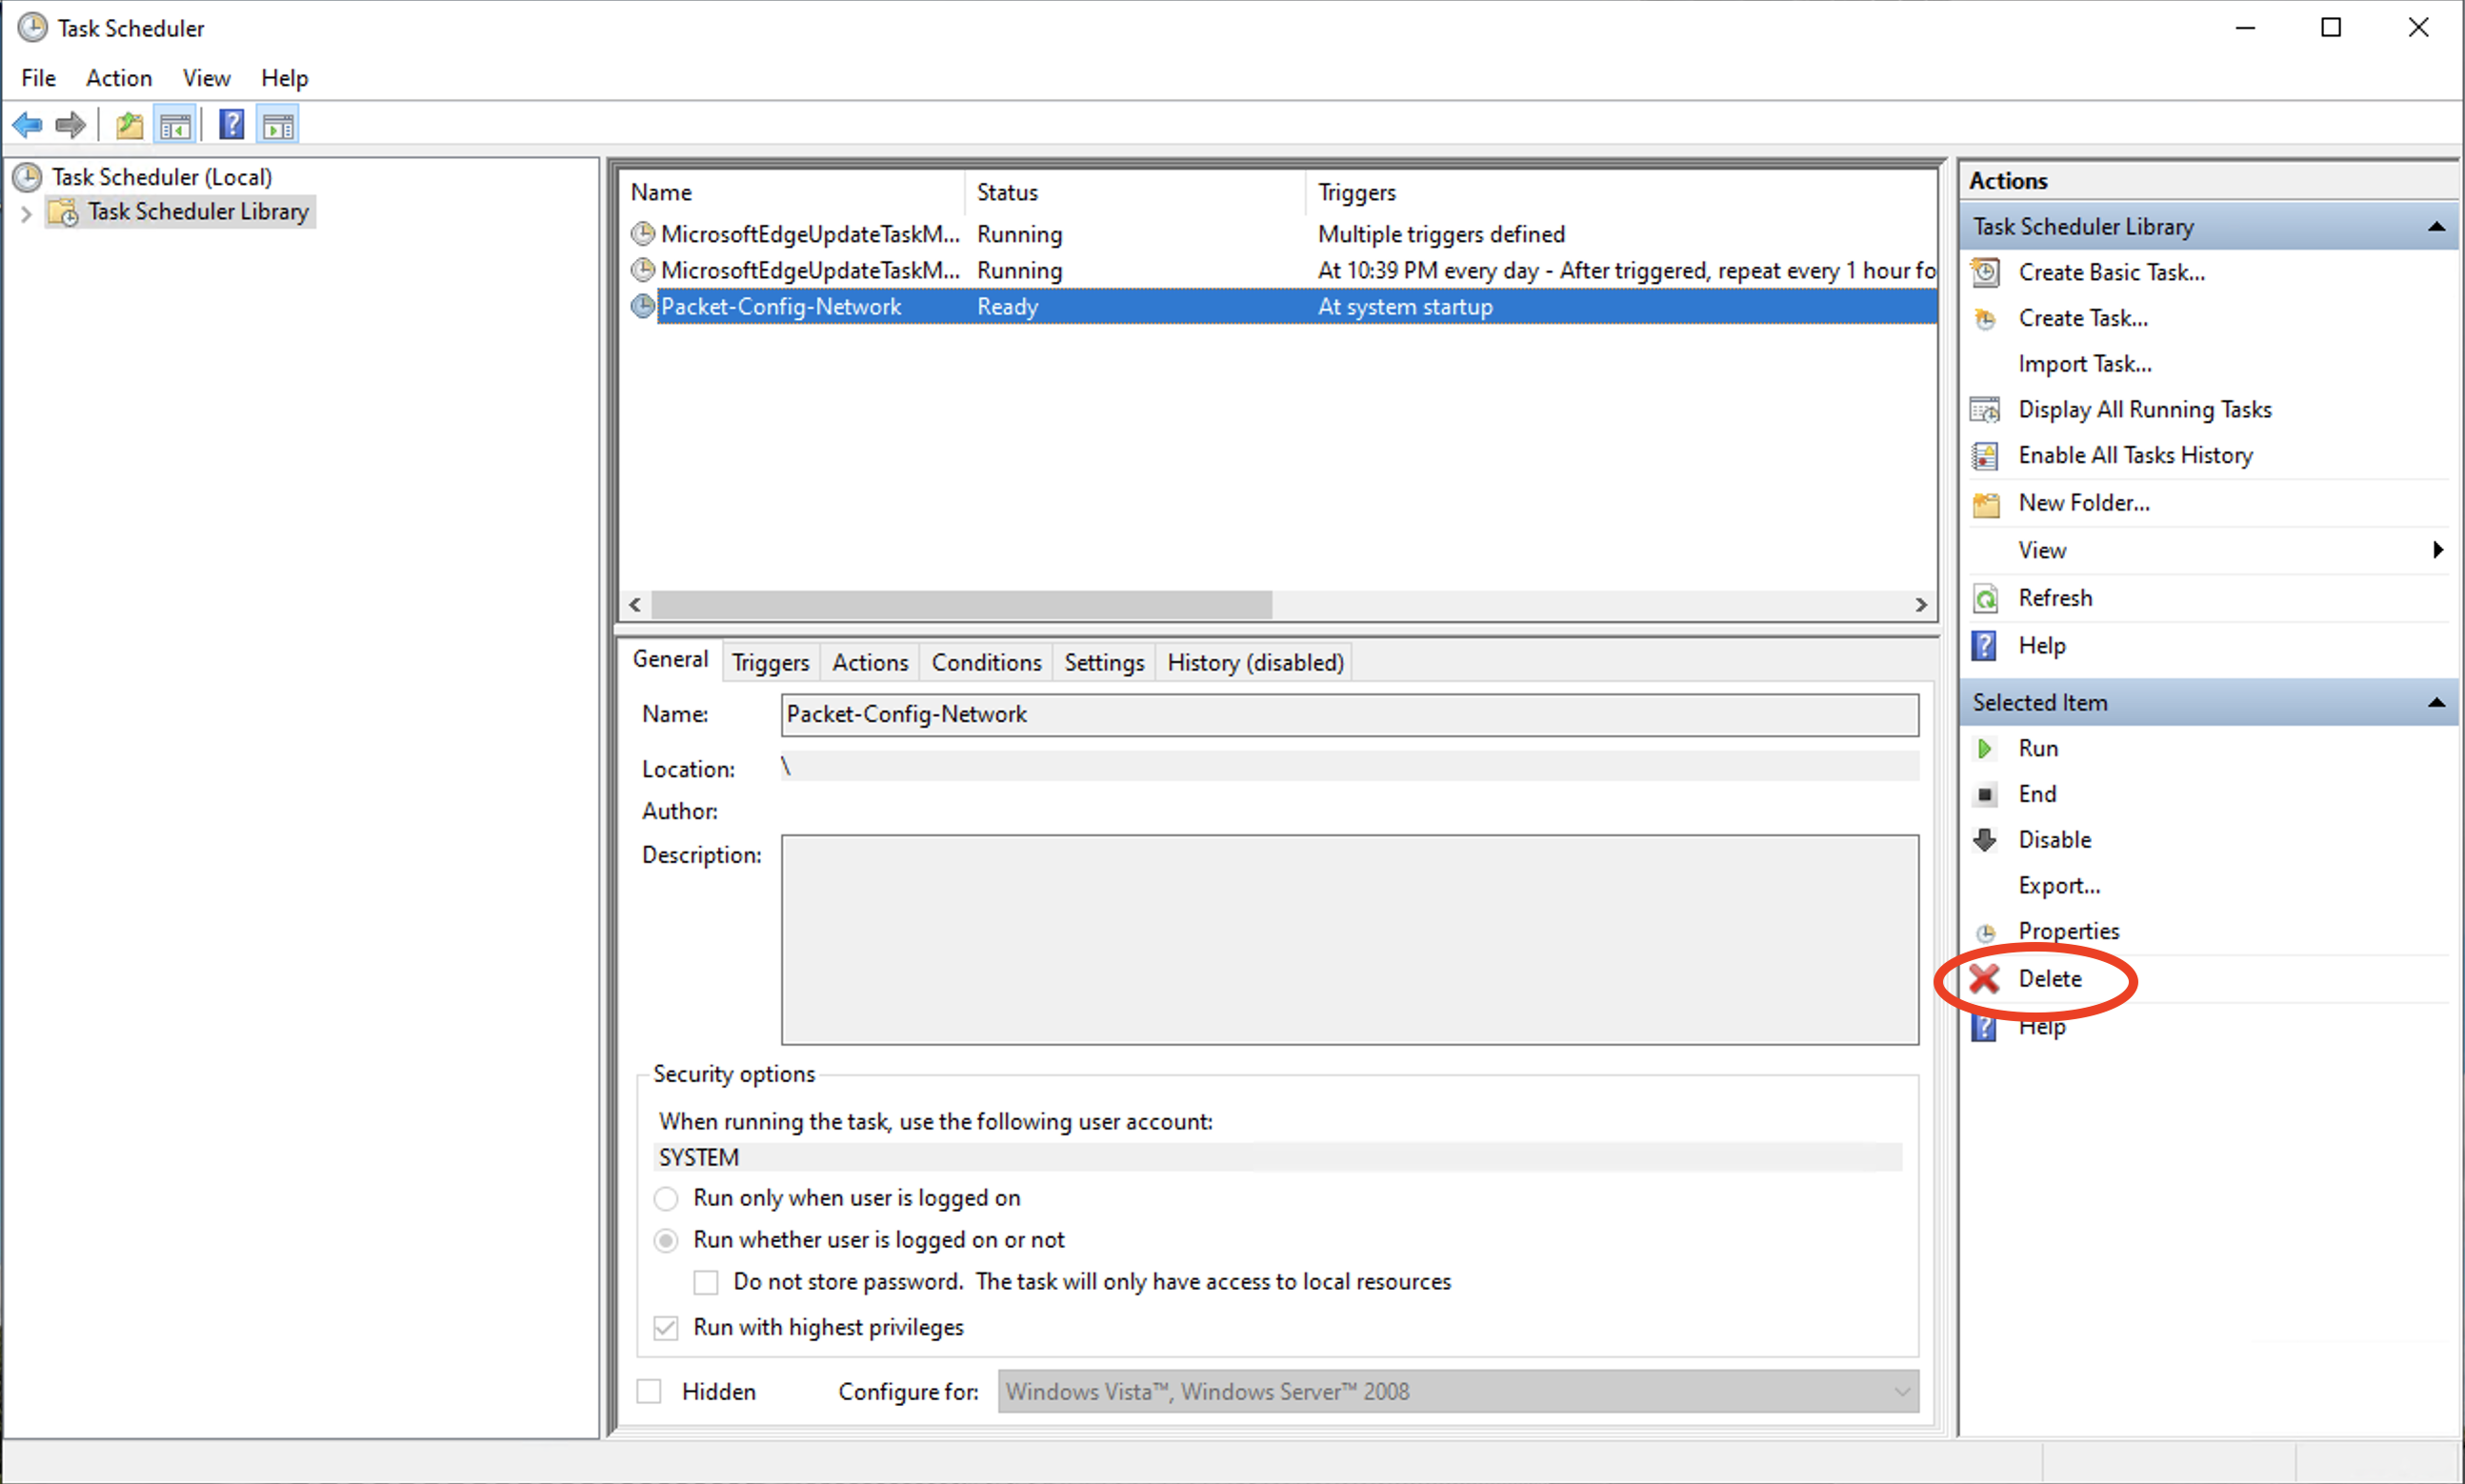
And use the Windows Task Scheduler to disable the Packet-Config-Network boot-time task.
To disable these through the command line, run PowerShell as an Administrator, and the use commands:
sc.exe config "cloudbase-init" start=disabled
Get-ScheduledTask -TaskName "Packet-Config-Network"
Unregister-ScheduledTask -TaskName "Packet-Config-Network" -Confirm:$false
Wrap-up
This has been a quick overview of how to get Windows Server up and running on Equinix Metal with examples of how to access your server and configure some of our networking features.
You may also like
Dig deeper into similar topics in our archives
Configuring BGP with BIRD 2 on Equinix Metal
Set up BGP on your Equinix Metal server using BIRD 2, including IP configuration, installation, and neighbor setup to ensure robust routing capabilities between your server and the Equinix M...

Configuring BGP with FRR on an Equinix Metal Server
Establish a robust BGP configuration on your Equinix Metal server using FRR, including setting up network interfaces, installing and configuring FRR software, and ensuring secure and efficie...

Crosscloud VPN with WireGuard
Learn to establish secure VPN connections across cloud environments using WireGuard, including detailed setups for site-to-site tunnels and VPN gateways with NAT on Equinix Metal, enhancing...

Deploy Your First Server
Learn the essentials of deploying your first server with Equinix Metal. Set up your project & SSH keys, provision a server and connect it to the internet.

Ready to kick the tires?
Use code DEPLOYNOW for $300 credit