- Home /
- Resources /
- Learning center /
- Deploying An Equin...
Deploying An Equinix Metal Instance Using Terraform
Terraform user? Start here to get fimiliar with the Equinix Metal Terraform Provider.

On this page
This guide will walkthrough the reader through the steps of using Terraform to deploy a server on Equinix Metal. Terraform has become the defacto tool for Infrastructure-as-Code (IaC) needs. This guide will serve as a basis point for the reader to become familiar with the Equinix Metal Terraform Provider.
Prerequisites
- An Equinix Metal Account.
- An Equinix Metal Project ID.
- An Equinix Metal API key.
- Terraform installed on your workstation.
- (Optional) An IDE, like VS Code.
Creating an Equinix Account, Organization, and Project
Start by going to the Equinix Metal Console and either log into an existing account or create a new one.
Note that during the creation of your account, you will create and name an organization, add billing information, and create a project.
If you already have an account, then you can find all of your projects by navigating to the top left of the navigation menu and choosing All Projects.
If you need some more help navigating the Equinix Metal console, check out the relevant documentation:
Finding and Copying Your Project ID
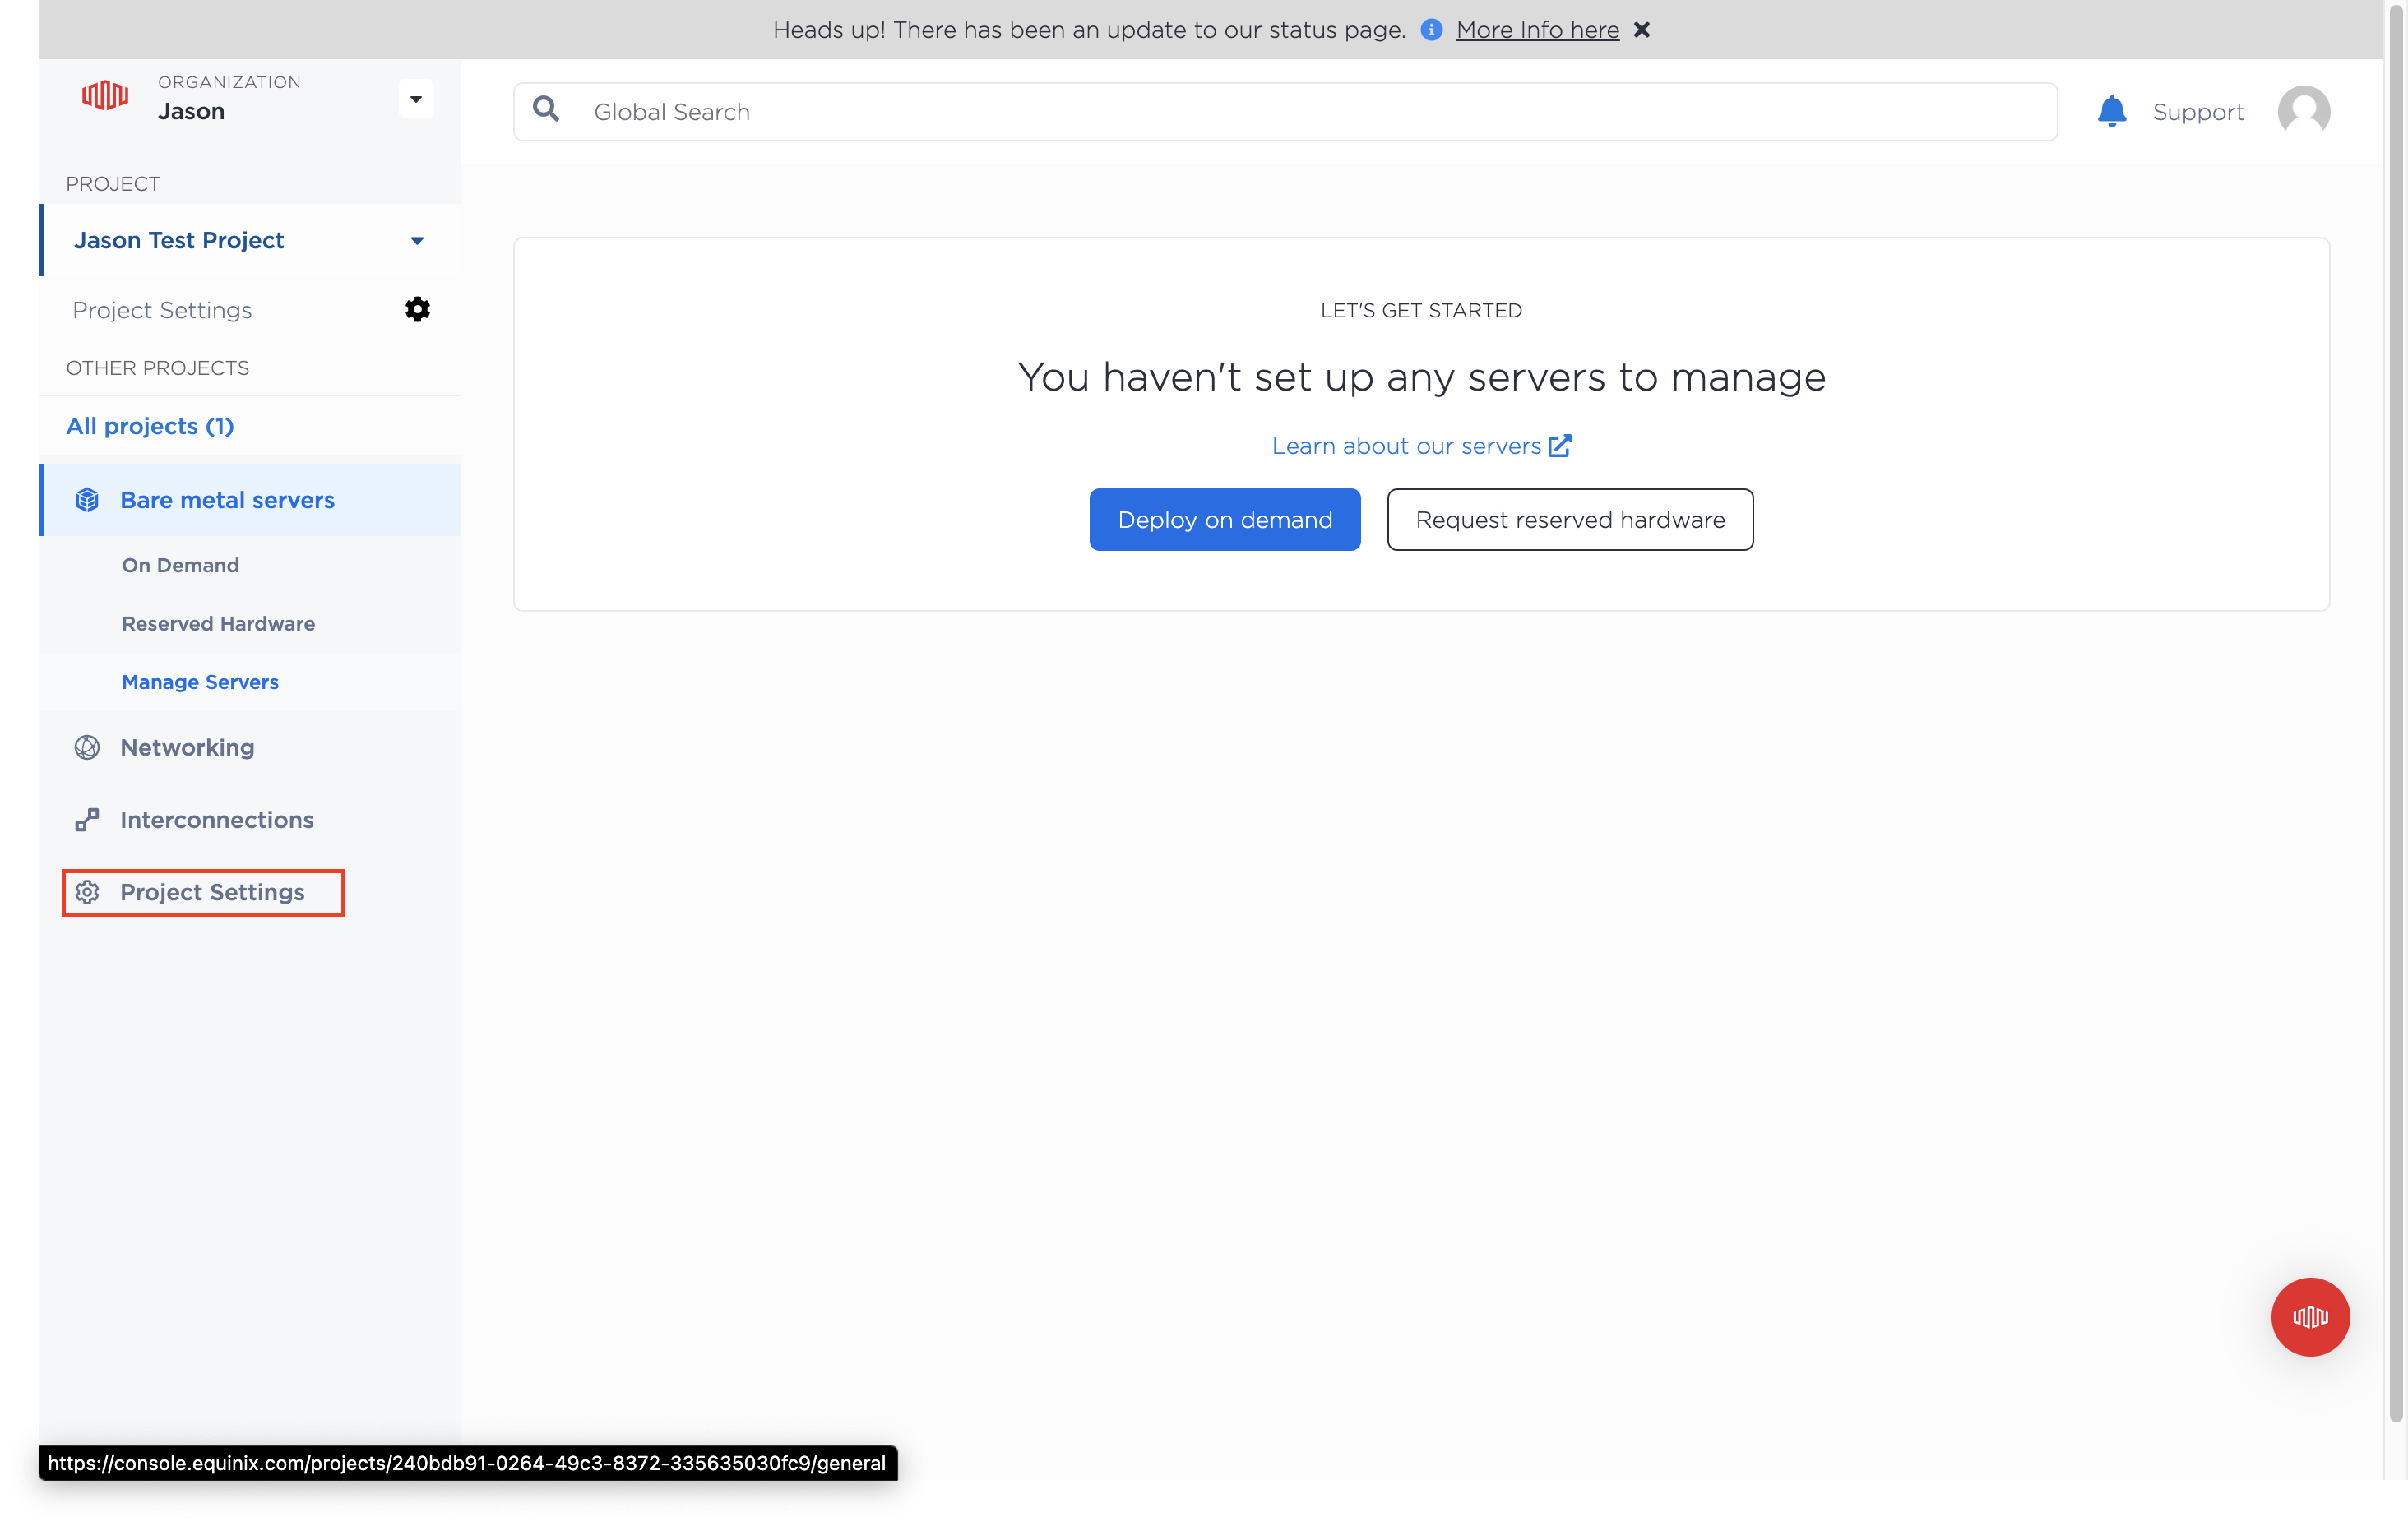
After creating a project, you will need to locate and copy the project ID. You will be able to find your project ID by going to the left-hand side of the screen and selecting Project Settings.
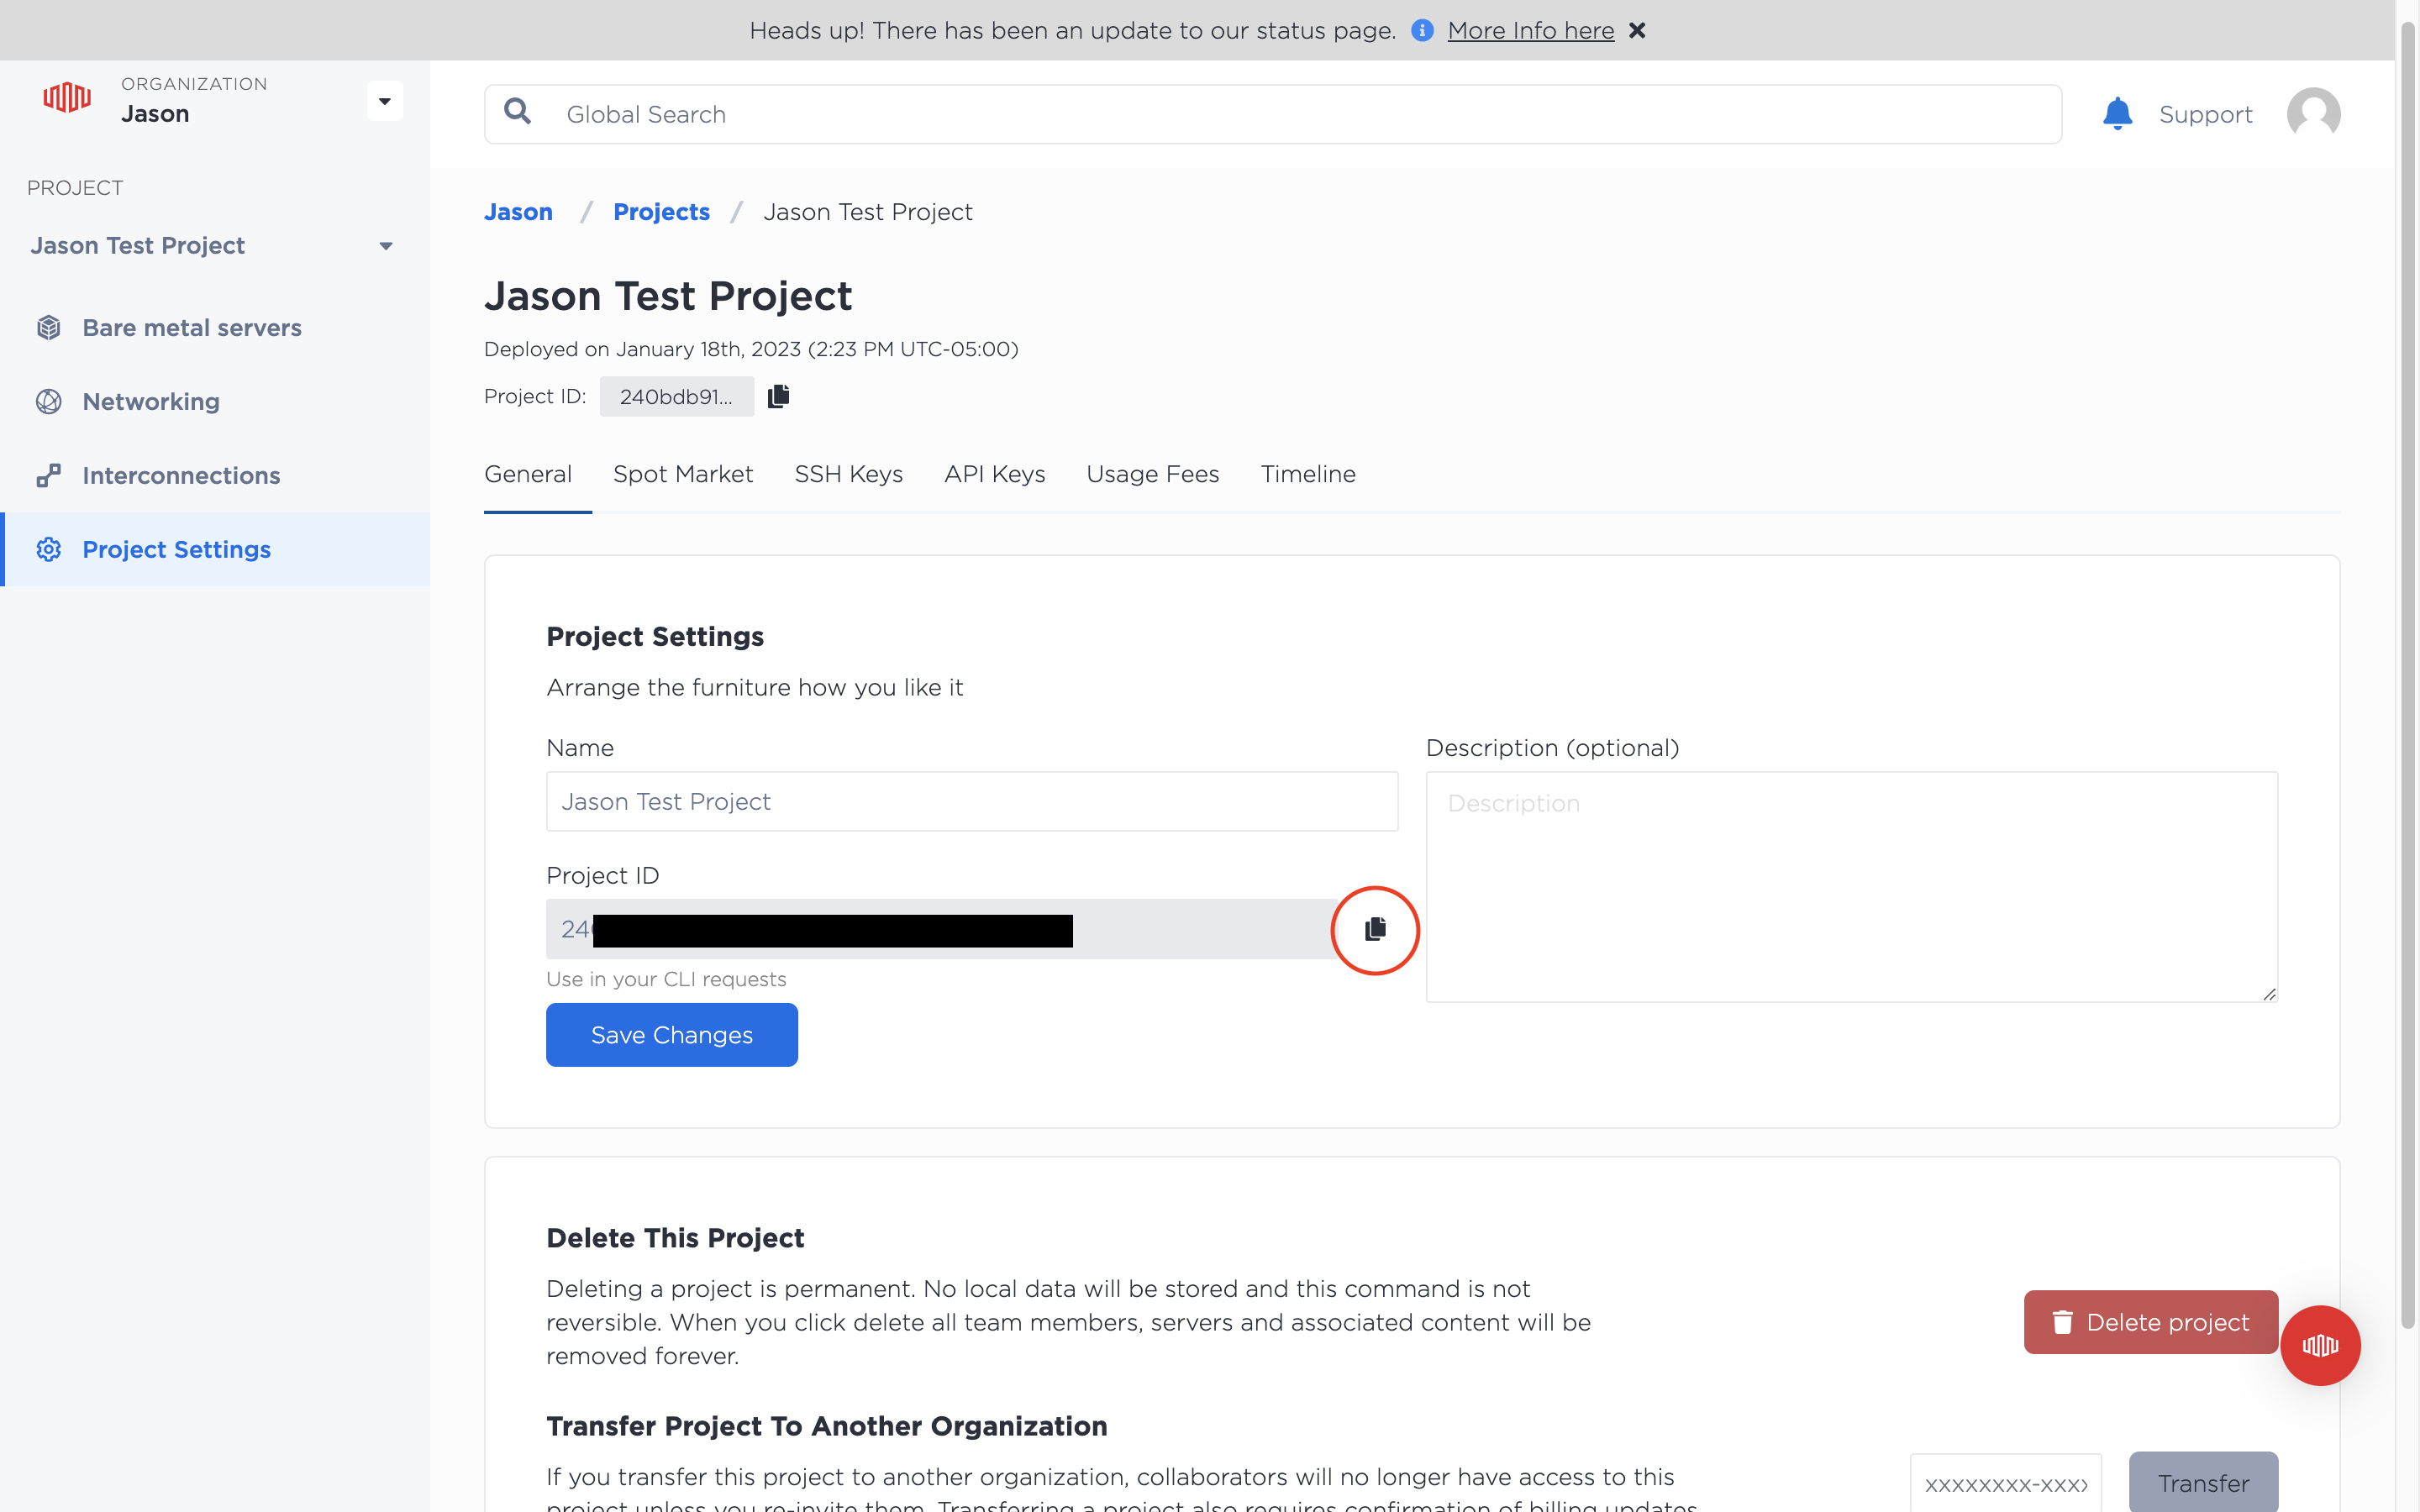
Then it will take you to the project's details and you will see the ID and a button to copy it. Copy and save the ID as it will be needed later.
Creating and copying an API Key
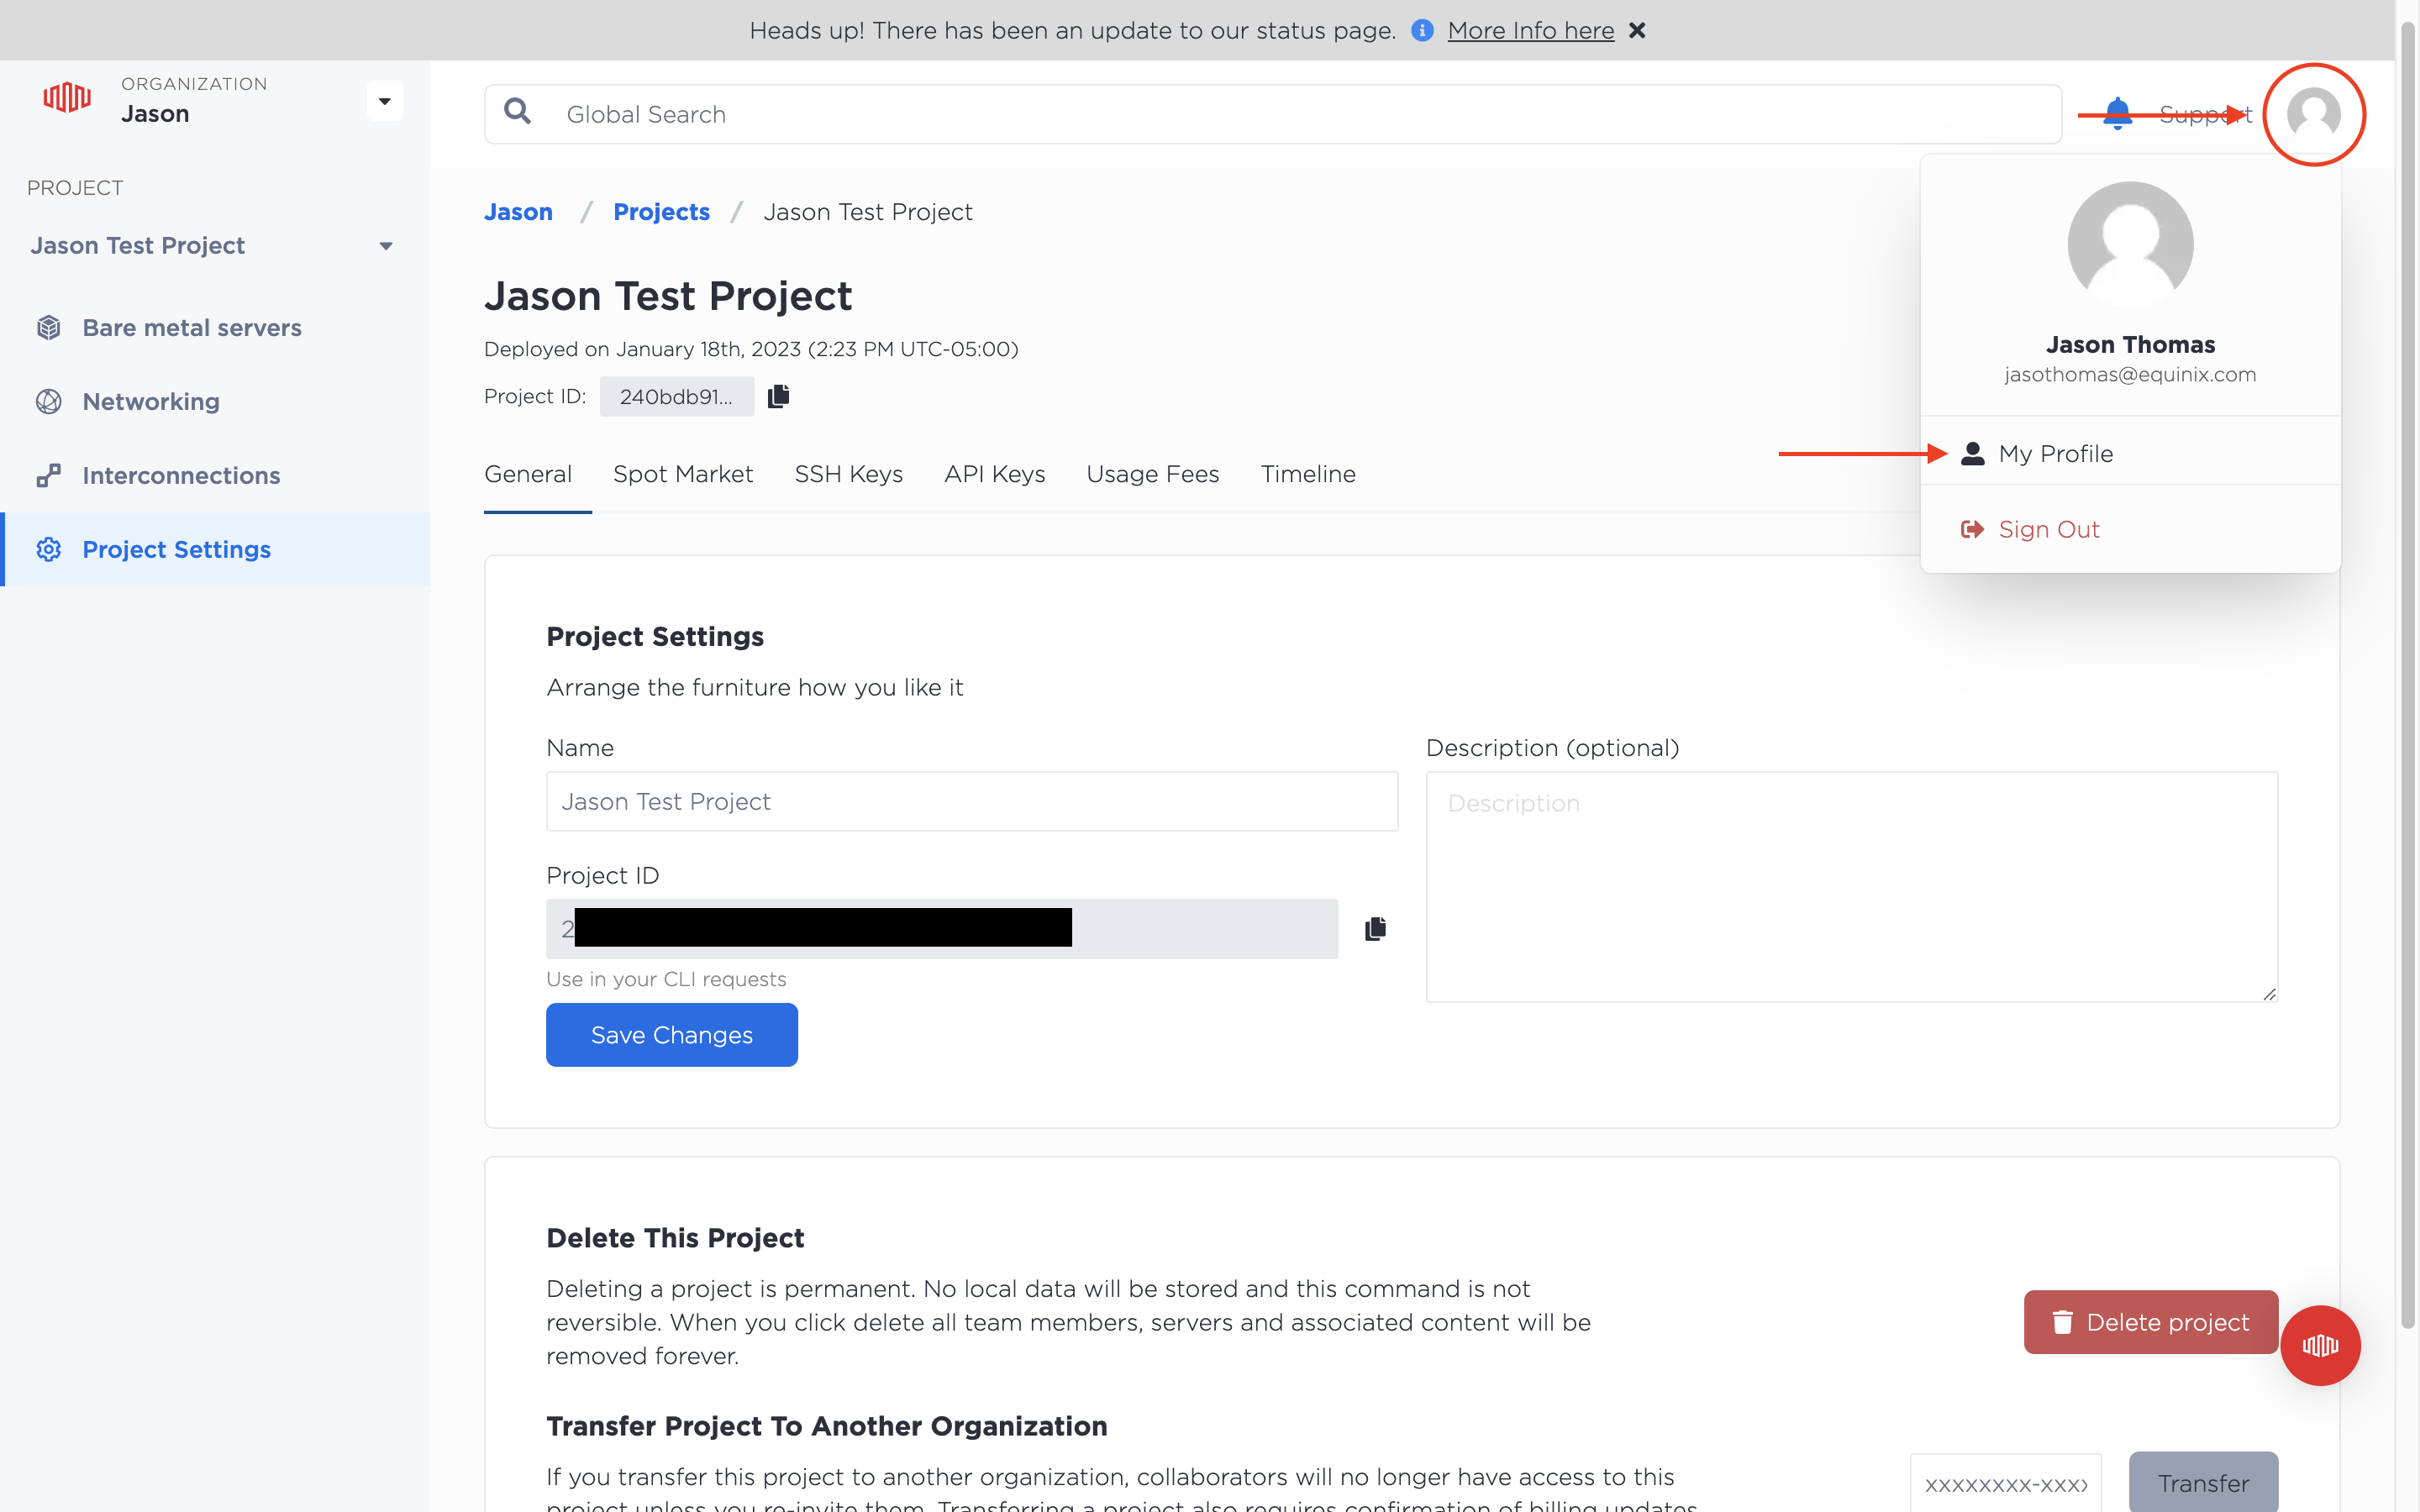
We also need to create an API key. Navigate to the upper right-hand corner, click on the avatar, and click on My Profile.
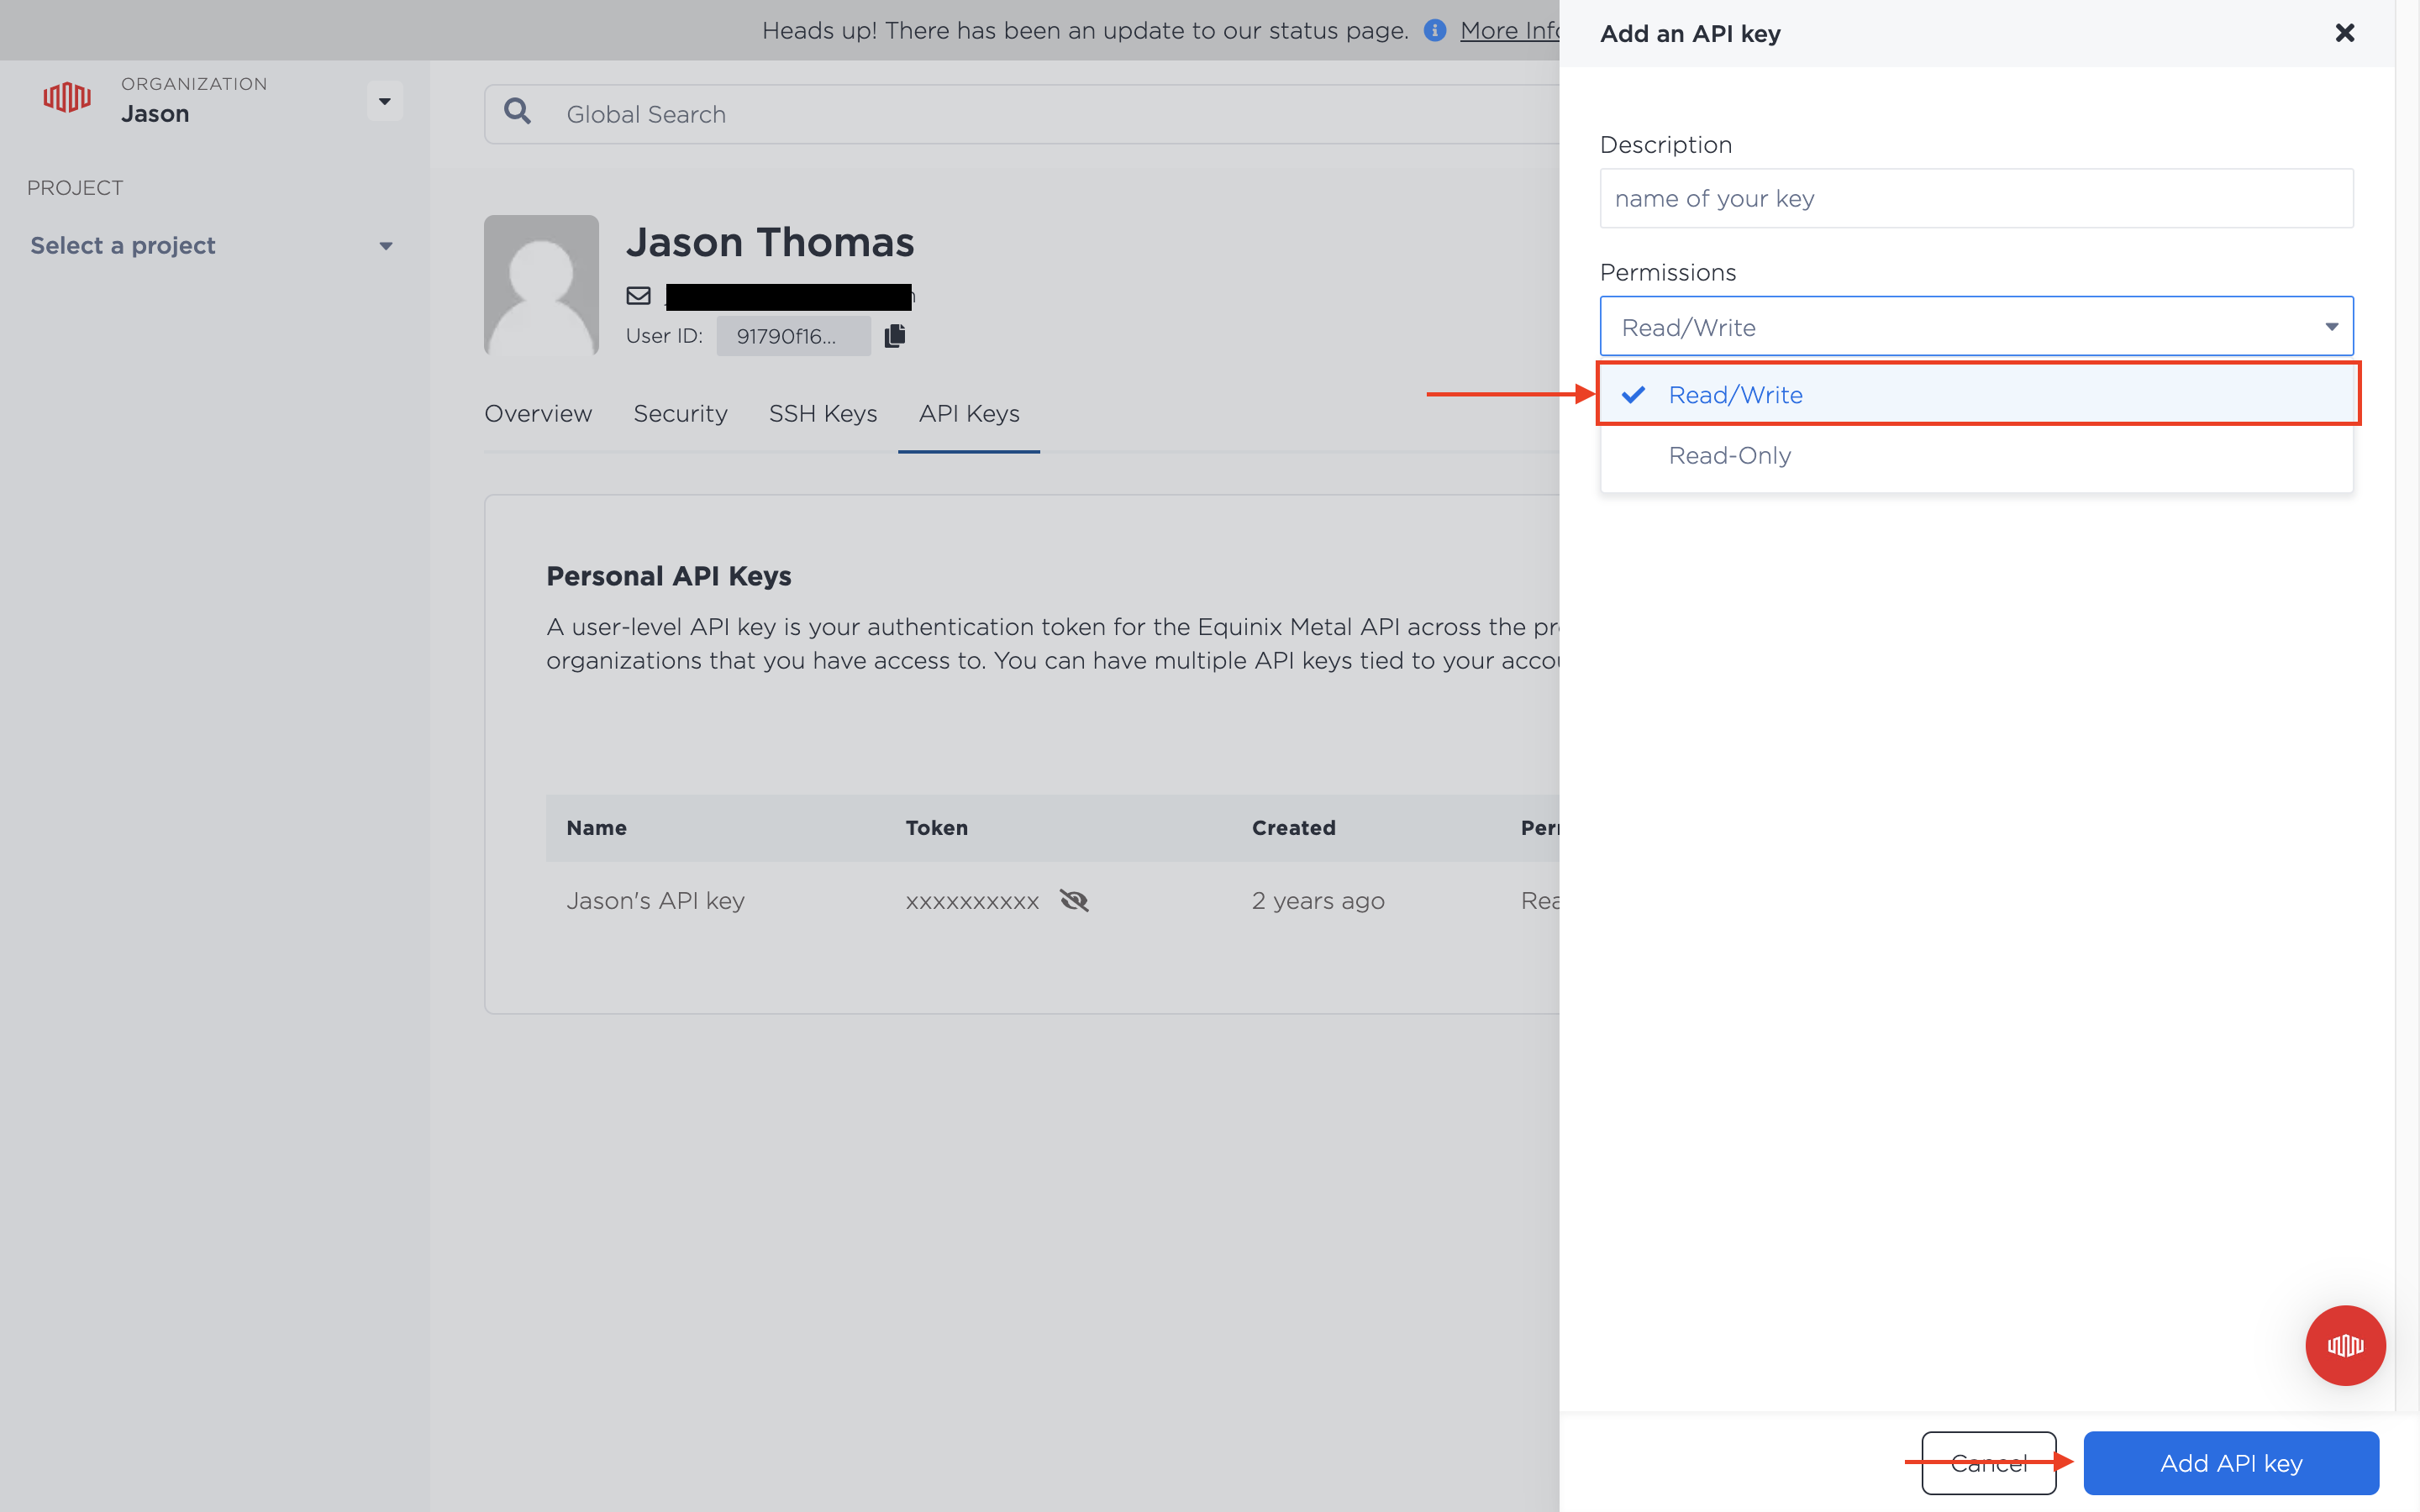
Once your profile page opens find the tab titled API Keys and then click the button titled Add New Key.
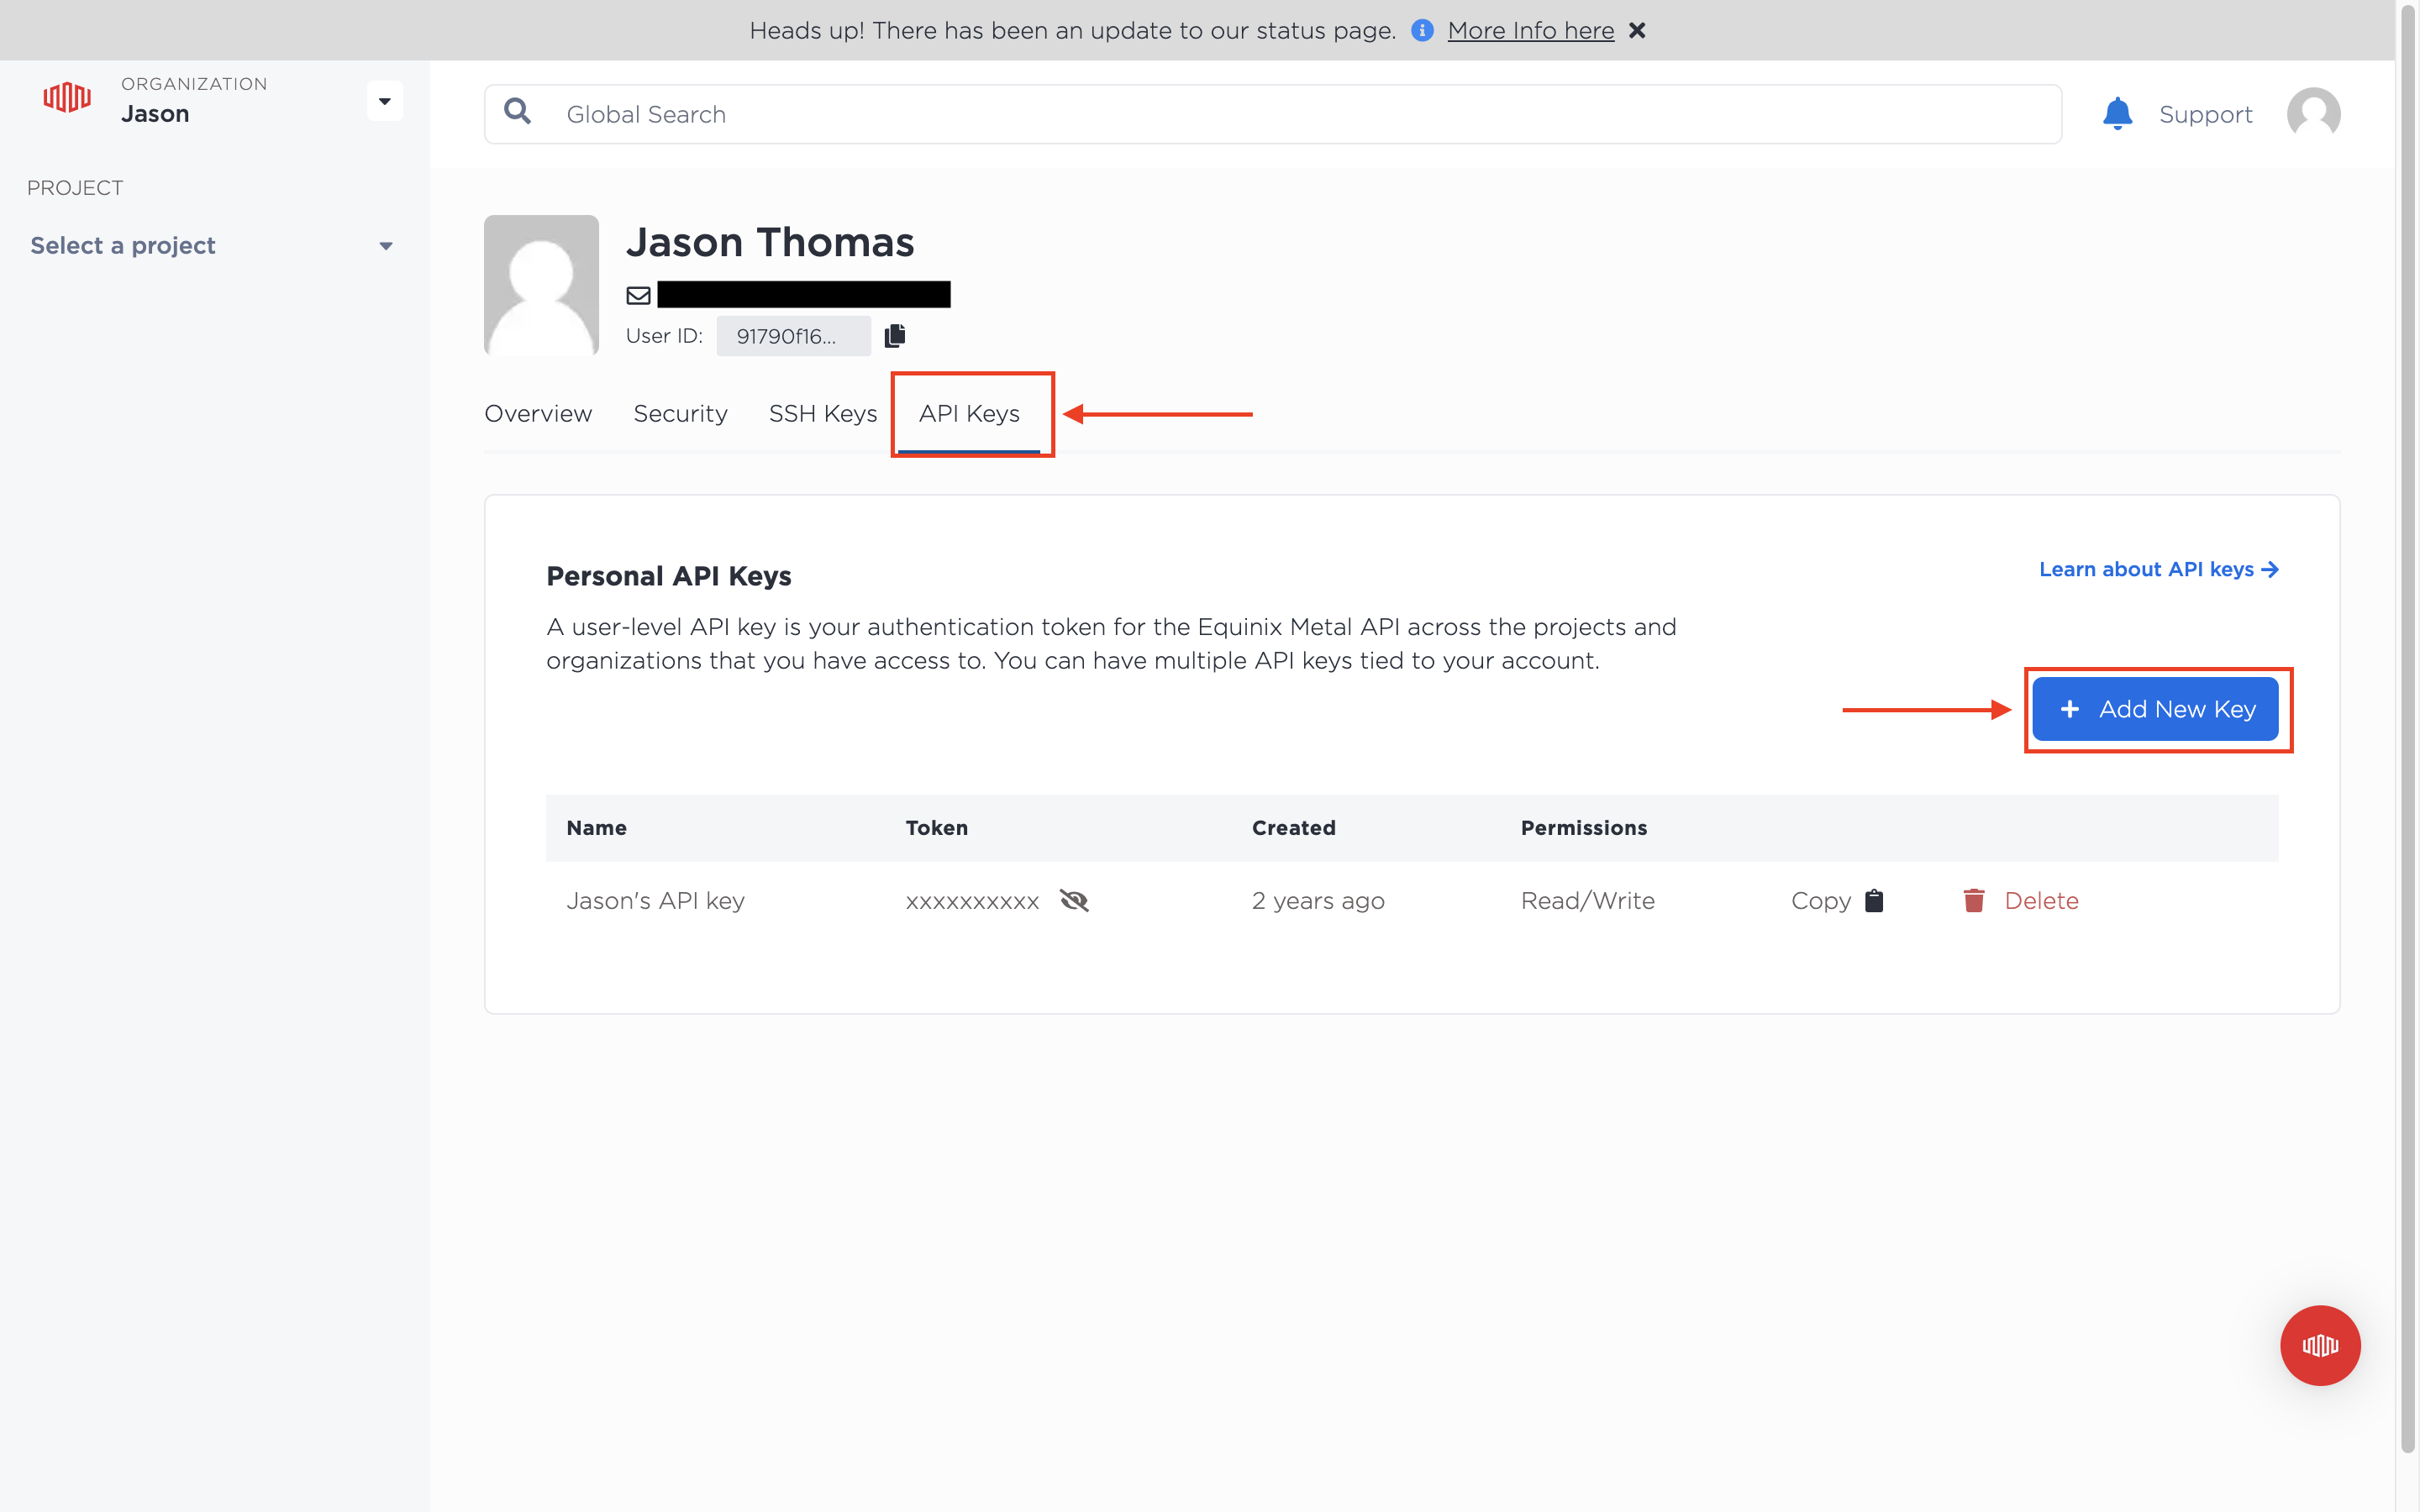
Give your key a name and choose to give it the Read/Write permission.
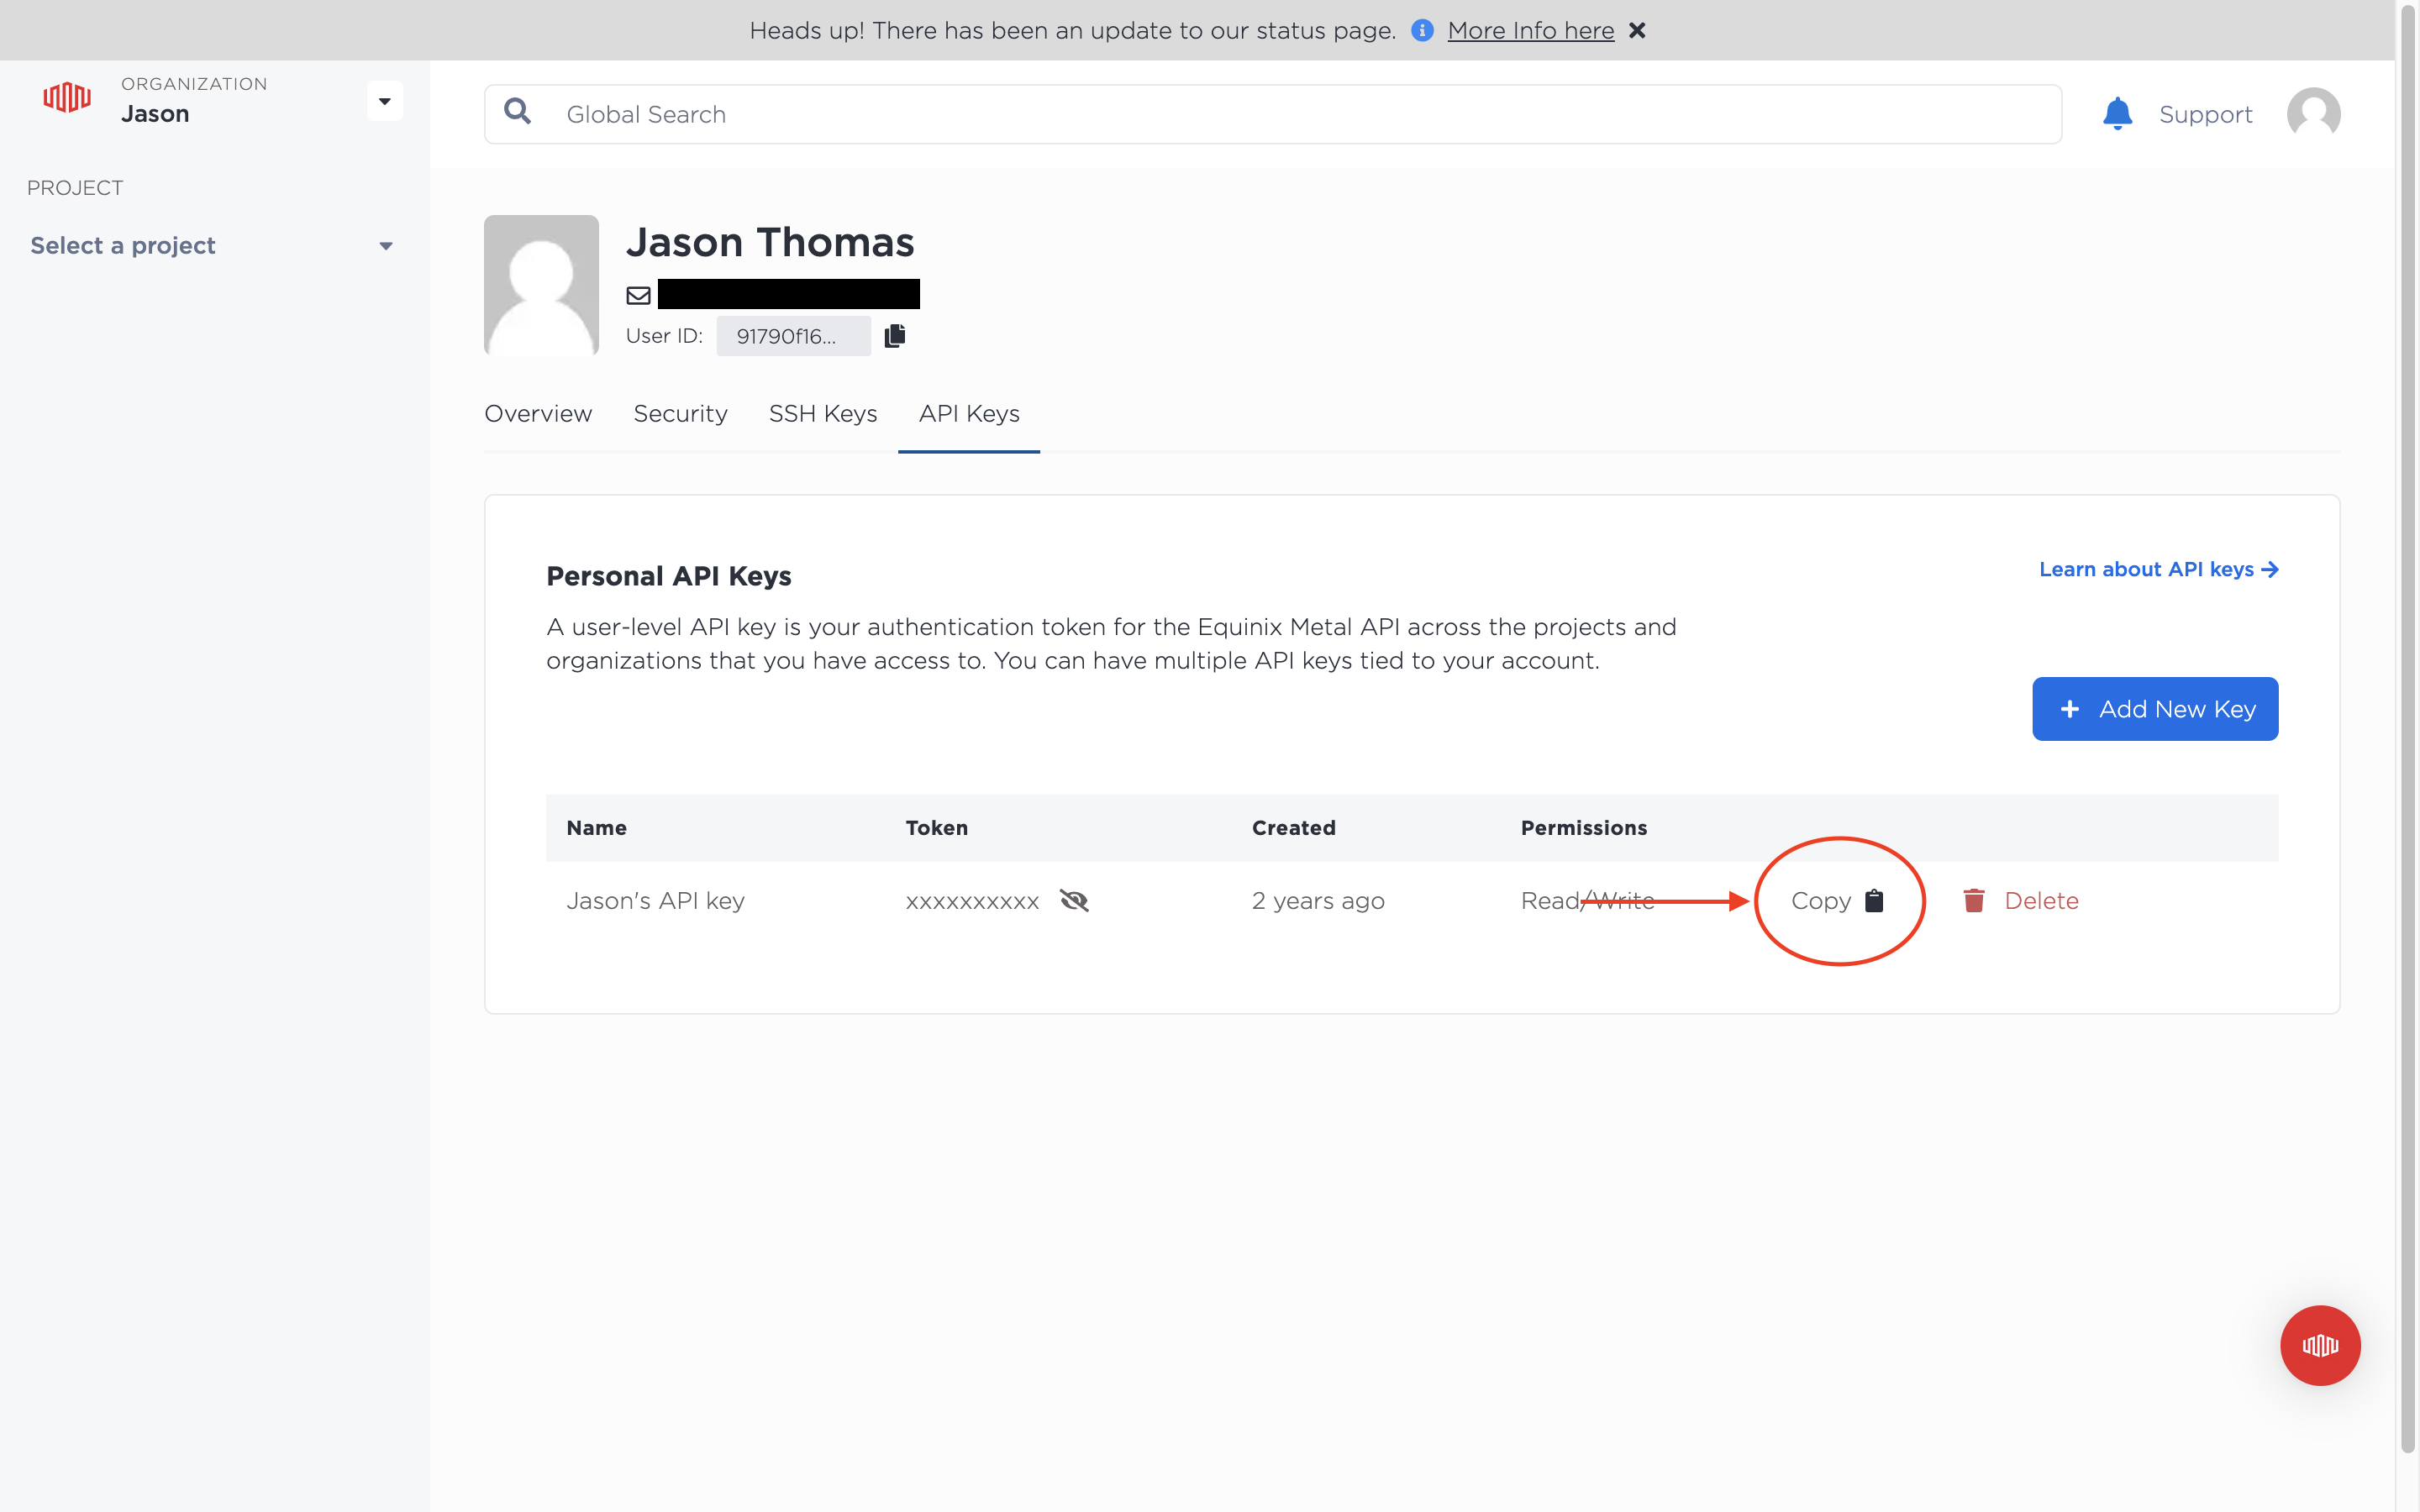
Once the key is created it should show up in your list of API keys and there should be a copy button in that same line. Copy and save the API key as it will be needed later.
If you are having trouble navigating and creating an API key check out the API Key Documentation
If you would like to learn more about the Metal API, check out Equinix Metal API.
Installing Terraform
Terraform is an open-source infrastructure-as-code software tool created by HashiCorp. Users define and provide data center infrastructure using a declarative configuration language known as HashiCorp Configuration Language (HCL).
To install Terraform, check out the official documentaiton.
For the purpose of this guide, we'll quickly recap how we installed Terraform on the MacOS workstation we used:
brew tap hashicorp/tap
brew install hashicorp/tap/terraform
To test that it's been installed correctly try running:
terraform -help
If you had trouble getting Terraform installed from these instructions, please refer to Terraform's official installation video for a better visualization and explanation.
Setup is now complete you should have all the things required to begin using Terraform to deploy Equinix Metal servers.
Pre-flight checklist
Before we begin make sure you've done the following:
- Created an Equinix Metal account and organization
- Created a project and saved the project ID
- Created an API key and saved it
- Installed Terraform
We're now ready to get started!
Deploying a Metal server with Terraform
To use Terraform with Equinix Metal you will need to create a new directory and create a Terraform file inside that will hold the script with the deployment plan.
From a terminal, make a new directoy, I named mine terraform-example, and navigate into the newly created directoy.
mkdir terraform-example
cd terraform-example
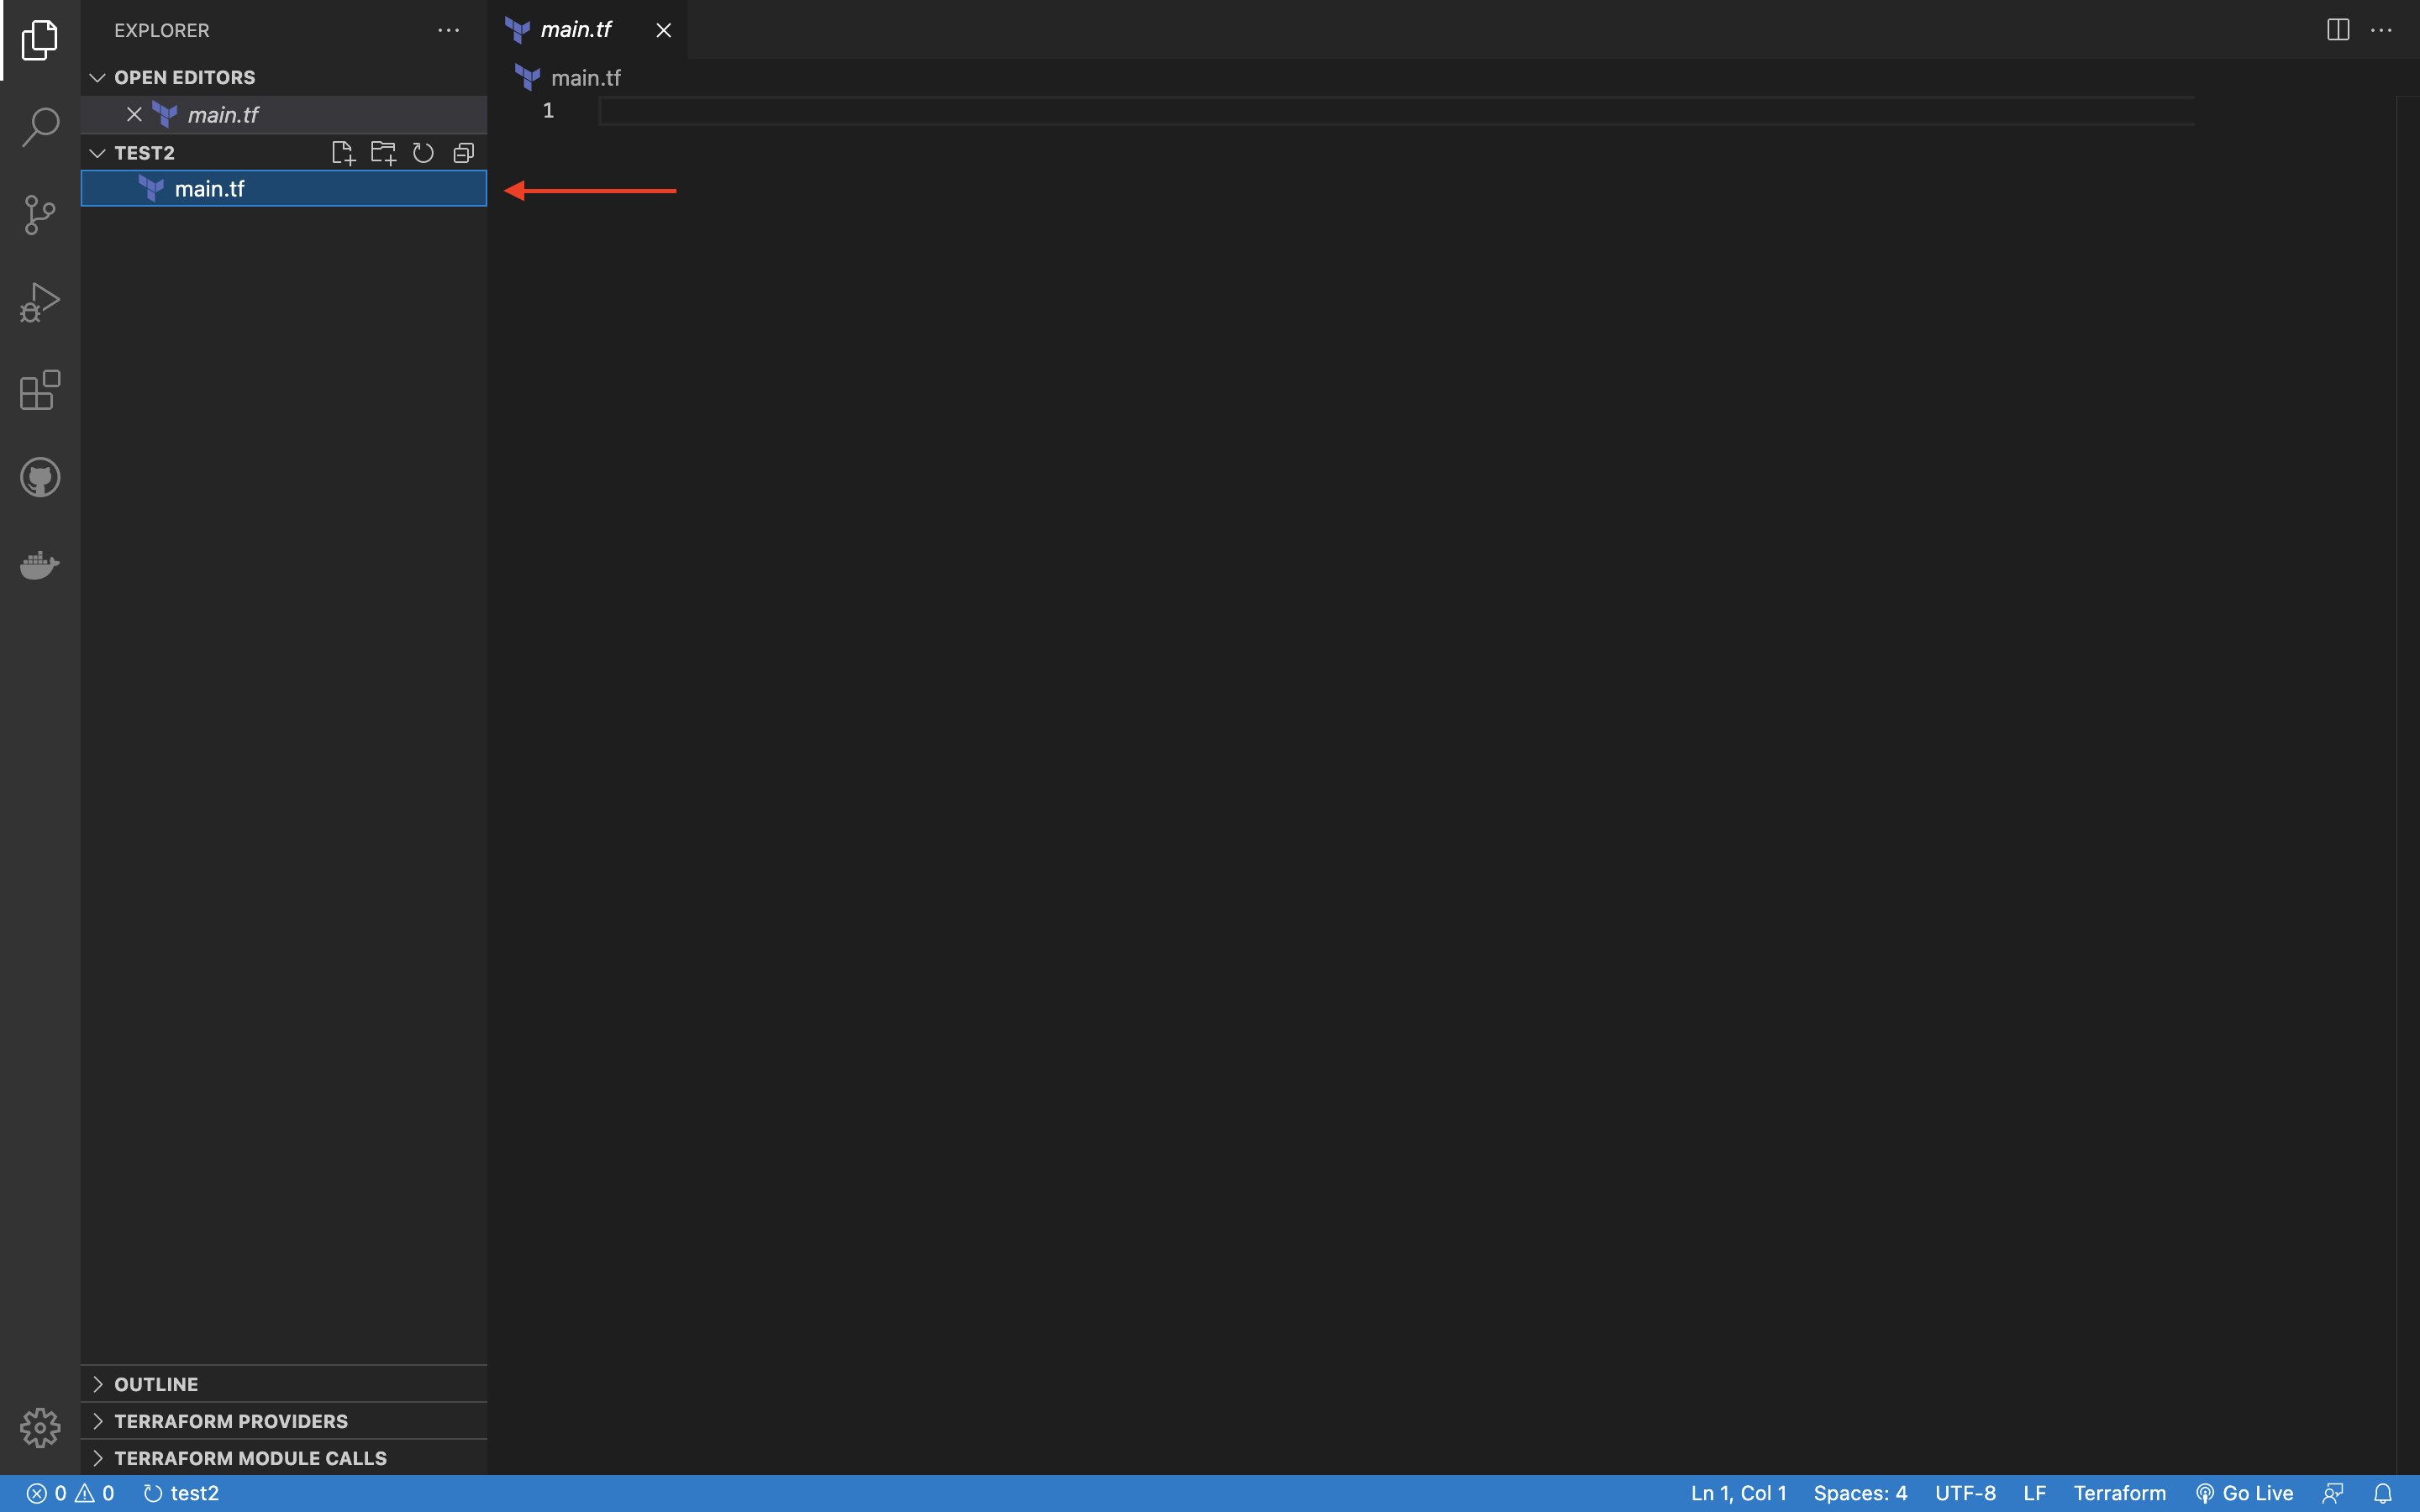
Create a Terraform file using the touch command, name it main.tf
touch main.tf
Now you should have a directory that looks like this:
❯ terraform-example
.
└── main.tf
Terraform Script
Using VS Code, open the folder you just created. It will display its contents on the left side of the screen. Open the Terraform file you just created and it will open an editor for that file.
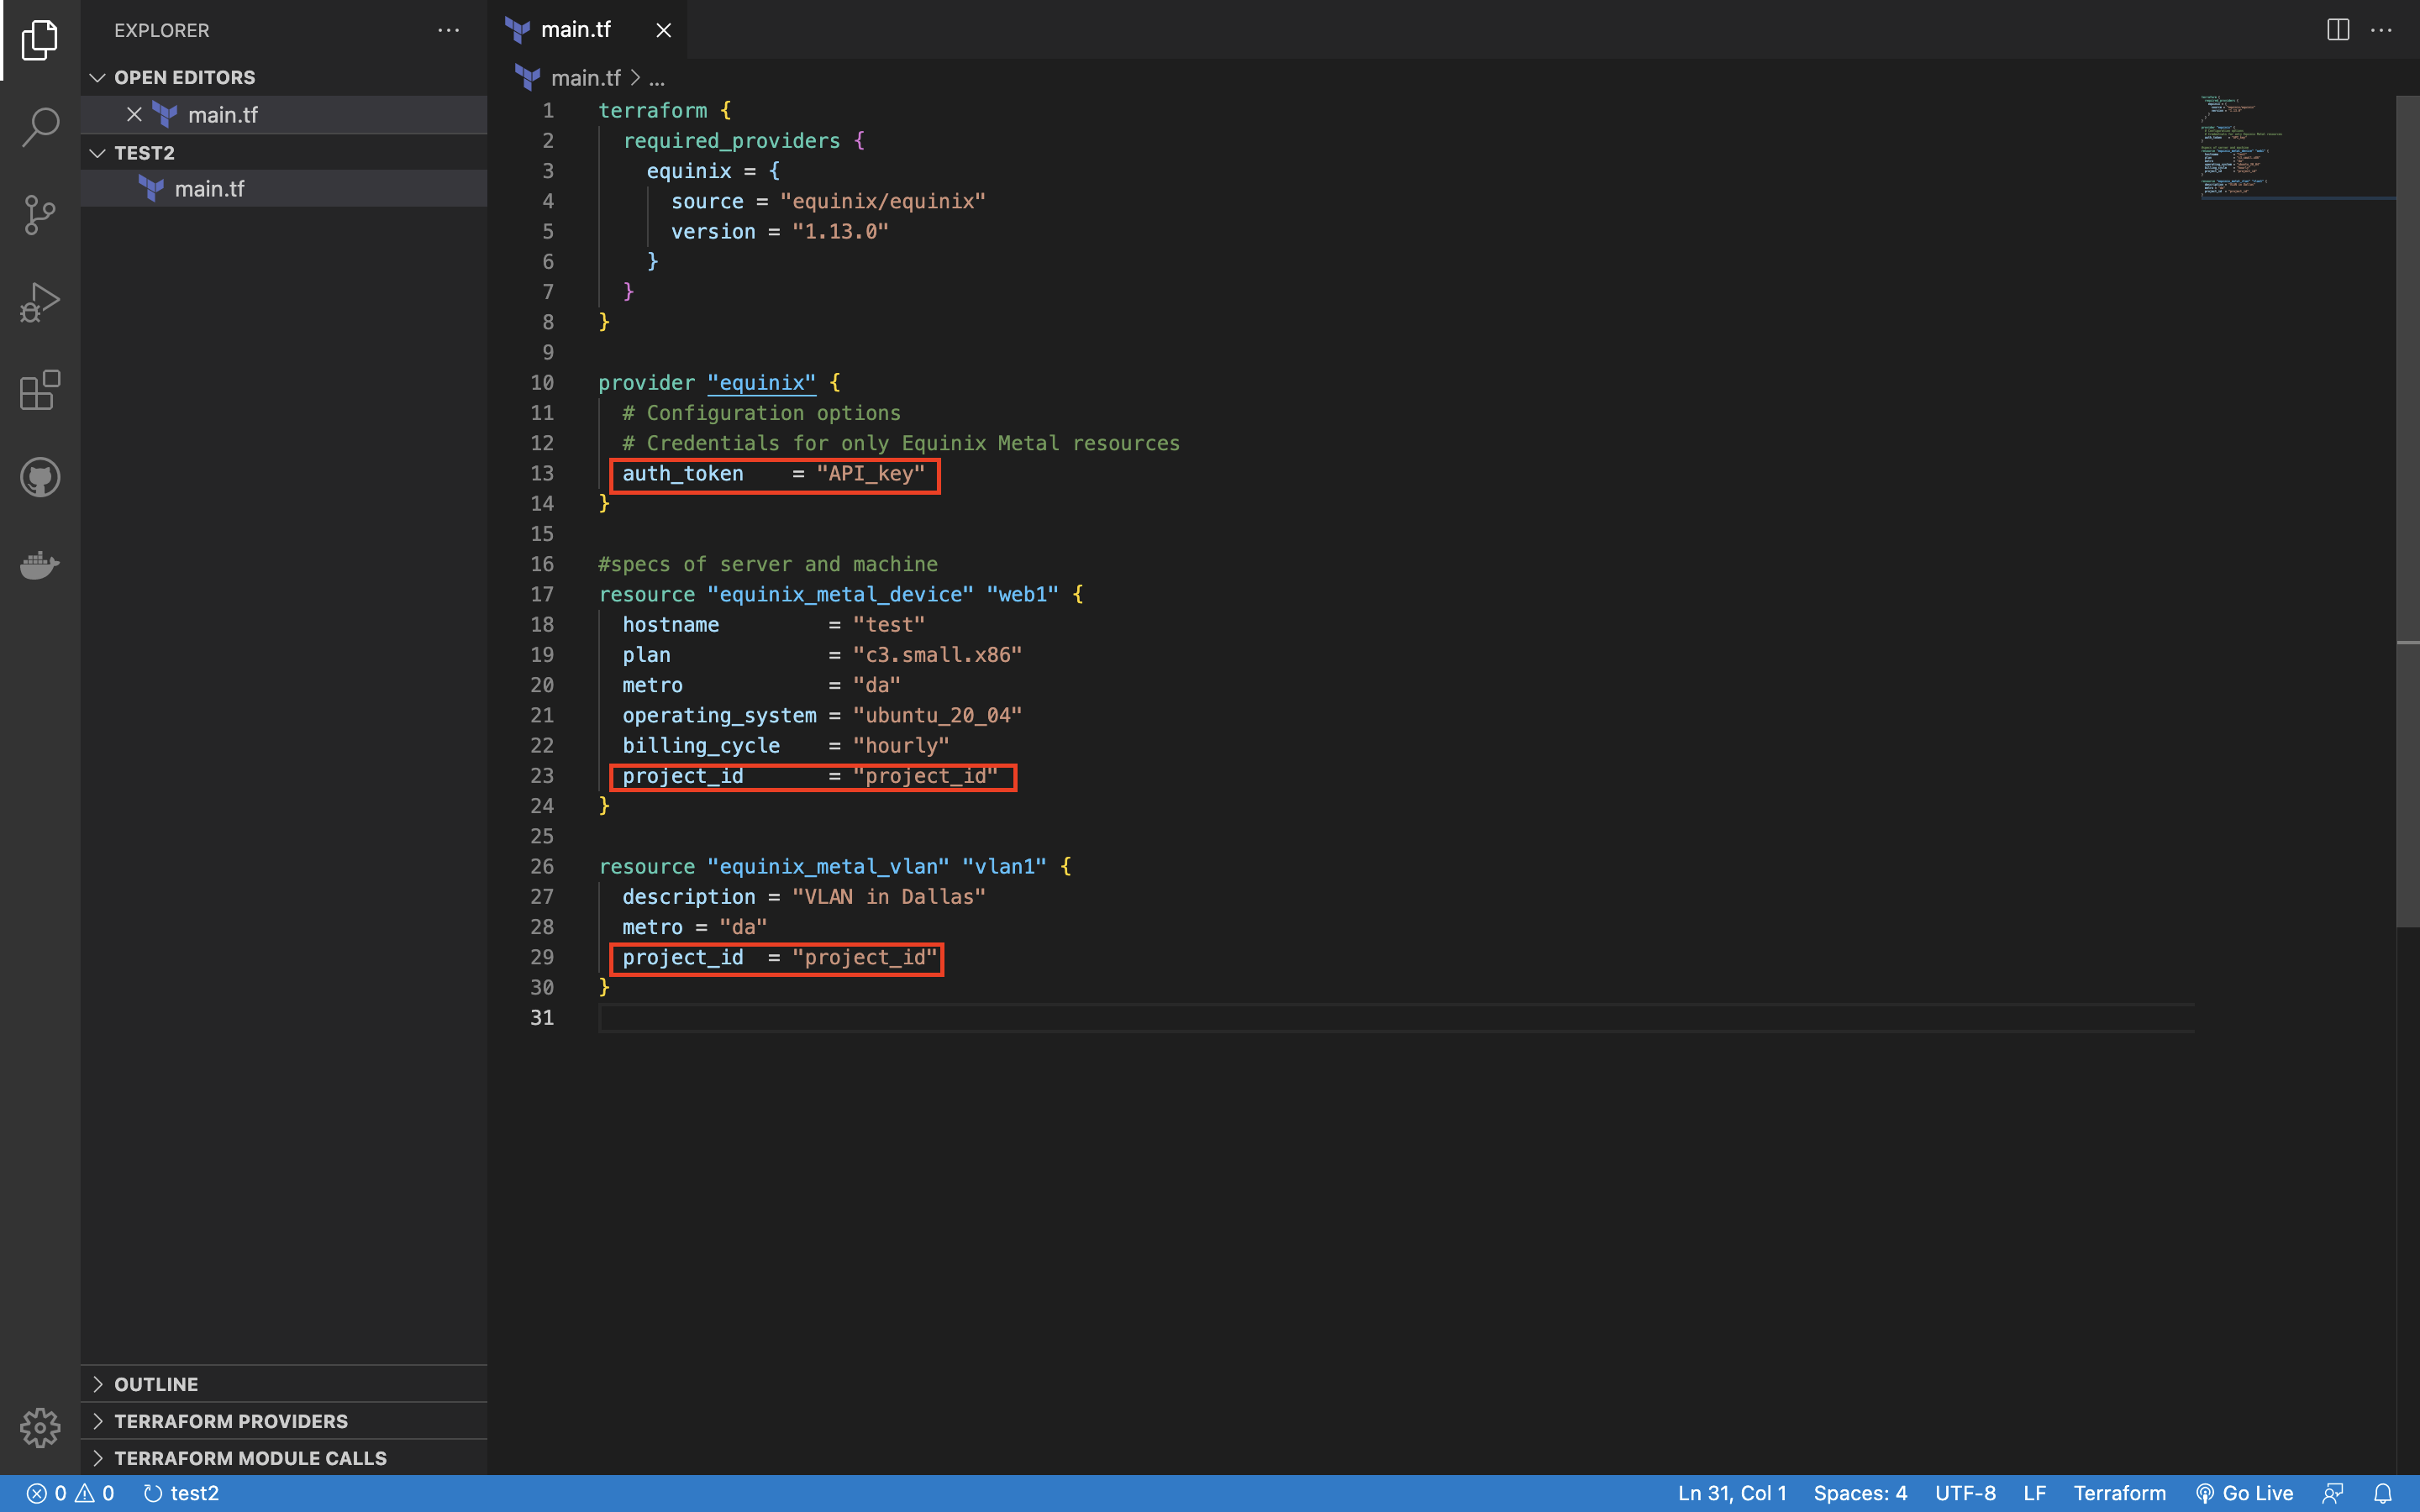
Copy and paste this plan configuration inside your file.
terraform {
  required_providers {
    equinix = {
      source  = "equinix/equinix"
      version = "1.13.0"
    }
  }
}

provider "equinix" {
  # Configuration options
  # Credentials for only Equinix Metal resources
  auth_token = "API_key"
}

#specs of server and machine
resource "equinix_metal_device" "web1" {
  hostname = "test"
  plan = "c3.small.x86"
  metro = "da"
  operating_system = "ubuntu_20_04"
  billing_cycle = "hourly"
  project_id = "project_id"
}

resource "equinix_metal_vlan" "vlan1" {
  description = "VLAN in Dallas"
  metro = "da"
  project_id = "project_id"
}
Update API key and Project ID
After copying this code to your main.tf file there will be two things that you must do for it to work:
- Update the
auth_tokenvalue with your own API key that was created earlier. - Update the
project_idvalues for the server and VLAN sections with your own project ID that was created earlier.
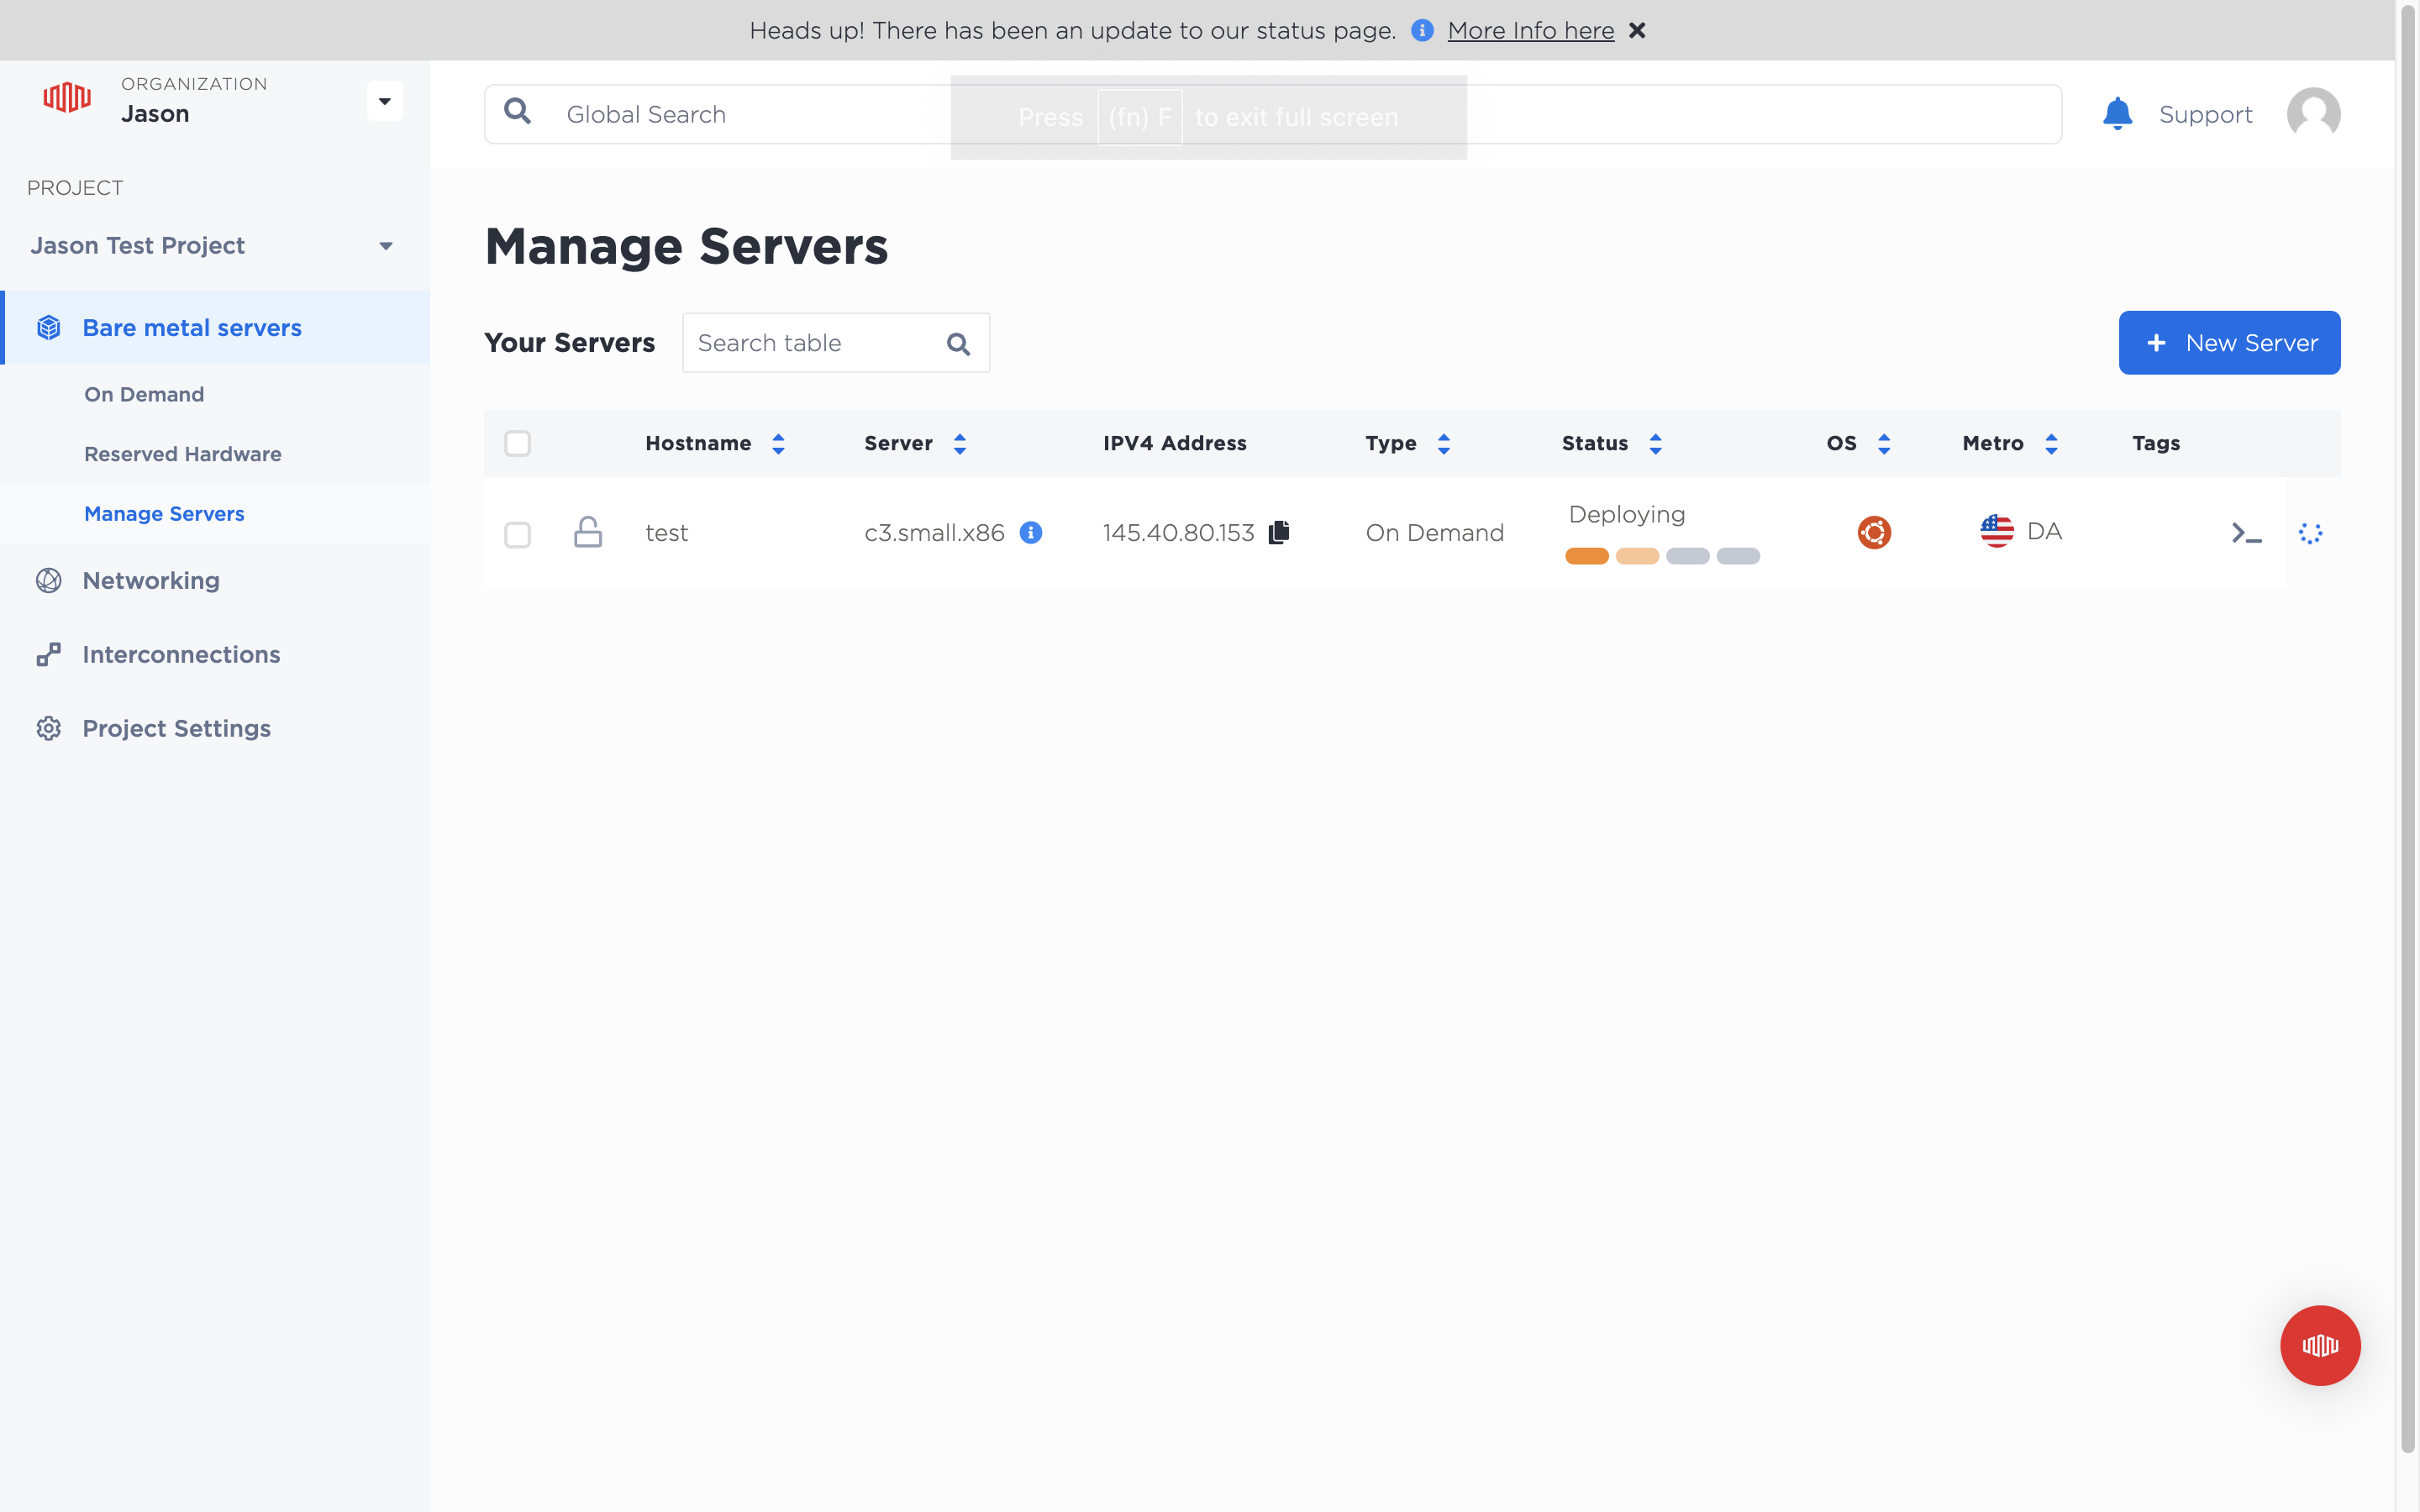
The current configuration will deploy a c3.small.x86 server named test and running Ubuntu 20.04 on an hourly billing cycle located in the Dallas metro. It will also create a VLAN in the Dallas metro, with the description VLAN in Dallas.
All these configuration options can be modified and adjusted to fit what you are trying to create. For more info about what you can create checkout the Equinix Terraform Provider Docs and learn more about what you can do.
Also, for more information about valid input options and attribute references Check out the Attribute Reference Page in the Equinix Terraform Provider Docs
Customize your plan
This section is meant to help you find and navigate where to see all available options for your tags inside the Terraform script.
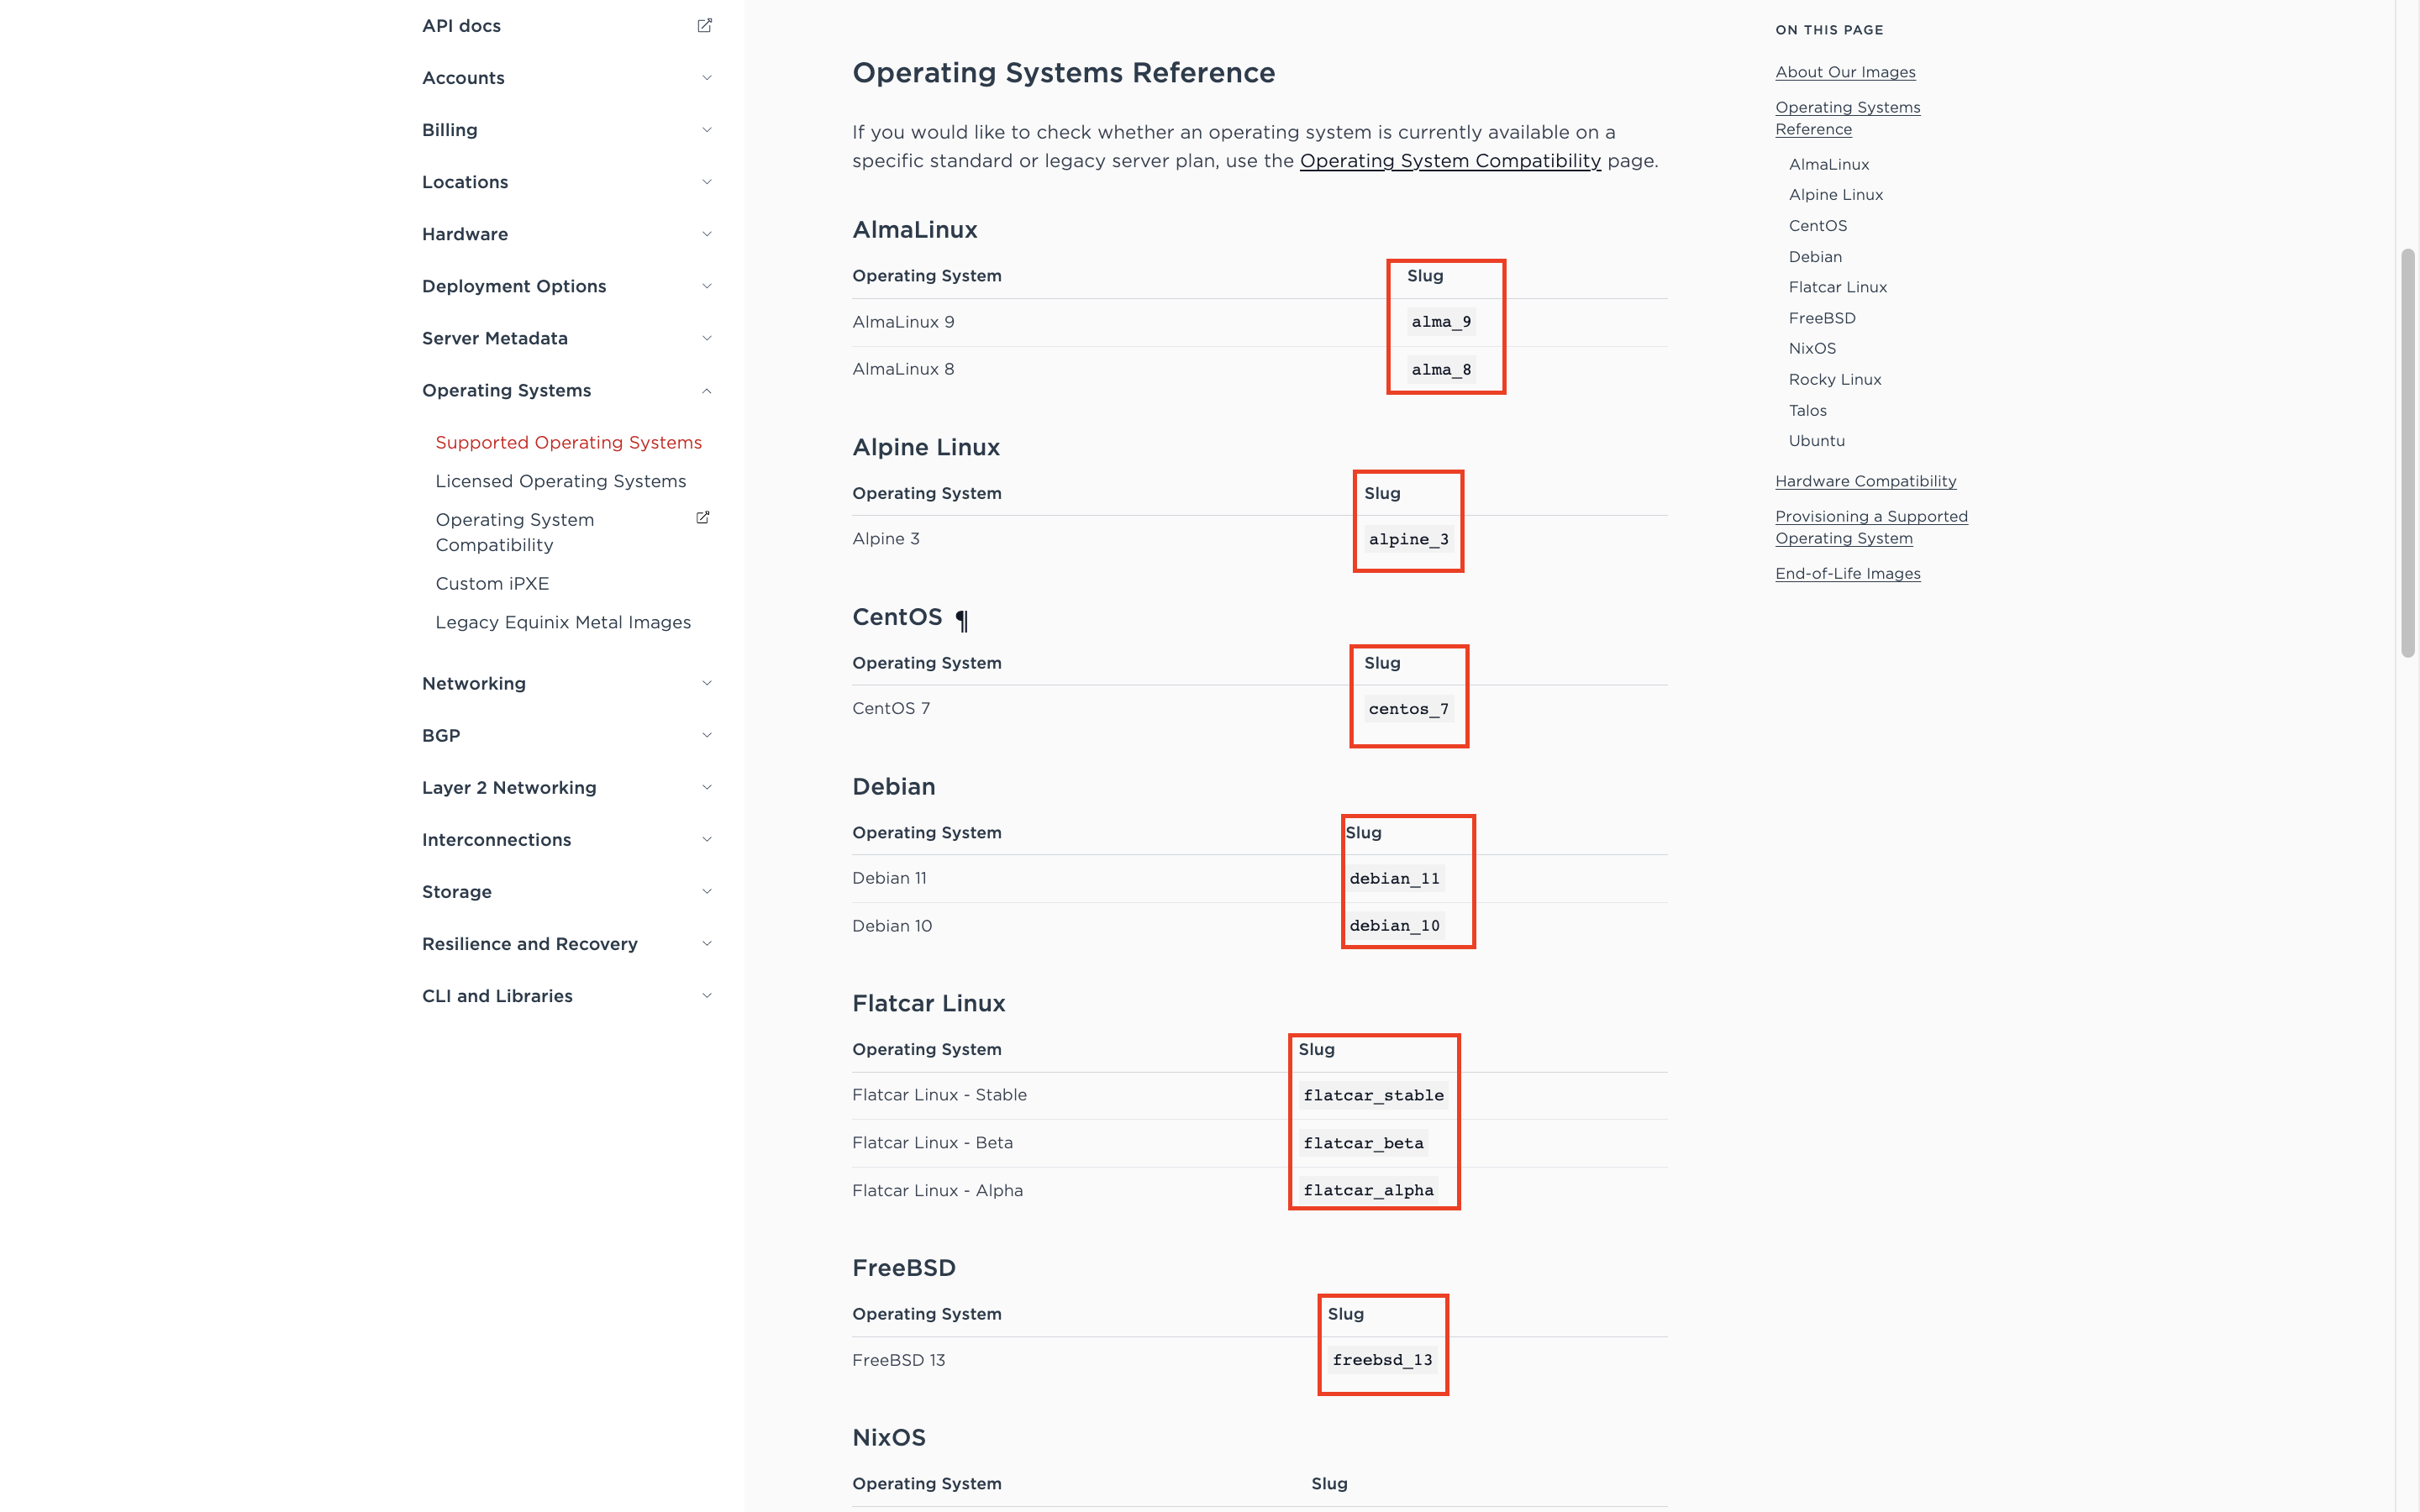
Operating System Tags
You will be able to find all valid operating system options by checking the operating-system slug. The slugs are what you would put inside the quotes for operating_system = "slug", for example, if you wanted CentOS 7 you would update the value to:
operating_system = "centos_7"
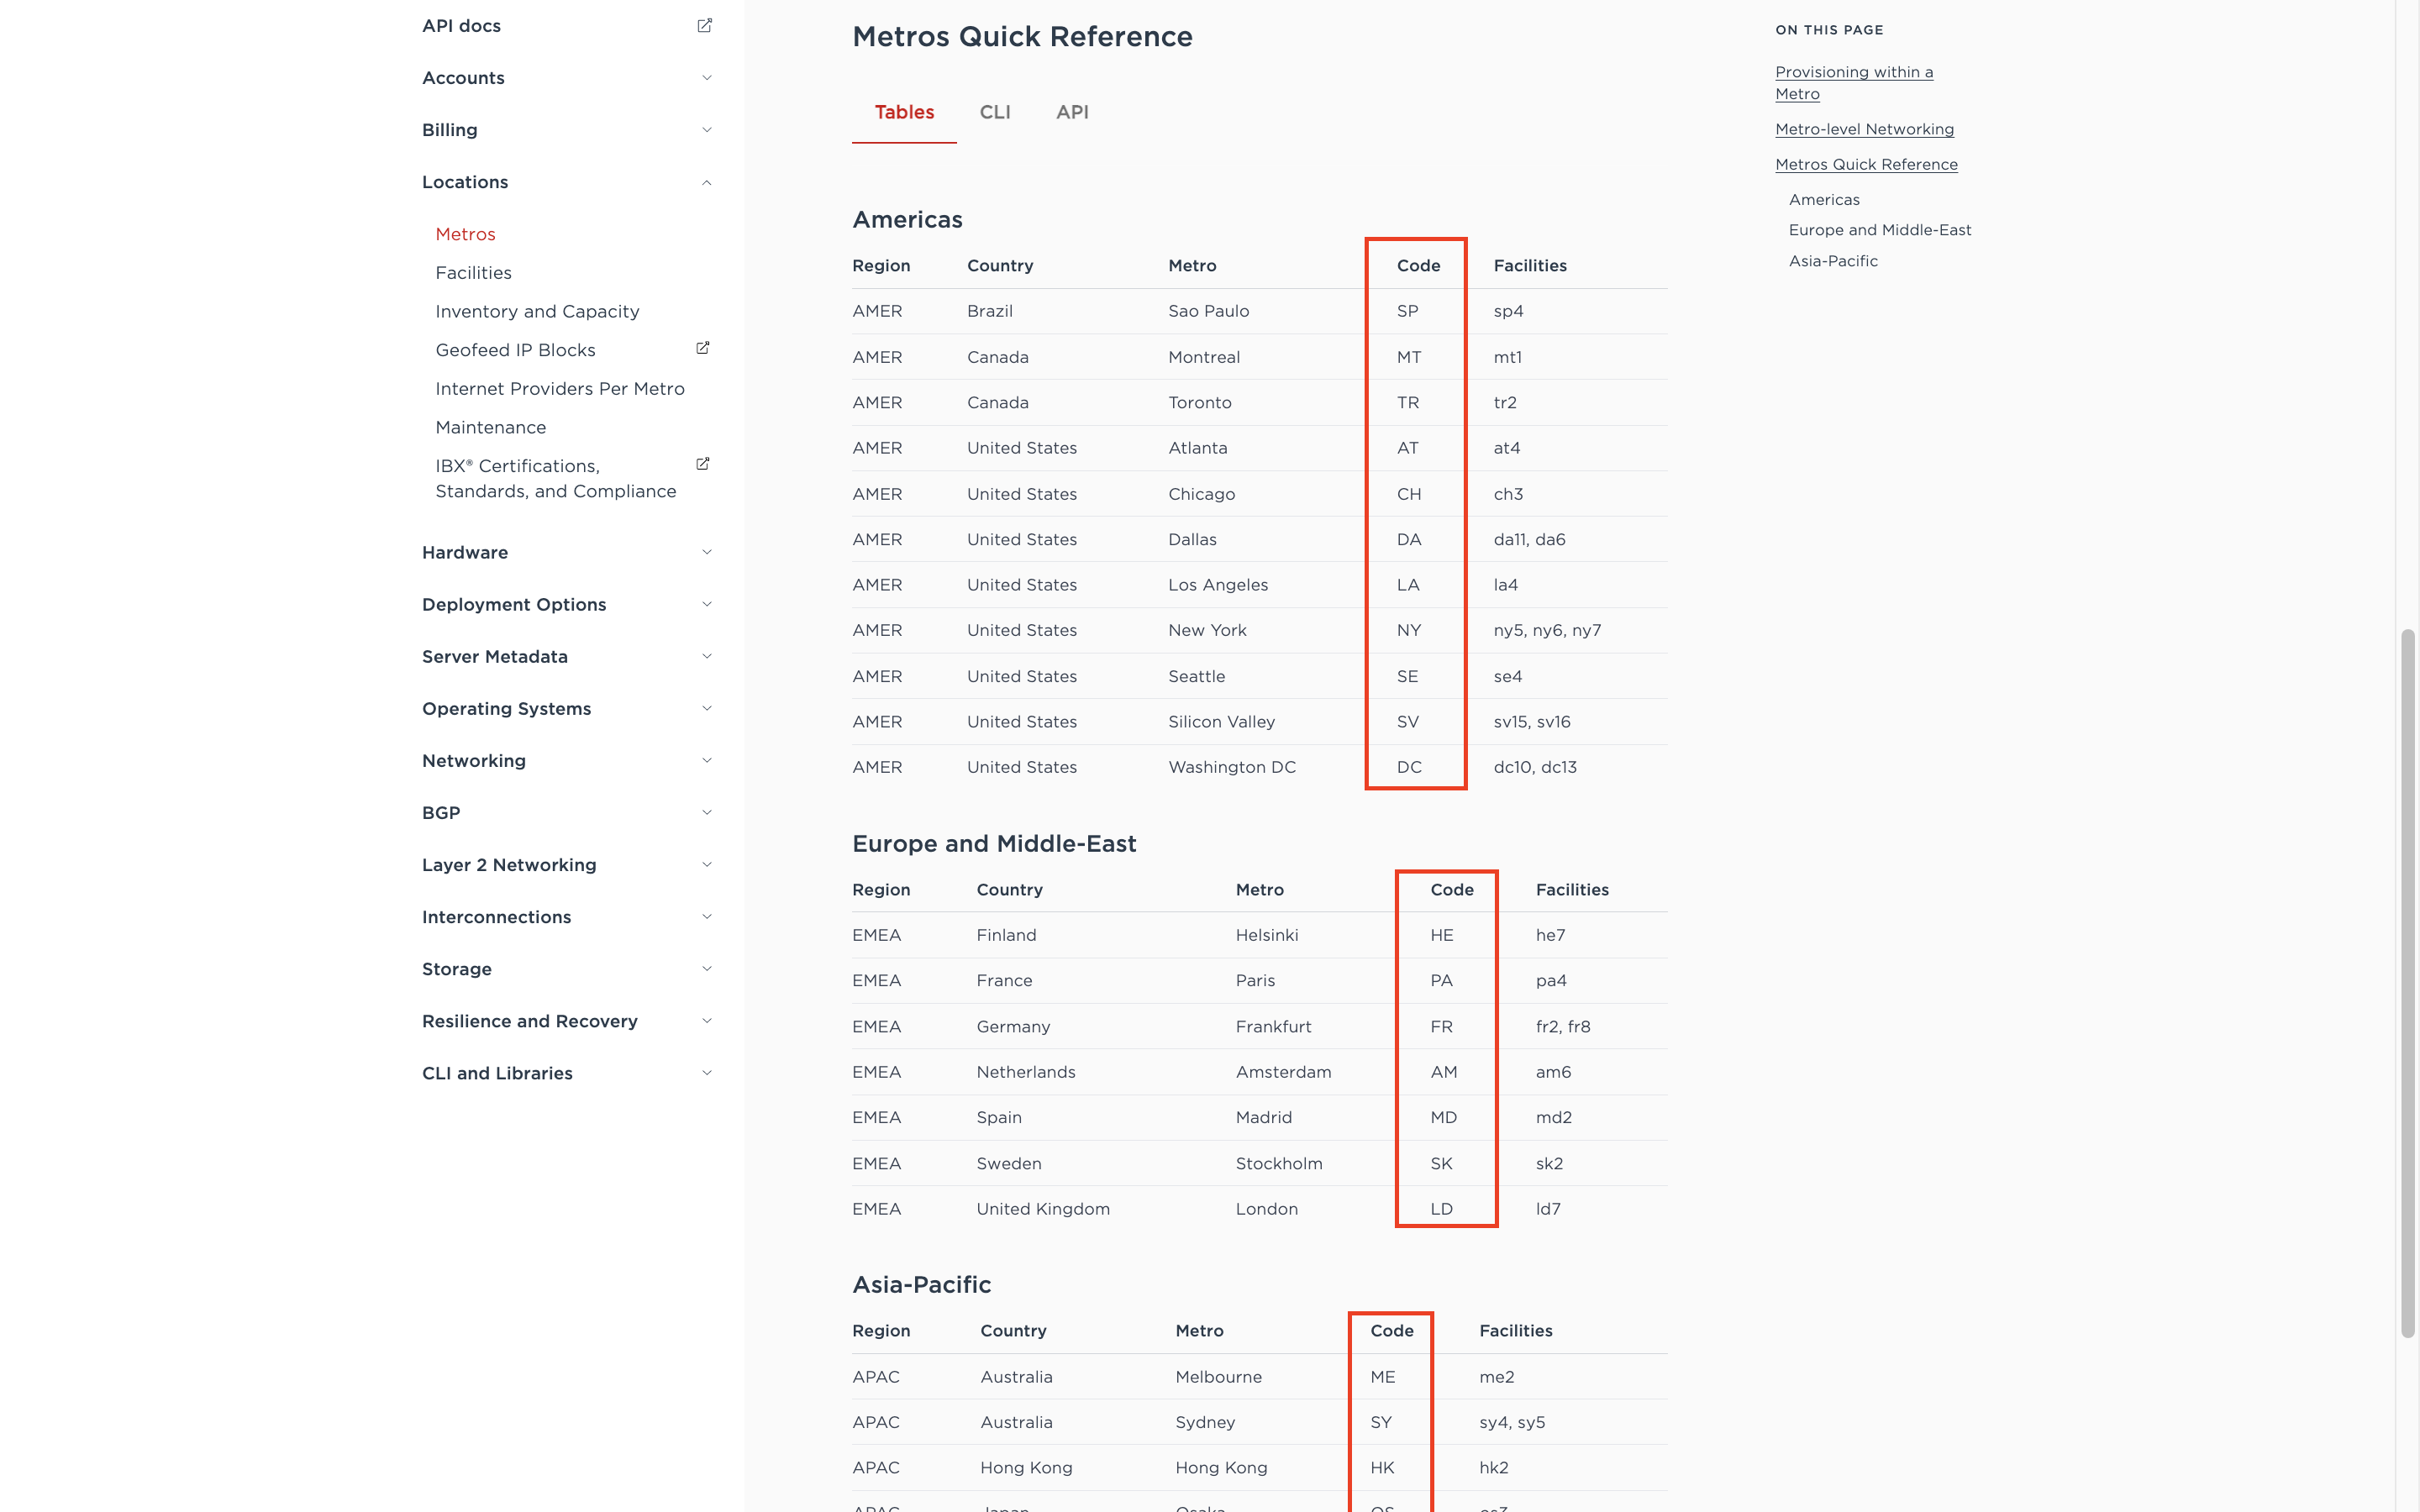
Metro Codes
You will be able to find all valid metro options by checking the metro codes. The values are what you would put inside the quotes for metro = "code", for example, if you want to deploy in Toronto you would update the value to:
metro = "tr"
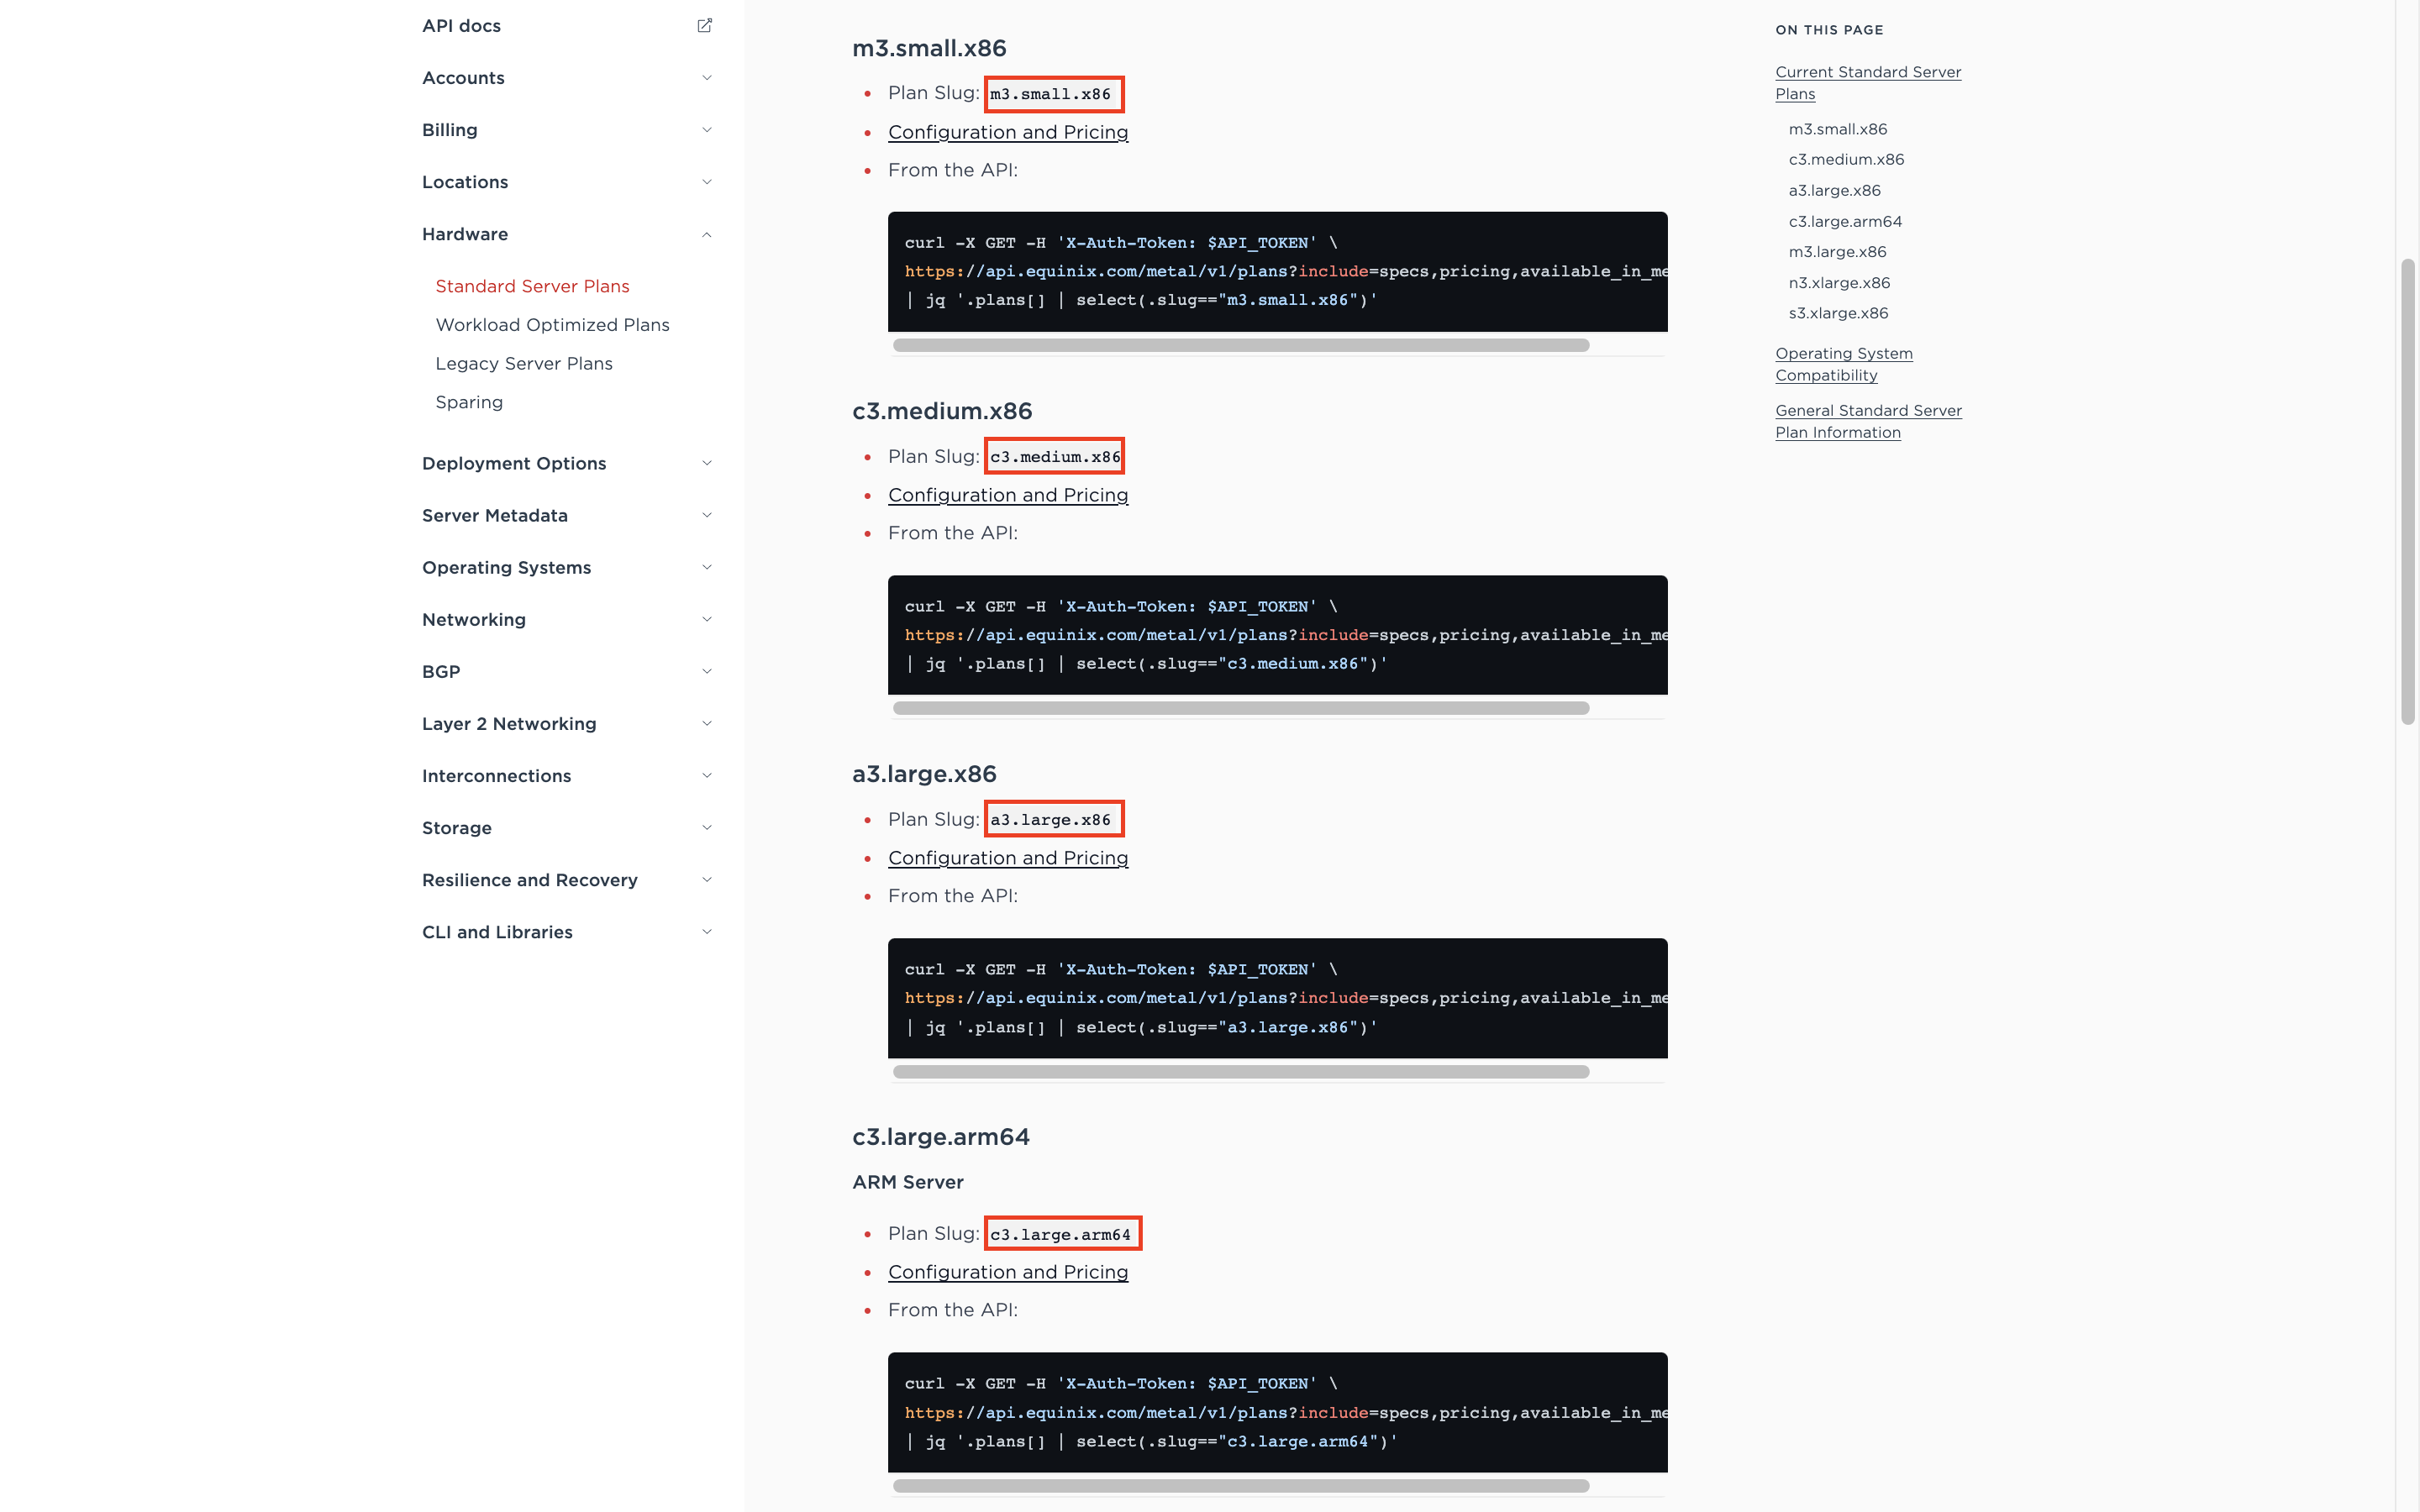
Plan Tags
You will be able to find all valid plan options by checking the plan slugs. The slugs are what you would put inside the quotes for plan = "slug", for example, if you wanted a c3.medium.x86 plan, you would update the value to:
plan = "c3.medium.x86"
Running Terraform
Finally, it is time to run our Terraform plan. Navigate back to your terminal and make sure you are in the directory you made that has the Terraform file inside.
The first step is to initialize Terraform, which will install the Equinix Metal provider.
terraform init

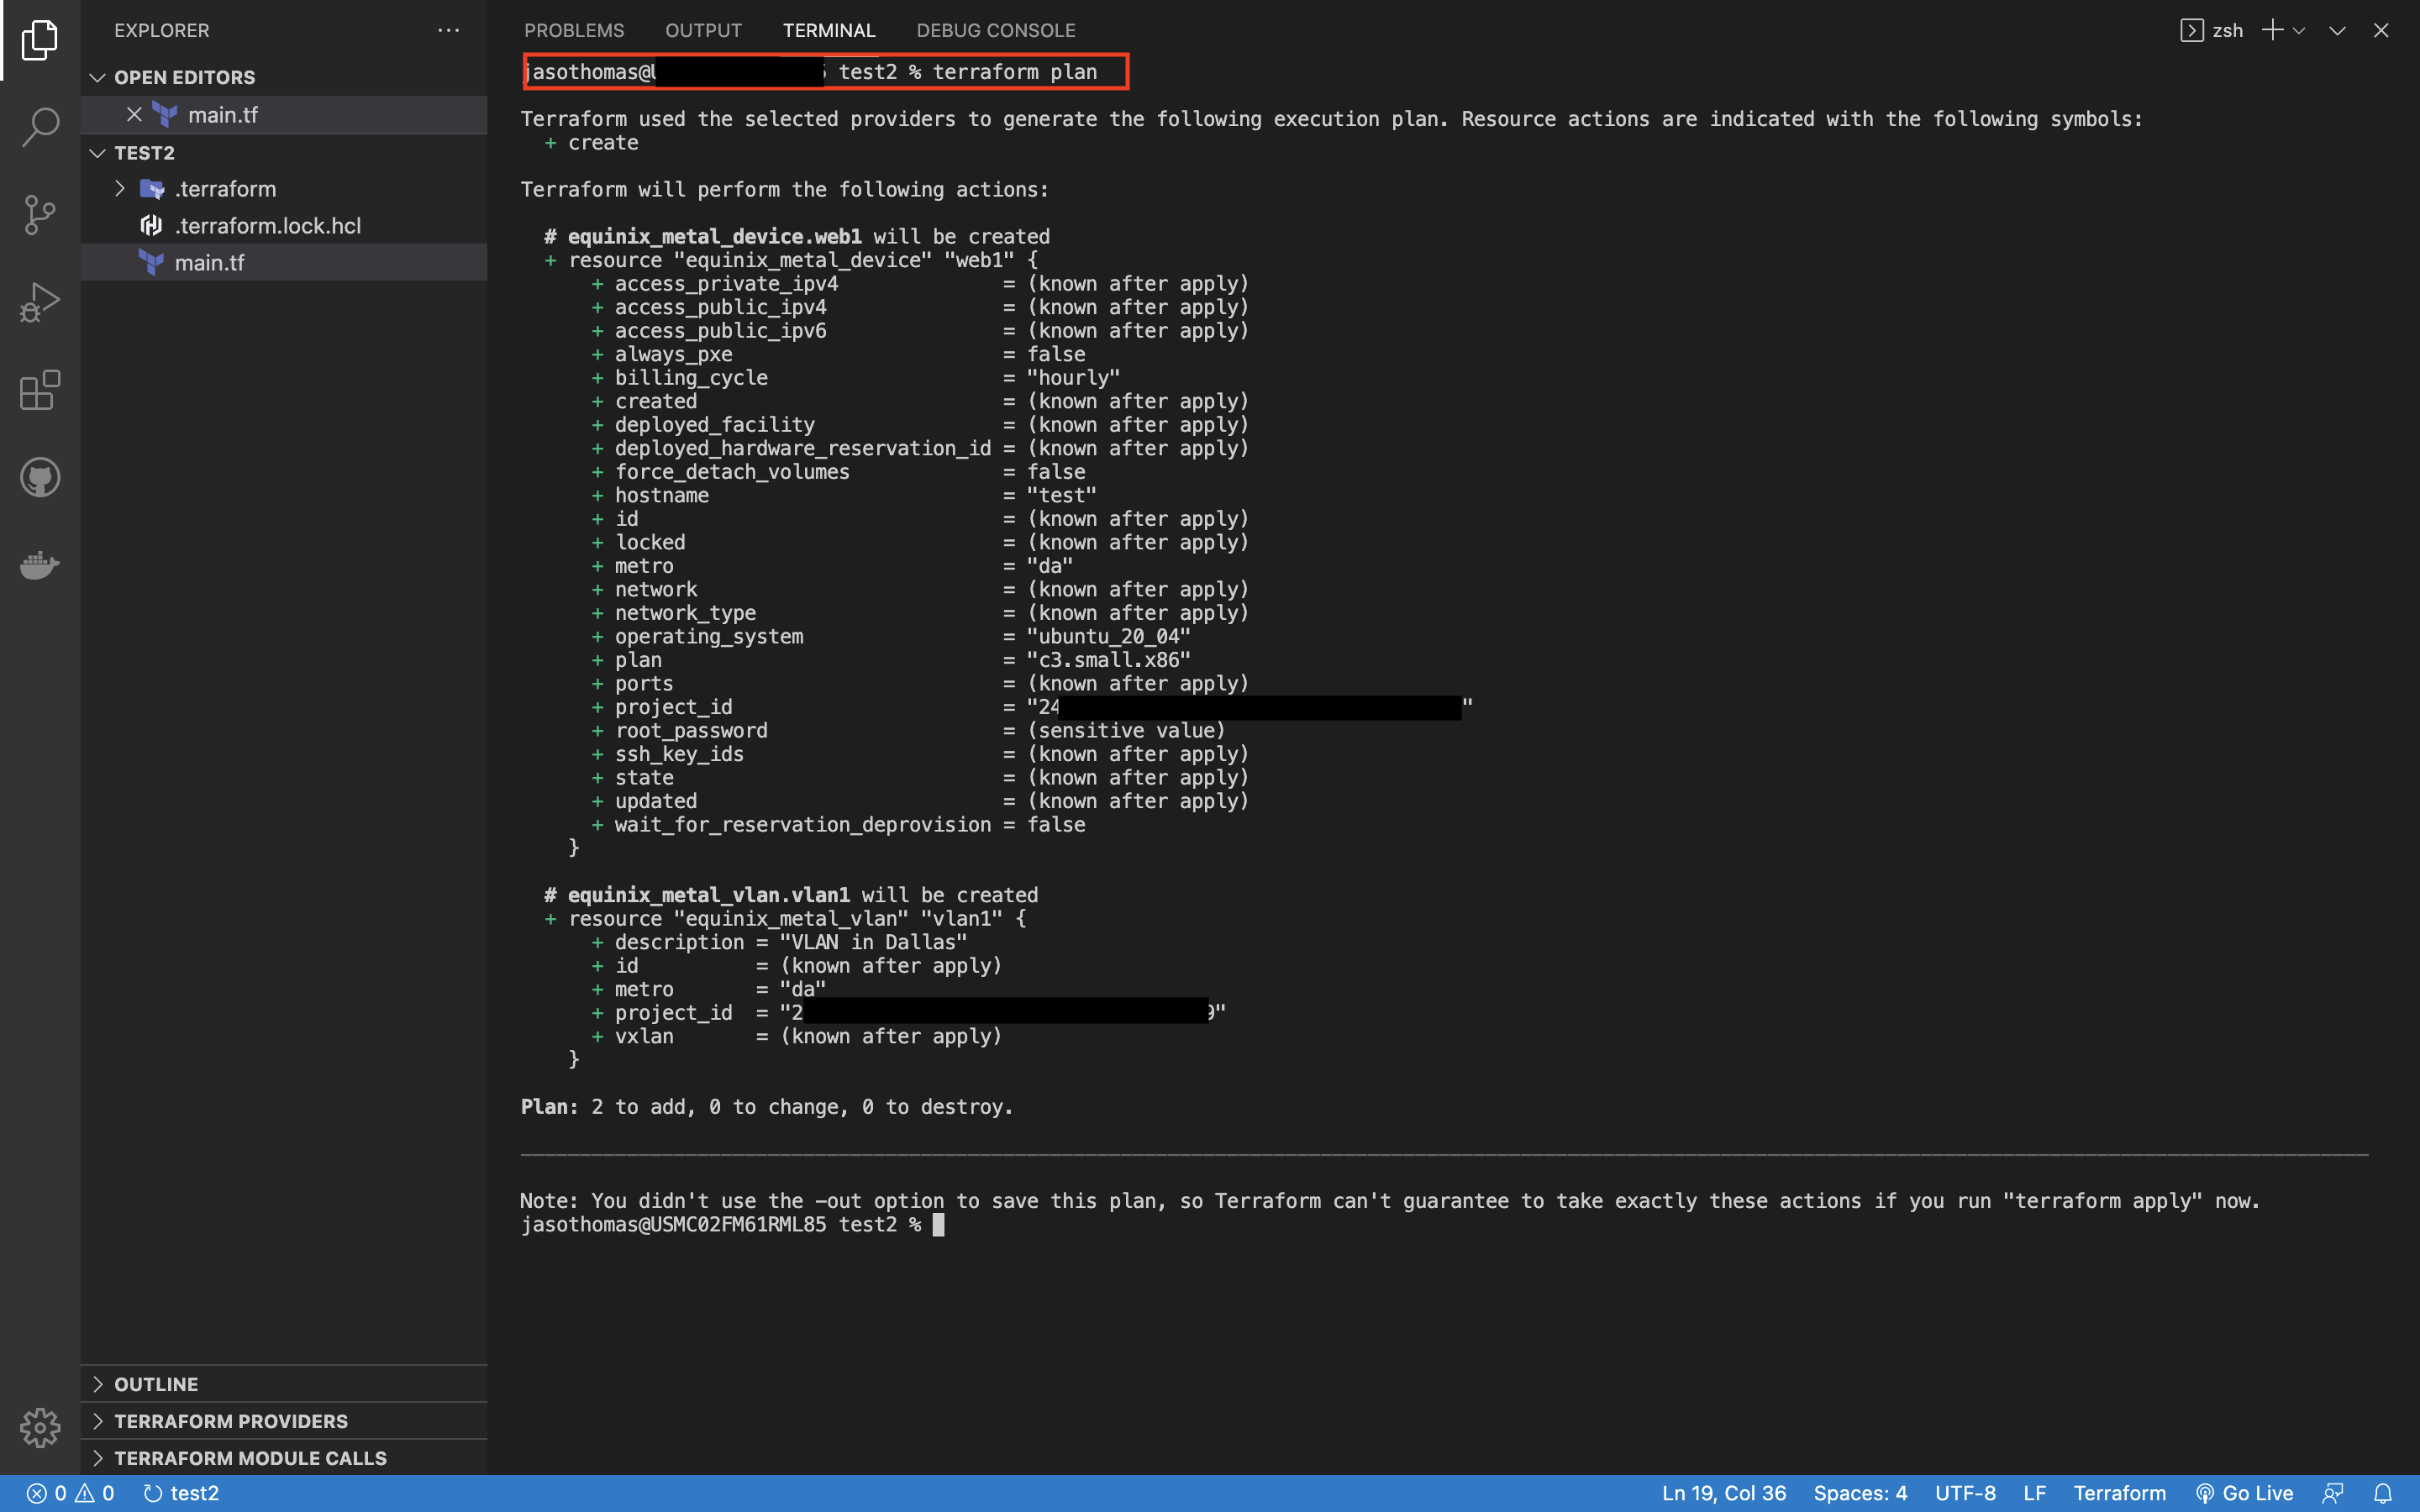
The next step is to see the current plan that you will be applied.
terraform plan
Finally, apply the plan to begin the deployment.
terraform apply

After running the terraform apply command, you'll be prompted to verify that you want to deploy the server, choose yes. It will show you the progress of the deployment in the terminal. You can also go back to the Equinix Metal console to see the server and VLAN being deployed there.
Delete and stop the server
To delete and stop the servers use the terraform destroy command:
terraform destroy

After entering this command, it will prompt you to type yes to confirm you want to run the plan and delete all devices.
Optionally, you can navigate back to the metal console and locate each respective server and choose to delete them from the action menu.
Conclusion
Thanks for following along with this guide! In this guide we covered the setup and steps needed to utilize Terraform to deploy Equinix Metal servers. Specifically, we covered:
- Creating an Equinix Account, Organization and Project.
- Creating an API Key and finding your project key inside the Metal Portal.
- Creating a Terraform script that can be used to deploy Equinix Metal servers.
- Running the Terraform script you created.
Good luck with your own deployment! You can get started with Equinix Metal by going to https://deploy.equinix.com/get-started/.
Last updated
25 June, 2024Category
Tagged
QuickstartYou may also like
Digger deeper into similar topics in our archives
Configuring BGP with BIRD 1.6 on an Equinix Metal Server
Set up BGP on your Equinix Metal server using BIRD 1.6, covering IP configuration, installation, and neighbor setup to ensure robust routing capabilities between your server and the Equinix...

Configuring BGP with FRR on an Equinix Metal Server
Establish a robust BGP configuration on your Equinix Metal server using FRR, including setting up network interfaces, installing and configuring FRR software, and ensuring secure and efficie...

Crosscloud VPN with Wireguard
Learn to establish secure VPN connections across cloud environments using WireGuard, including detailed setups for site-to-site tunnels and VPN gateways with NAT on Equinix Metal, enhancing...

Deploy Your First Server
Learn the essentials of deploying your first server with Equinix Metal. Set up your project & SSH keys, provision a server and connect it to the internet.

Ready to kick the tires?
Use code DEPLOYNOW for $300 credit