- Home /
- Resources /
- Learning center /
- SmartOS on Equinix...
SmartOS on Equinix Metal
Boot SmartOS using our custom iPXE option on top of a local storage ZFS pool.

On this page
Equinix Metal™ offers a Custom iPXE boot option that allows users to boot a system image like that of SmartOS persistently across boots, on top of a local storage ZFS pool for the VM and zone data on the node itself, to provide a fast and easily administered hypervisor operating system experience.
Booting
There are two options for booting SmartOS on Equinix Metal. First, you can use the SmartOS netboot server, which will give you the option of selecting from a few recent platform images. Second, you can set up your own server with any SmartOS platform image you choose.
Using The SmartOS Netboot Server
To use the SmartOS netboot server, set the custom_pxe URL to the following:
https://netboot.smartos.org/packet.ipxe
This will boot to a menu where you can select from several recently released platform images. The menu will default to boot the latest platform image after 10 seconds.
Setting up your own netboot server
After acquiring the SmartOS archive image, decompressing it in any web-facing path (this can be in object storage, behind a webserver, etc. as long as the path is web reachable). For example, in the leanest possible example, you can place it in an Nginx path like /usr/share/nginx/html/smartos, and then, in that path, at /usr/share/nginx/html/smartos.ipxe, you can add the following iPXE manifest:
#!ipxe

dhcp

set base-url http://${YOUR_HOST_ADDR}

kernel ${base-url}/smartos/smartos/platform/i86pc/kernel/amd64/unix -B smartos=true,console=ttyb,ttyb-mode="115200,8,n,1,-"

module ${base-url}/smartos/smartos/platform/i86pc/amd64/boot_archive type=rootfs name=ramdisk
module ${base_url}/smartos/smartos/platform/i86pc/amd64/boot_archive.hash type=hash name=ramdisk
module http://metadata.platformequinix.com/metadata type=file name=tinkerbell.json

boot
Which will, for example, set a relative path for your webserver to refer to the kernel and boot module files on disk.
Provisioning a server
In the Equinix Metal console, you can create a new instance, and select Custom iPXE as your Operating System:
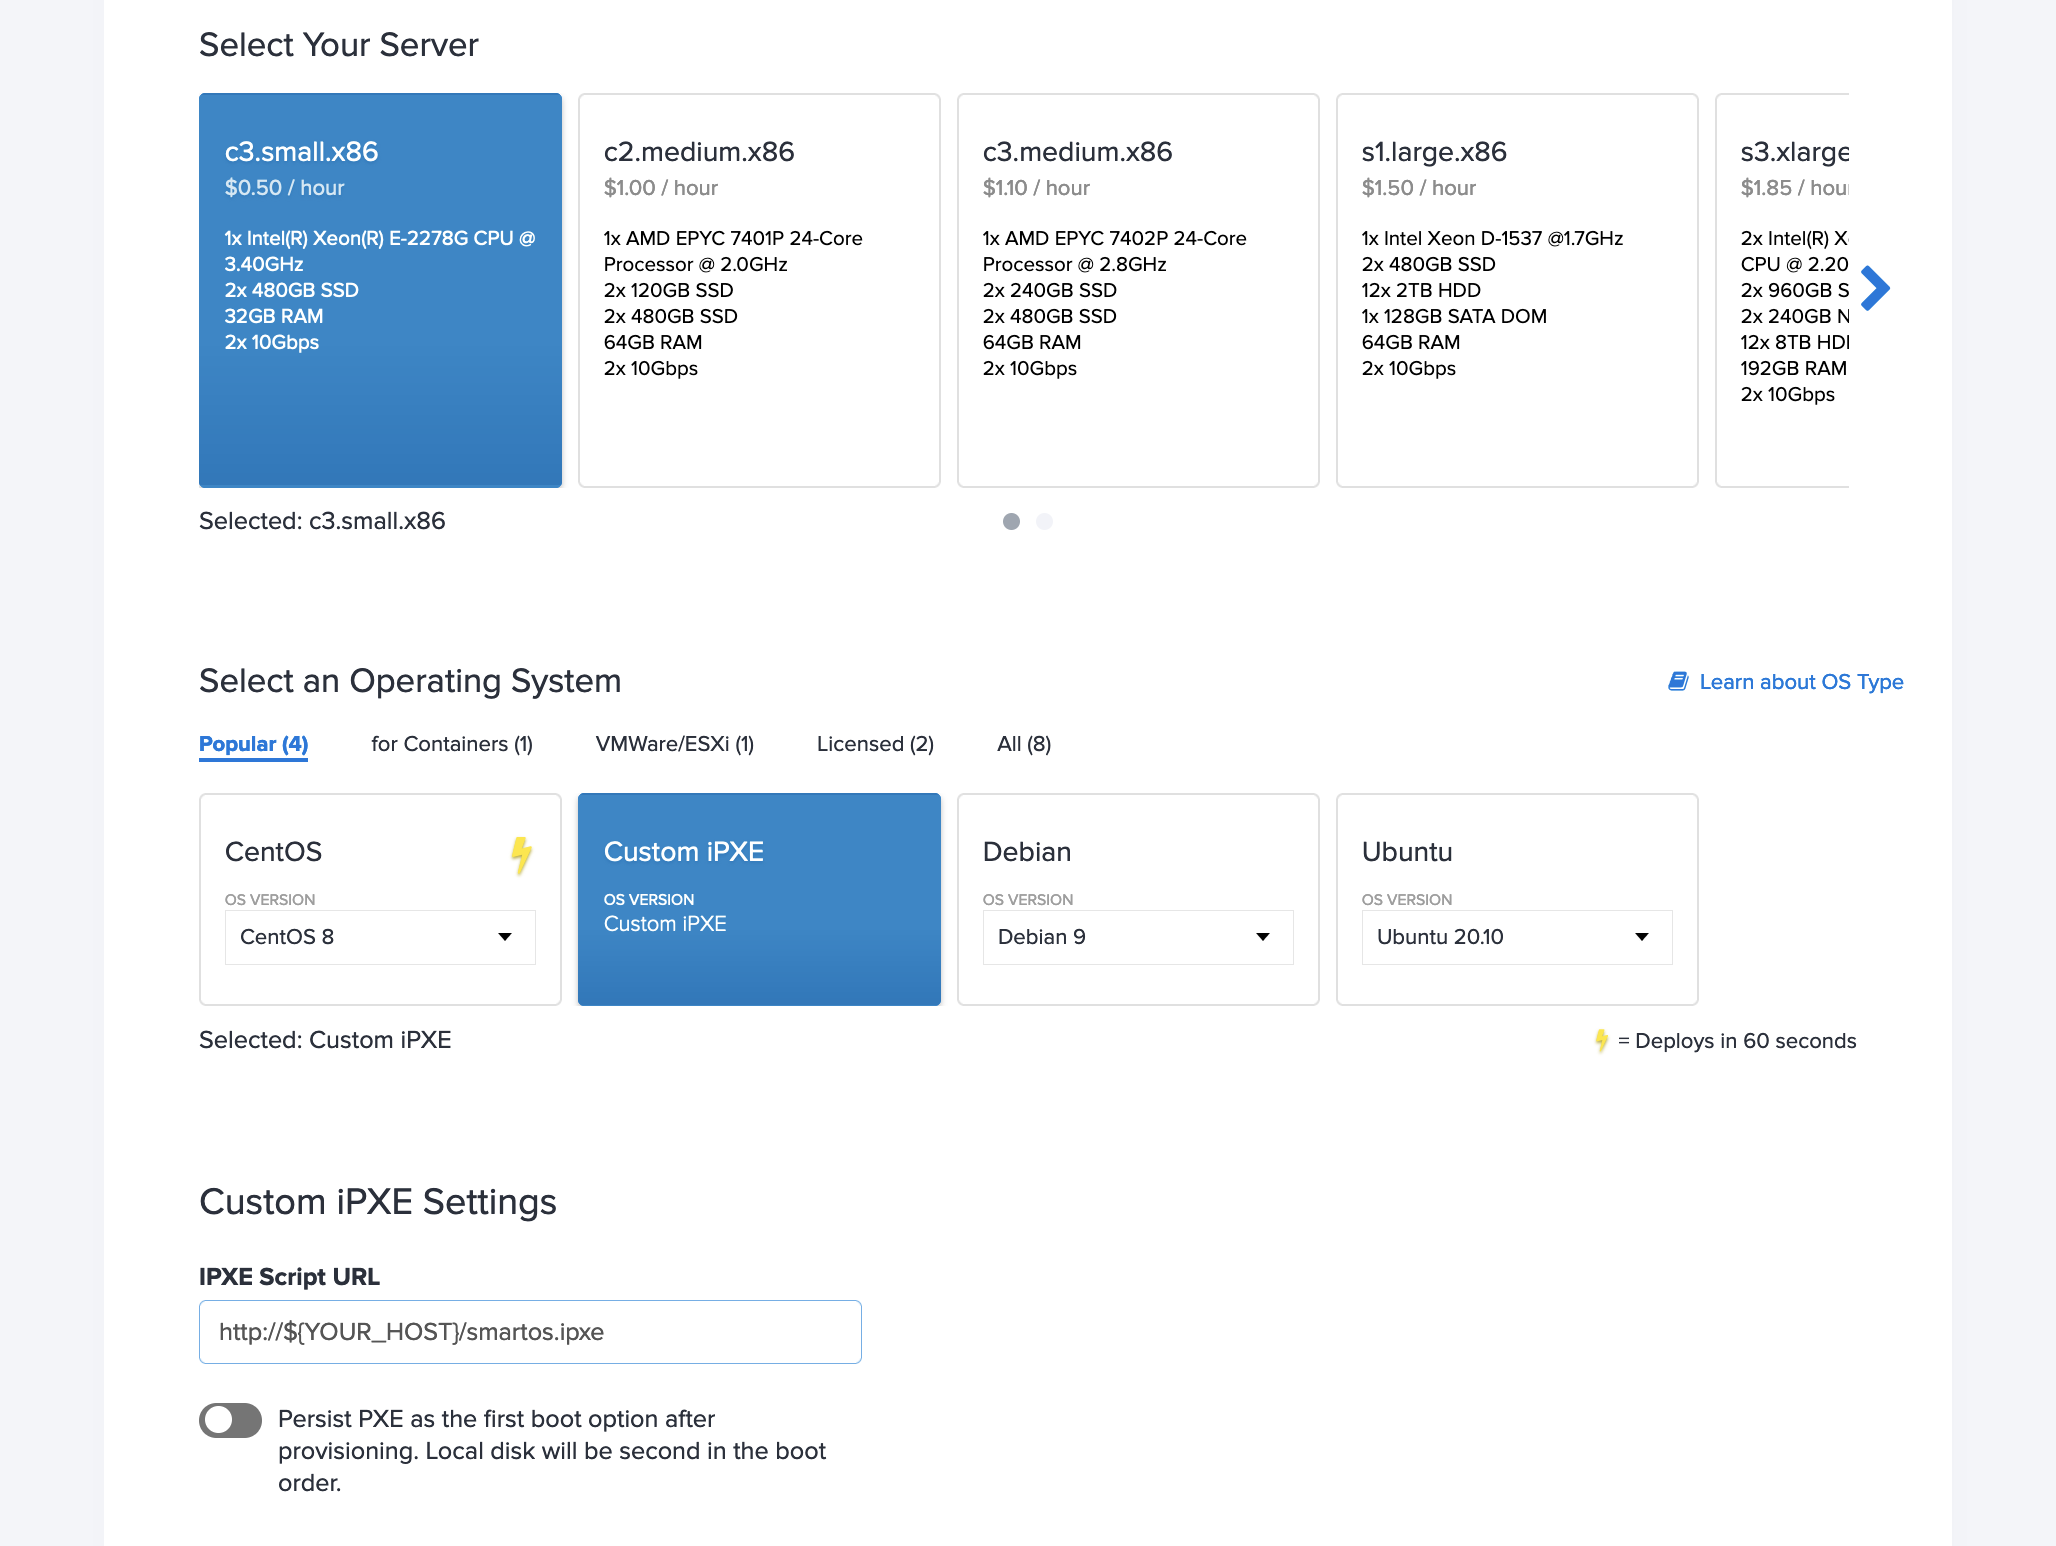
Then, in the text field below that selection, paste the full path to the iPXE script.
For the SmartOS netboot server:
https://netboot.smartos.org/packet.ipxe
Or your own:
http://${YOUR_HOST}/smartos.ipxe
Configuring SmartOS
After hitting “Deploy Servers” in the Equinix Metal console, you’ll find, once it’s online, you will need to use the Out-Of-Band Console to complete the setup.
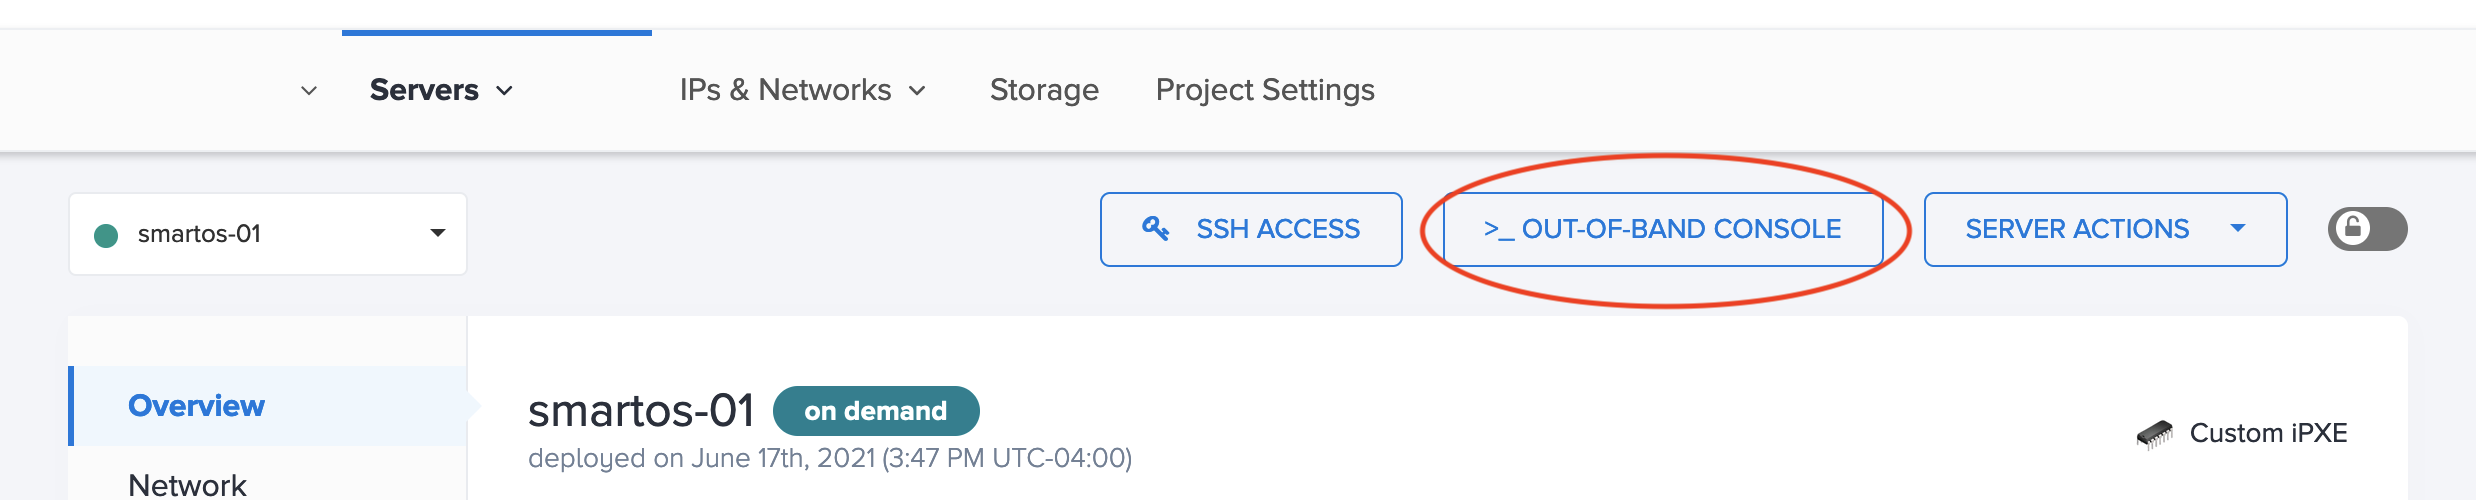
Because this is the first boot, you will need to configure things like a root password, a network configuration for your management interface, and the storage pool for your instance.
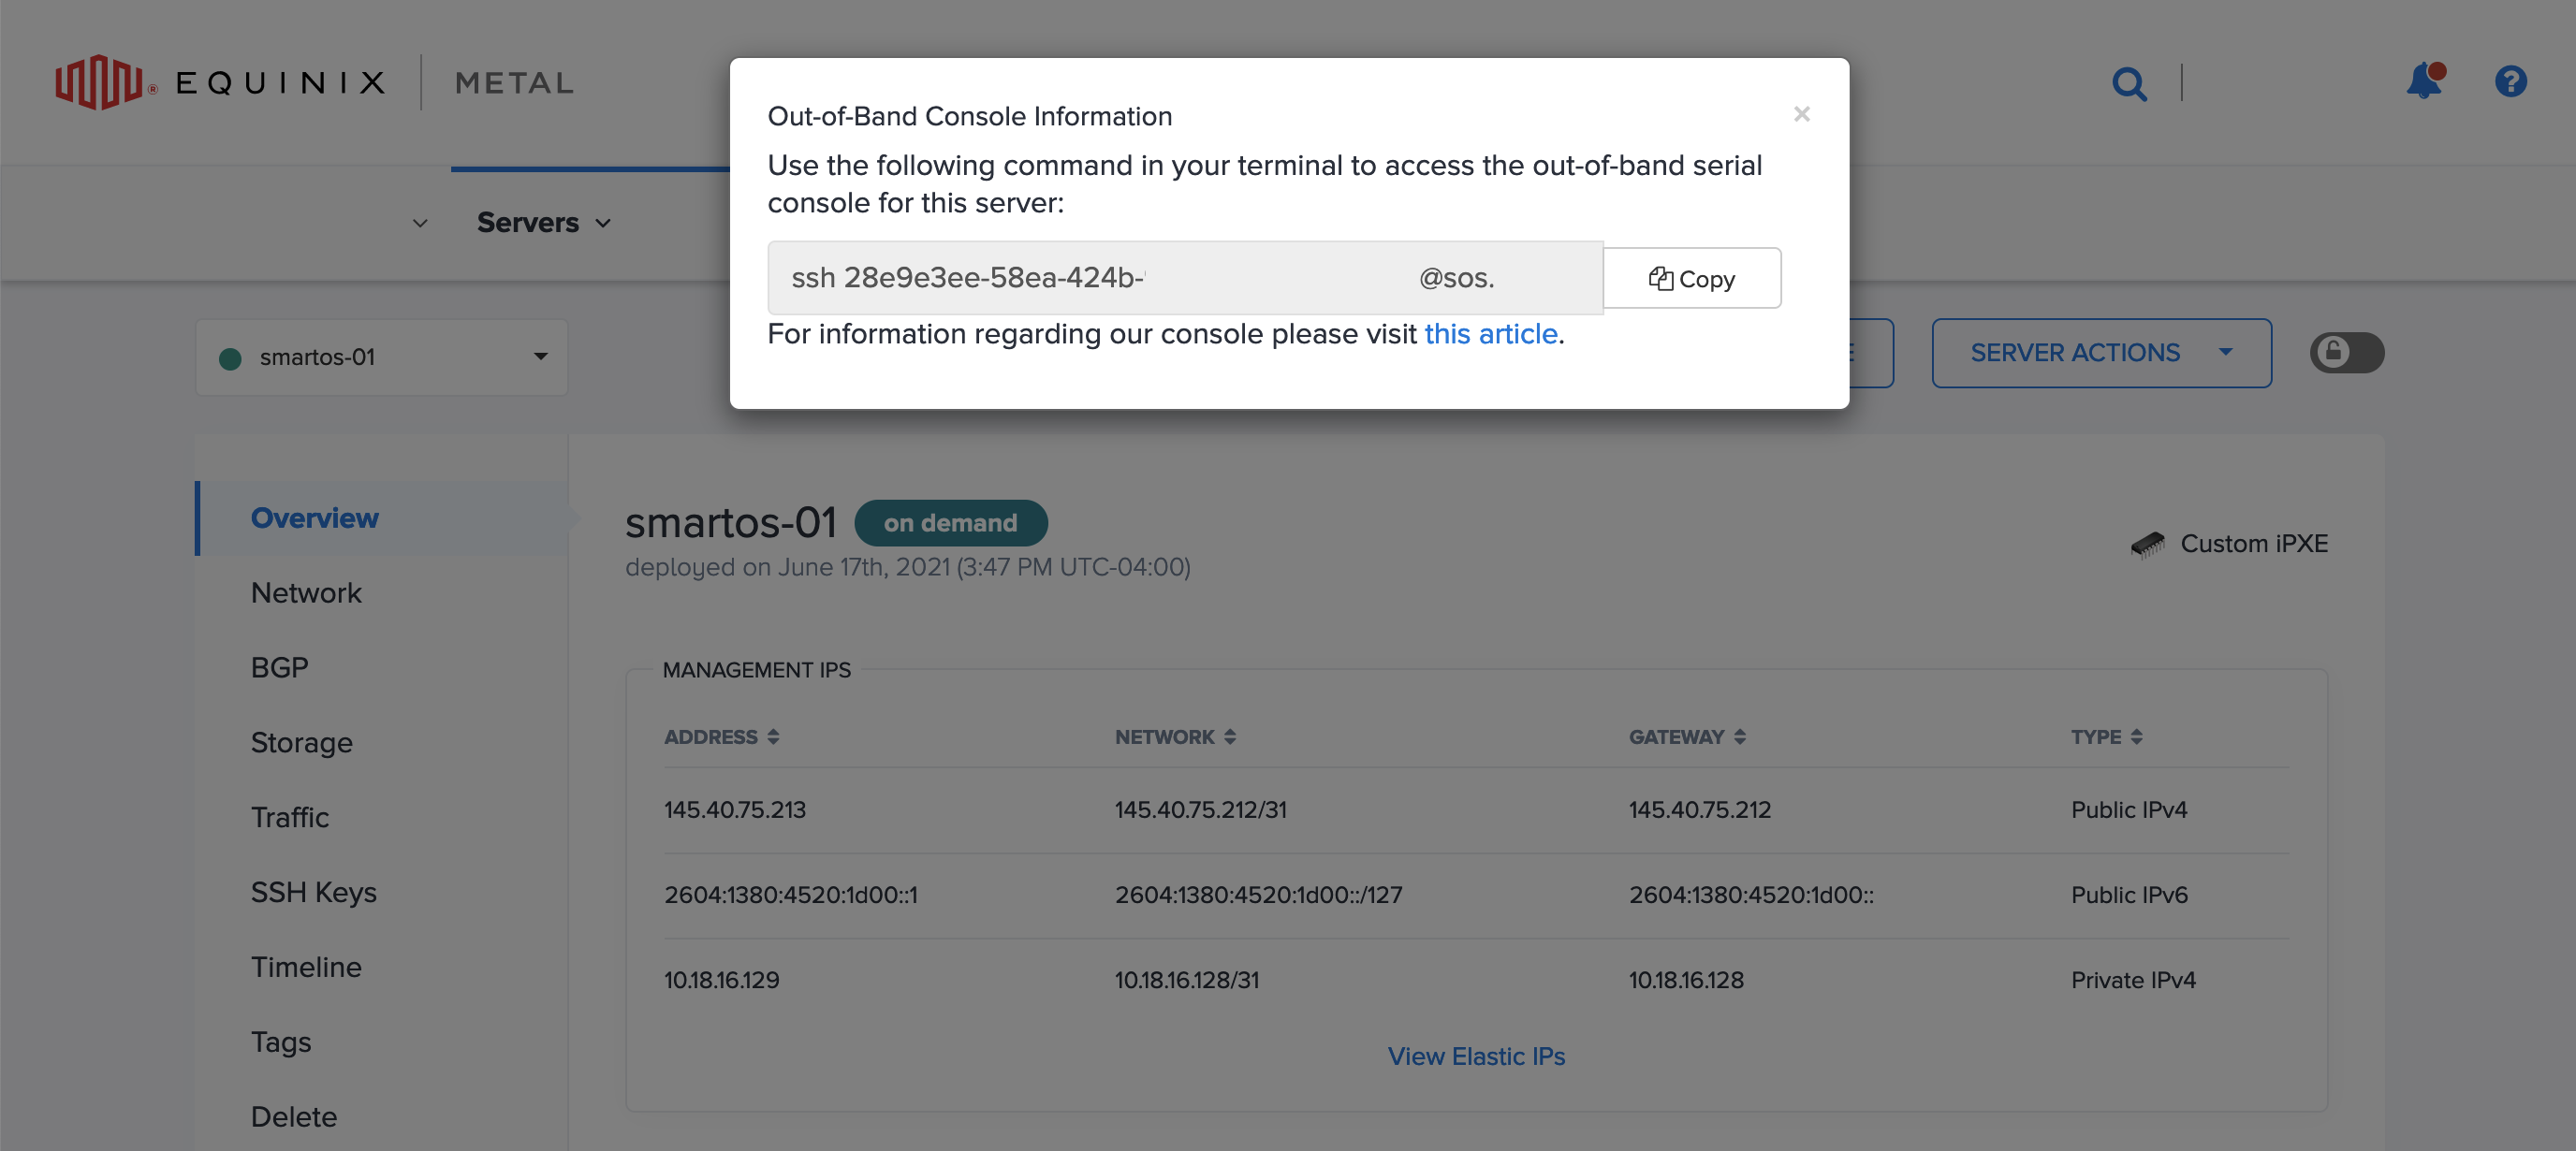
You’ll find your SSH information to access the console on the Out-Of-Band Console link pictured. Make note of your network configuration as well, as you’ll need this when connecting to the SmartOS setup screens to follow.
Once you connect to your Console, you’ll see a setup screen like this, which will prompt you to select the NIC to use for the admin interface. Ideally, this will not be Internet-facing, however, you are welcome to plug in your Public network details here as well for use with SSH:
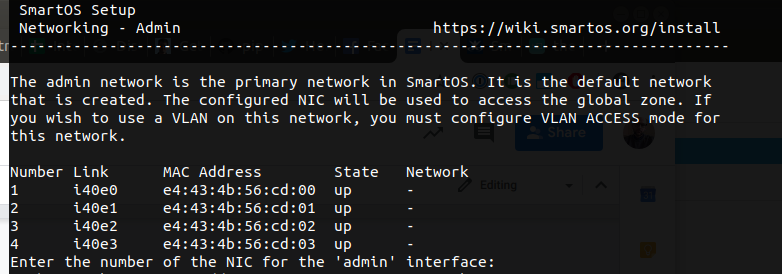
From there, you’ll be prompted for the IP, netmask, gateway, and DNS resolvers for this interface.
The next step is to configure storage, which SmartOS will make a recommendation for a storage pool:
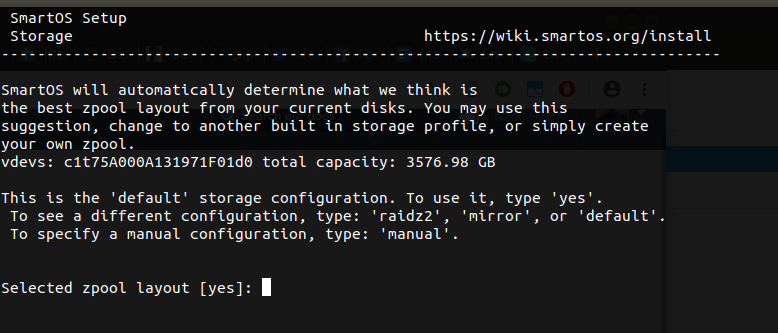
If the default works for you, then type “yes”, and continue, however, there are other options for SmartOS storage configurations, or manually defining options if you’ve decided to, for example, attach network storage, or add block devices.
During this step you can also choose to make the zpool bootable. While SmartOS is not typically installed to disk, on Equinix Metal booting from the zpool is preferred. To configure your SmartOS system to boot from the zpool, enter zones as the boot pool, and latest as the source.
If you choose to boot form the zpool, go into the Equinix Metal console, click "Server Actions" and click "Disable Always PXE Boot" (if it is not already set). If for any reason your pool becomes unbootable, you can reset this to "Set to Always PXE Boot" (and ensuring your custom_ipxe URL is set correctly) to boot from the network. If you do not enter a boot pool, you will need to always boot from PXE.
Persistent installation specific things like passwords, users, VM data, is always stored in the node storage pool in either case.
Your final step is to configure a root password for the device:
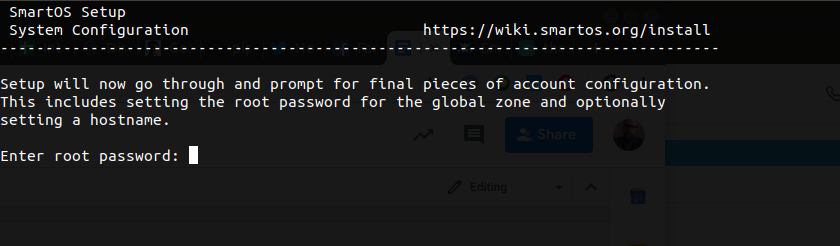
You’ll use the root user and password you set here, once the host has rebooted, to access the admin interface to begin using SmartOS, once the installation has completed:
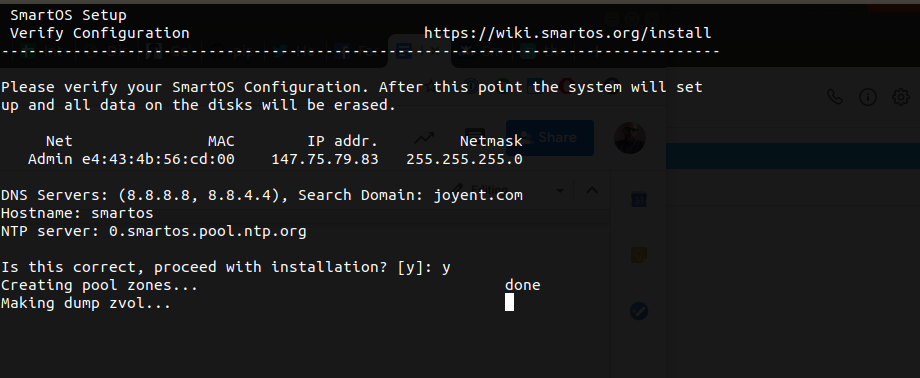
Once complete, you’ll be prompted to hit “Enter” to reboot the host, and complete installation. You can monitor the console to ensure the host comes back online, and if successful, it will boot to the SmartOS login screen:

You are ready to proceed and login over your configured administrative interface over SSH and begin deploying your zones.
You may also like
Digger deeper into similar topics in our archives
Configuring BGP with BIRD 1.6 on an Equinix Metal Server
Set up BGP on your Equinix Metal server using BIRD 1.6, covering IP configuration, installation, and neighbor setup to ensure robust routing capabilities between your server and the Equinix...

Configuring BGP with FRR on an Equinix Metal Server
Establish a robust BGP configuration on your Equinix Metal server using FRR, including setting up network interfaces, installing and configuring FRR software, and ensuring secure and efficie...

Crosscloud VPN with Wireguard
Learn to establish secure VPN connections across cloud environments using WireGuard, including detailed setups for site-to-site tunnels and VPN gateways with NAT on Equinix Metal, enhancing...

Deploy Your First Server
Learn the essentials of deploying your first server with Equinix Metal. Set up your project & SSH keys, provision a server and connect it to the internet.

Ready to kick the tires?
Use code DEPLOYNOW for $300 credit