- Home /
- Resources /
- Learning center /
- Proxmox
Proxmox
Configure and manage a Proxmox virtual environment on Equinix Metal, starting from provisioning a server with Debian 10, setting up essential networking, and securely connecting to the Proxmox interface for robust VM management.

On this page
Proxmox is a free (community paid tier for support) hypervisor. While Proxmox is not an officially supported Equinix Metal OS, this guide will help you get it up and running.
Request an Elastic IP block
You will need to request a /28 Elastic IP block to provision the proxmox instance in the following step. To request an Elastic IP block, go to the "IPs & Networks" tab at the top of the Equinix Metal portal, then select the "IPs" category.
On the IPs page, click "Request IP Addresses", then select the "Public IPv4" type of IPs. Choose the Metro location that your server instance will be provisioned at and for the quantity choose the /28 subnet size.
Provision a Server With Debian 10
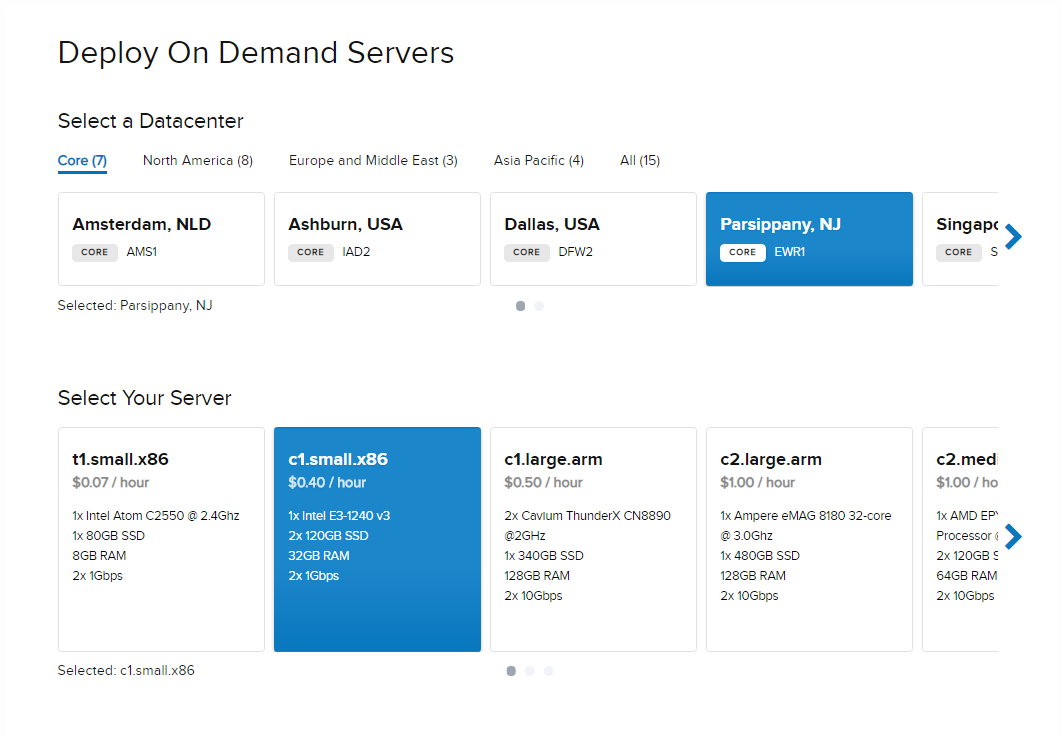
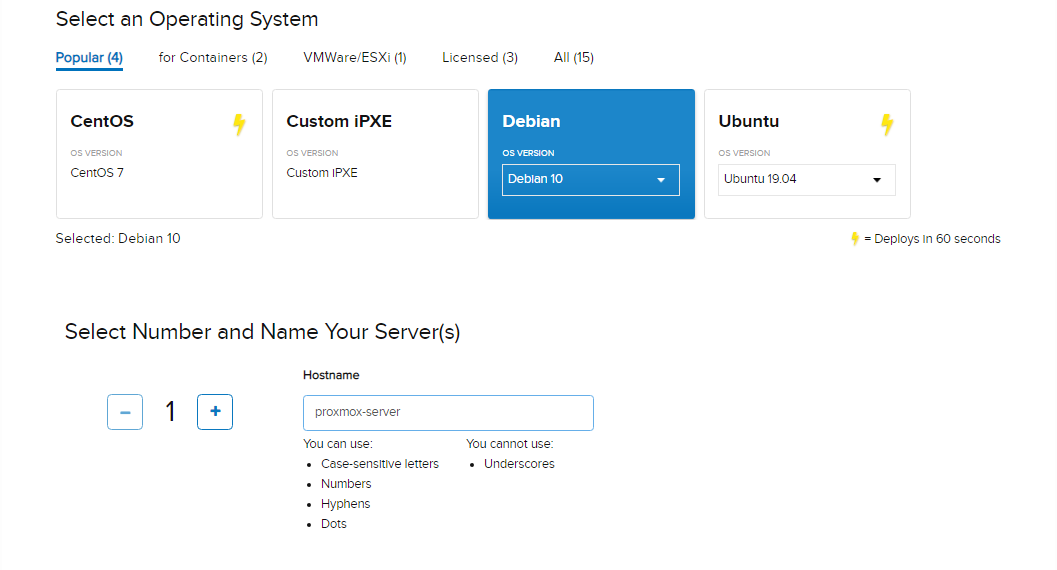
For this demonstration, we'll use our c3.small.x86 configuration running Debian 10.
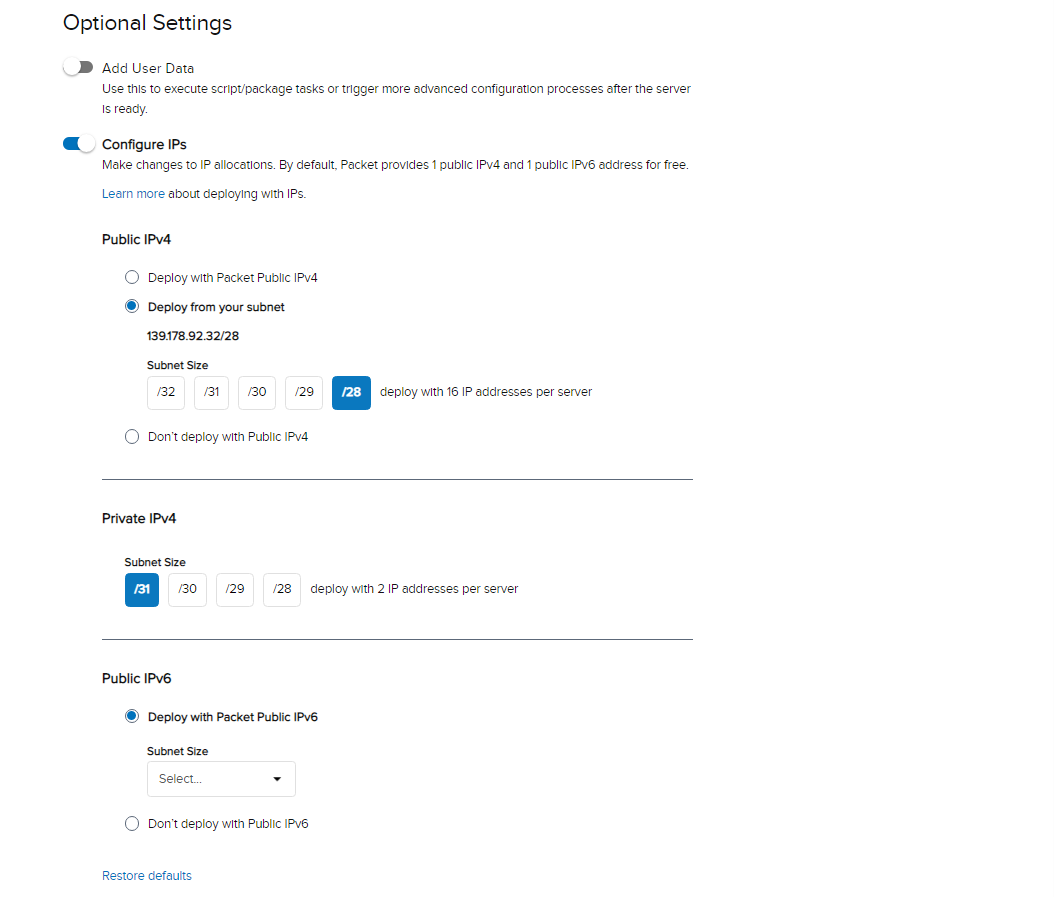
From the Optional Settings, click the switch to enable 'Configure IPs' and under the Public IPv4 section, choose the "Deploy from your subnet" option, then select the Elastic IP subnet-size of /28.
Configure the hosts file in the OS
Once the instance is deployed, please make sure that your machine's hostname is resolvable via /etc/hosts, i.e you need an entry in /etc/hosts which includes your Public IPv4 address to the FQDN of your device.
Note: Make sure there is no reference to IPv6 address for your hostname specified in /etc/hosts
For example, if your IP address is 139.178.67.130, and your hostname is prox.domain.com, then your /etc/hosts file should look like the following:
127.0.0.1	localhost
139.178.67.130  prox.domain.com prox
# The following lines are desirable for IPv6 capable hosts
::1	localhost ip6-localhost ip6-loopback
ff02::1	ip6-allnodes
ff02::2	ip6-allrouters
Note: Your instance hostname might be set so that it resolves to the localhost 127.0.0.1 address by default so you need to remove the hostname from that line in the hosts file.
You can then test if your hostname/IP are correct using the hostname command:
hostname --ip-address
139.178.67.130
Note: If the hostname command returns 127.0.0.1 you need to remove your hostname reference from the localhost address in the hosts file for the proxmox installation to complete successfully.
Install Proxmox Repo
Add the repository to your apt list:
echo "deb http://download.proxmox.com/debian/pve buster pve-no-subscription" > /etc/apt/sources.list.d/pve-install-repo.list
Add the Proxmox repository key:
wget http://download.proxmox.com/debian/proxmox-ve-release-6.x.gpg -O /etc/apt/trusted.gpg.d/proxmox-ve-release-6.x.gpg
Update your repository and system by running:
apt update && apt full-upgrade
Install Proxmox Packages
apt install proxmox-ve postfix open-iscsi
Watch terminal/console screen to configure packages which require input (e.g. Email server, and Samba asking about WINS/DHCP support). If you do not have or need a mail server keep it local only and keep the system name as is.
When the proxmox installation asks about the GRUB bootloader, choose to "keep the local configuration" and to install it on the root disk partition which will typically show up as /dev/sdx3.
Lastly, reboot the system by issuing the reboot command, the new Proxmox kernel should automatically boot from the GRUB menu. You can monitor the reboot process by using the Out-of-Band Console.
NOTE: If you have a subscription key don't forget to switch to the enterprise repository after installation, see Package repositories.
Connect to the Proxmox Interface
Connect to the interface via https://youripaddress:8006. Note that you have to type out the full https://youripaddress:8006 URL on the browser to access the Proxmox Web UI. Just entering IP-ADDRESS:8006 or using http does not work so you have to specify https.
Proxmox login credentials
The login credentials will be the same as what you had on Debian before installing the Proxmox packages.
The default username will be root and the password listed in the Equinix Metal portal or if you have changed it, it would be that. Should you not recall the root password, you can reset it utilizing our recovery image, directions on the Rescue Mode page.
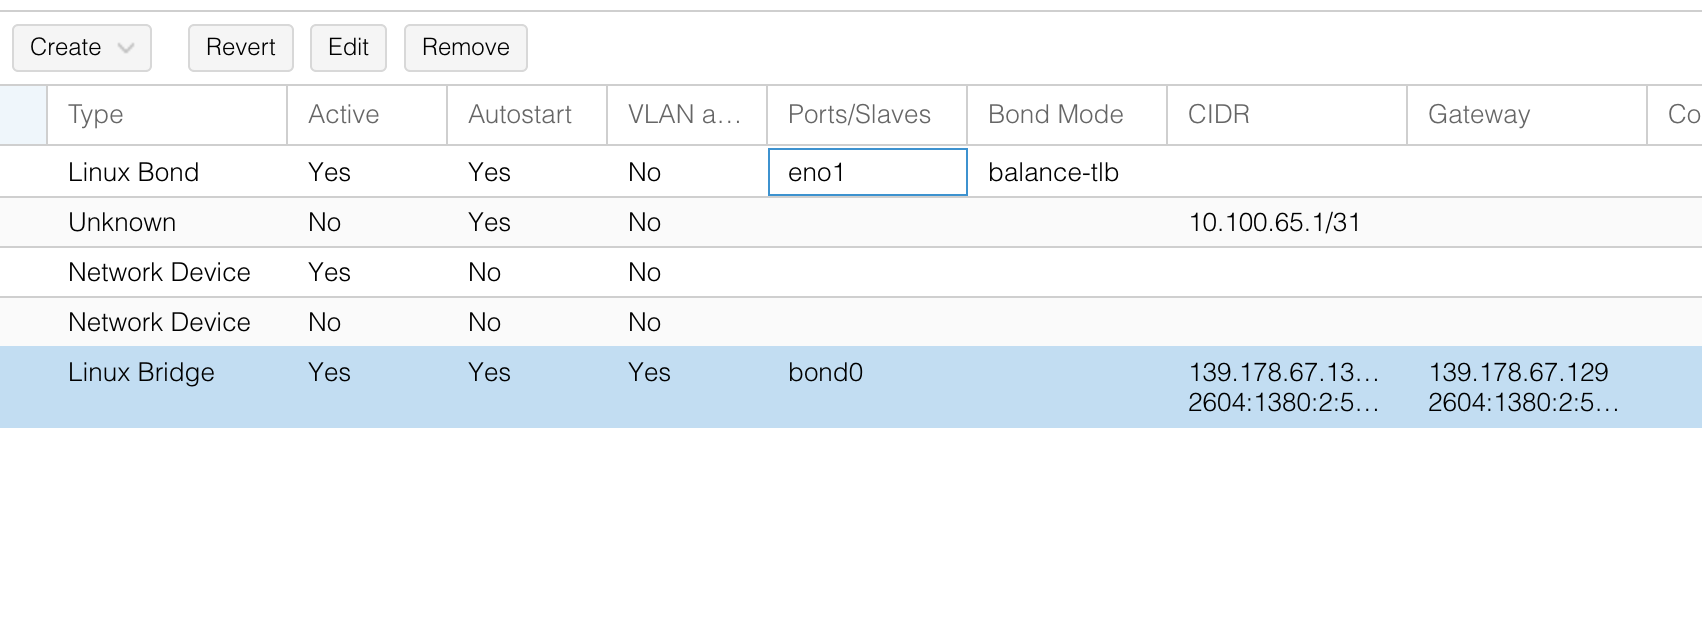
Network configuration
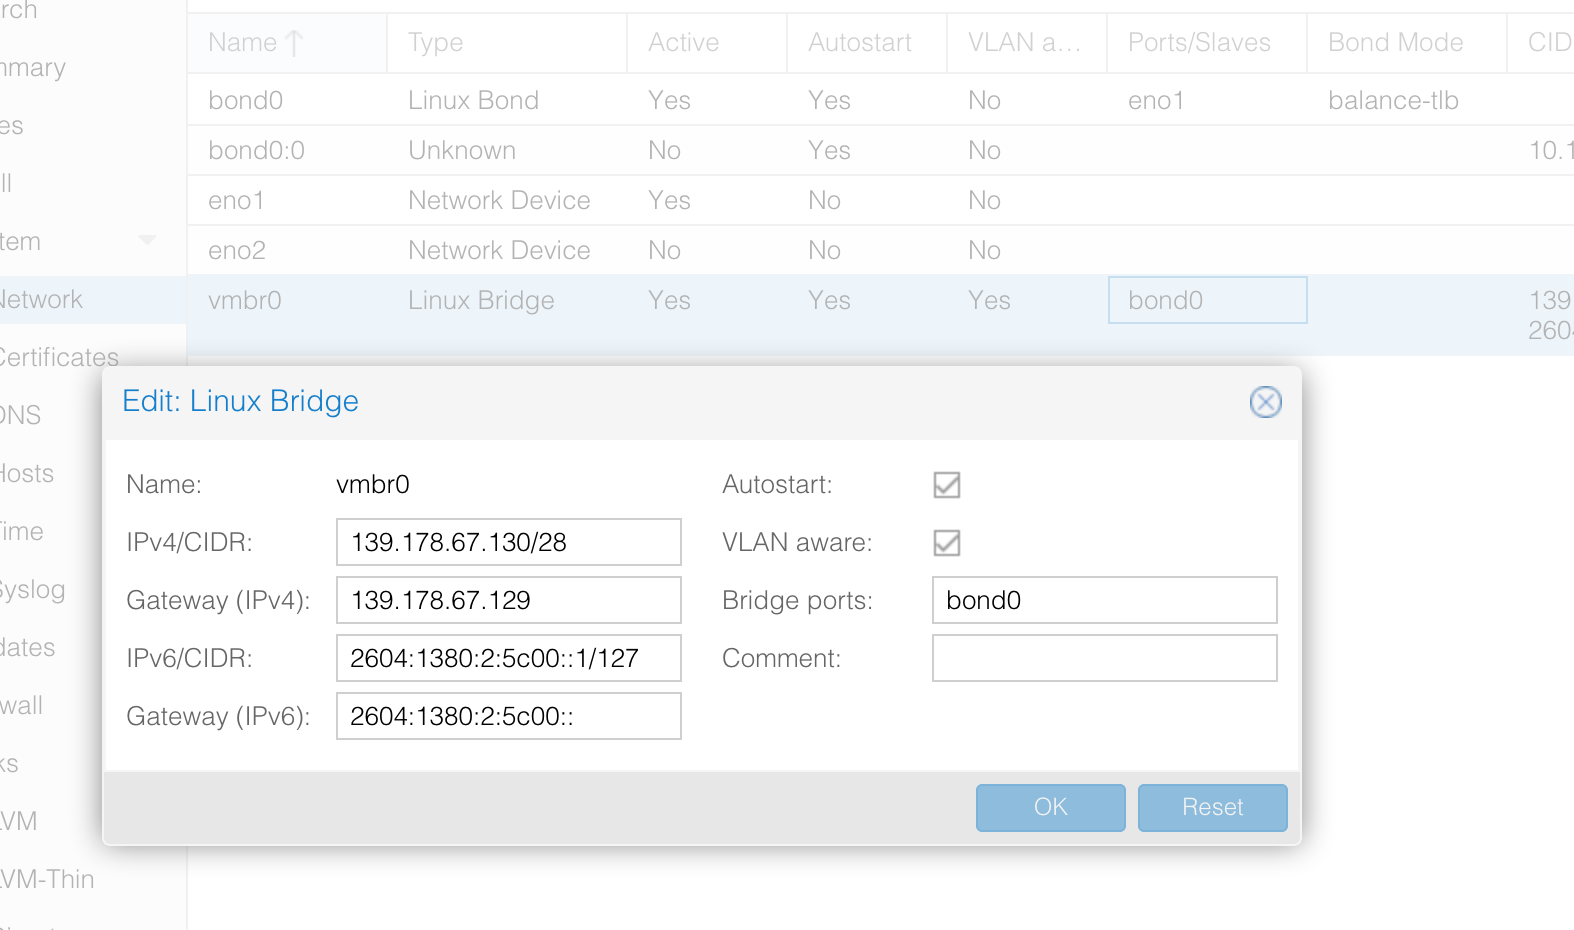
Once logged in, create a Linux Bridge called vmbr0, and add your first network interface to it. In this example it would be bond0. In short, move the IP addresses from bond0 to vmbr0s of bond0 to vmbr0.
For these interface changes to take effect, you would need to restart the system. You can do this via command line with shutdown -r now or via the web interface on either Proxmox or Equinix Metal portal actions dropdown.

Next Steps
Thanks for reading through this guide! We covered important topics on how to install Proxmox on Equinix Metal servers, specifically, we covered:
- How to configure the hosts file for Proxmox
- How to add the Proxmox repos and install the Proxmox package
- How to access the web interface
You're now ready to use your Proxmox instance to spin up virtual machines. If you are looking for more information on Proxmox check out their Documentation.
You may also like
Digger deeper into similar topics in our archives
Configuring BGP with BIRD 1.6 on an Equinix Metal Server
Set up BGP on your Equinix Metal server using BIRD 1.6, covering IP configuration, installation, and neighbor setup to ensure robust routing capabilities between your server and the Equinix...

Configuring BGP with FRR on an Equinix Metal Server
Establish a robust BGP configuration on your Equinix Metal server using FRR, including setting up network interfaces, installing and configuring FRR software, and ensuring secure and efficie...

Crosscloud VPN with Wireguard
Learn to establish secure VPN connections across cloud environments using WireGuard, including detailed setups for site-to-site tunnels and VPN gateways with NAT on Equinix Metal, enhancing...

Deploy Your First Server
Learn the essentials of deploying your first server with Equinix Metal. Set up your project & SSH keys, provision a server and connect it to the internet.

Ready to kick the tires?
Use code DEPLOYNOW for $300 credit