- Home /
- Resources /
- Learning center /
- Introduction to th...
Introduction to the Equinix Metal Console
Let's get you comfortable with the main parts and interface of the console

On this page
The Equinix Metal Console is a web-based interface that allows you to manage your Equinix Metal account.
In this introductory guide, we will walk you through the main parts of the Equinix Metal Console, get you comfortable with its interface.
This is not a complete and comprehensive guide to the the console, but a great way to get started and ease in.
The Home Page
Below is a sample of the main page, after you register and login.
The home page of the Console is divided into a few main parts. Each of these is highlighted in the picture below.
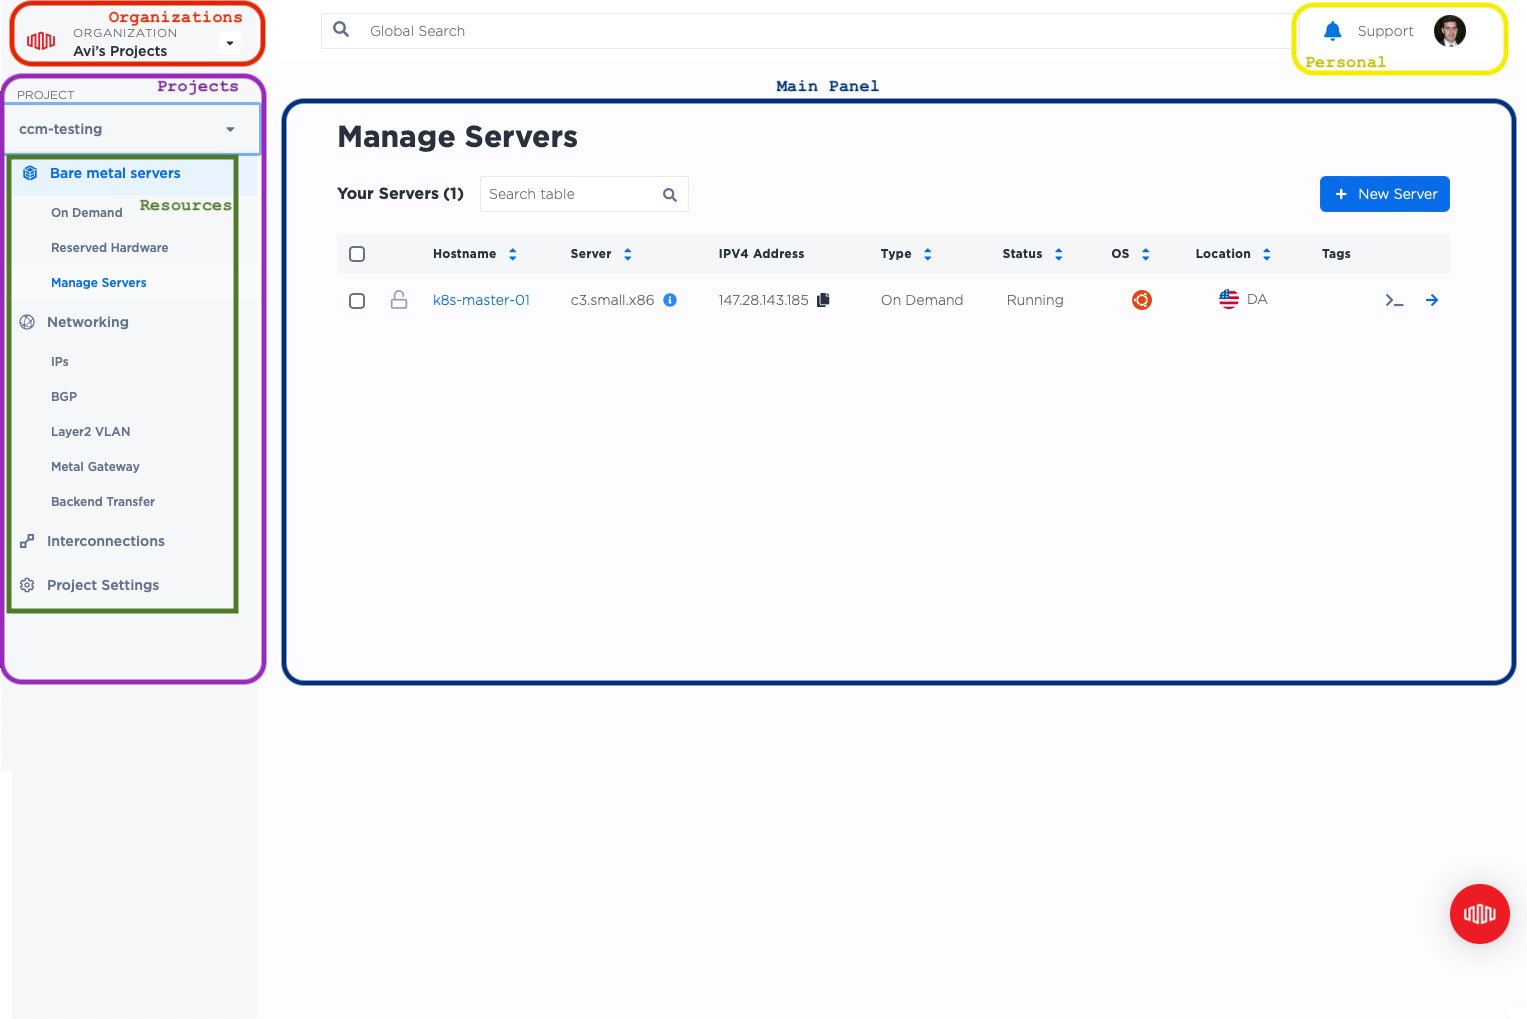
- Organizations - the highest level of collating resources. Each organization has billing, users and permissions. This section lets you pick an organization with which to work, or create a new one.
- Projects - within each organization, groups of resources, like servers and networking, are organized into projects. This section lets you choose with which project you want to work inside an organization, or create new ones.
- Resources - these are the actual Metal resources within your project. They include compute resources (servers), networking resources, private interconnections to other resources, projects, and clouds, and project settings.
- Personal - alerts, link to support, and your profile
- Main panel - this is where you manage the details for the section you are in.
Let's look at each in detail.
Organizations
Organization is the highest level organizing construct in Metal. Everything you do in Metal, like deploying servers or connecting networks, takes place inside an organization. The organization groups together users and permissions, and sets the billing for everything that happens inside it.
You need an organization to deploy anything in Metal.
If you're new to Metal, the first time you set up your new account, you will be required either to create an organization or be invited to join an existing one.
When you create a new organization, whether the first time you create an account or a new one later, you will be asked for a payment method to use with the organization. This is the payment method that will be billed for all of the resources you deploy inside that organization.
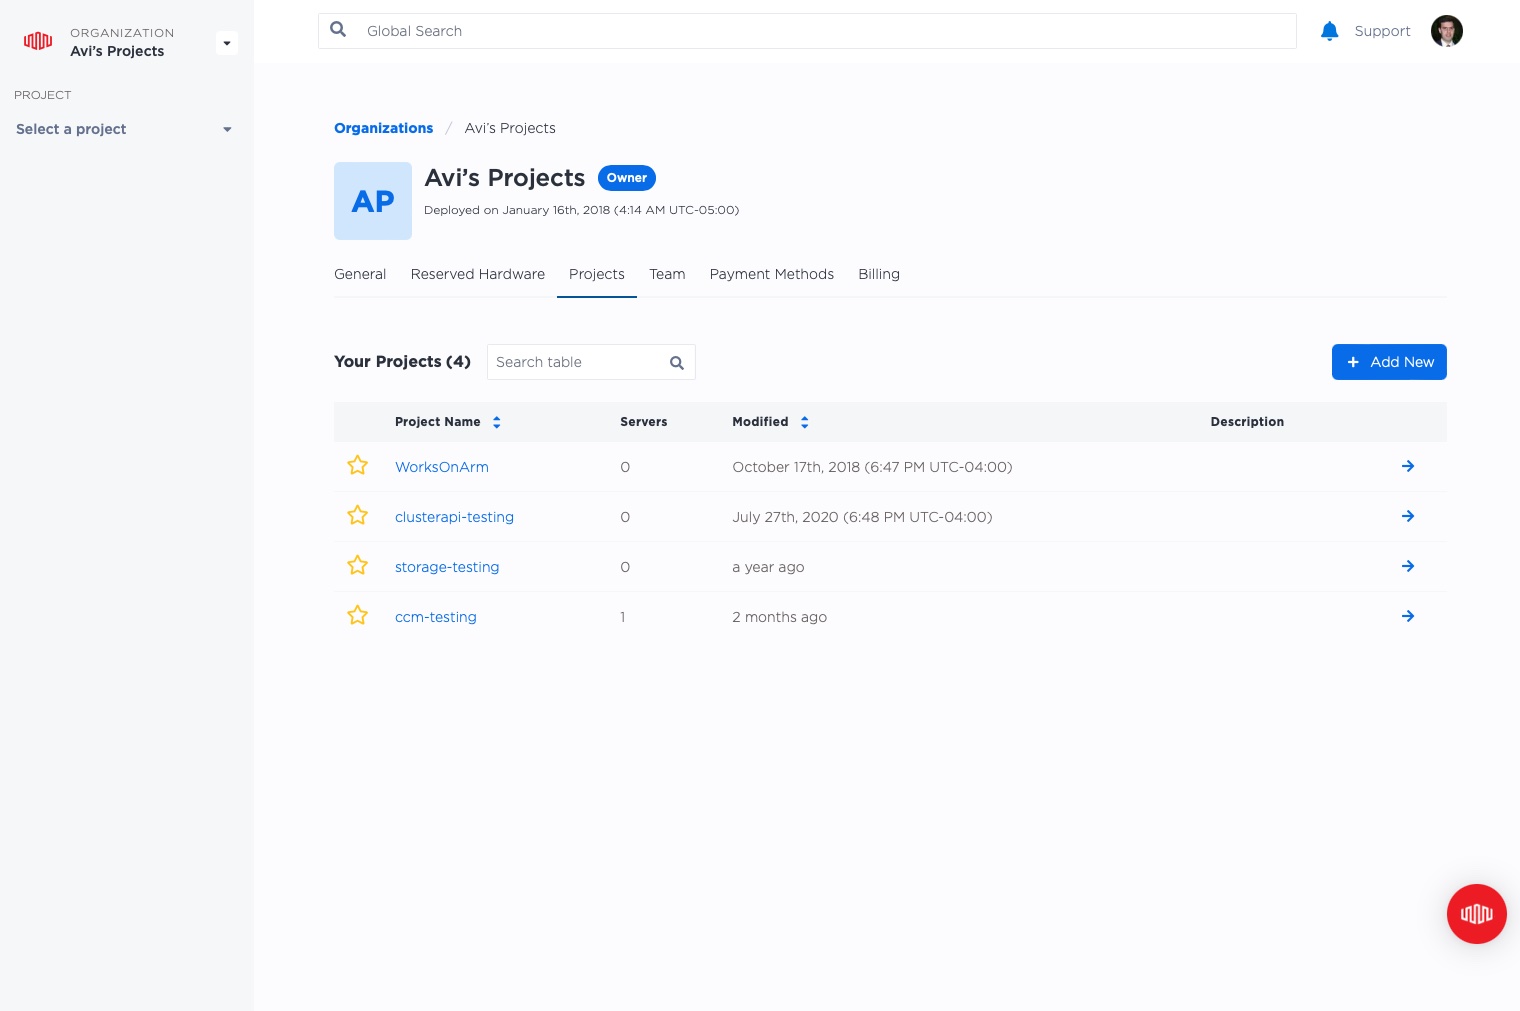
You can manage your organizations from the Organization section of the Console. Click on the Organizations section. You will see a list of your organizations as well as "Create New" to create a new one.

Select the organization you want, and then the Main Section will allow you to manage the organization. You can update the billing, invite people to your team, and manage and create projects.
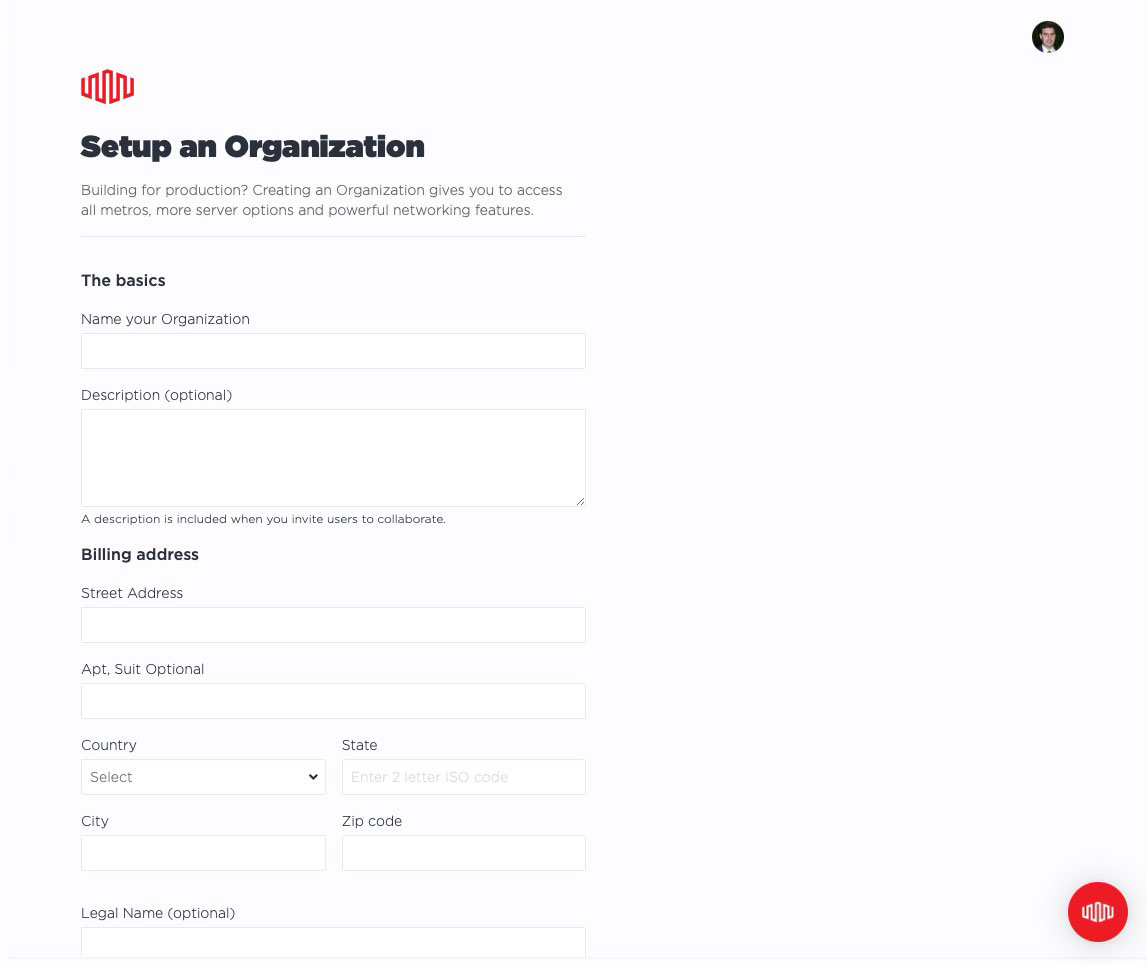
If you set up a new organization, it will ask you for the name and, as described earlier, the payment method:
Projects
A project is a grouping of resources, like servers and networking, within an organization. Each project shares private IP space among all of its servers and interconnects them. Team members can be allocated to an organization as a whole, or to individual projects.
For example, you can have two projects, one for production and one for development. You can then assign the operations team full access to production, while giving your entire group access to development.
To manage projects or create a new one, click on the Projects section. You will see a list of your projects.
Click on any project to manage the resources and settings for that project.
For a shortcut, you can select any project from the "PROJECT" pull-down under "ORGANIZATION" in the upper-left corner.
Resources
Resources are the technology infrastructure components you deploy: servers, networking, and interconnections.
All resources are deployed into a project, and are part of that project.
Let's take a look at the two primary resource types: servers and networking.
Servers
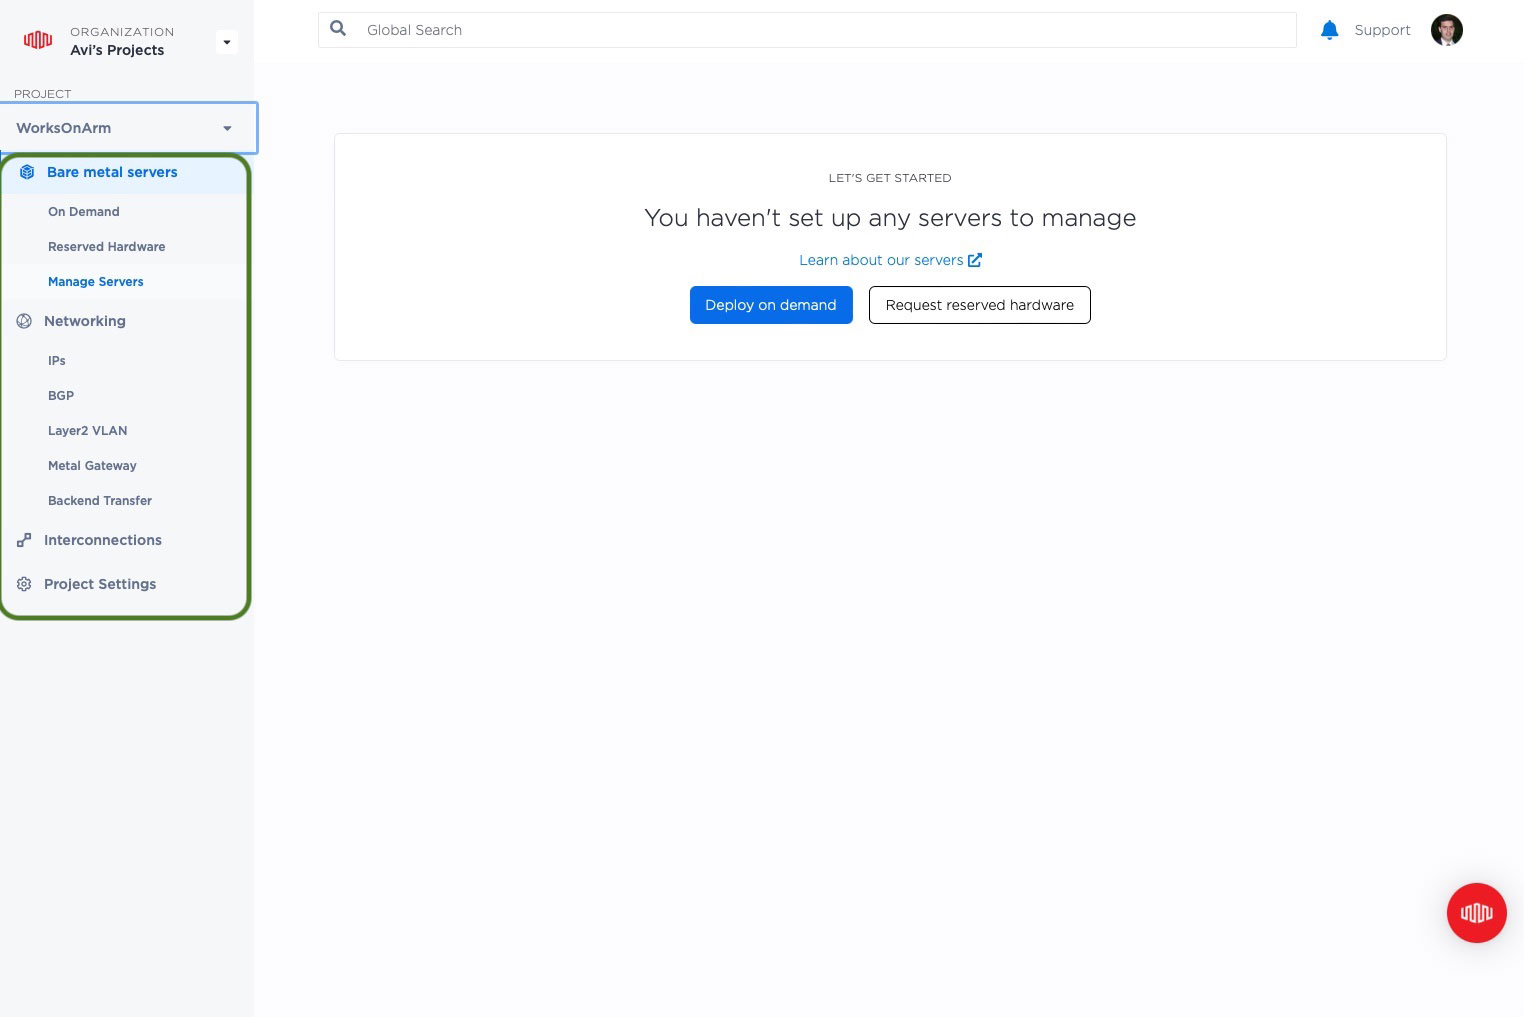
Under "Bare metal servers", there are three options:
- On Demand: deploy servers on-demand.
- Reserved Hardware: Metal supports servers reserved just for your organization. When a server is reserved, an organization administrator can allocate it to a project, and then a project admin can deploy it. You also can use this space to request reserved hardware.
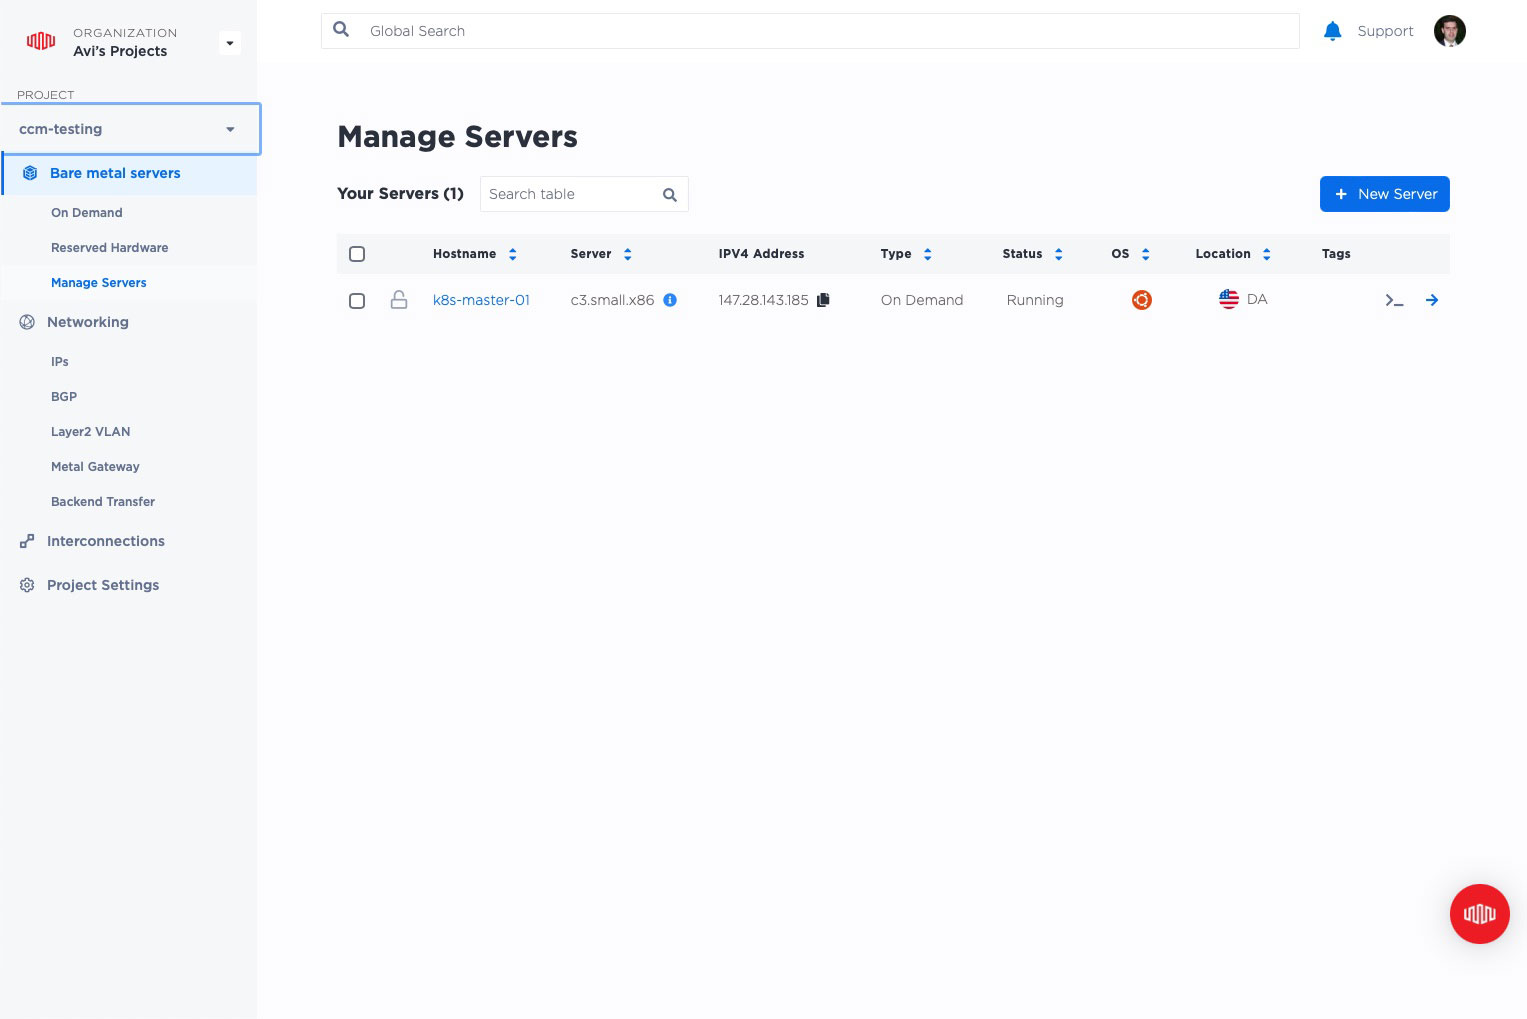
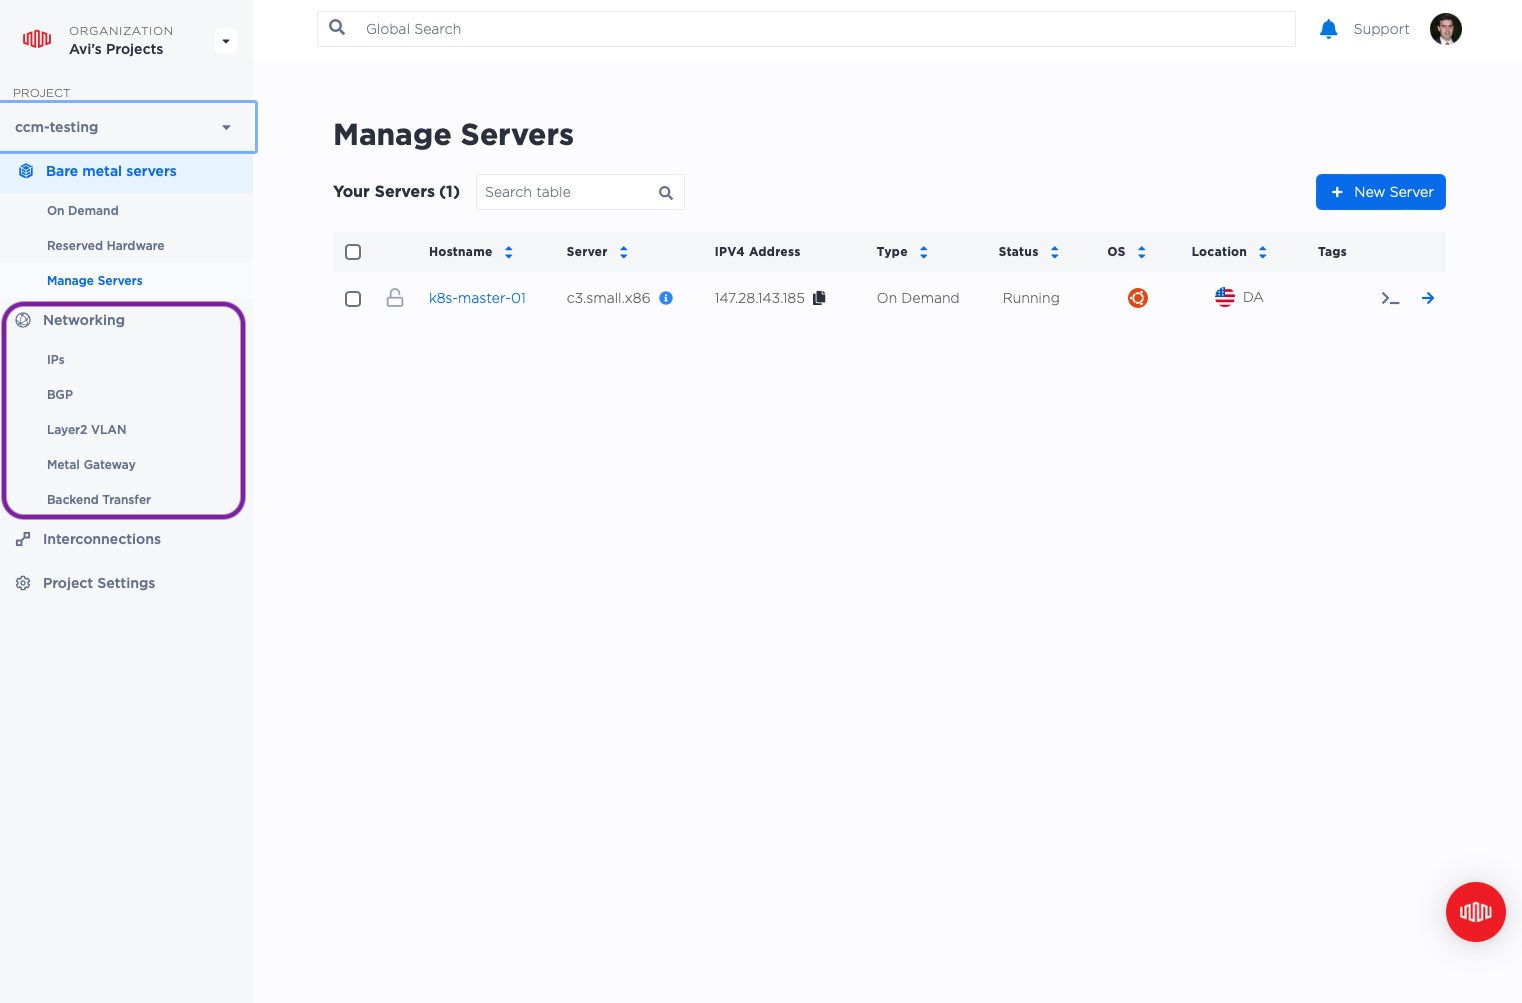
- Manage Servers: manage servers you already have deployed, both on demand and reserved.
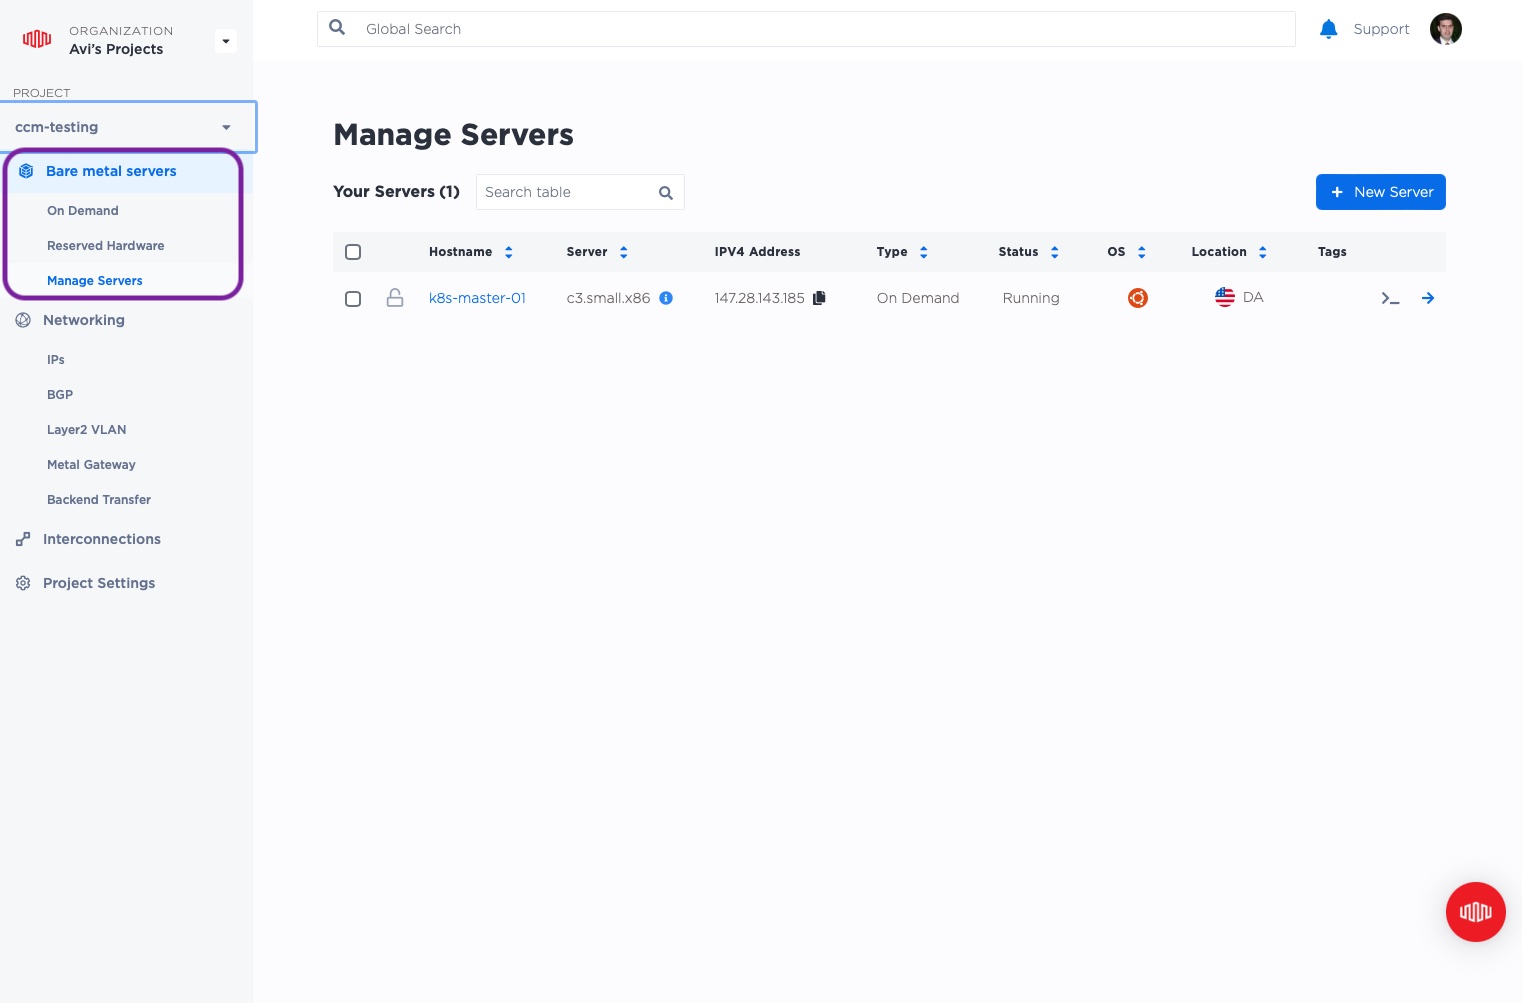
Manage Servers
Under the project resources, select "Manage Servers" to see the servers you have deployed. You then can select servers to work with, or click on an individual server to see the details.
On Demand Servers
To deploy a new on-demand server, select "On Demand" under "Bare metal servers". You then select where you want to deploy it, what type of server, what operating system, and other details, and deploy it.

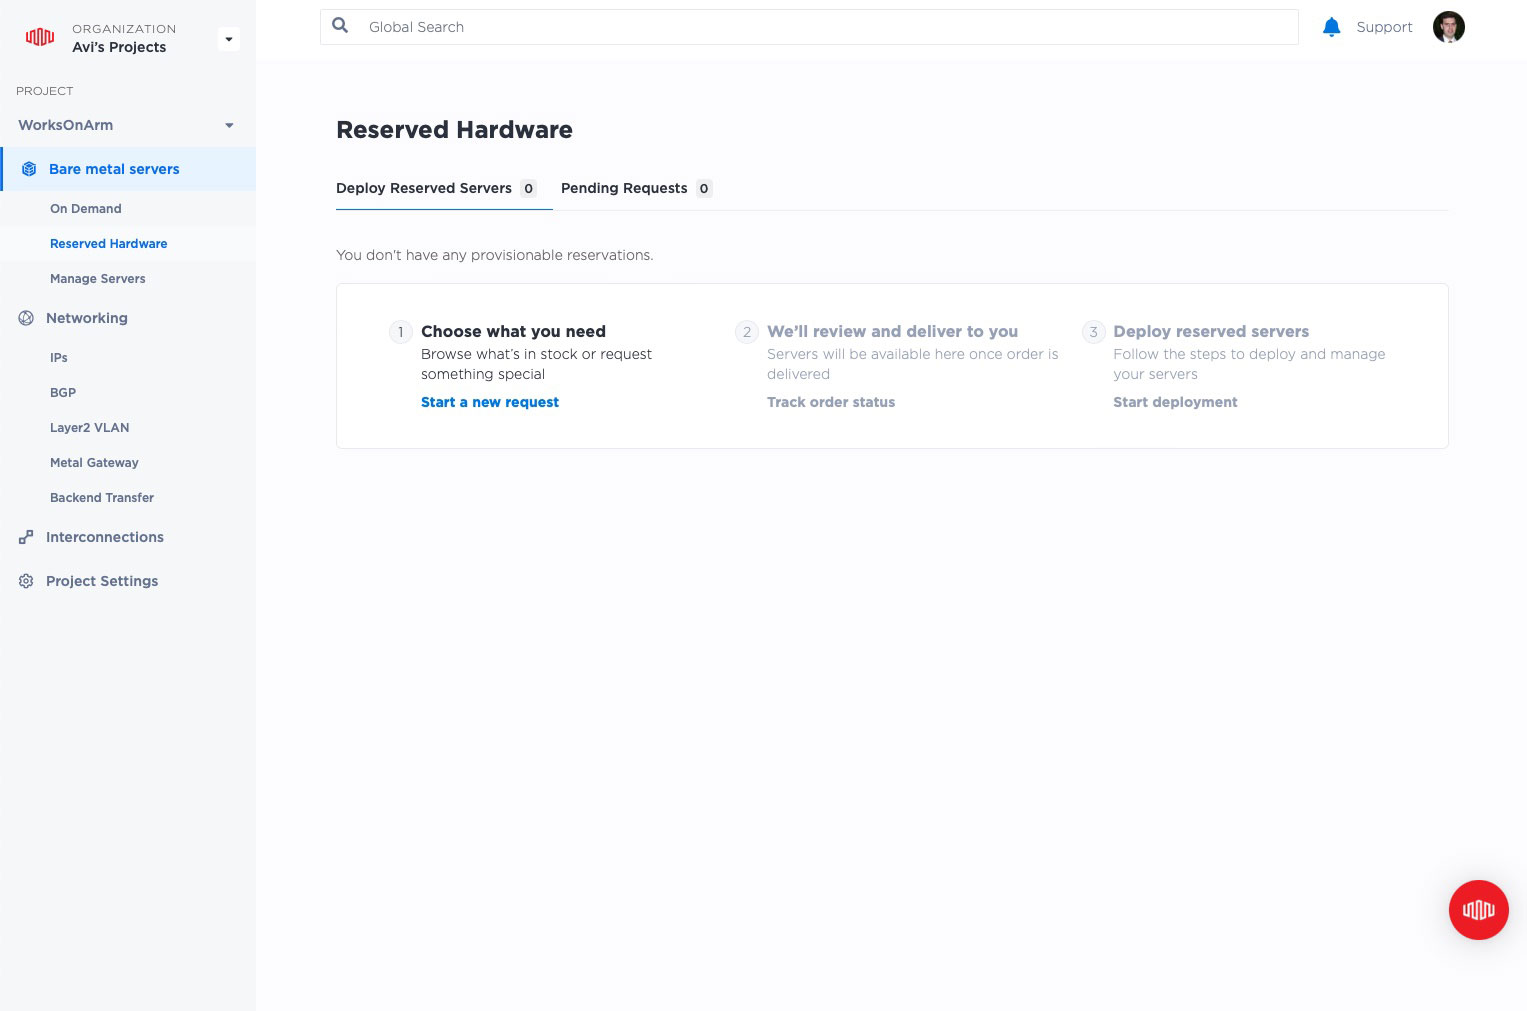
Reserved Hardware
Your organization can reserve hardware for your exclusive use. This is a great way to get a dedicated machine that no one else uses at special rates, or special exclusive hardware that may not be available for the general public.
To deploy reserved hardware, or to request hardware from the reserved pool, select "Reserved Hardware" under "Bare metal servers". You then can pick from available reserved hardware in the project, or request to reserve hardware.
Networking
Under "networking", you can manage IP addresses, BGP, L2 VLANs, Metal Gateways and Backend Transfer.
As this is not a comprehensive guide, we will focus on just IP addresses.
If you select "IPs", you will see a full list of IP addresses allocated to this project: private and public, IPv4 and IPv6. You also can request new addresses, a single one or an entire range, via the "Request IP Addresses" button.
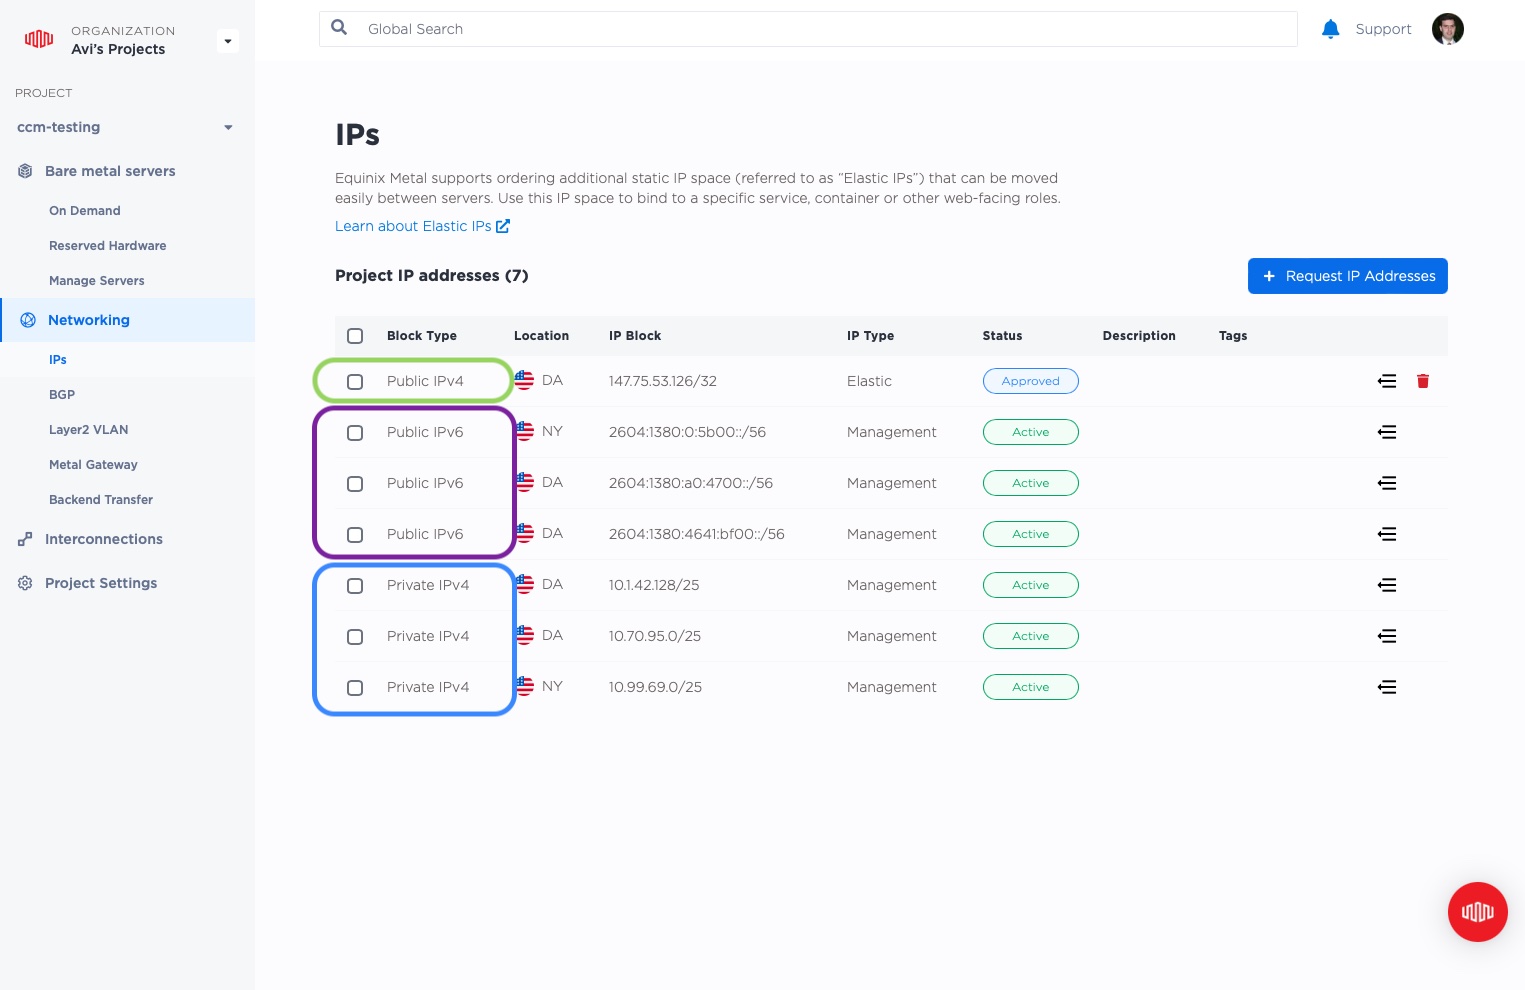
Looking at the screenshot, we can see:
- 3 private IPv4
/25addresses, of the type "Management", active status. - 3 public IPv6
/56addresses, of the type "Management", active status. - 1 public IPv4
/32single address, of the type "Elastic", approved status.
Management addresses are the internal addresses used for management of the server, provided by Equinix. By contrast, Elastic addresses are single addresses or a range provided by Equinix upon request by you, the customer.
Equinix does not charge for management addresses, but does charge for Elastic addresses.
Elastic addresses are assigned to the network, with the Metal-provided router receiving the incoming packets. The Metal router will then route it to servers based on one of:
- a single server directly, allocated via the Metal console or API
- one or more servers, announced via BGP
- one or more servers, via ARP on a VLAN, when in L2 mode
- a Metal Gateway, configured via the Metal console or API
The private IPv4 and public IPv6 Management addresses are assigned by Equinix when a project's first server is set up in each metro. For more about how Metal networking works, see "Networking" in the Equinix Metal Docs.
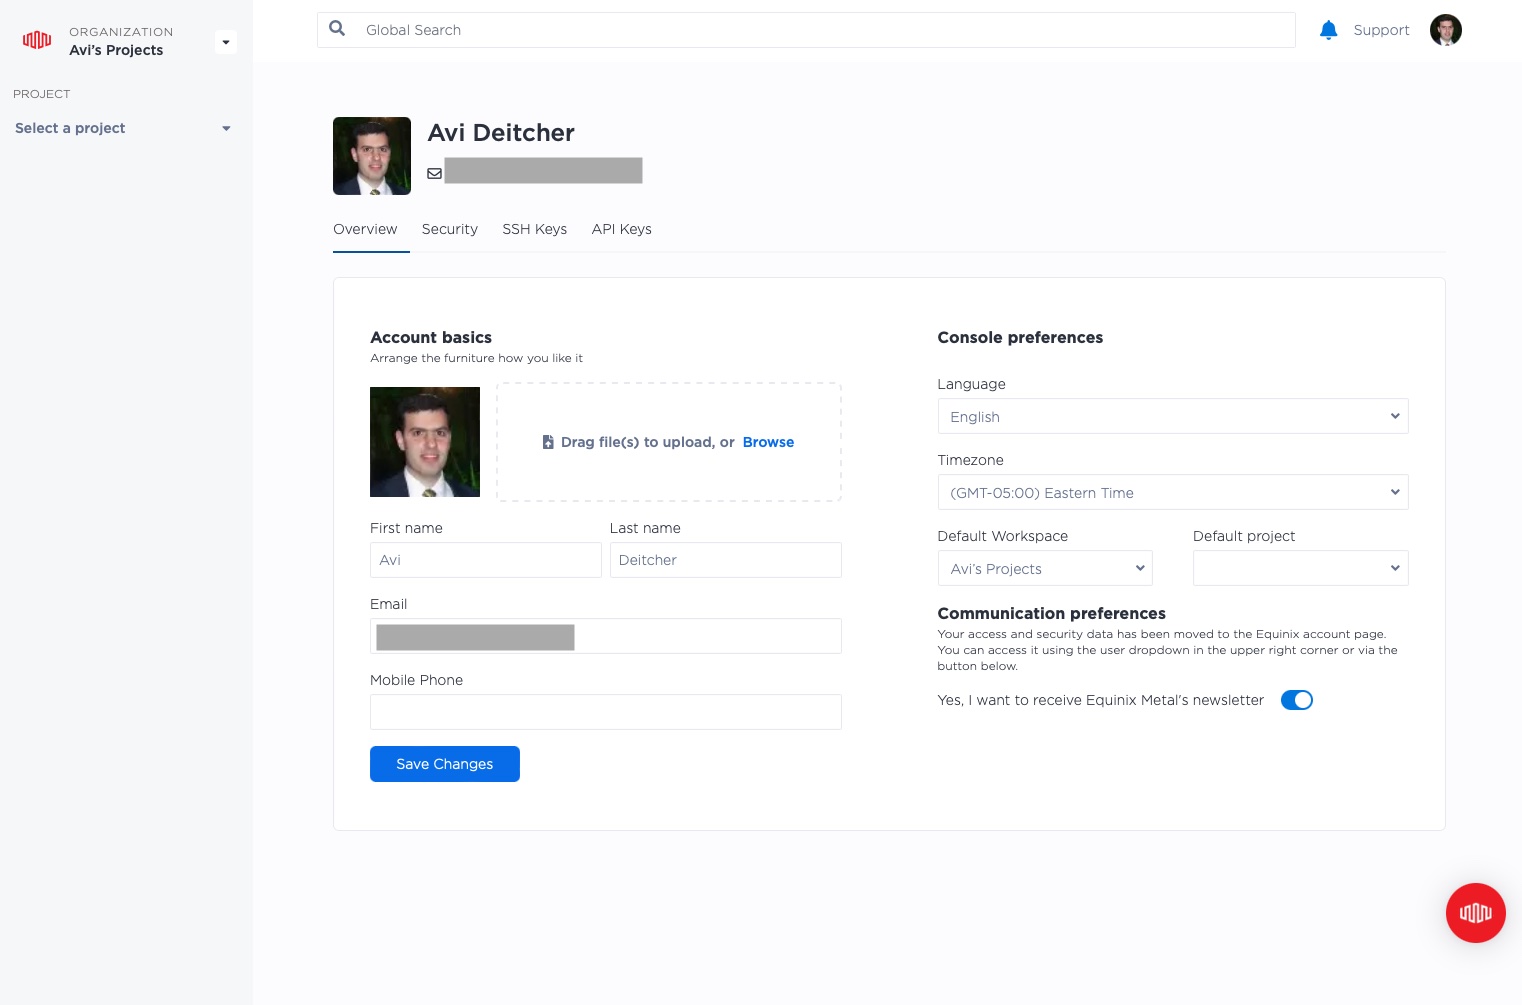
Personal
The personal section is where you can manage your profile and preferences, manage security like login password and multi-factor authentication, load ssh keys that will be placed on new servers you deploy, and generate API keys to provide programmatic access.
Your ssh keys are particularly important when you deploy servers. Metal takes care of loading those public keys onto servers that you deploy. This gives you the ability to connect to the servers remotely and perform activities on them.
For more information on ssh keys, read the Metal ssh docs. In other guides, when we deploy a server, we will see how to load ssh keys.
Summary
That is it! You now should have a good understanding of the Equinix Metal console, its major sections, what purpose they serve, and how to use them.
For more detailed information, we recommend reading the official Equinix Metal documents, or taking more steps in other guides.
You may also like
Dig deeper into similar topics in our archives
Configuring BGP with BIRD 2 on Equinix Metal
Set up BGP on your Equinix Metal server using BIRD 2, including IP configuration, installation, and neighbor setup to ensure robust routing capabilities between your server and the Equinix M...

Configuring BGP with FRR on an Equinix Metal Server
Establish a robust BGP configuration on your Equinix Metal server using FRR, including setting up network interfaces, installing and configuring FRR software, and ensuring secure and efficie...

Crosscloud VPN with WireGuard
Learn to establish secure VPN connections across cloud environments using WireGuard, including detailed setups for site-to-site tunnels and VPN gateways with NAT on Equinix Metal, enhancing...

Deploy Your First Server
Learn the essentials of deploying your first server with Equinix Metal. Set up your project & SSH keys, provision a server and connect it to the internet.

Ready to kick the tires?
Use code DEPLOYNOW for $300 credit