- Home /
- Resources /
- Learning center /
- CI/CD Guide - Depl...
CI/CD Guide - Deploy Jenkins infrastructure on Equinix Metal
Deploy an entire scalable Jenkins infrastructure on Equinix Metal

In this guide, you are going to set up a pool of Equinix Metal servers on which you will run an entire Jenkins infrastructure. The Jenkins controller will be a container on the Kubernetes cluster, and jobs themselves will run as other containers on the same Kubernetes cluster. This will allow you to run your CI/CD workflows on your own infrastructure, providing you with more control and flexibility, while ensuring each job run gets a brand-new, clean environment. Each Equinix Metal device will join a Kubernetes cluster as a worker node, on which containers for job executors and controllers will run.
In the introduction, you described how you need to decide the following in advance:
- Quantity of worker nodes: the more you have, the more jobs you can execute in parallel. These are not 1:1, as you can launch multiple containers on a single Equinix Metal device. However, you are bound by the resources required by each container.
- Location of nodes: this may not matter for simple jobs, but can be very important if you need to access other resources as part of the job runs, especially at Equinix Metal's global locations.
- Size of nodes: the more resources you allocate, the more jobs each worker node can run in parallel.
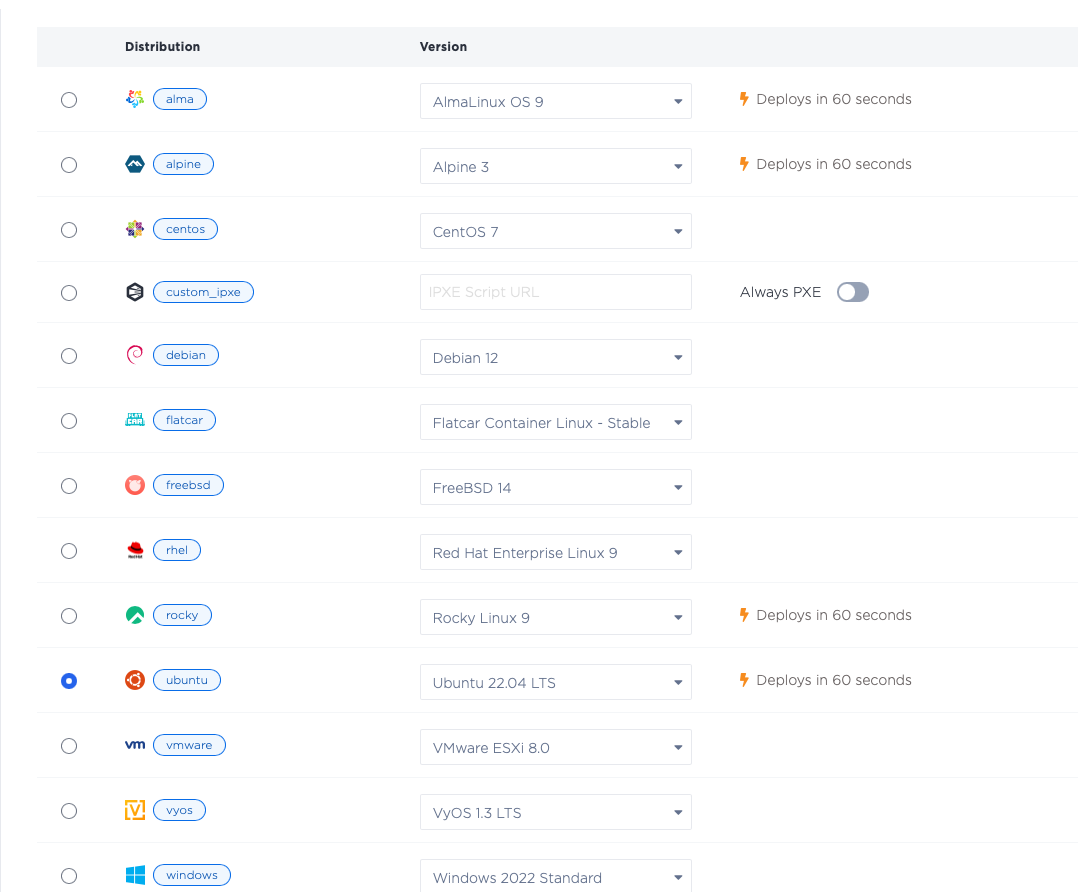
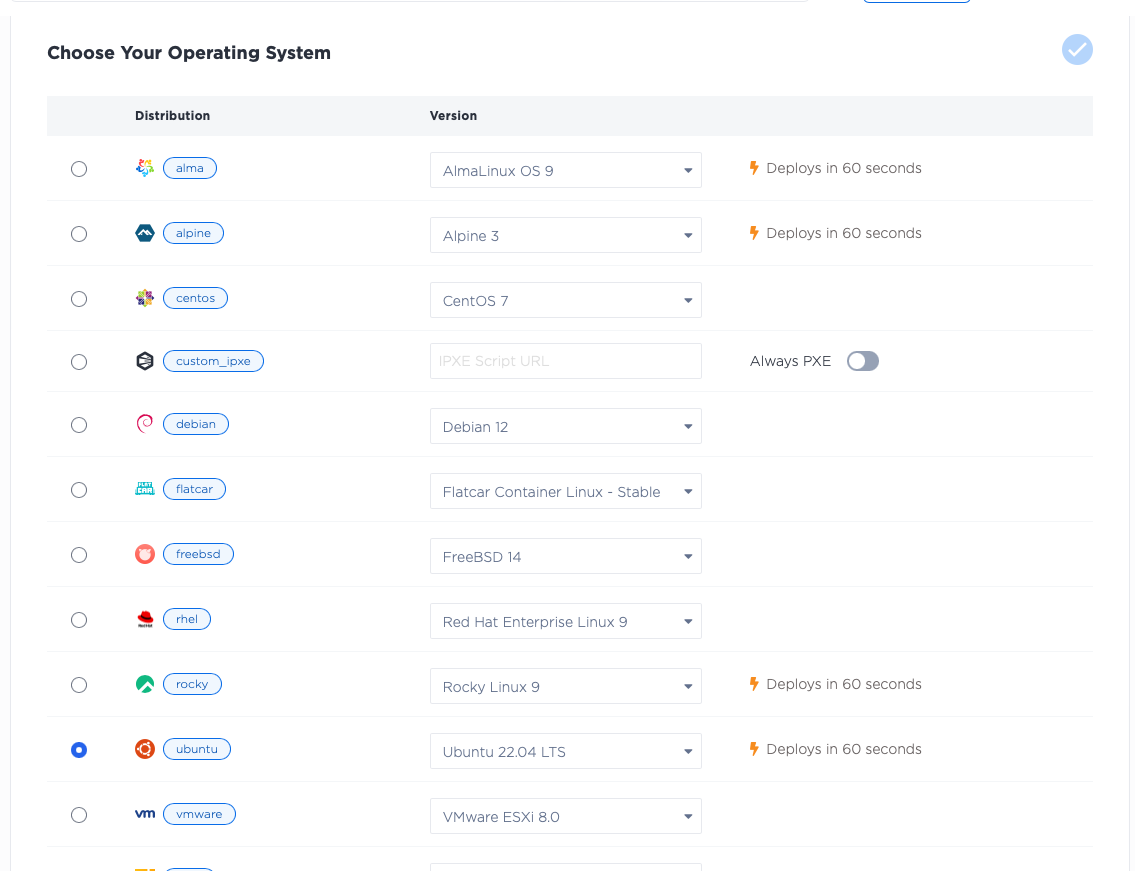
- Node operating system: which operating system you will run, whether one of the standard ready-to-run Equinix-managed OSes, or one of your own.
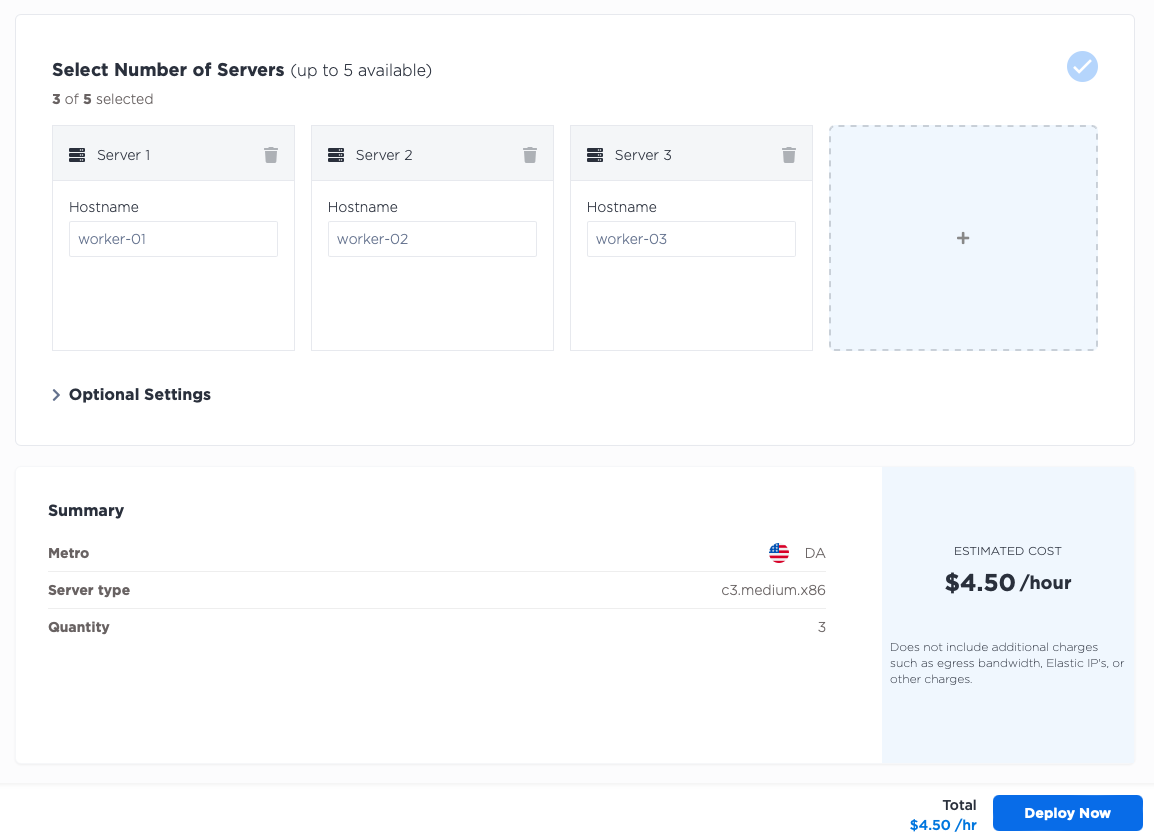
For this guide, you will deploy:
- three worker nodes...
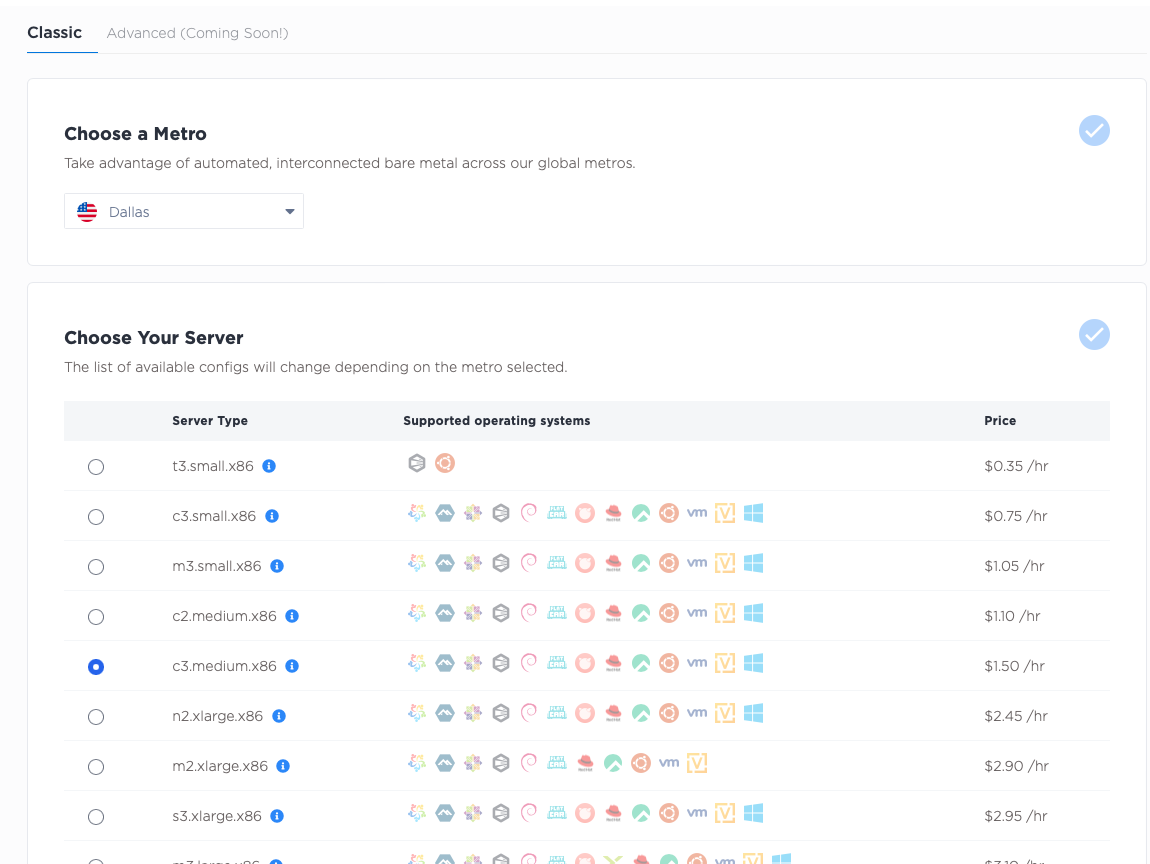
- each of size
c3.medium.x86... - and three control plane nodes...
- each of size
c3.small.x86... - all running Ubuntu 20.04
ubuntu_20_04... - all in the Dallas (
da) metro.
Deploy the Equinix Metal servers
Log into the Equinix Metal Console, create or select a project,
and deploy three servers for the control plane. Add these servers in the Dallas metro, select the c3.small.x86 size
and select Ubuntu 20.04 as the operating system. If you want more control plane nodes for higher redundancy,
or of different sizes, by all means do so.

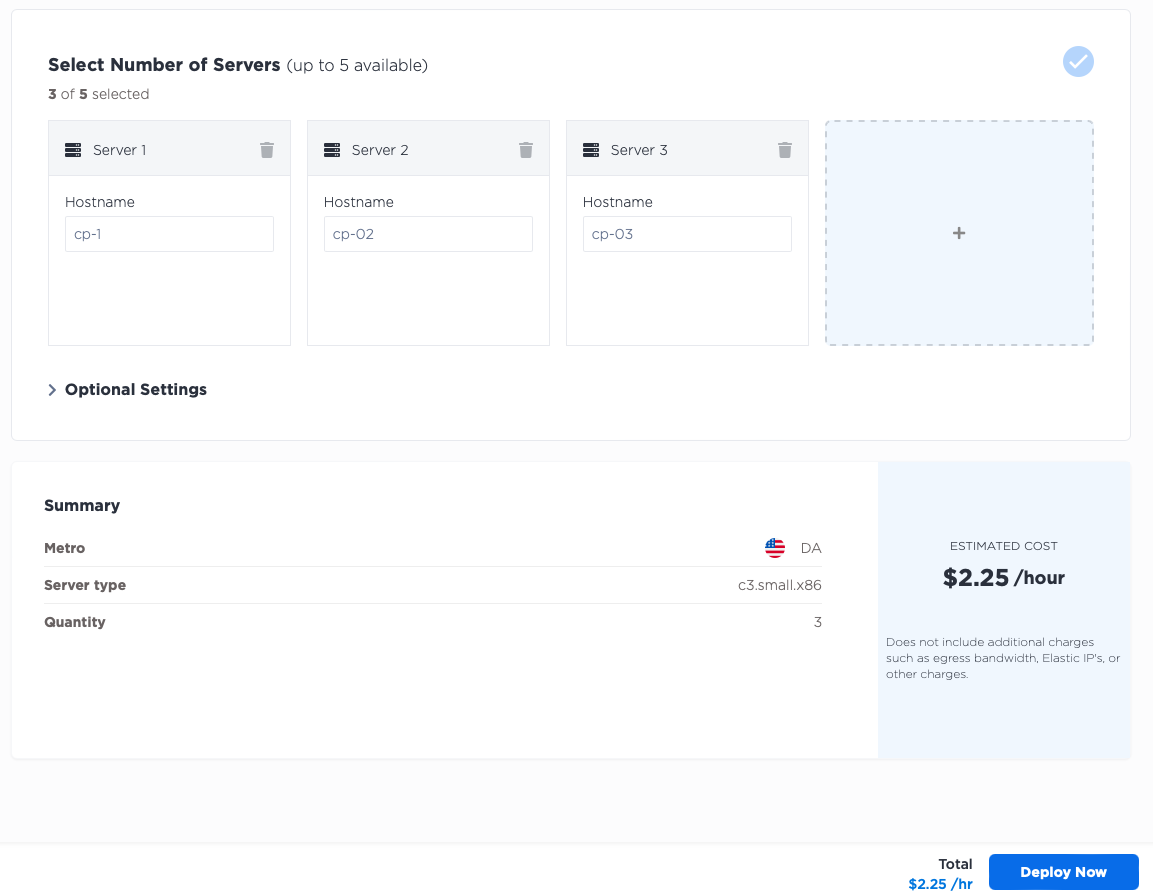
Next, deploy three servers for your workers. As with the control plane, deploy three c3.medium.x86
workers in the Dallas metro, selecting Ubuntu 20.04 as the operating system. If your use case requires more workers,
of different sizes, or you prefer a different operating system, by all means do so.
Set up the Kubernetes cluster
Now set up a k3s Kubernetes cluster on them.
The process is as follows:
- SSH into the first node.
- Set configuration and start it as a control plane node.
- Retrieve token for other nodes.
- SSH into the other control plane nodes.
- Set configuration and have them join the cluster as control plane nodes.
SSH into the first node.
Install jq so you can parse the JSON output from the Equinix Metal metadata API, and then get the private IP address.
This is the address to which the k3s apiserver will bind, so you will save it to the variable BIND_IP.
apt install -y jq
BIND_IP=$(curl -fsSL https://metadata.platformequinix.com/metadata | jq -r '.network.addresses | map(select(.public==false and .management==true)) | first | .address')
Now, set the install information for k3s:
export INSTALL_K3S_EXEC="\
    --bind-address ${BIND_IP} \
    --advertise-address ${BIND_IP} \
    --node-ip ${BIND_IP} \
    --tls-san ${BIND_IP} \
    --disable-cloud-controller \
    --kubelet-arg cloud-provider=external \
    --disable=servicelb \
    --cluster-init"
Next, install k3s:
curl -sfL https://get.k3s.io | sh -
This step sometimes takes a little while to finish. Once it is done, you will need to retrieve a few things from the server before you can move on to the others:
- IP where the first node is listening, which you saved as
BIND_IP
echo $BIND_IP
- Token for servers to join the cluster
cat /var/lib/rancher/k3s/server/token
- Token for agents to join the cluster; this might be the same as the server one, or it might be unique
cat /var/lib/rancher/k3s/server/agent-token
With those in hand, exit the shell on the first node, and ssh to each of the other nodes. Repeat the process, with the variants for the other nodes.
Install jq so you can retrieve information, and then get the node's private IP and save it as BIND_IP:
apt install -y jq
BIND_IP=$(curl -fsSL https://metadata.platformequinix.com/metadata | jq -r '.network.addresses | map(select(.public==false and .management==true)) | first | .address')
Save the token from the first node as TOKEN:
TOKEN=<token retrieved from the first server>
Recall that BIND_IP from the first node, where the first server is listening. The second and third nodes
will use that to join the cluster. For them it is the API_IP. Save that:
API_IP=<BIND_IP from the first node>
Set the install information for k3s. It is similar, but not quite identical, to the first node.
export INSTALL_K3S_EXEC="server \
    --server https://${API_IP}:6443 \
    --bind-address ${BIND_IP} \
    --advertise-address ${BIND_IP} \
    --node-ip ${BIND_IP} \
    --tls-san ${BIND_IP} \
    --disable-cloud-controller \
    --kubelet-arg cloud-provider=external \
    --disable=servicelb \
    --token ${TOKEN}"
And install k3s:
curl -sfL https://get.k3s.io | sh -
Once this is done on all three nodes, you will be able to see all three of the nodes, on any one of them:
$ kubectl get node
NAME       STATUS   ROLES                       AGE     VERSION
cp-1       Ready    control-plane,etcd,master   3h17m   v1.28.7+k3s1
cp-2       Ready    control-plane,etcd,master   149m    v1.28.7+k3s1
cp-3       Ready    control-plane,etcd,master   27m     v1.28.7+k3s1
When you log into each of those nodes, you will want to be able to interact with the cluster.
SSH into each of those nodes and set the KUBECONFIG to the one that k3s uses:
export KUBECONFIG=/etc/rancher/k3s/k3s.yaml
The above only works for your current shell. Make it permanent by adding it to your shell's profile so it is set every time you log in.
echo "export KUBECONFIG=/etc/rancher/k3s/k3s.yaml" >> ~/.bashrc
The control plane is up and running, so have the workers join the cluster as well, this time as worker nodes:
- SSH into each worker node.
- Set configuration and have them join the cluster as worker nodes.
SSH into each worker node, and configure it to join the cluster.
apt install -y jq
BIND_IP=$(curl -fsSL https://metadata.platformequinix.com/metadata | jq -r '.network.addresses | map(select(.public==false and .management==true)) | first | .address')
API_IP=<BIND_IP from the first node>
TOKEN=<agent-token retrieved from the first server>
export INSTALL_K3S_EXEC="agent \
    --server https://${API_IP}:6443 \
    --kubelet-arg cloud-provider=external \
    --node-ip ${BIND_IP} \
    --token ${TOKEN}"
curl -sfL https://get.k3s.io | sh -
Once this is done, you can return to any of the control plane nodes and check the status:
$ kubectl get node
NAME       STATUS   ROLES                       AGE     VERSION
cp-1       Ready    control-plane,etcd,master   3h17m   v1.28.7+k3s1
cp-2       Ready    control-plane,etcd,master   149m    v1.28.7+k3s1
cp-3       Ready    control-plane,etcd,master   27m     v1.28.7+k3s1
worker-1   Ready    <none>                      68s     v1.28.7+k3s1
worker-2   Ready    <none>                      30s     v1.28.7+k3s1
worker-3   Ready    <none>                      4s      v1.28.7+k3s1
You now have a fully functional Kubernetes cluster running. Before you move on to Jenkins, you are going to add the following add-on services:
- Cloud Provider Equinix Metal (CPEM) for connection with Equinix Metal and provision of cloud resources, such as Elastic IPs.
- Longhorn for persistent storage volumes, which you will need to store Jenkins controller data.
- kube-vip for a highly available LoadBalancer service, which you will use to expose Jenkins to the world.
The Cloud Provider, or Cloud Controller Manager, is a standard Kubernetes add-on that enables Kubernetes to work more closely with the cloud provider infrastructure on which it is running. Equinix provides its standard implementation in the Cloud Provider Equinix Metal.
Start by creating a Kubernetes secret providing your Equinix Metal API token and project ID. You also will add some configuration information for the Cloud Provider.
apiVersion: v1
kind: Secret
metadata:
  name: metal-cloud-config
  namespace: kube-system
stringData:
  cloud-sa.json: |
    {
    "apiKey": "abc123abc123abc123",
    "projectID": "abc123abc123abc123",
    "metro": "da",
    "loadbalancer": "kube-vip://"
    }
Be sure to replace the apiKey and projectId with your actual Metal API key and project ID,
as well as the metro with the metro where your servers are located.
Save the file as metal-cloud-secret.yaml, and apply it:
kubectl apply -f metal-cloud-secret.yaml
Now deploy the Equinix Metal Cloud Provider manifest:
RELEASE=$(curl -sL https://api.github.com/repos/kubernetes-sigs/cloud-provider-equinix-metal/releases | jq -r ".[0].name")
kubectl apply -f https://github.com/kubernetes-sigs/cloud-provider-equinix-metal/releases/download/${RELEASE}/deployment.yaml
Equinix Metal does not have a cloud block store or object store, which would make it challenging to migrate pods that have persistent data, like the Jenkins controller, from one host to another. Longhorn creates volumes that are replicated across multiple Kubernetes nodes, using local storage. This enables us to have the same persistent volume across multiple nodes, for the Jenkins controller to store its data.
For production, you may use Longhorn, a different replicated filesystem, or any other solution that works for your needs.
Install Longhorn, and then create a storage class called longhorn,
from which you will create volumes. For this example, you will use the default option offered by
Longhorn itself:
RELEASE=v1.6.0
kubectl apply -f https://raw.githubusercontent.com/longhorn/longhorn/${RELEASE}/deploy/longhorn.yaml
kubectl create -f https://raw.githubusercontent.com/longhorn/longhorn/${RELEASE}/examples/storageclass.yaml
Next, you will deploy kube-vip. This is a highly available LoadBalancer service
that sees Kubernetes Services, like the one you will create later for Jenkins, and exposes them via
BGP.
First, deploy the manifest that creates a Kubernetes service account with the necessary permissions:
kubectl apply -f https://kube-vip.io/manifests/rbac.yaml
Next, generate the manifests needed to deploy kube-vip.
You need the latest version of kube-vip:
KVVERSION=$(curl -sL https://api.github.com/repos/kube-vip/kube-vip/releases | jq -r ".[0].name")
IMAGE="ghcr.io/kube-vip/kube-vip:${KVVERSION}"
With the version in hand, pull down that image:
ctr image pull ${IMAGE}
Next, generate the manifest:
ctr run --rm --net-host ${IMAGE} vip /kube-vip manifest daemonset \
  --interface lo \
  --annotations metal.equinix.com \
  --services \
  --inCluster \
  --bgp > /tmp/kube-vip.yaml
And apply it:
kubectl apply -f /tmp/kube-vip.yaml
Deploy Jenkins
With a solid Kubernetes cluster in place. including storage and load balancer management, move on to installing Jenkins. The official docs for Jenkins on Kubernetes can be found here.
The steps are as follows:
- Create the namespace
- Create the service account with appropriate permissions
- Create a persistent volume for Jenkins
- Apply the deployment yaml
- Apply the service yaml
Start by creating the namespace:
kubectl create namespace jenkins
Next, you will create the service account with the appropriate permissions. You will call it jenkins-admin.
apiVersion: rbac.authorization.k8s.io/v1
kind: ClusterRole
metadata:
  name: jenkins-admin
rules:
  - apiGroups: [""]
    resources: ["*"]
    verbs: ["*"]

---

apiVersion: v1
kind: ServiceAccount
metadata:
  name: jenkins-admin
  namespace: jenkins

---

apiVersion: rbac.authorization.k8s.io/v1
kind: ClusterRoleBinding
metadata:
  name: jenkins-admin
roleRef:
  apiGroup: rbac.authorization.k8s.io
  kind: ClusterRole
  name: jenkins-admin
subjects:
- kind: ServiceAccount
  name: jenkins-admin
  namespace: devops-tools
Save this as jenkins-admin.yaml, and apply it:
kubectl apply -f jenkins-admin.yaml
Now, you are ready to create a volume for Jenkins to use. You will use the longhorn storage class you created earlier
and create a PersistentVolumeClaim:
apiVersion: v1
kind: PersistentVolumeClaim
metadata:
  name: jenkins-pv-claim
  namespace: jenkins
spec:
  accessModes:
    - ReadWriteOnce
  storageClassName: longhorn
  resources:
    requests:
      storage: 3Gi
Save the yaml to a file named pvc.yaml and apply it:
kubectl apply -f pvc.yaml
Next, deploy the Jenkins controller:
apiVersion: apps/v1
kind: Deployment
metadata:
  name: jenkins
  namespace: jenkins
spec:
  replicas: 1
  selector:
    matchLabels:
      app: jenkins-server
  template:
    metadata:
      labels:
        app: jenkins-server
    spec:
      securityContext:
            fsGroup: 1000
            runAsUser: 1000
      serviceAccountName: jenkins-admin
      containers:
        - name: jenkins
          image: jenkins/jenkins:lts
          resources:
            limits:
              memory: "2Gi"
              cpu: "1000m"
            requests:
              memory: "500Mi"
              cpu: "500m"
          ports:
            - name: httpport
              containerPort: 8080
            - name: jnlpport
              containerPort: 50000
          livenessProbe:
            httpGet:
              path: "/login"
              port: 8080
            initialDelaySeconds: 90
            periodSeconds: 10
            timeoutSeconds: 5
            failureThreshold: 5
          readinessProbe:
            httpGet:
              path: "/login"
              port: 8080
            initialDelaySeconds: 60
            periodSeconds: 10
            timeoutSeconds: 5
            failureThreshold: 3
          volumeMounts:
            - name: jenkins-data
              mountPath: /var/jenkins_home
      volumes:
        - name: jenkins-data
          persistentVolumeClaim:
              claimName: jenkins-pv-claim
Save it to a file named jenkins-controller.yaml and apply it:
kubectl apply -f jenkins-controller.yaml
Finally, expose the Jenkins controller via a Service:
apiVersion: v1
kind: Service
metadata:
  name: jenkins-service
  namespace: jenkins
  annotations:
      prometheus.io/scrape: 'true'
      prometheus.io/path:   /
      prometheus.io/port:   '8080'
spec:
  selector:
    app: jenkins-server
  type: LoadBalancer
  ports:
    - port: 8080
      targetPort: 8080
Save it to a file named jenkins-service.yaml and apply it:
kubectl apply -f jenkins-service.yaml
The Service you created is of type: LoadBalancer. When CPEM sees this, it will create an Elastic IP and
assign it to the service, and kube-vip will expose the service to the world.
You can retrieve the IP address of the LoadBalancer service by running:
$ kubectl  -n jenkins get svc jenkins-service
NAME              TYPE           CLUSTER-IP    EXTERNAL-IP   PORT(S)        AGE
jenkins-service   LoadBalancer   10.43.44.21   145.80.75.65  80:32182/TCP   25m
The EXTERNAL-IP is the Elastic IP that CPEM created for you.
Jenkins now is configured to run, with a persistent volume for its data, and exposed via a LoadBalancer service.
You can log onto Jenkins by connecting to the IP address of the Elastic IP, on port 8080, e.g. http://145.80.75.65:8080 in your browser.
When you access the Jenkins UI for the first time, you will be asked for the initial admin password. You need to retrieve this from the Jenkins controller pod. Pods often have unique names, partially randomly generated by Kubernetes. For example:
$ kubectl -n jenkins get pods
NAME                       READY   STATUS    RESTARTS   AGE
jenkins-6f857ff9b9-fdnvh   1/1     Running   0          6m26s
The name of the pod is jenkins-6f857ff9b9-fdnvh; yours will be different. This can make
it somewhat challenging to have a consistent command to retrieve the password.
Fortunately, the Jenkins controller deployment adds a label to the pod, app=jenkins-server.
We can use that to retrieve the password:
$ kubectl -n jenkins exec $(kubectl -n jenkins get pod -l app=jenkins-server -o name) -- cat /var/jenkins_home/secrets/initialAdminPassword
You have now set up a pool of Equinix Metal servers running an entire Jenkins infrastructure. You can now use Jenkins as needed to manage your CI/CD workflows.
Last updated
25 June, 2024Category
Tagged
ArticleYou may also like
Digger deeper into similar topics in our archives
Configuring BGP with BIRD 1.6 on an Equinix Metal Server
Set up BGP on your Equinix Metal server using BIRD 1.6, covering IP configuration, installation, and neighbor setup to ensure robust routing capabilities between your server and the Equinix...

Configuring BGP with FRR on an Equinix Metal Server
Establish a robust BGP configuration on your Equinix Metal server using FRR, including setting up network interfaces, installing and configuring FRR software, and ensuring secure and efficie...

Crosscloud VPN with Wireguard
Learn to establish secure VPN connections across cloud environments using WireGuard, including detailed setups for site-to-site tunnels and VPN gateways with NAT on Equinix Metal, enhancing...

Deploy Your First Server
Learn the essentials of deploying your first server with Equinix Metal. Set up your project & SSH keys, provision a server and connect it to the internet.

Ready to kick the tires?
Use code DEPLOYNOW for $300 credit