- Home /
- Resources /
- Learning center /
- CI/CD Guide - Leve...
CI/CD Guide - Leverage Equinix Metal servers as persistent GitHub Actions runners
This guide covers how to deploy persistent GitHub Action Runners on Equinix Metal.

On this page
In this guide, you are going to set up a pool of Equinix Metal servers to be used as persistent GitHub Actions runners. This will allow you to run your CI/CD workflows on your own infrastructure, providing you with more control and flexibility.
Because they are "persistent", there won't be much setup before and cleanup after individual job runs.
In the introduction, you saw how you need to decide the following in advance:
- Quantity of runners: the more you have, the more jobs you can execute in parallel.
- Location of runners: this may not matter for simple jobs, but can be very important if you need to access other resources as part of the job runs, especially at Equinix Metal's global locations.
- Size of runners: the more resources you allocate, the faster your jobs may run. Some jobs may even have minimum resource requirements - such as CPU, memory or storage - to be able to execute at all.
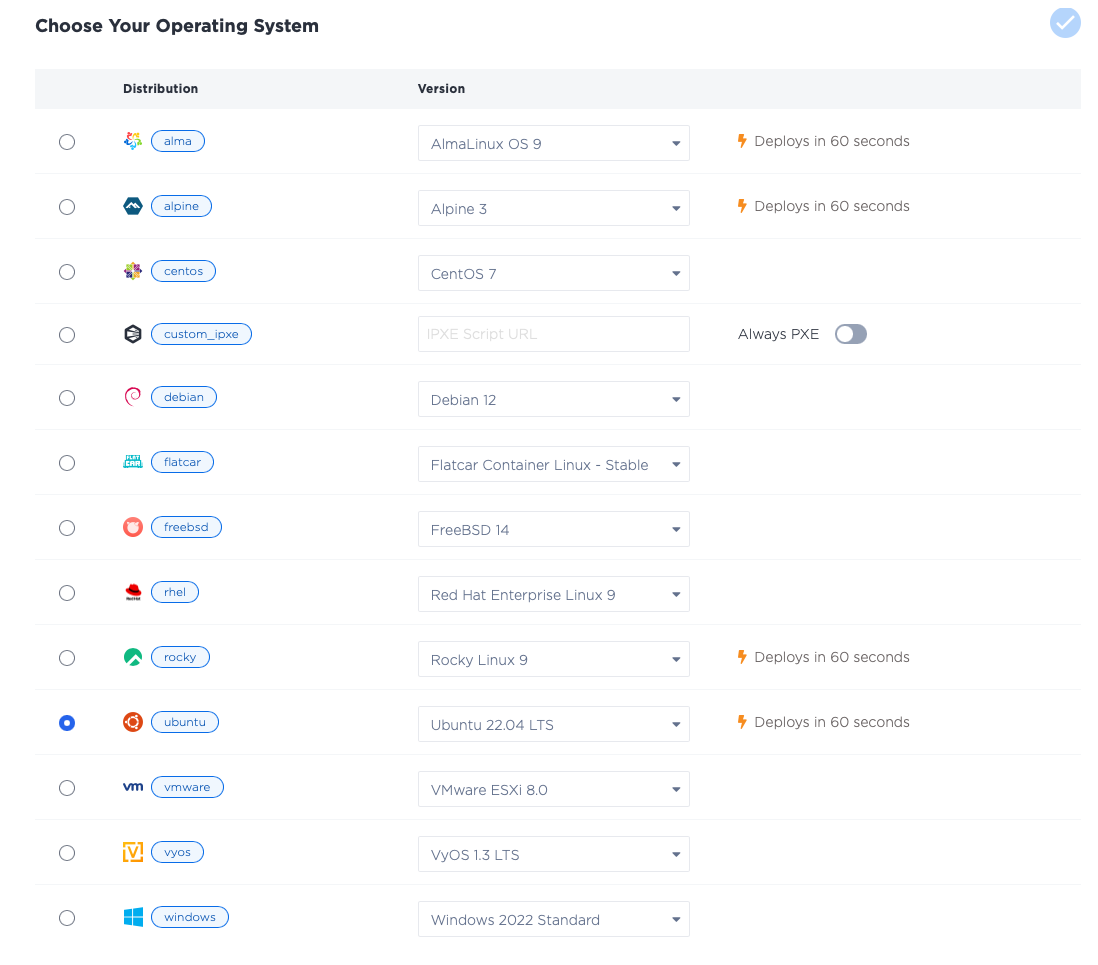
- Runner operating system: which operating system you will run, whether one of the standard ready-to-run Equinix-managed OSes, or one of your own.
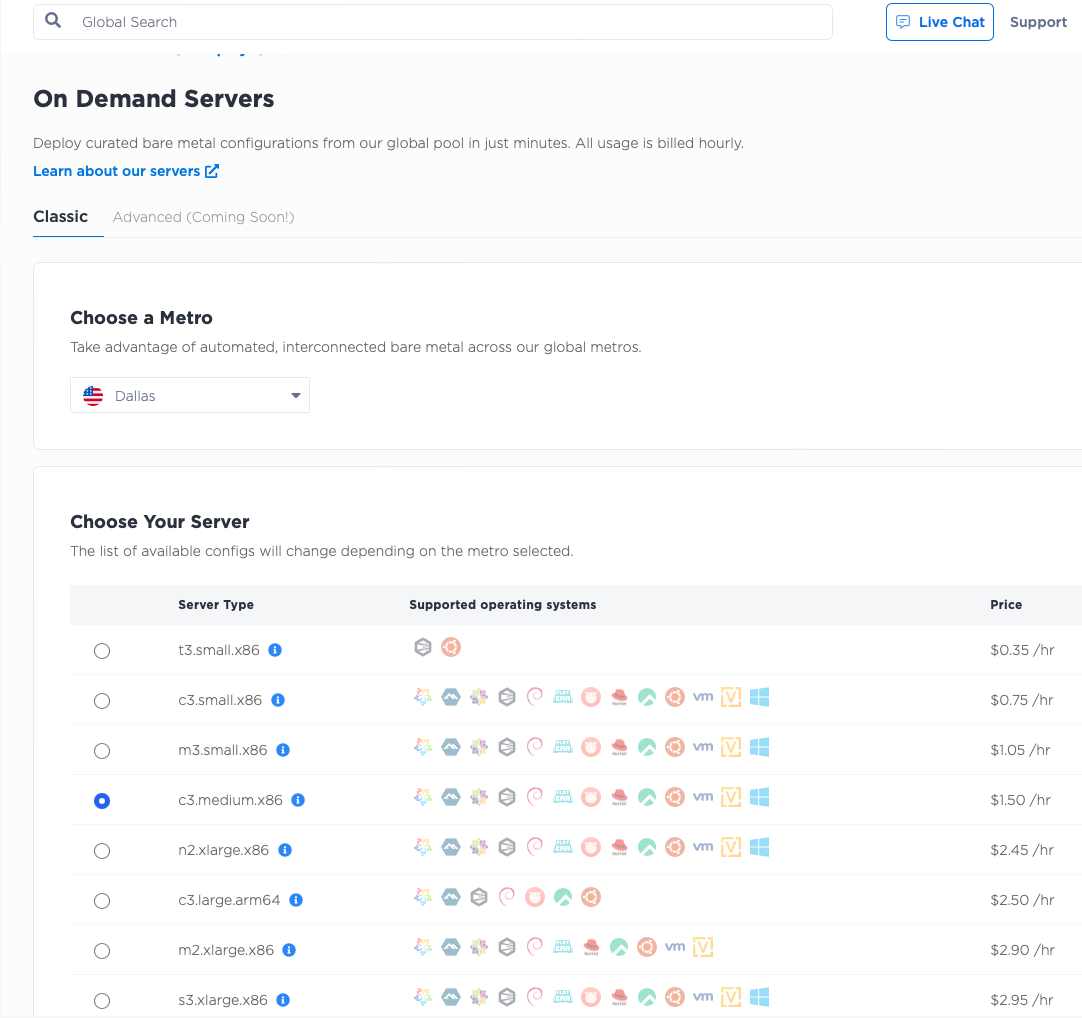
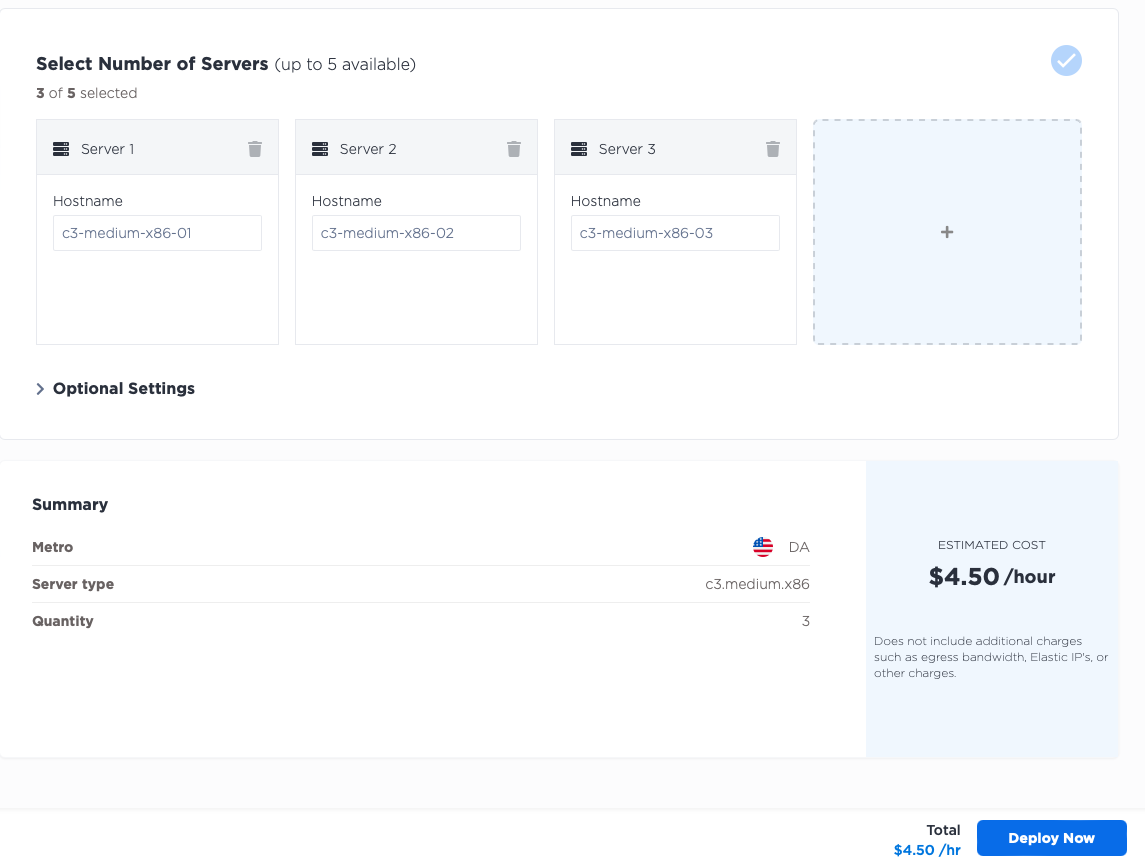
For this guide, you will deploy:
- three runners...
- in the Dallas (
da) metro... - each of size
c3.medium.x86... - running Ubuntu 20.04
ubuntu_20_04.
Start by deciding if your runners will be used for a GitHub organization, or just a repository. In this guide, you will use them for just a single repository. However, the approach is the same for an organization. The only difference in process is the actual start command you run on each runner.
For this guide, you will deploy to a single repository.
The steps you will take are as follows:
- Create a repository
- Deploy servers
- Attach servers as GitHub Runners
- Create a workflow that uses the runners
1. Create a repository
The first step is to create your repository, if you don't already have one. You can do this on GitHub's website.
2. Deploy servers
Deploy the servers.
Log into the Equinix Metal Console, create or select a project, and deploy three servers.
3. Attach servers as GitHub Runners
Once your servers are ready, you can begin to attach them as GitHub Runners.
The process is summarized in the following steps, which will be expanded upon throughout this guide:
- SSH into each server.
- Download the GitHub runner software package
- Run the configuration script
This last step is particularly important. When you launch the runner, you need to give it two things:
- The context where it will run, i.e. the URL to the repository or organization
- A security token that lets it register, otherwise any machine could run and have access to your code and secrets
The security token is short-lived. That is why you waited for the servers to be ready before starting the process on the GitHub side.
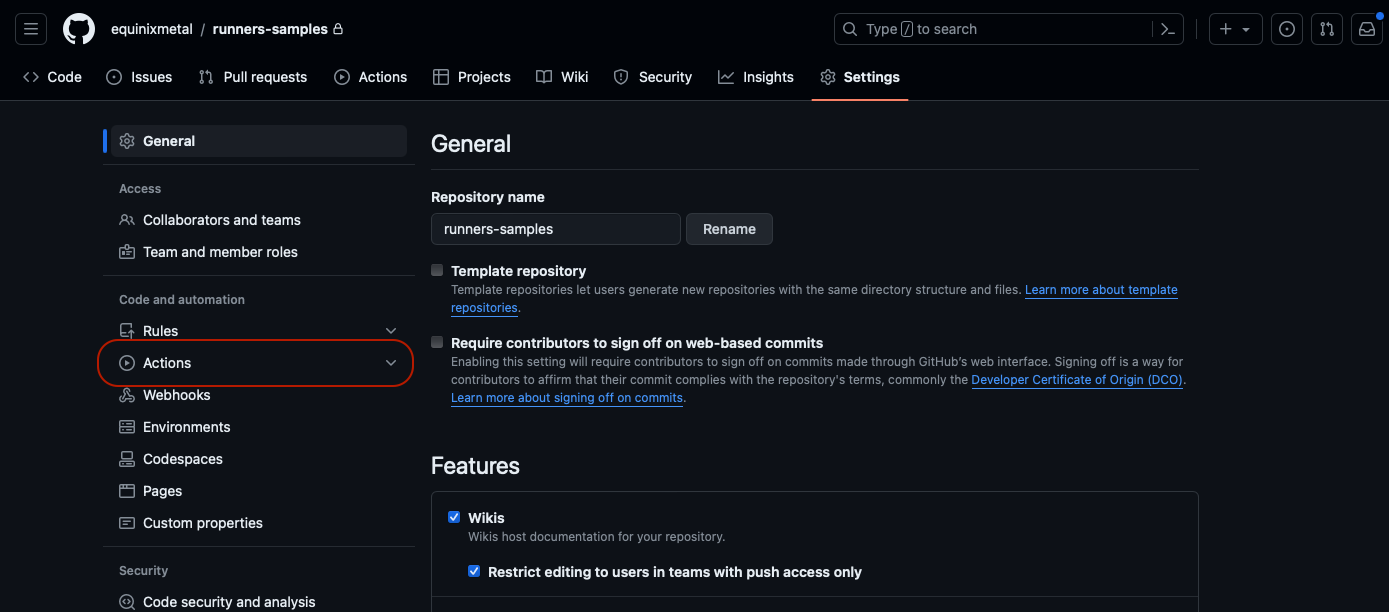
Return to the repository, and click "Settings":

Then, click "Actions" on the left:
Then, click "Runners":
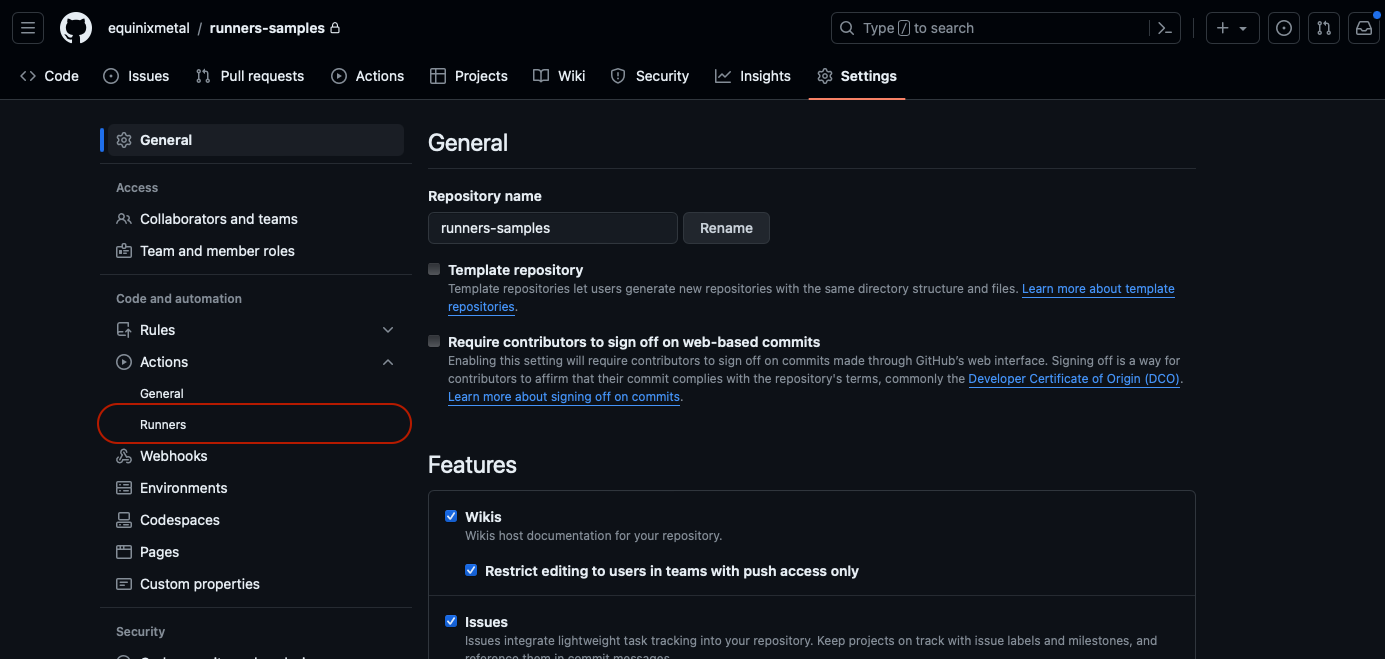
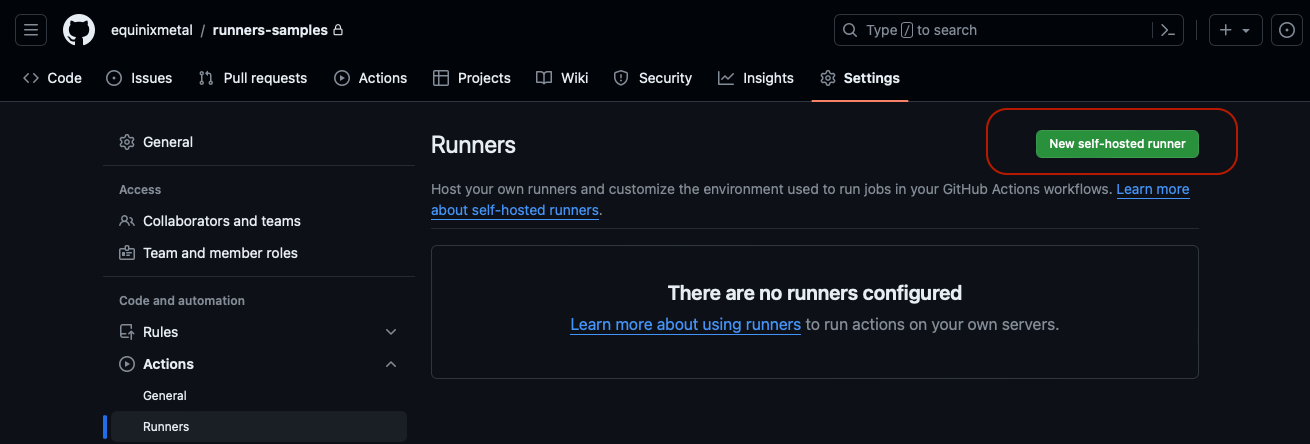
Finally, click the button labeled "New Self-Hosted Runner":
GitHub supports runners for MacOS, Linux and Windows. For this tutorial, click "Linux":
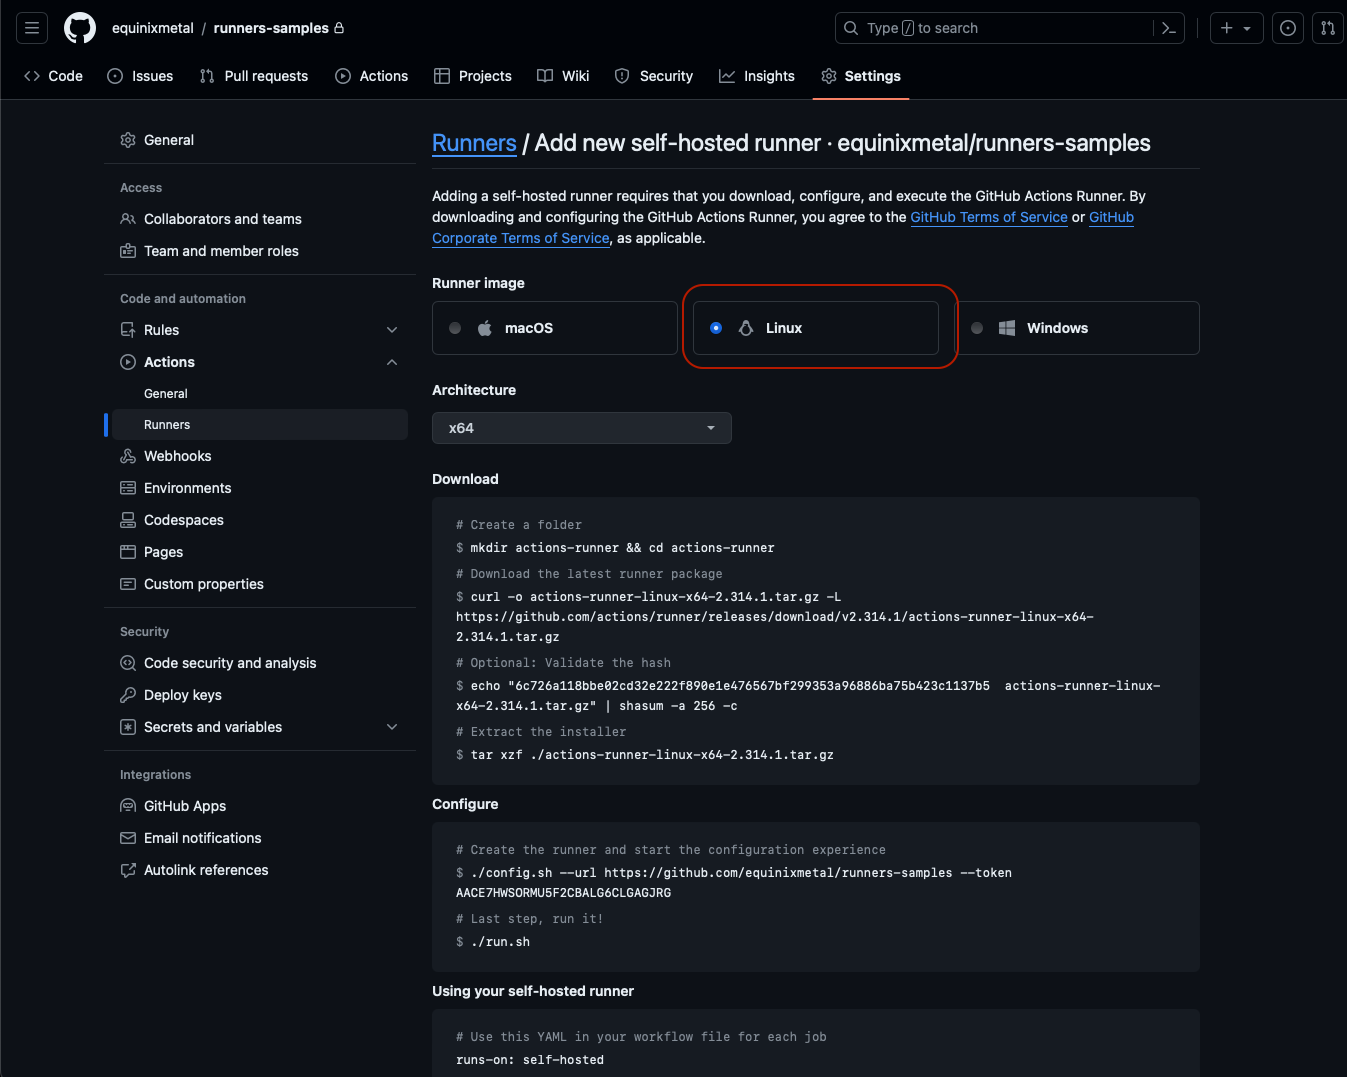
This brings up the architecture to select - in this case x64 - and then shows the commands to download the runner
package:
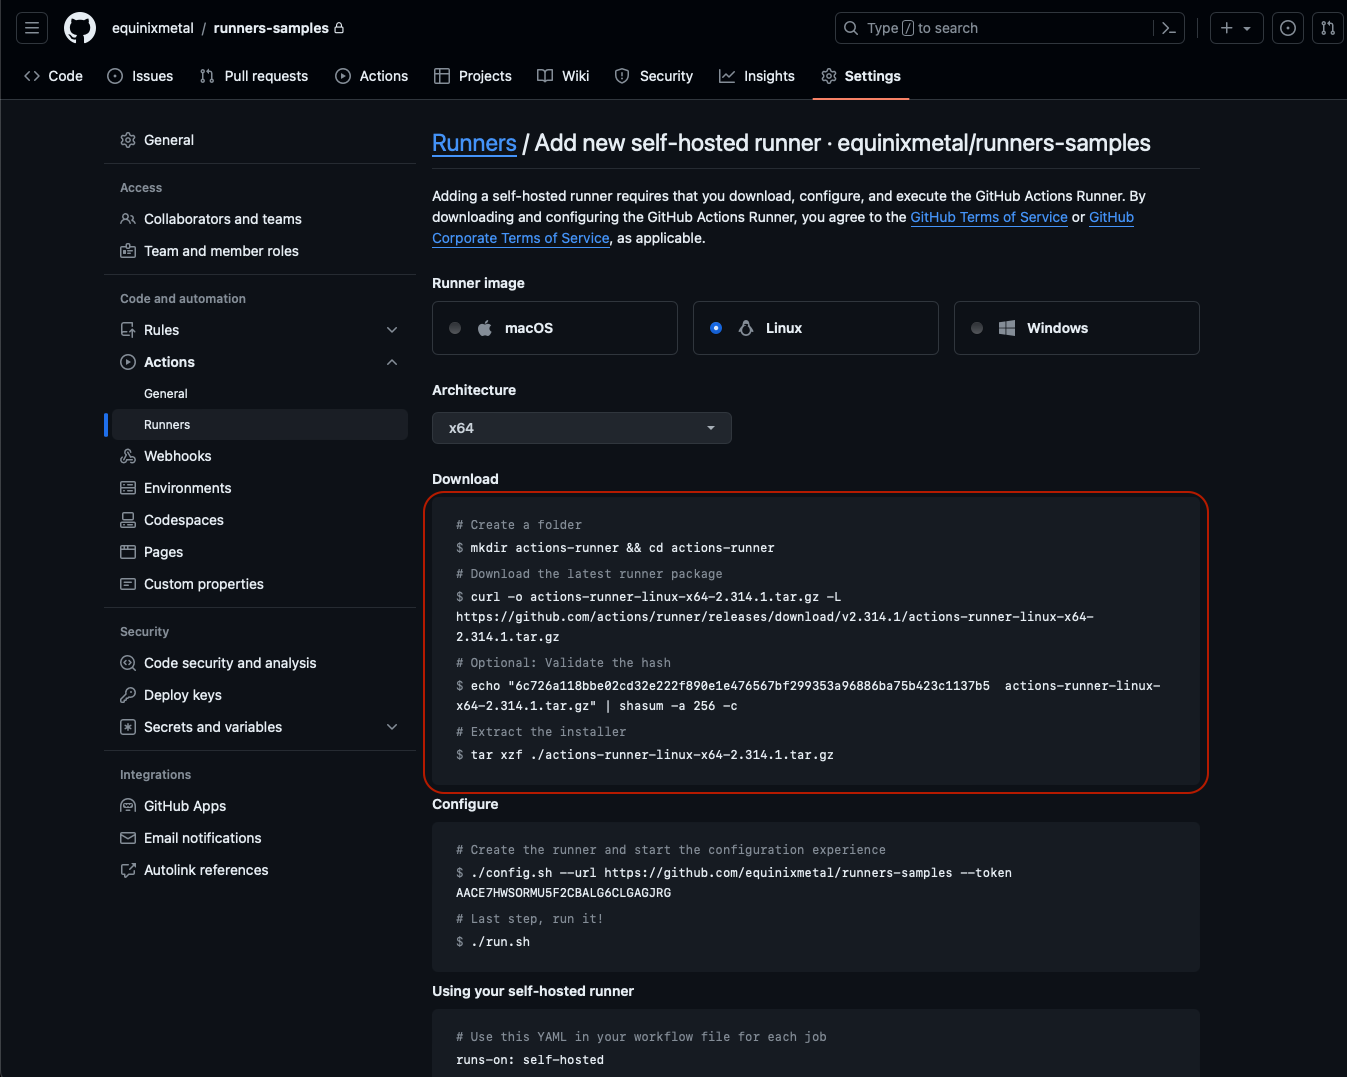
The "Download" step is common across all installations, as it just installs and verifies the software.
Once the package is downloaded, use the commands in the "Configure" section to configure the server:
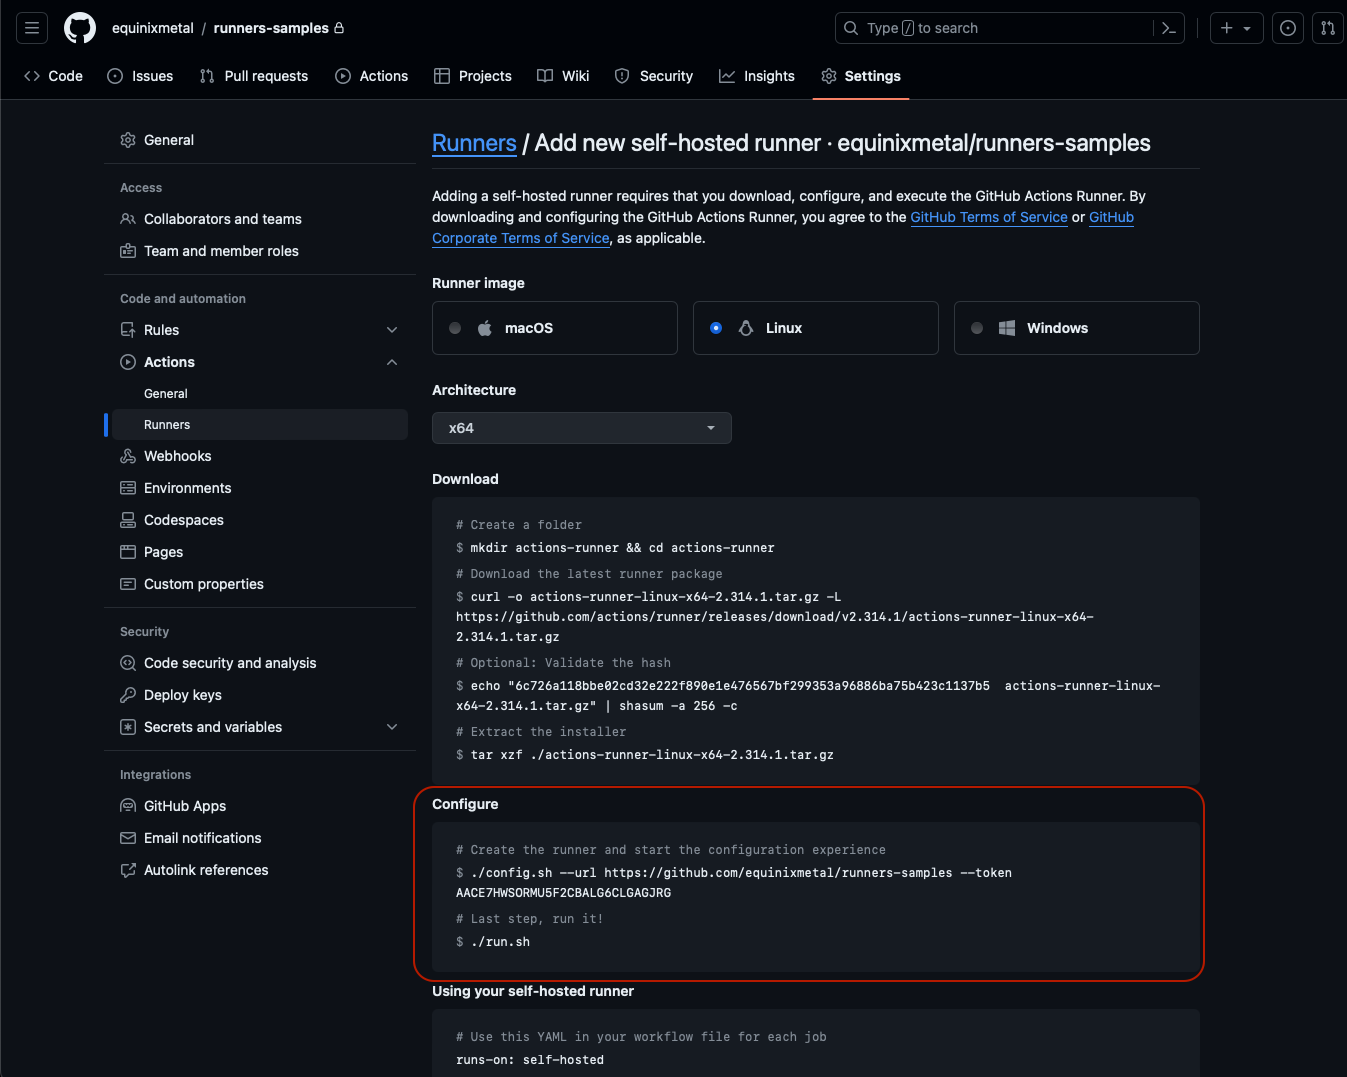
The "Configure" step is where you provide it the key bits of information:
- The URL of the repository or organization
- The security token
The security token in the sample above is short-lived, so don't worry too much about it being exposed here.
Follow the steps:
- SSH into the first server:
$ ssh root@147.75.35.5
Welcome to Ubuntu 22.04.4 LTS (GNU/Linux 5.15.0-97-generic x86_64)
...
root@c3-medium-x86-01:~#
- Create a user for the runner and switch to that user:
root@c3-medium-x86-01:~# useradd -c "GitHub Runner" -s /bin/bash -d /home/runner -m runner
root@c3-medium-x86-01:~# su - runner
runner@c3-medium-x86-01:~$
- Enter the commands in the "Download" section:
runner@c3-medium-x86-01:~$ mkdir actions-runner && cd actions-runner
runner@c3-medium-x86-01:~/actions-runner$ curl -o actions-runner-osx-x64-2.315.0.tar.gz -L https://github.com/actions/runner/releases/download/v2.315.0/actions-runner-osx-x64-2.315.0.tar.gz
runner@c3-medium-x86-01:~/actions-runner$ echo "619c41a338b81f8e4613dad91e6c3c27fd0944e28731a914395879a88097f9f7  actions-runner-osx-x64-2.315.0.tar.gz" | shasum -a 256 -c
actions-runner-osx-x64-2.315.0.tar.gz: OK
runner@c3-medium-x86-01:~/actions-runner$ tar xzf ./actions-runner-osx-x64-2.315.0.tar.gz
- Enter the commands in the "Configure" section:
runner@c3-medium-x86-01:~/actions-runner$ ./config.sh --url https://github.com/equinixmetal/runners-samples --token <your token>
- Start the runner
runner@c3-medium-x86-01:~/actions-runner$ ./run.sh
For your convenience, we put them all right here for you, from right after you ssh in. Remember that yours may vary, based on the version of the runner software, the security token and the repository.
useradd -c "GitHub Runner" -s /bin/bash -d /home/runner -m runner
su - runner
mkdir actions-runner && cd actions-runner
curl -o actions-runner-linux-x64-2.314.1.tar.gz -L https://github.com/actions/runner/releases/download/v2.314.1/actions-runner-linux-x64-2.314.1.tar.gz
echo "6c726a118bbe02cd32e222f890e1e476567bf299353a96886ba75b423c1137b5  actions-runner-linux-x64-2.314.1.tar.gz" | shasum -a 256 -c
tar xzf ./actions-runner-linux-x64-2.314.1.tar.gz
./config.sh --url https://github.com/equinixmetal/runners-samples --token AACE7HWSORMU5F2CBALG6CLGAGJRG
./run.sh
Repeat the steps on the other servers.
Once the servers are configured, return to the "Runners" section of the GitHub repository settings, and check that all of the runners are listed:
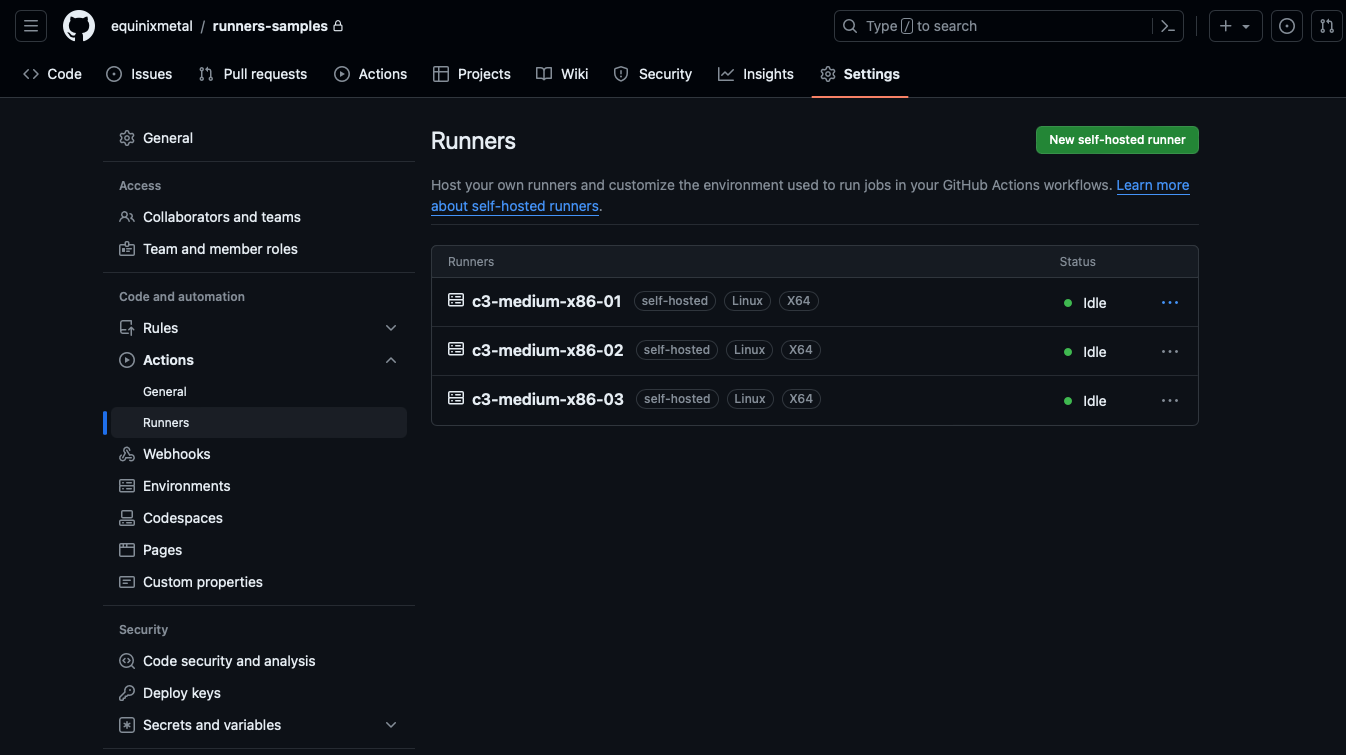
Each one has a name by which it can be referenced, but also three labels: the group self-hosted, and an
automatically-generated label for the operating system Linux and architecture X64.
GitHub supports multiple methods for grouping together self-hosted runners, and using those groupings for determining which runners are selected for which jobs. This guide didn't use those, but it is a powerful feature.
You can use labels to apply arbitrary data to runners. You then can select which groups of runners should get those jobs by labels. This can be useful if you want to manage the allocation of jobs by characteristics, for example, those with special network access or devices such as GPUs.
You also can use groups, including applying policies to each group, controlling access. This can be useful for security or cost allocation purposes.
For simplicity sake, you didn't use labels or groups here. Rather, you let your runners join the default group.
4. Create a workflow that uses the runners
Finally, create a workflow for the repository that uses these runners. This sample workflow is simple intentionally; your actual workflows may be more complex. You will just check operating system information and IP addresses.
Create a file .github/workflows/runner-info.yml with the following content:
name: Runner Info
on:
  workflow_dispatch:

jobs:
    runner-info:
        runs-on: self-hosted
        steps:
        - name: Check OS
          run: |
            cat /etc/os-release
            uname -a
        - name: Check IP
          run: |
            ip a
This workflow will run on the self-hosted group of runners, and will execute two steps: one to check the operating
system, and one to check the IP address. Because it launches on: workflow_dispatch, it will only run when you
launch it explicitly.
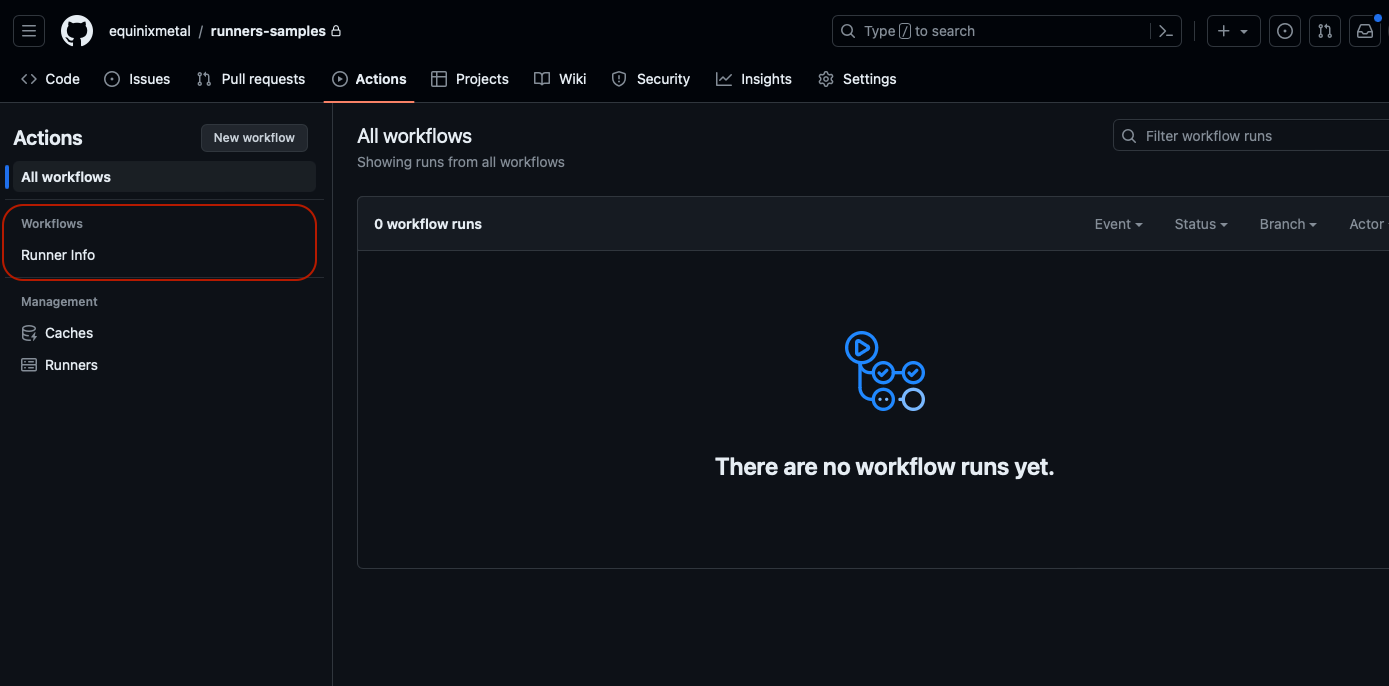
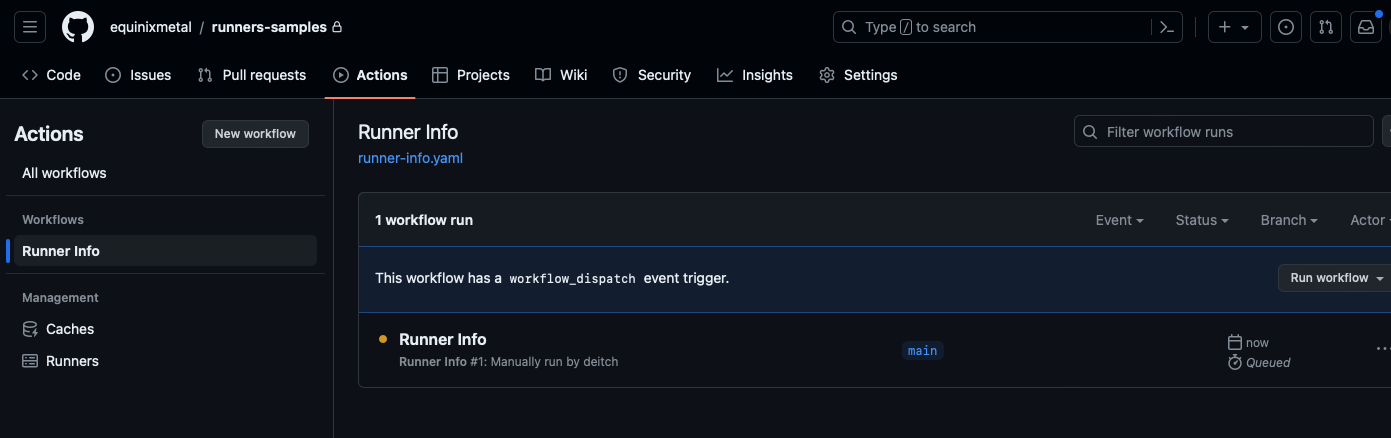
Check this file into your repository, and go to the "Actions" tab to execute it.
Click "Run workflow" dropdown, and then "Run workflow" button inside the dropdown.
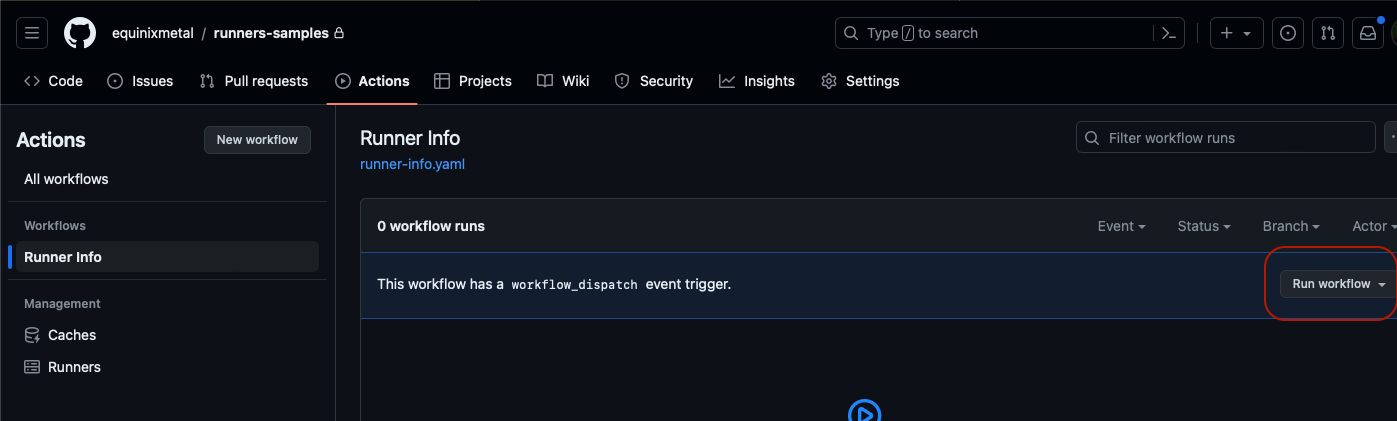
Click on the name of the workflow - "Runner Info" - again to see it running.
When the workflow is complete, it displays a green checkmark if successful, or red if there are errors.
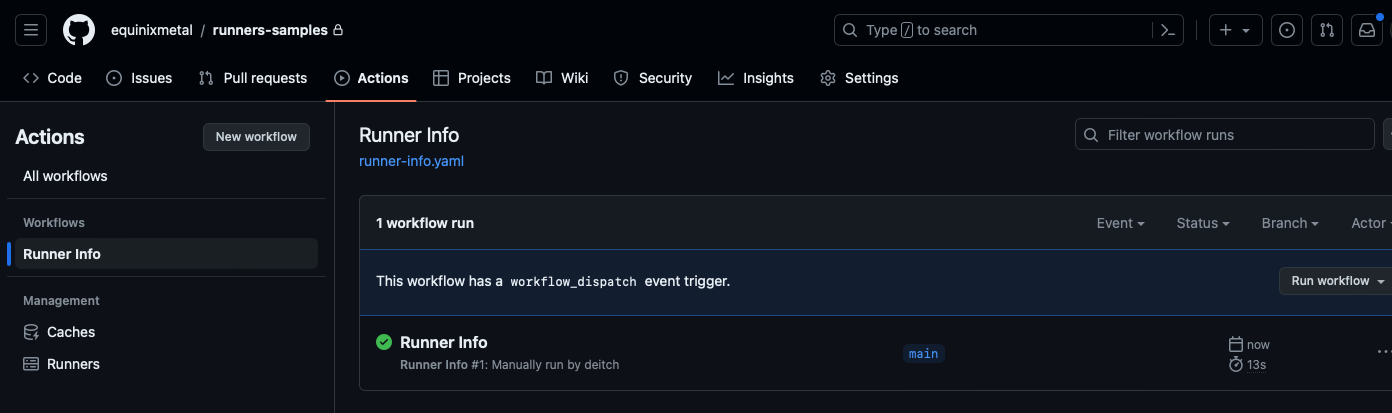
Click the workflow to see the output.
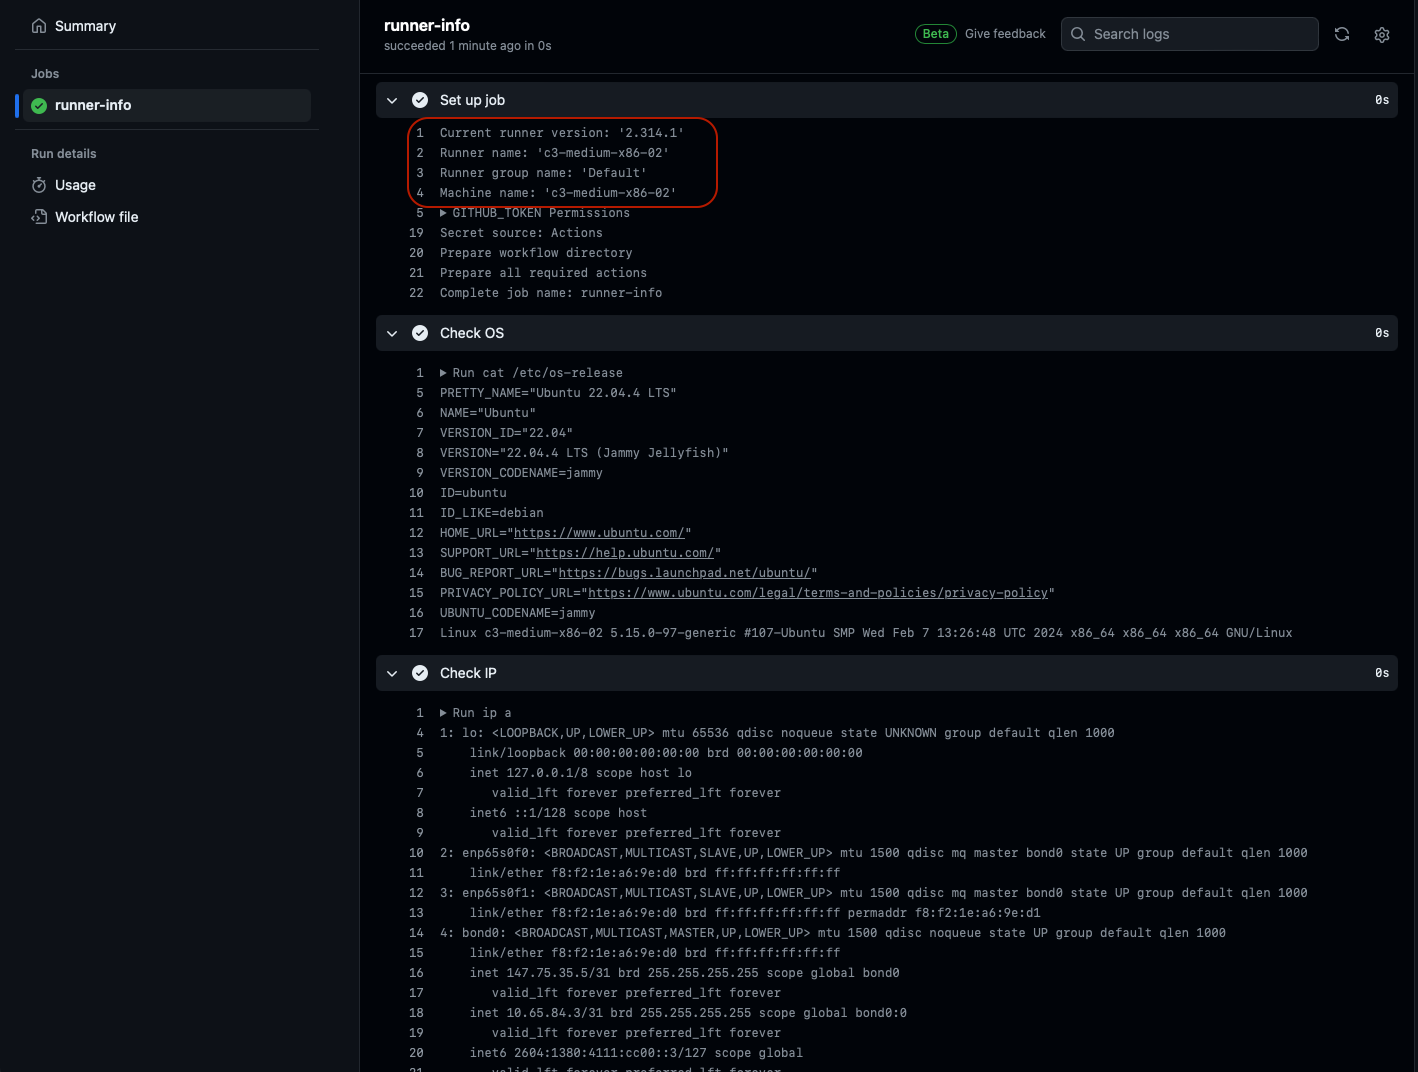
The name of the runner is highlighted in the output, so you can see which server executed it.
You now have set up a pool of Equinix Metal servers to be used as persistent GitHub Actions runners. You can add and modify the Actions as needed to manage your CI/CD workflows.
Last updated
25 June, 2024Category
Tagged
ArticleYou may also like
Digger deeper into similar topics in our archives
Configuring BGP with BIRD 1.6 on an Equinix Metal Server
Set up BGP on your Equinix Metal server using BIRD 1.6, covering IP configuration, installation, and neighbor setup to ensure robust routing capabilities between your server and the Equinix...

Configuring BGP with FRR on an Equinix Metal Server
Establish a robust BGP configuration on your Equinix Metal server using FRR, including setting up network interfaces, installing and configuring FRR software, and ensuring secure and efficie...

Crosscloud VPN with Wireguard
Learn to establish secure VPN connections across cloud environments using WireGuard, including detailed setups for site-to-site tunnels and VPN gateways with NAT on Equinix Metal, enhancing...

Deploy Your First Server
Learn the essentials of deploying your first server with Equinix Metal. Set up your project & SSH keys, provision a server and connect it to the internet.

Ready to kick the tires?
Use code DEPLOYNOW for $300 credit