- Home /
- Resources /
- Learning center /
- Deploy VMware ESXi...
Deploy VMware ESXi on Equinix Metal with Layer2
Learn how to use a VMware ESXi deployment on Equinix Metal in Layer 2 unbonded trunk mode

Equinix Metal is a globally accessible bare metal-as-a-service that offers automated, interconnected, and low-latency infrastructure. It is specifically designed to empower digital businesses with scalable, secure, integrated, and on-demand infrastructure across Platform Equinix.
Equinix Metal provides extensive support for ESXi deployment, allowing you to install it as an operating system on various x86-based bare metal server configurations. By utilizing VMware ESXi, you can conveniently partition your server into virtual machines, enabling efficient resource allocation and management.
The purpose of this document is to present a step-by-step procedure for enabling customers to utilize VMware ESXi deployment on Equinix Metal, leveraging the recently introduced Layer 2 unbonded trunk mode. This new mode enables the allocation of identical VLANs to both the eth0 and eth1 interfaces.
When provisioning servers with L2 unbonded trunk mode, default IP provisioning is disabled. As a result, customers are responsible for self-provisioning IP addresses on server interfaces using the SOS (Self-Service Portal) system.
The objective of this guide is to outline the usage of Metal ESXi server in conjunction with the Layer 2 Unbonded trunk mode, enabling the assignment of identical tagged VLANs to both the eth0 and eth1 network interfaces. The document will provide detailed instructions on utilizing the VMware vSphere Cluster wizard to add servers and configure Distributed Networking specifically for Metal servers.
(Note: The screenshots of the Equinix Metal console in this guide are not up-to-date. There will be some differences in the UX as you step through the guide. However, the intention and overall strategy of the technical steps remain the same.)
(Another Note: If you're interested in automating some parts of this guide with Terraform, check out the equinix-metal-vcf Terraform module that the Equinix Labs team maintains.)
Implement Metal servers using the VMware VCF Operating System Option
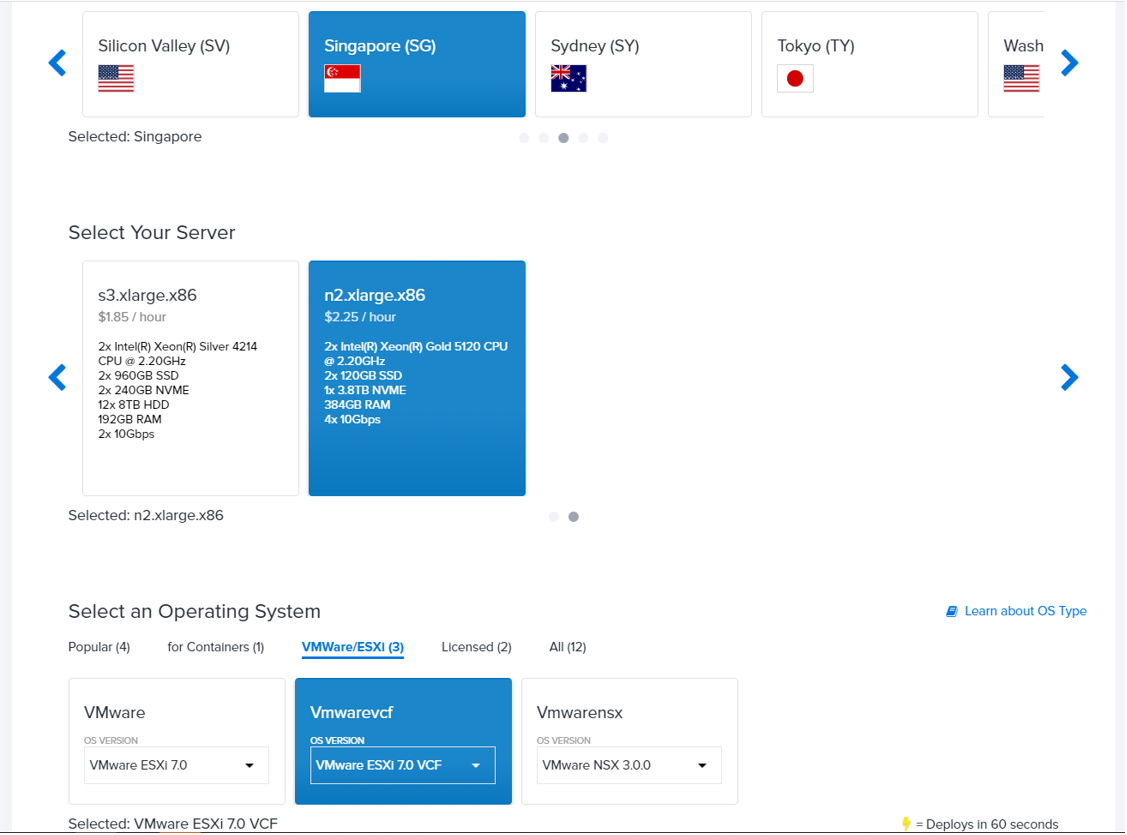
Initiate the deployment of an Equinix Metal server through the Metal Portal. Choose the desired location site for the deployment. Select the appropriate server instance type and Operating System according to your requirements.
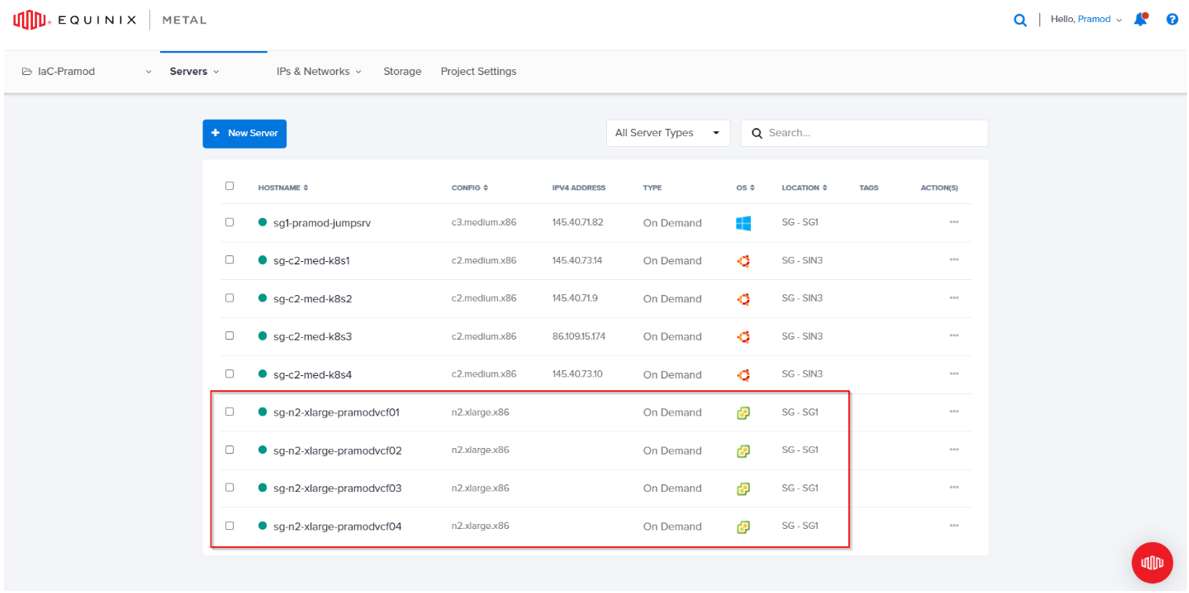
Specify the desired quantity of servers for deployment and assign suitable names to each server.
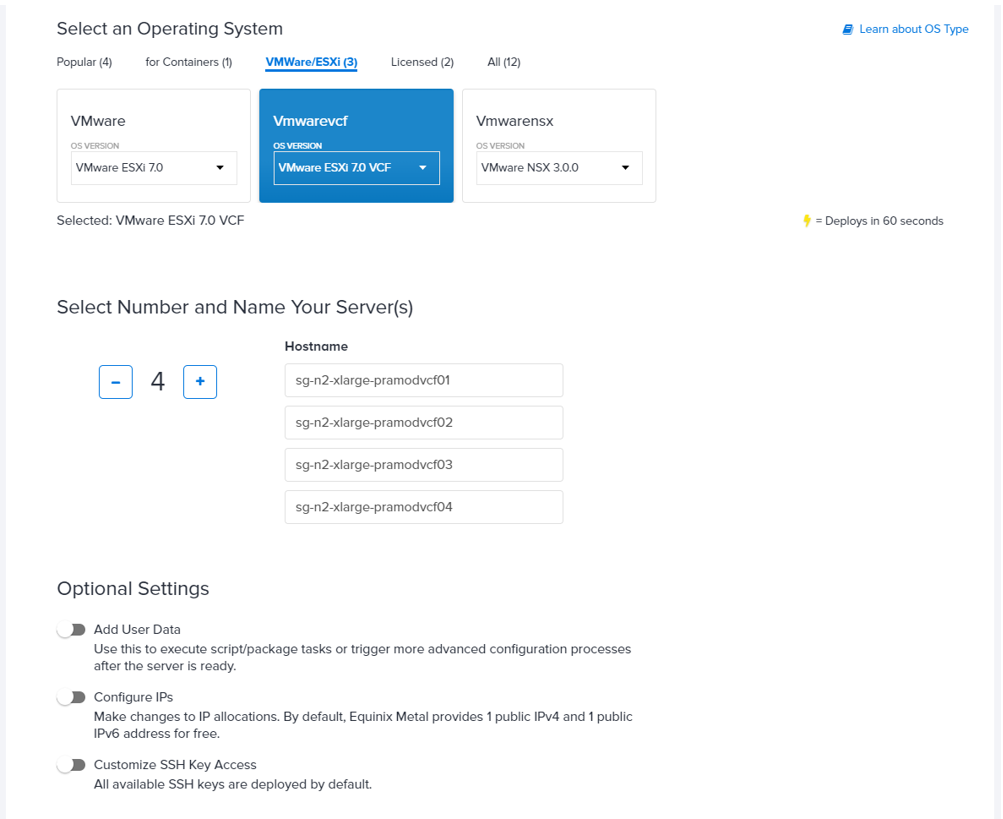
In this new mode, the deployment of servers does not include any pre-assigned IP addresses. Default IP provisioning is deactivated for servers provisioned with L2 unbonded trunk mode.
Configure Metal server Network interfaces with VLANs and IPs
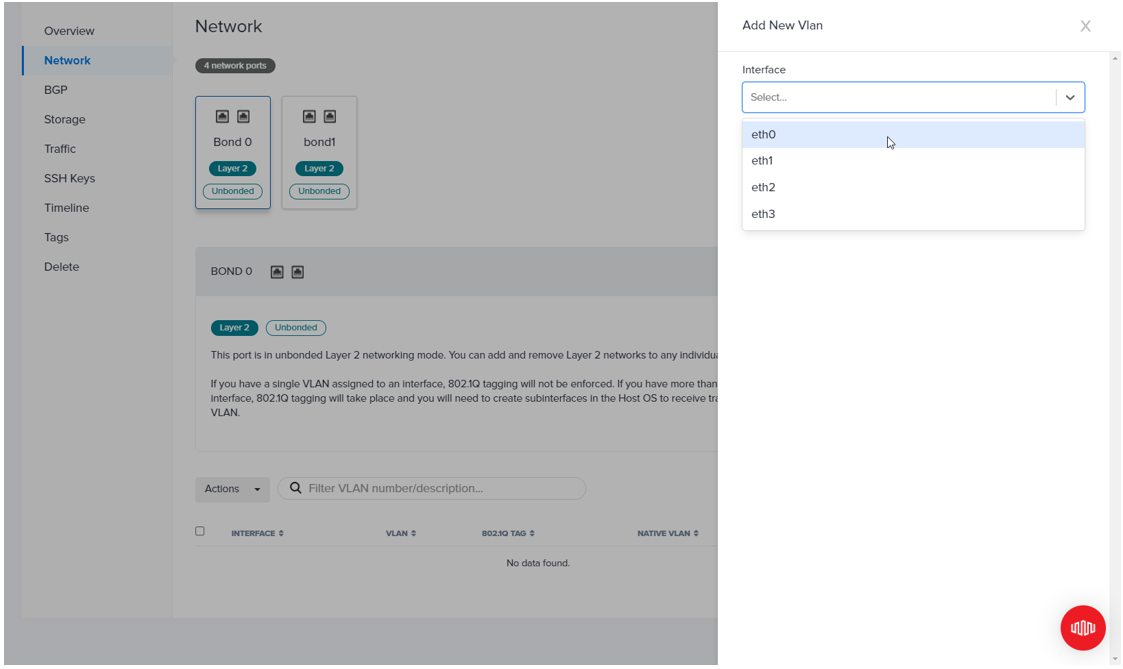
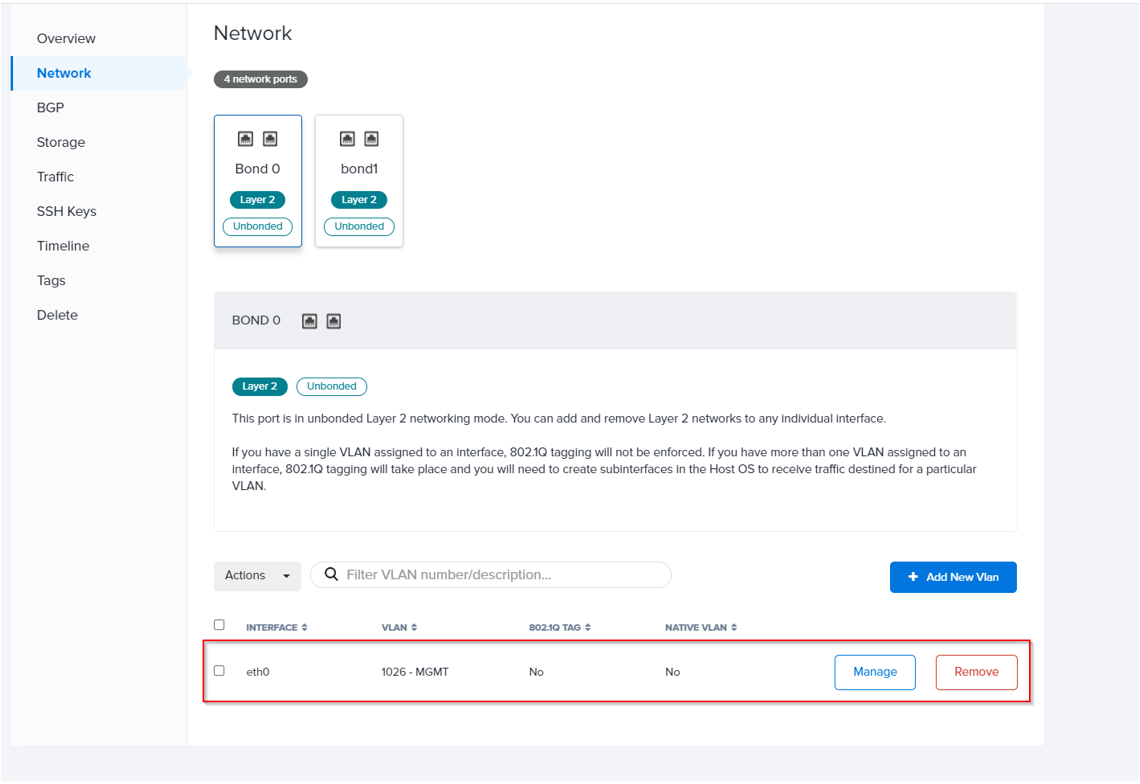
After the servers have been prepared, you can proceed to assign VLANs to their network interfaces. To accomplish this, navigate to the Server Network Interfaces section and select Add New VLAN to begin the process.

Choose the eth0 interface to add the VLAN.
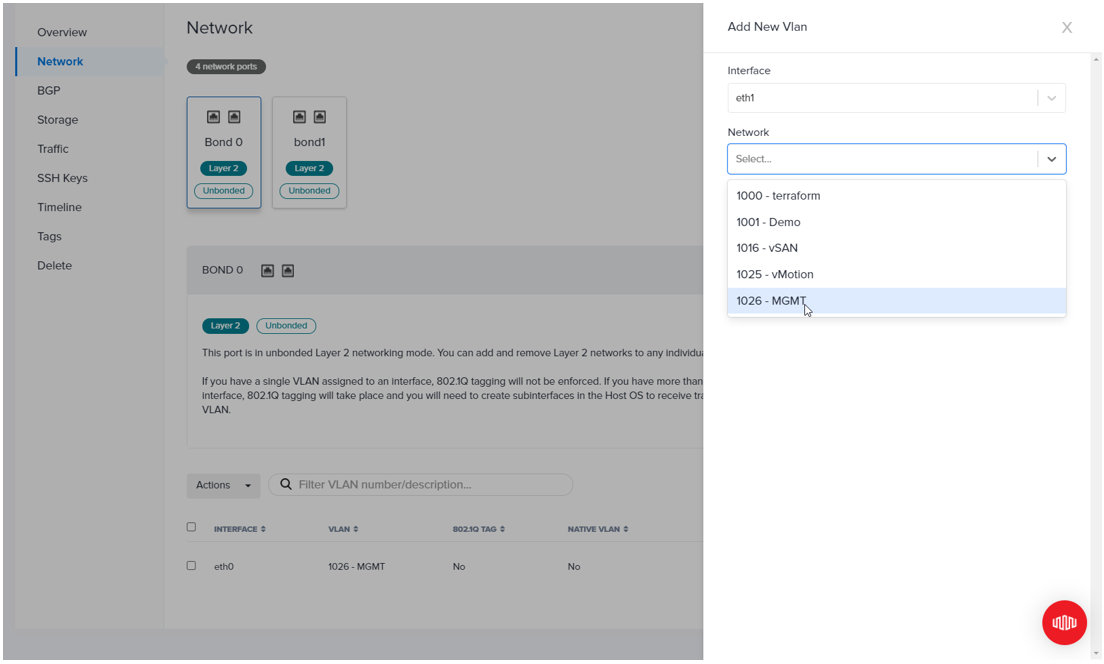
Choose the VLAN that you wish to add to the eth0 interface.

Take note that the VLAN has been successfully added to the eth0 interface.
Now, let's proceed to add the identical VLAN to the eth1 interface.
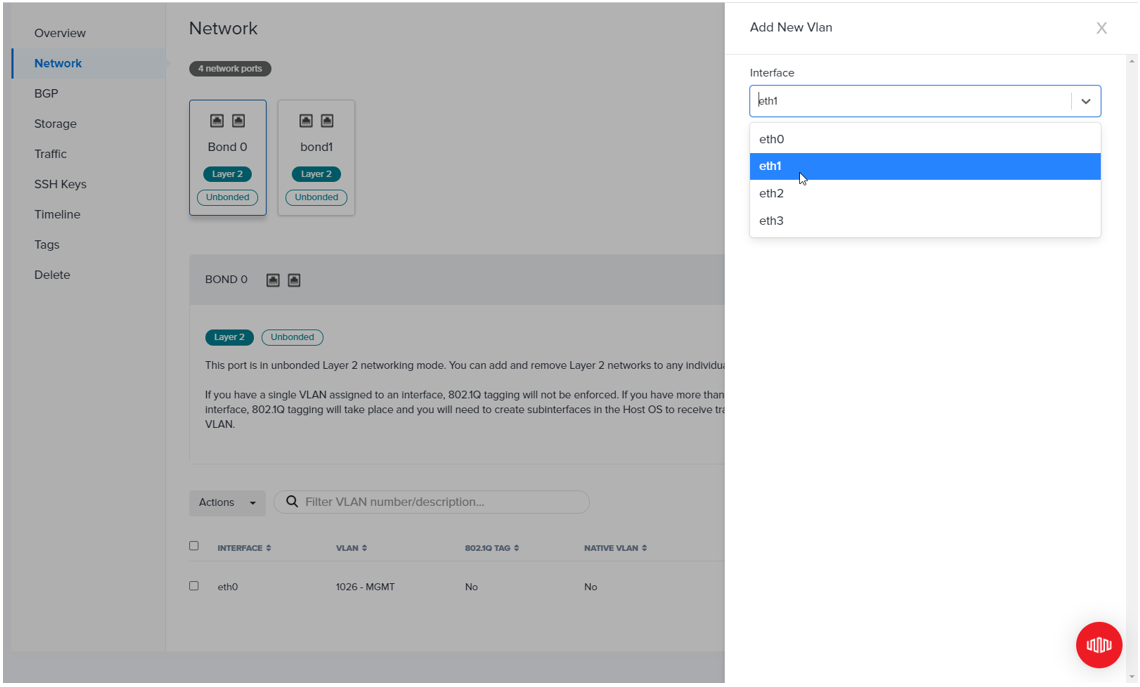
Select the eth1 interface and add the same VLAN to it.
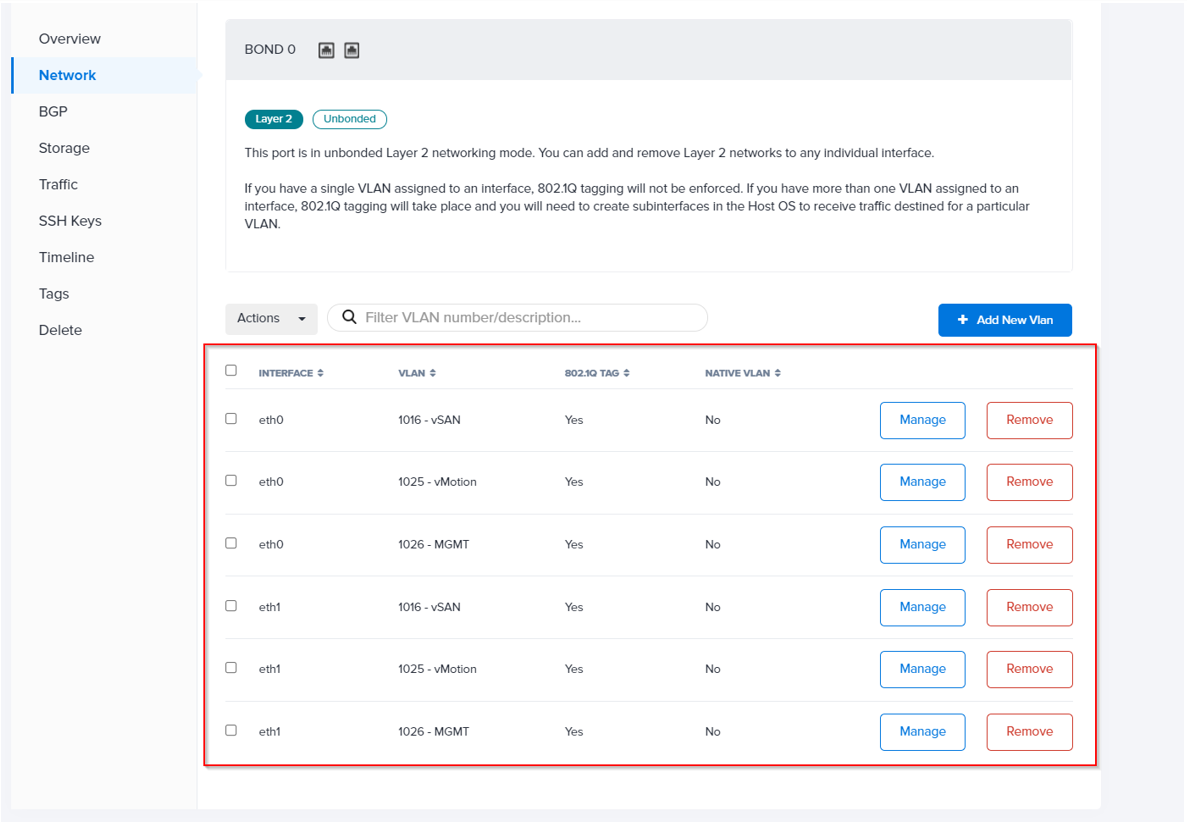
In this step, you will observe that the VLAN 1026 has been successfully added to both network interfaces, namely eth0 and eth1.
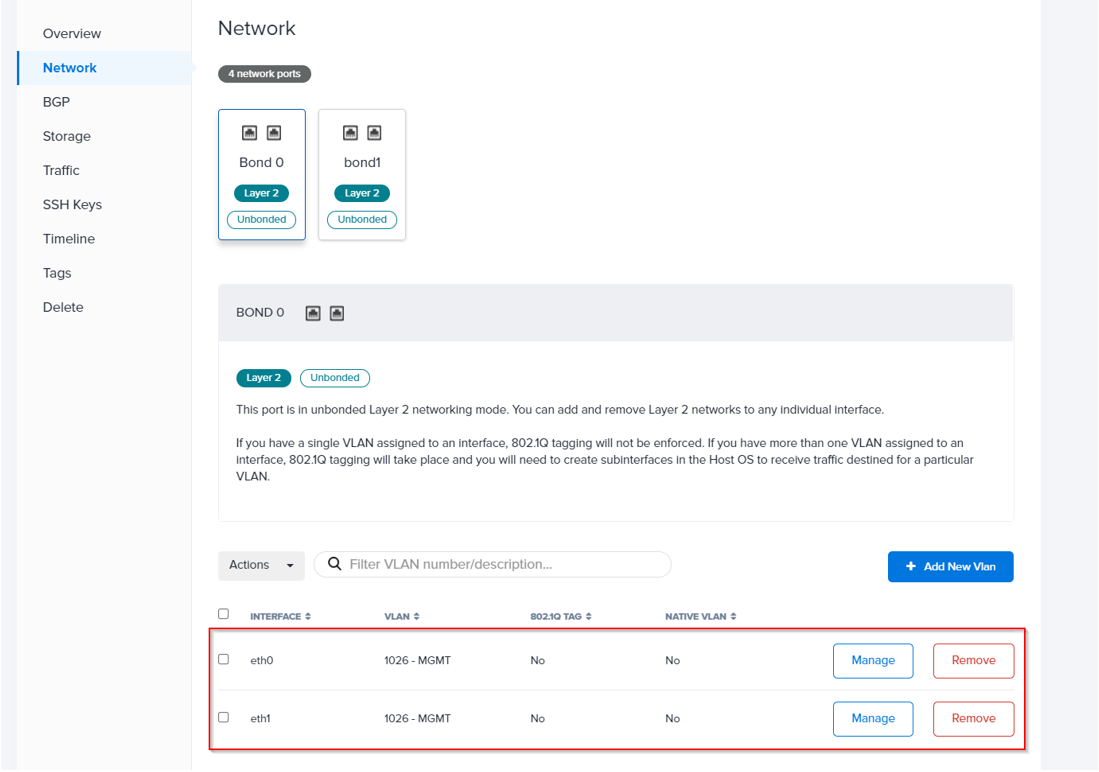
Optional: If you require the addition of multiple VLANs on the same interface, it is indeed possible. Initially, when only a single VLAN is assigned to the eth0 interface, the 802.1Q TAG status will display as 'No'. However, as you add more VLANs to eth0, the tag flag will change to 'Yes'.
It's important to note that if you have a single VLAN assigned to an interface, 802.1Q tagging will not be enforced. However, if you assign more than one VLAN to an interface, 802.1Q tagging will be implemented.
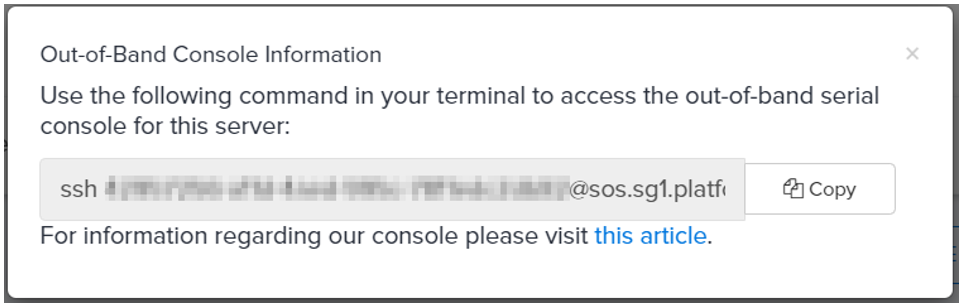
Next, we will establish a connection to the server using the "OUT-OF-BAND CONSOLE" feature and proceed to assign a custom private Management IP. Make sure to copy the SSH root password and securely save it in a notepad. Please note that the password will no longer be visible on the Metal portal after 24 hours. It is highly recommended to rotate the password immediately after the deployment. To access the server's console, click on "OUT-OF-BAND CONSOLE" and copy the provided SSH command.
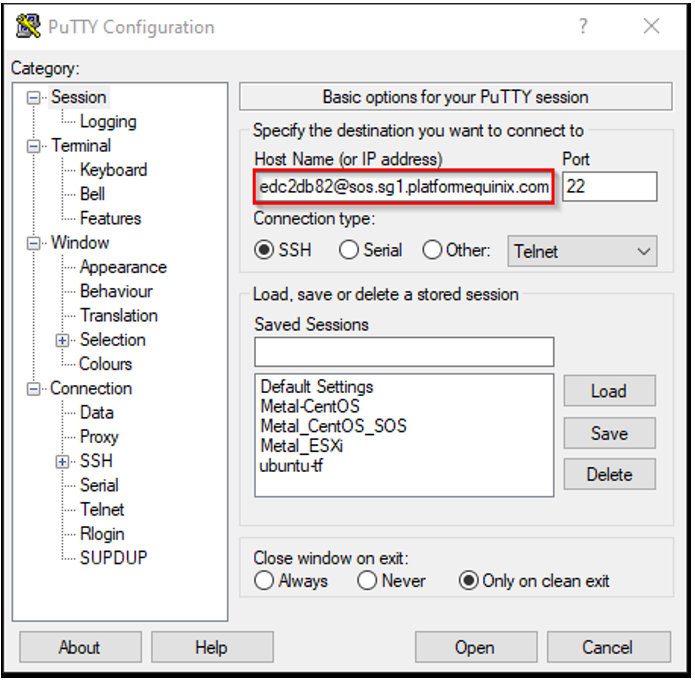
Utilize a terminal client such as Putty to access the console. When using the Putty client, ensure that you select a private PPK file corresponding to your User Profile and the SSH keys configured on the Portal.
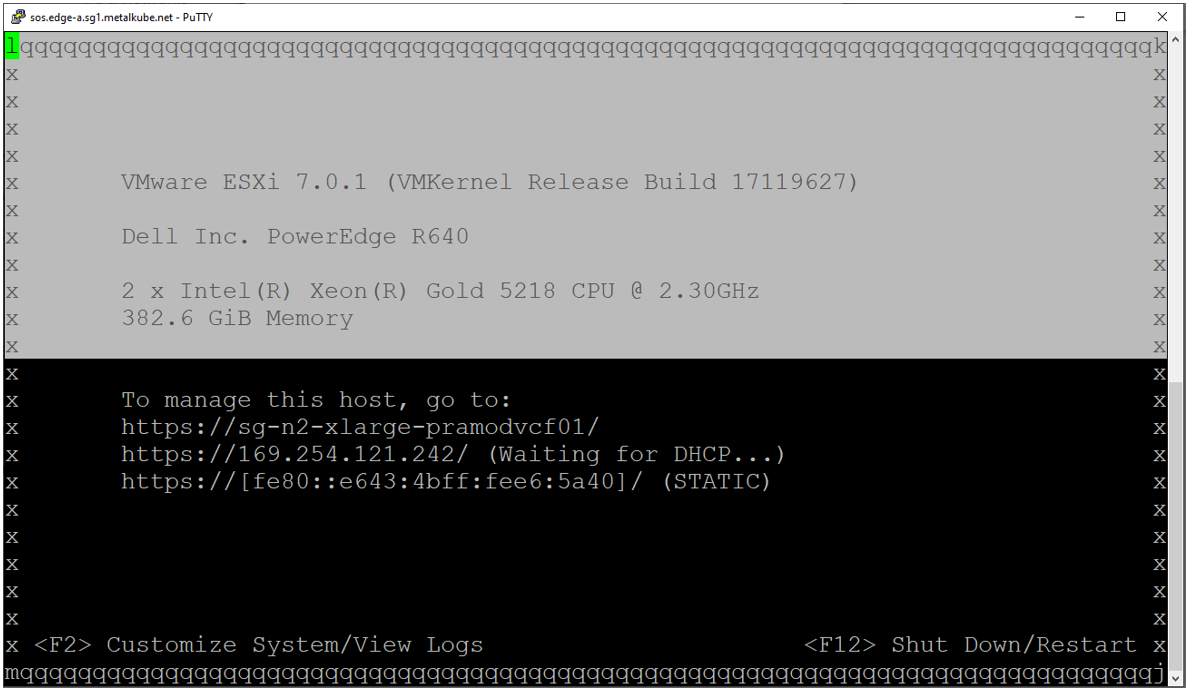
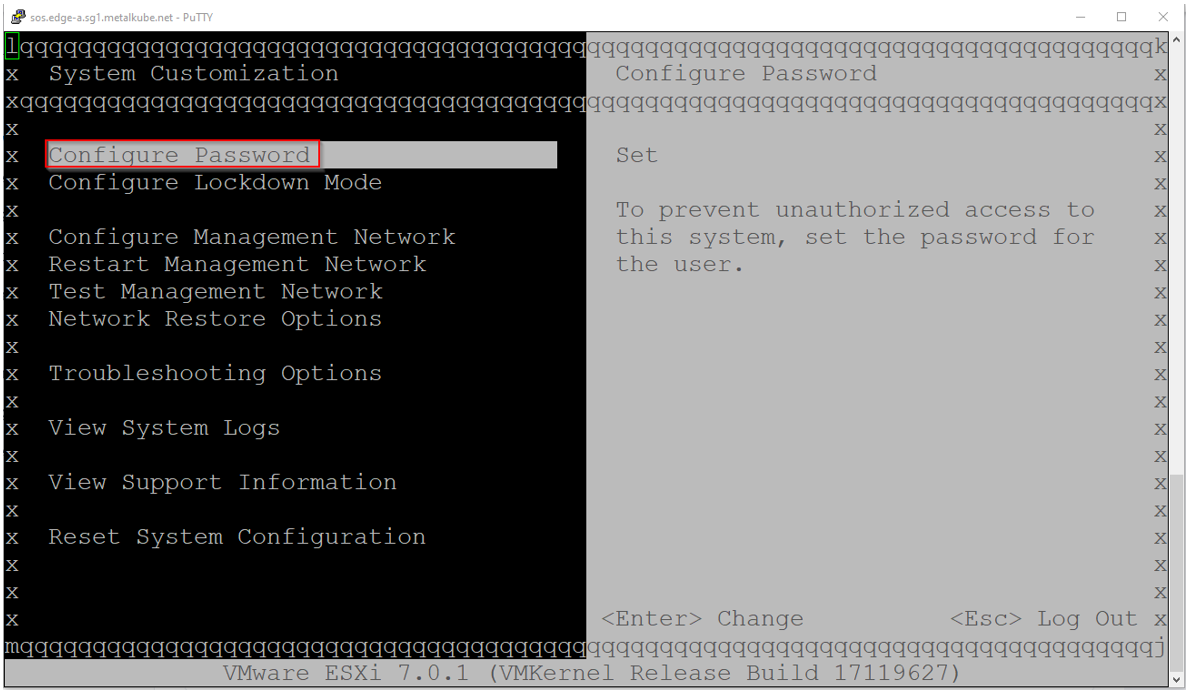
After successfully establishing a connection to the Server Console, press the F2 key to initiate the rotation of ESXi passwords and configure the Custom Private Management IPs.
Choose the Configure Password option to set a new password.
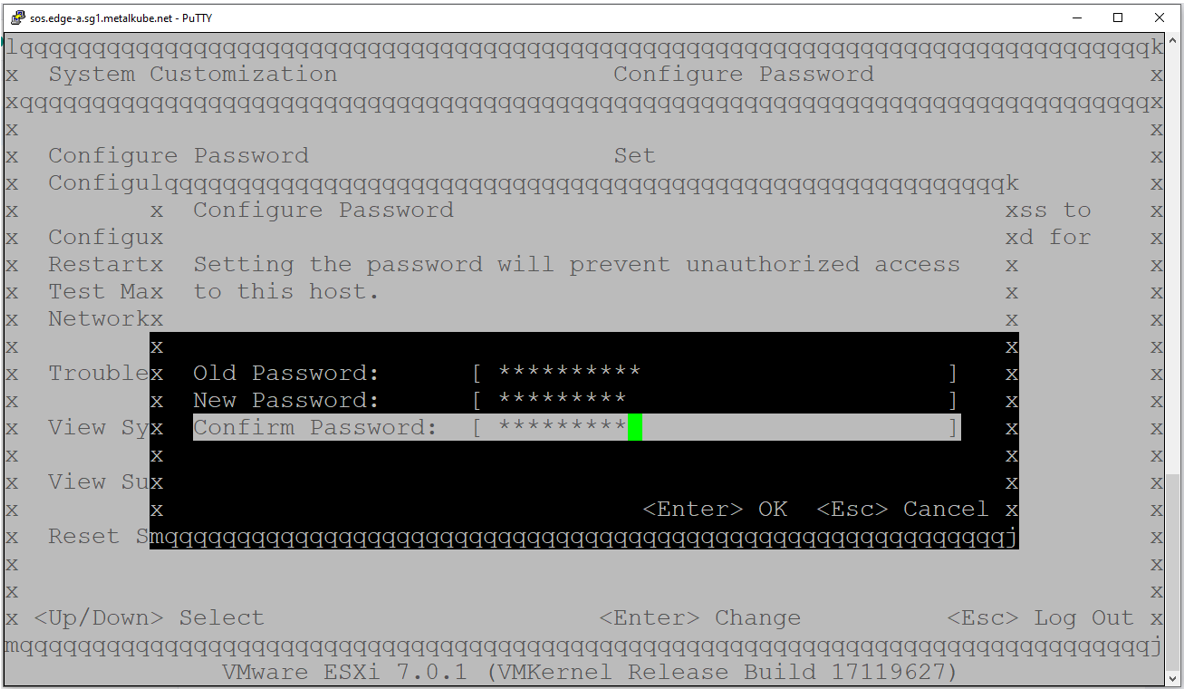
Enter the Old Password and specify the New Password.
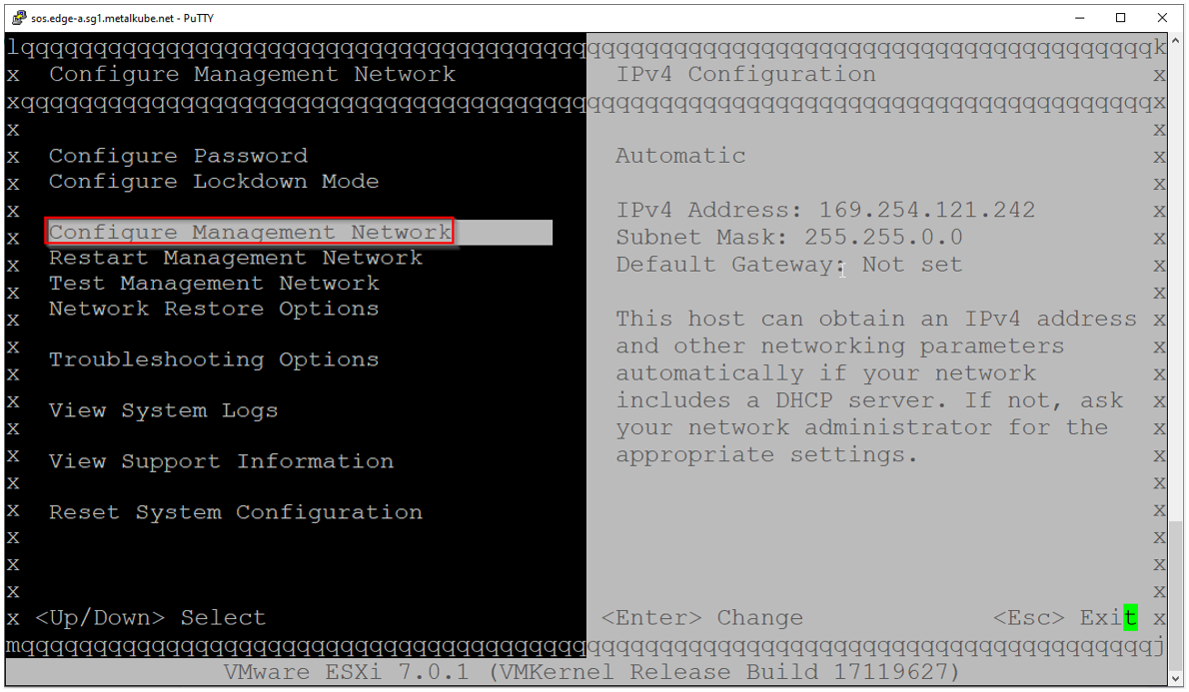
Choose the Configure Management Network option to configure the new Custom Private Management IP.
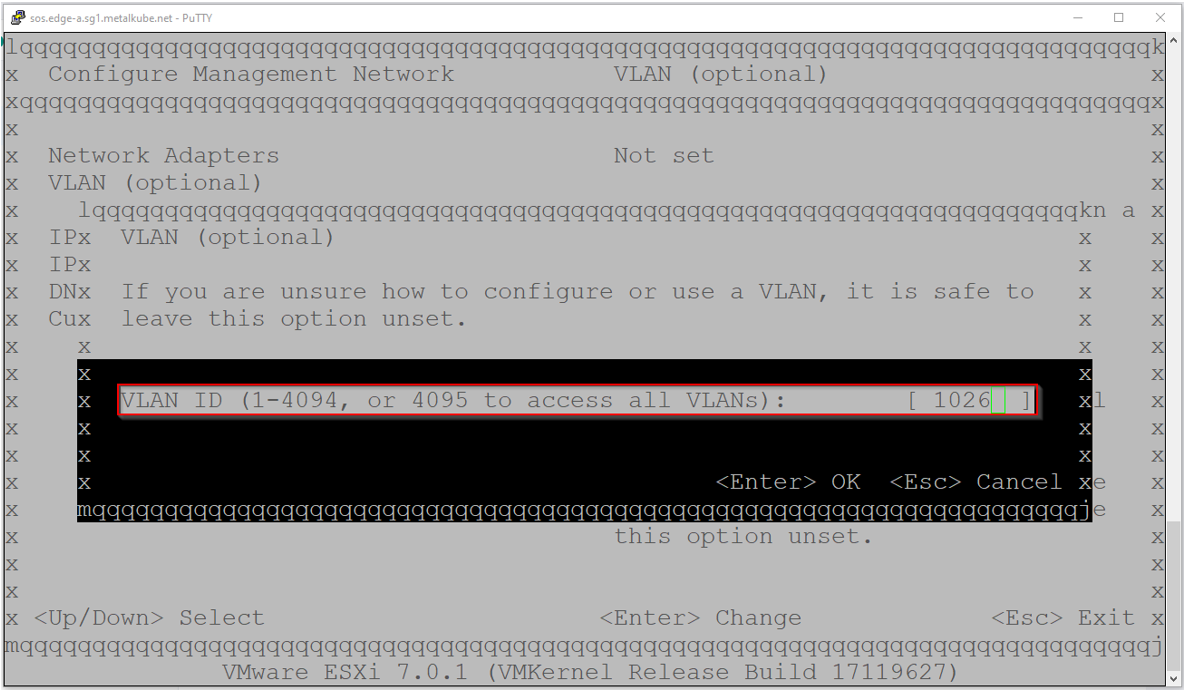
Optional: If applicable, click on the VLAN option and specify the VLAN for your Management subnet. This step is not necessary if you are using non-tagged VLANs.
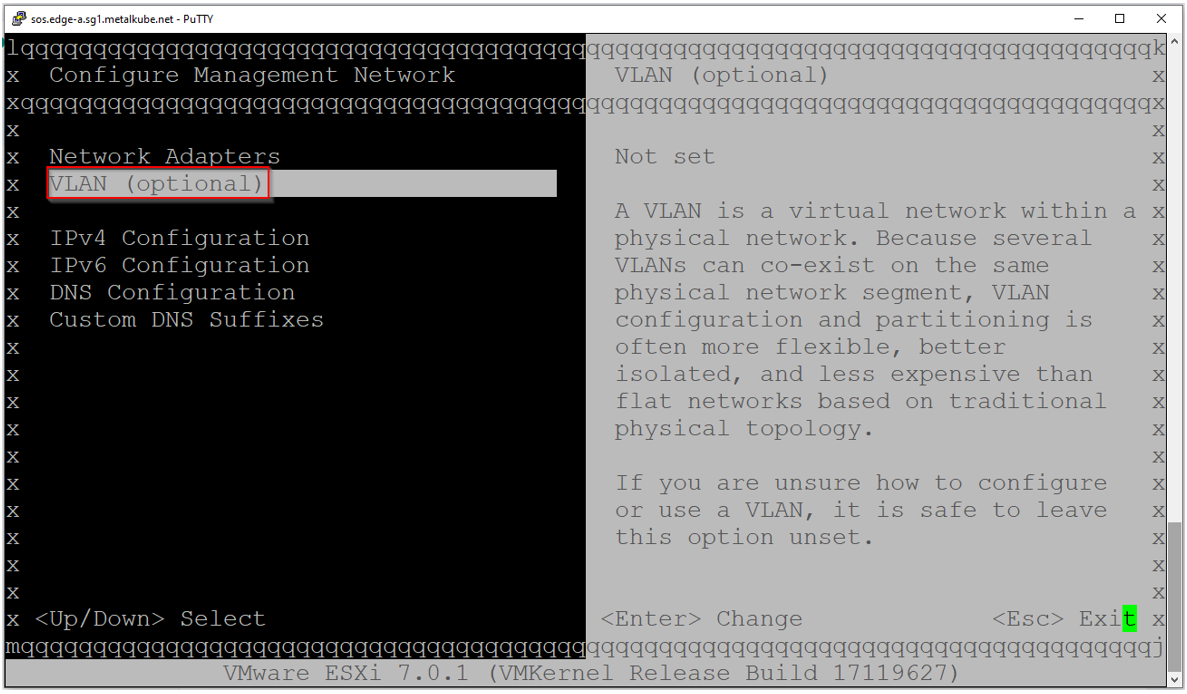
Specify the VLAN ID for your Management VLAN.
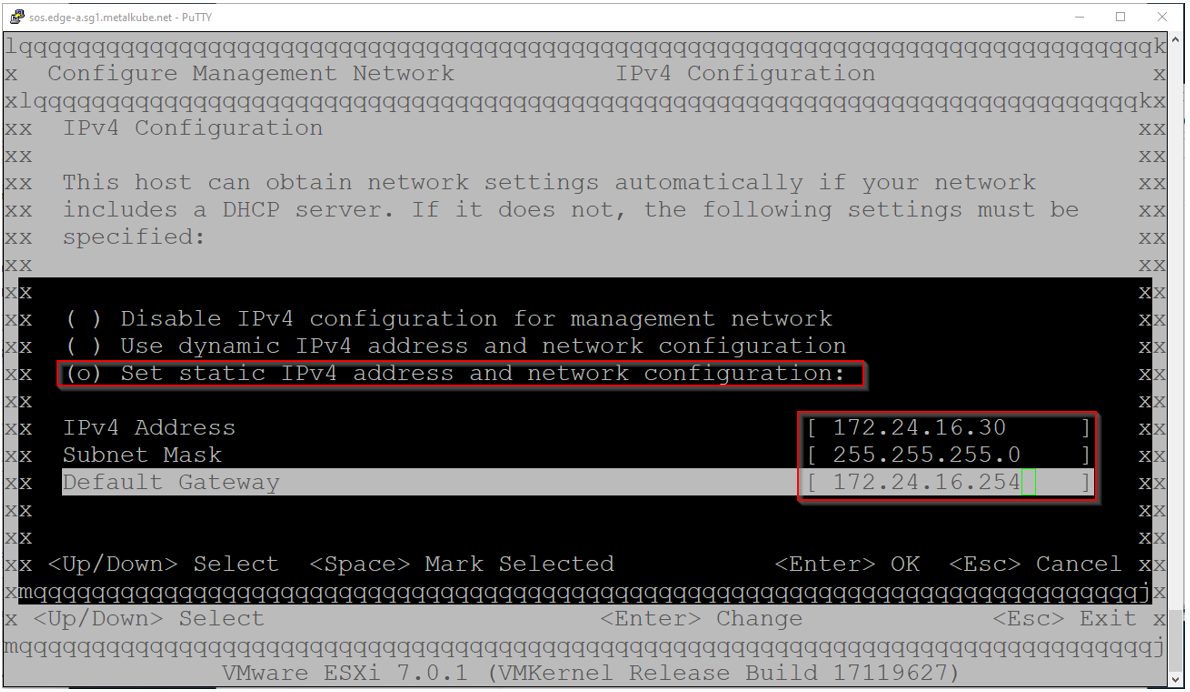
Next, navigate to the IPv4 Configuration section and proceed to assign the Custom Private Management IP.

Assign the Custom Private IP address, Subnet Mask, and Default Gateway for the Management network.
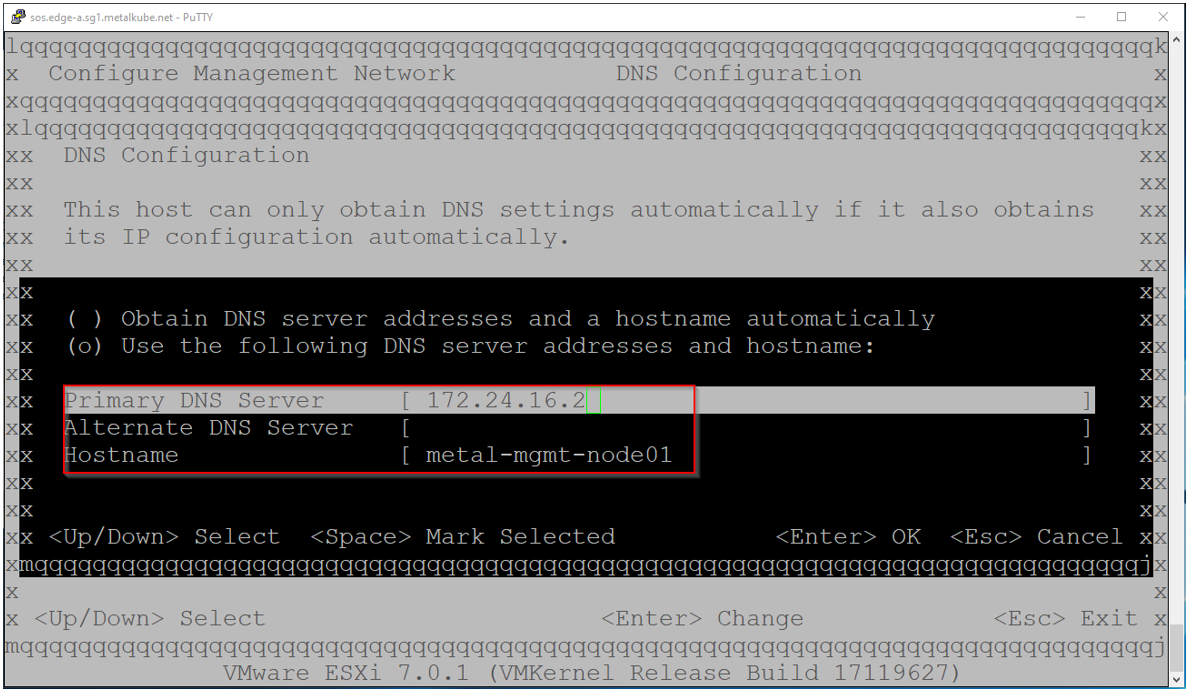
Additionally, you have the option to configure the server to use your DNS servers for name resolution. To do this, select DNS Configuration and enter the IP addresses of your DNS servers along with the desired hostname for the server.
To ensure the functionality of the management network and name resolution, you can perform a test by selecting the Test Management Network option.
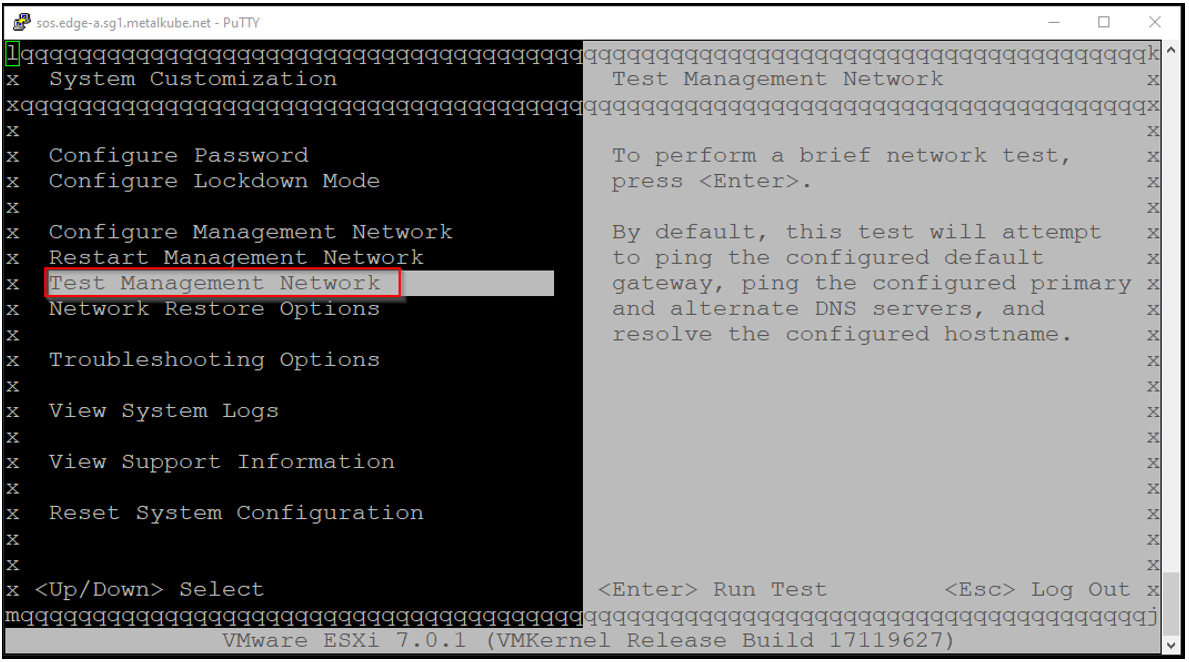
Below is the output indicating a successful test:
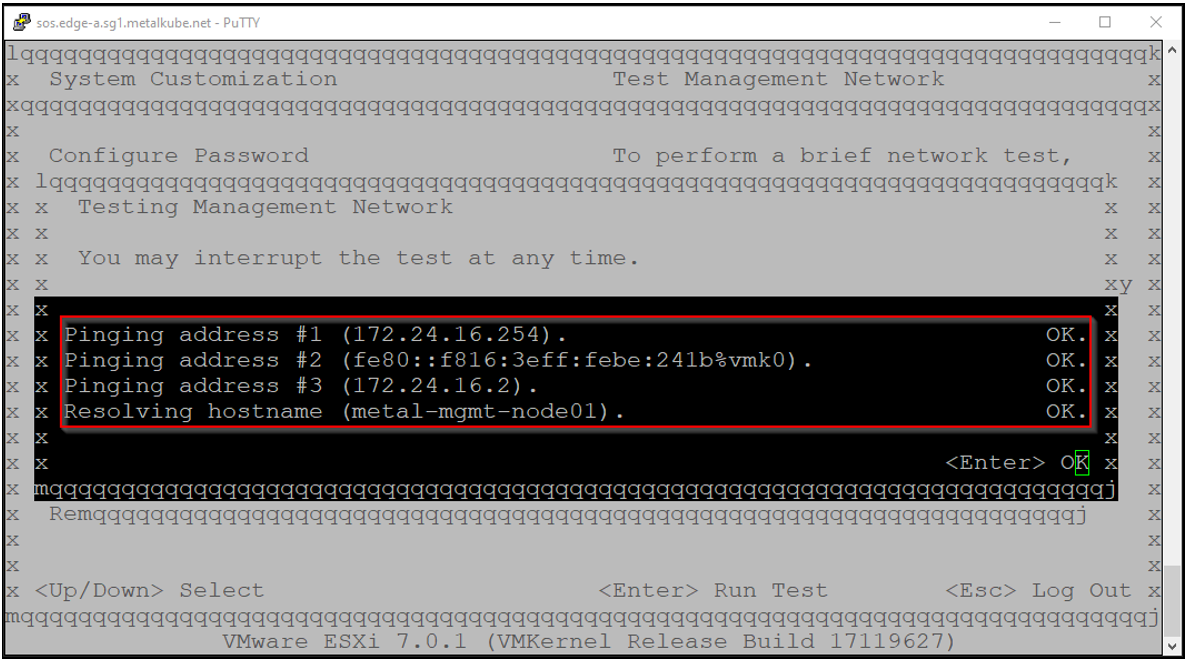
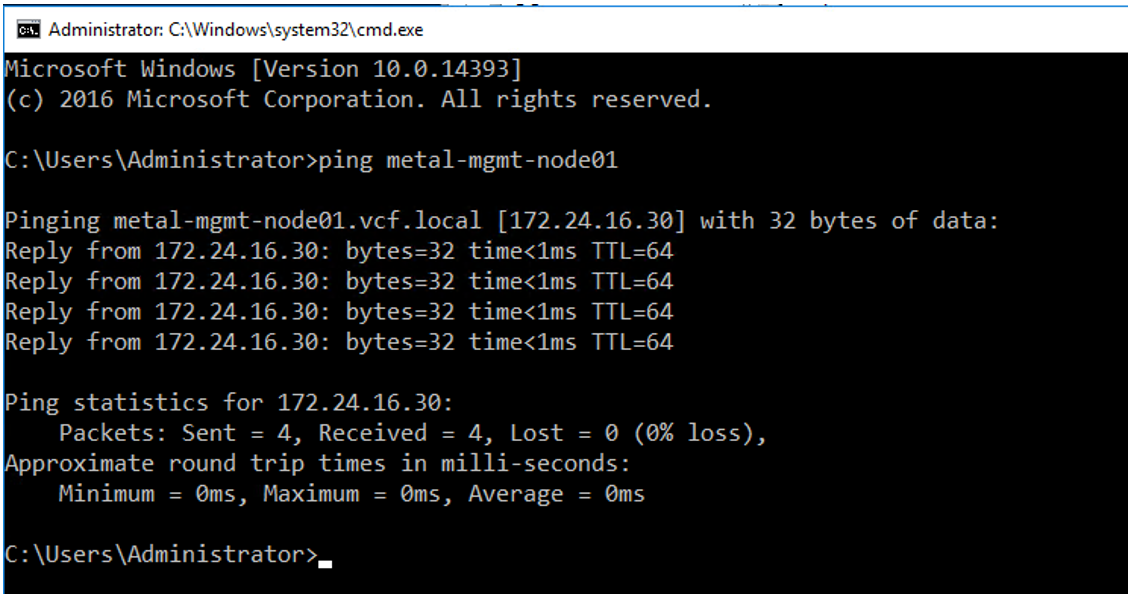
You can conduct an ICMP ping test to verify connectivity with the custom private management IP of the Metal ESXi server.
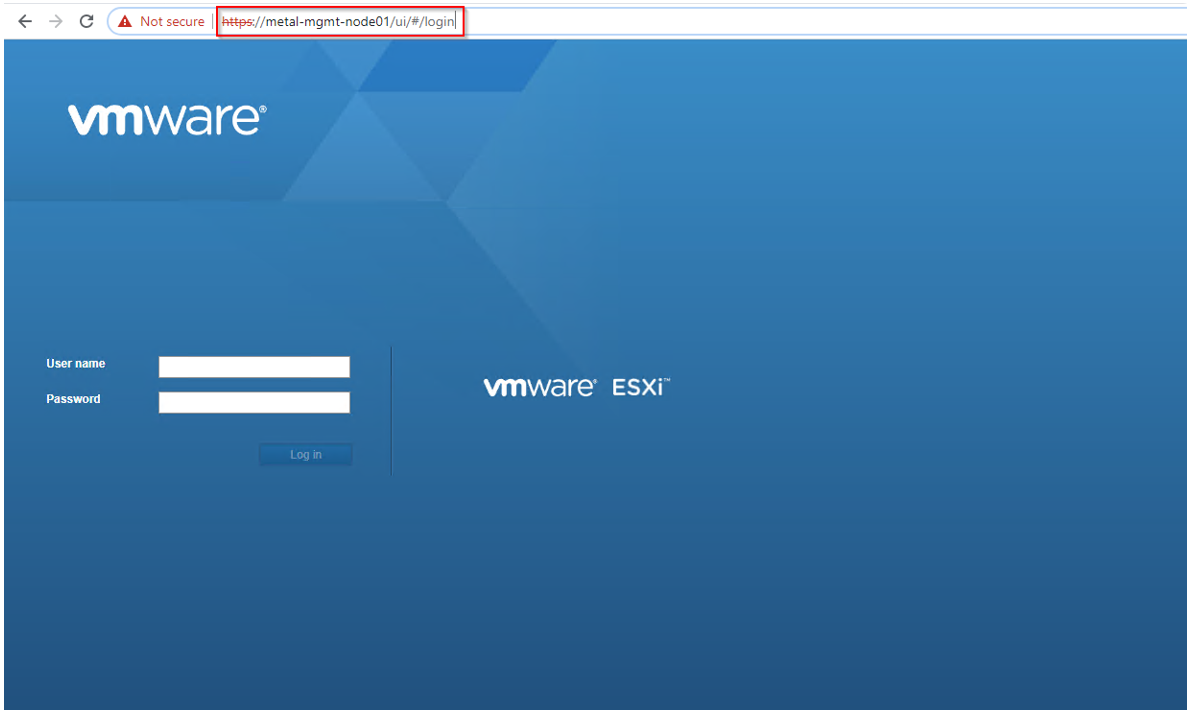
You can now access the ESXi UI by using either the server's management IP or the hostname assigned in the previous step.
Configure vCenter Cluster & Distributed Networking using Cluster QuickStart Wizard
Proceed to access the VMware vCenter UI and establish a Datacenter and Cluster according to your requirements.
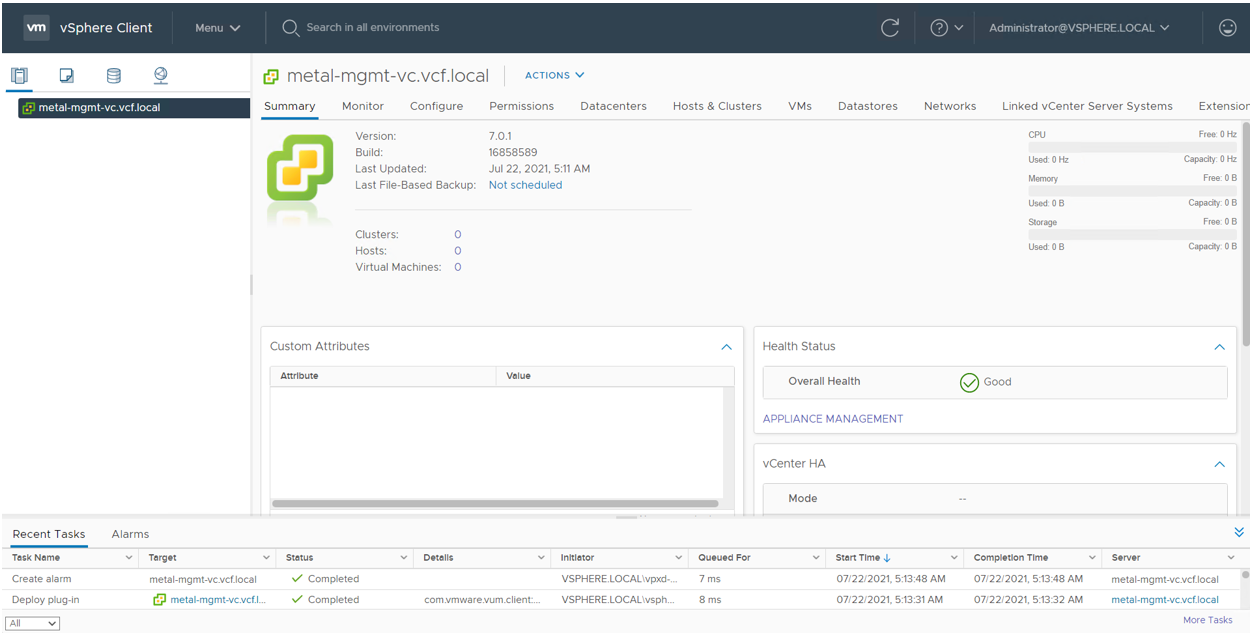
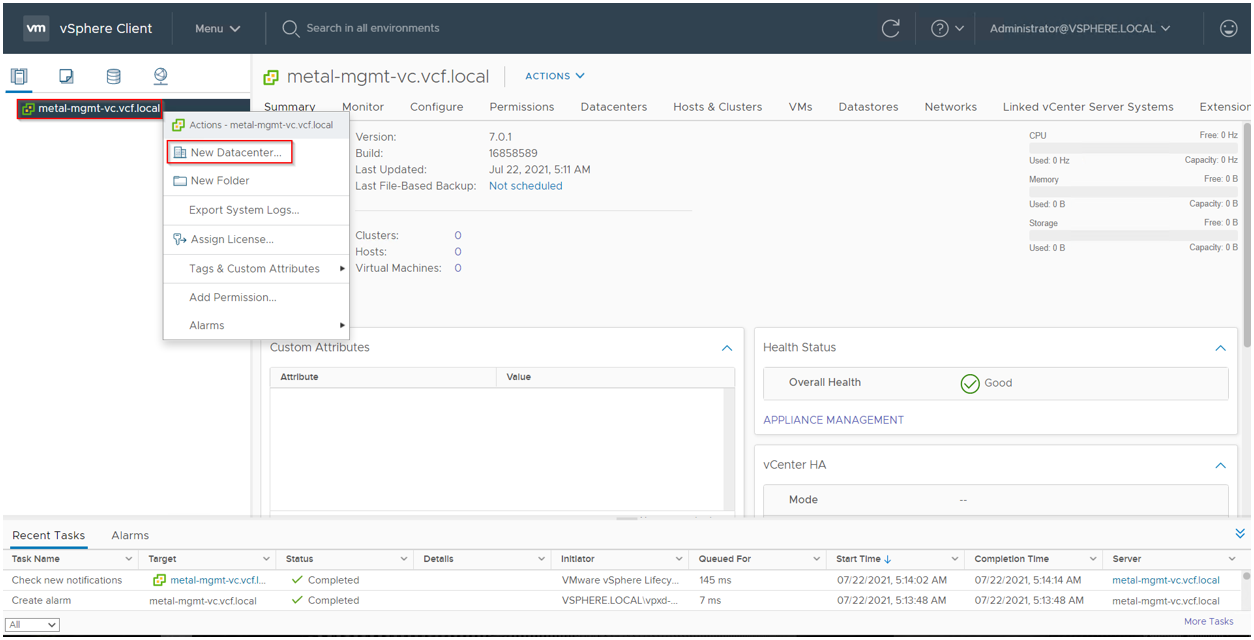
Prior to executing the Cluster QuickStart Wizard, it is necessary to create a Datacenter and Cluster name objects. To achieve this, follow these steps:
-
Right-click on the vCenter host.
-
Choose the option New Datacenter to create a new Datacenter object.
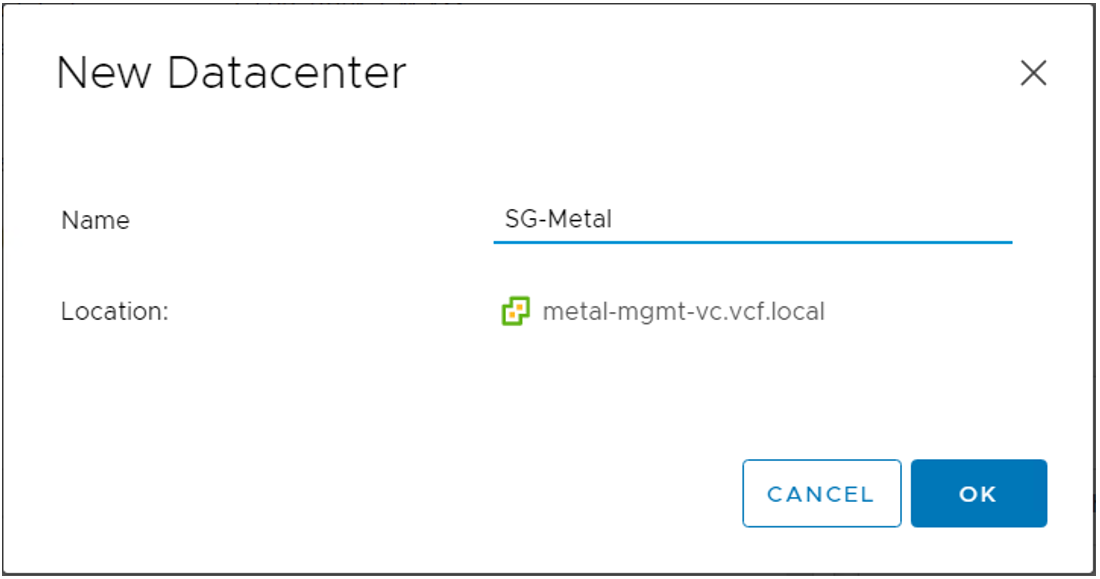
Assign a name to your Datacenter object.
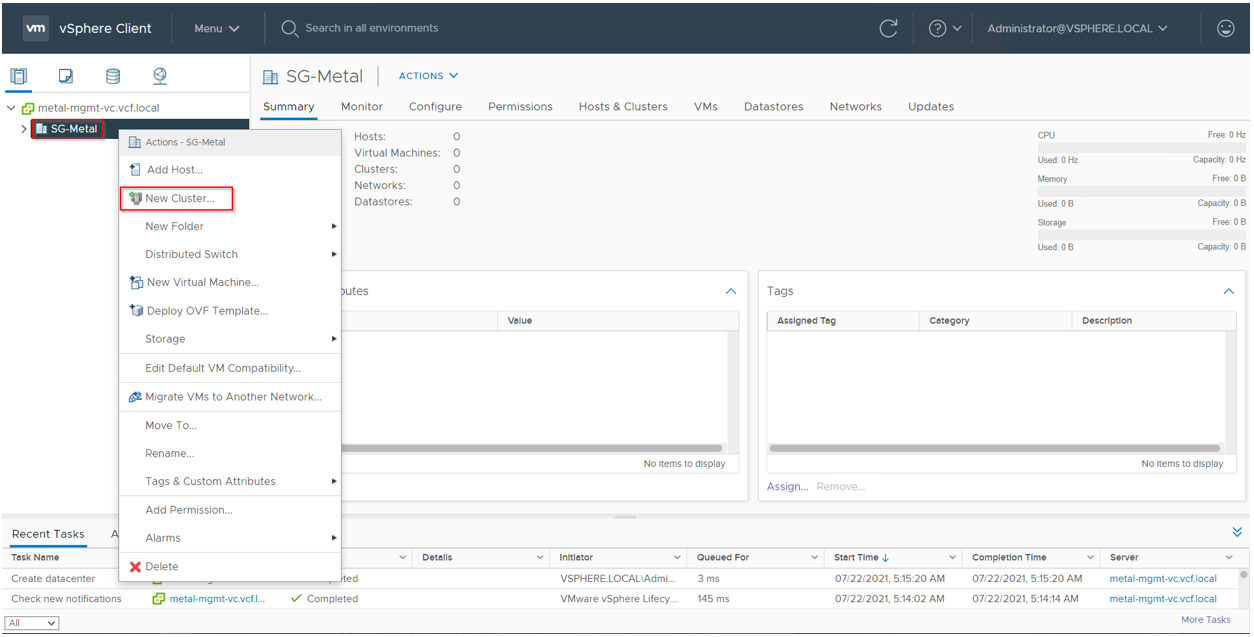
Create a new Cluster object by performing the following steps:
-
Right-click on the Datacenter.
-
Select the option New Cluster.
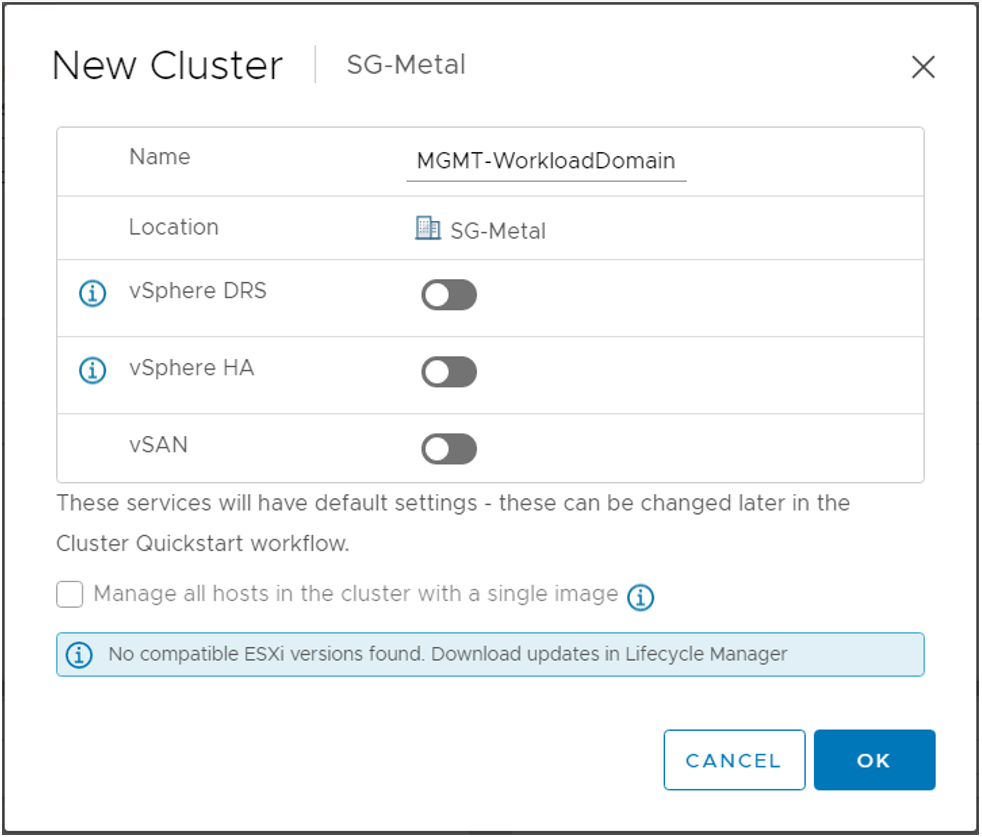
Assign a name to the Cluster and, if desired, enable additional features such as DRS (Distributed Resource Scheduler), HA (High Availability), and VSAN (Virtual SAN).
After successfully creating the Cluster object, you can proceed to launch the Cluster QuickStart Wizard.
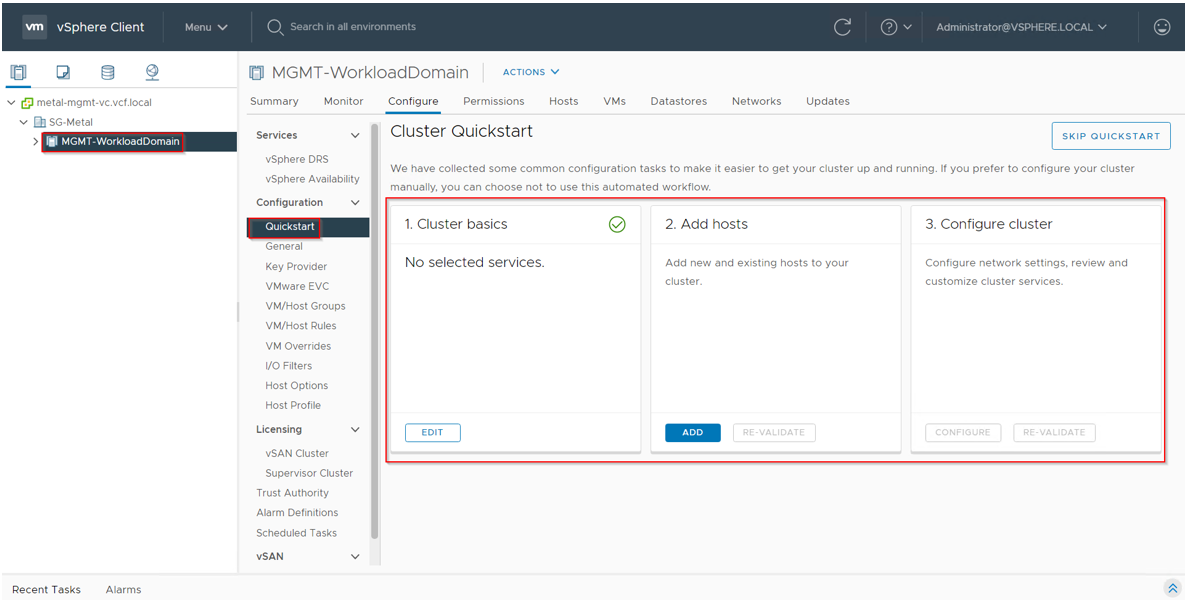
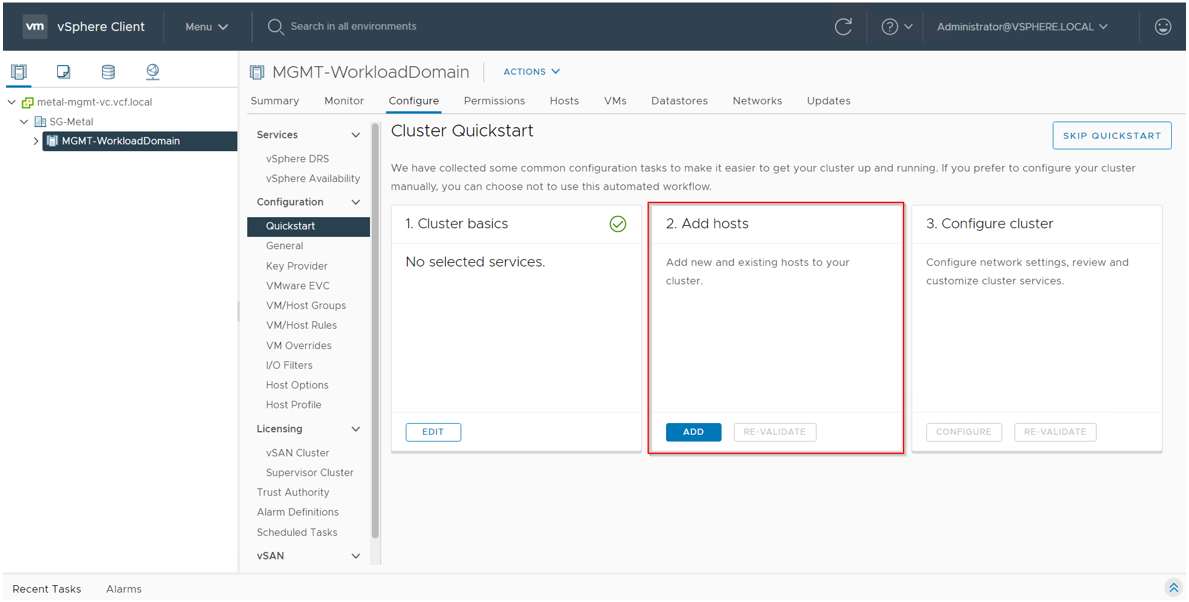
The initial configuration task you should execute in the Cluster QuickStart Wizard is to select Add Host.
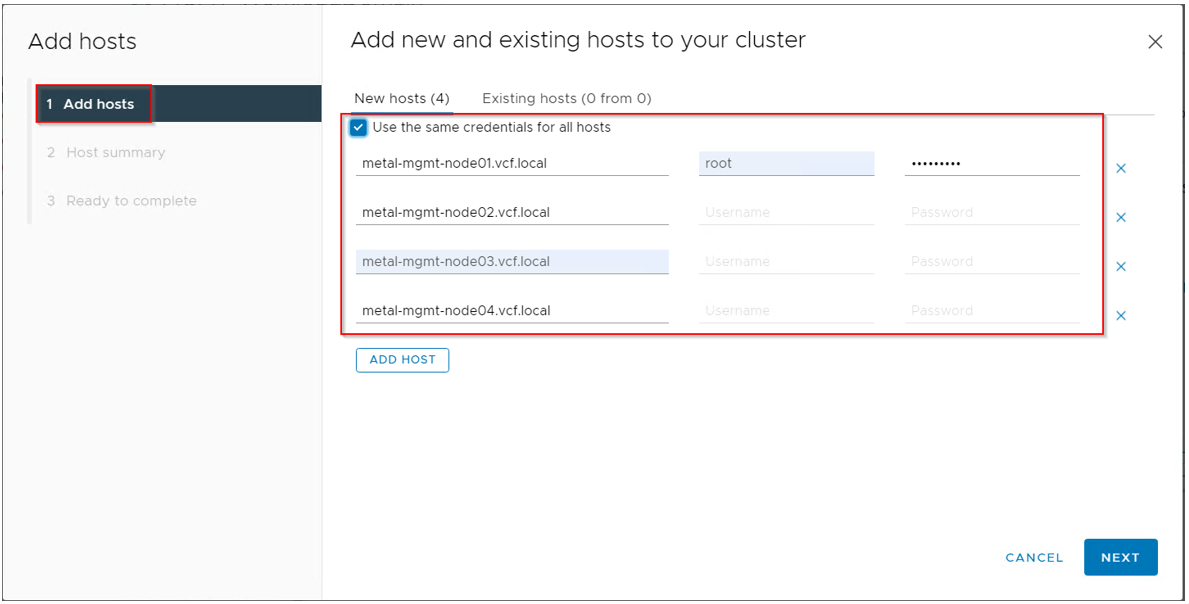
Add new hosts to the cluster and provide the necessary credentials for each host.
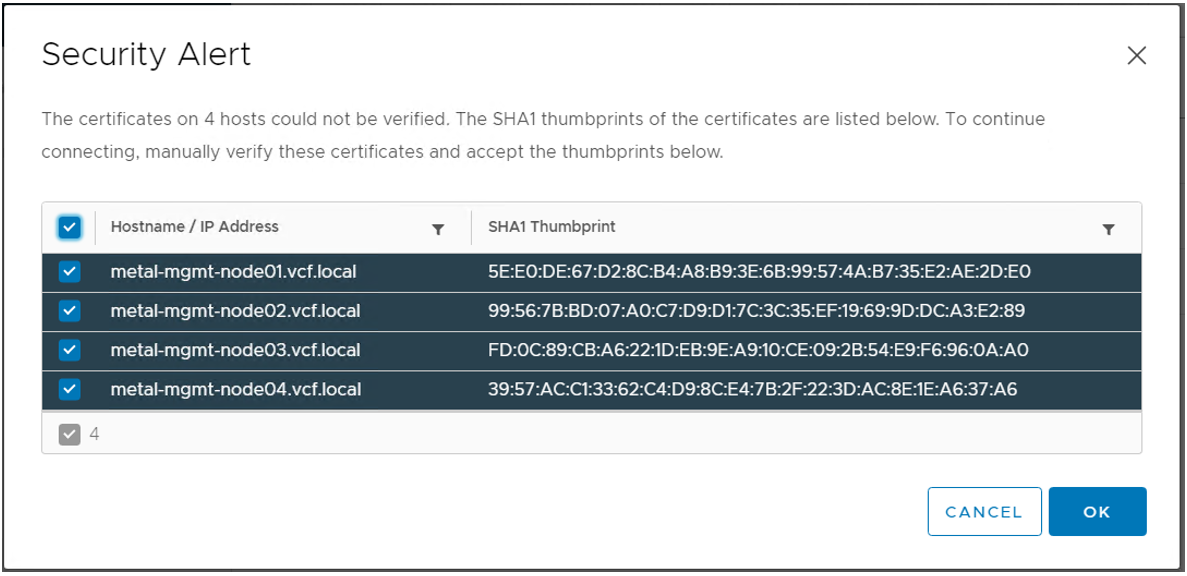
Accept the default SHA1 thumbprints of the certificates without making any changes.
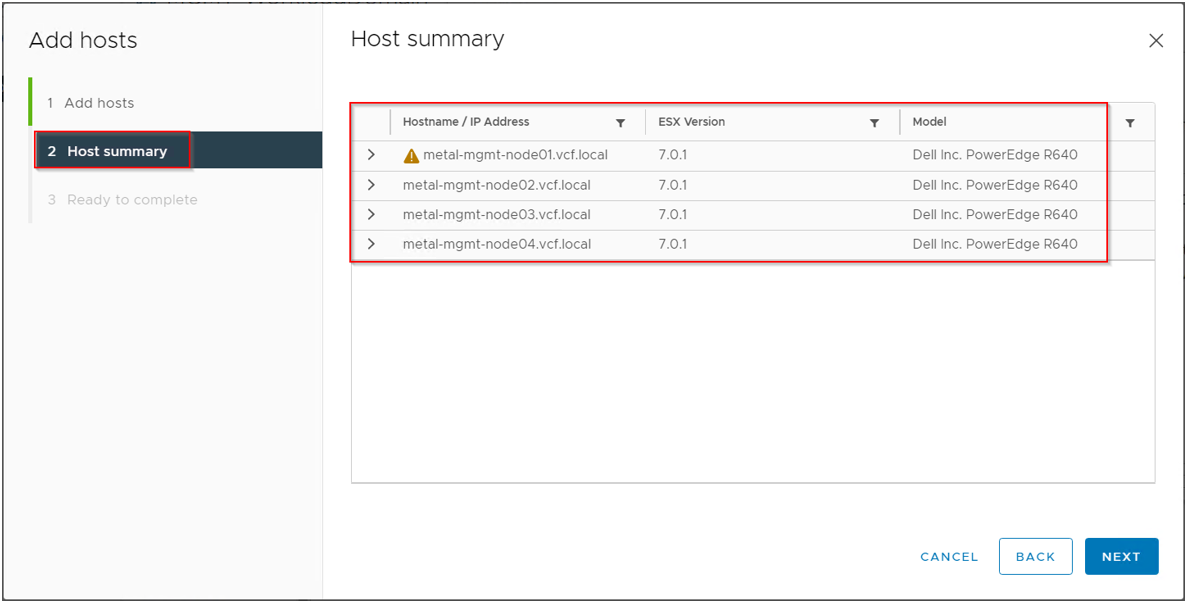
Verify the summary information of the host to ensure its accuracy.
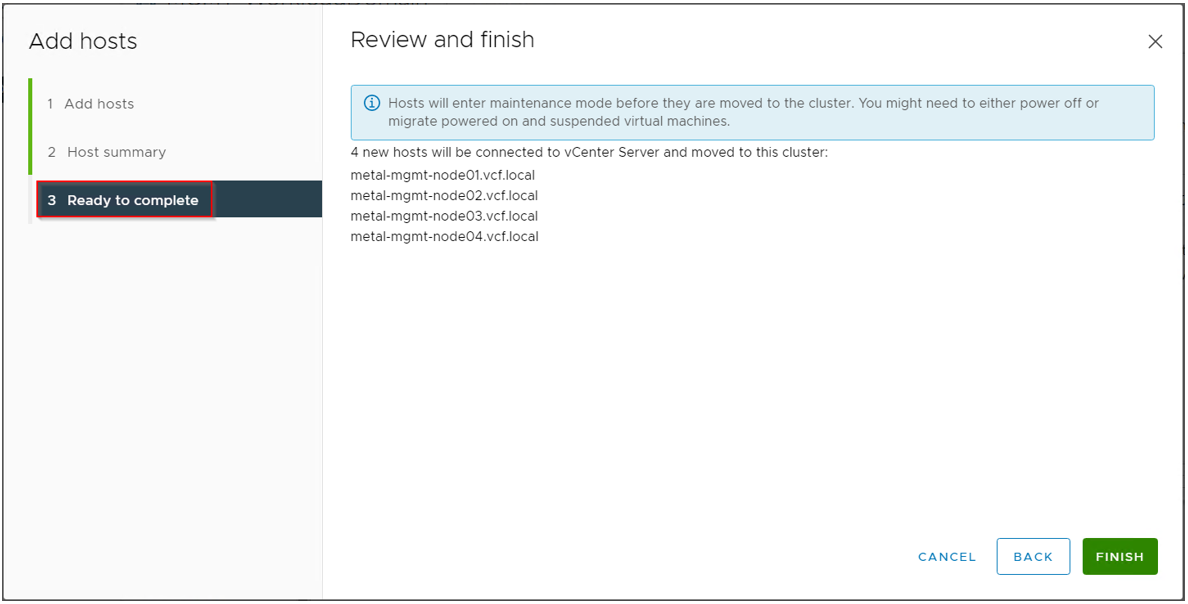
Review the task details and complete the process by selecting the Finish option.
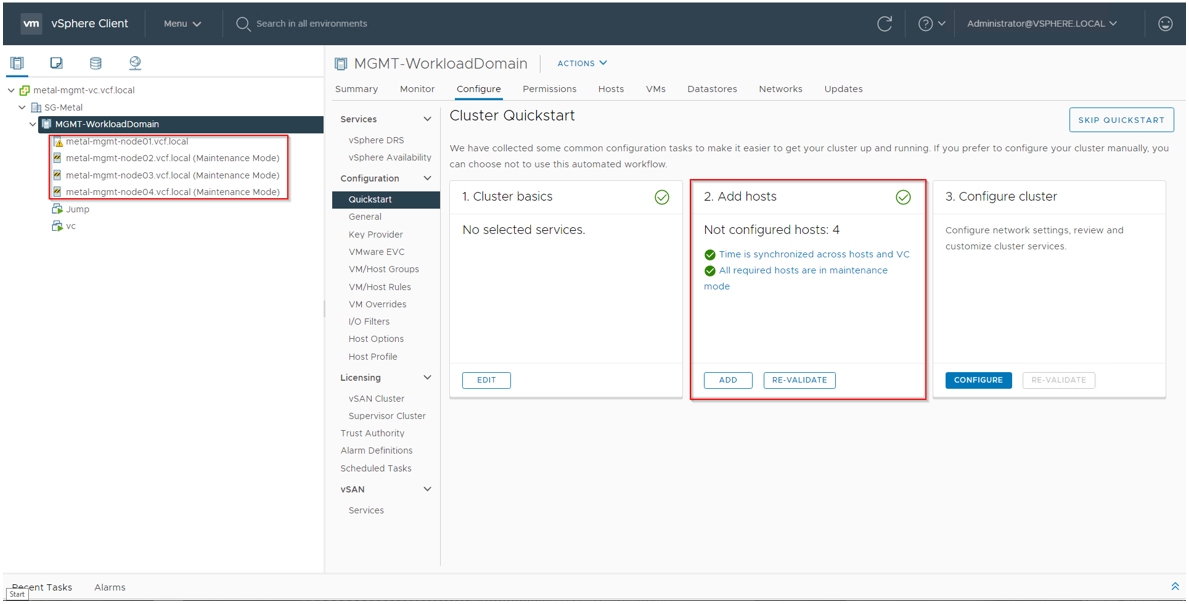
All the hosts have been successfully added to the Cluster. The host without any workload (VMs) will remain in "Maintenance Mode."
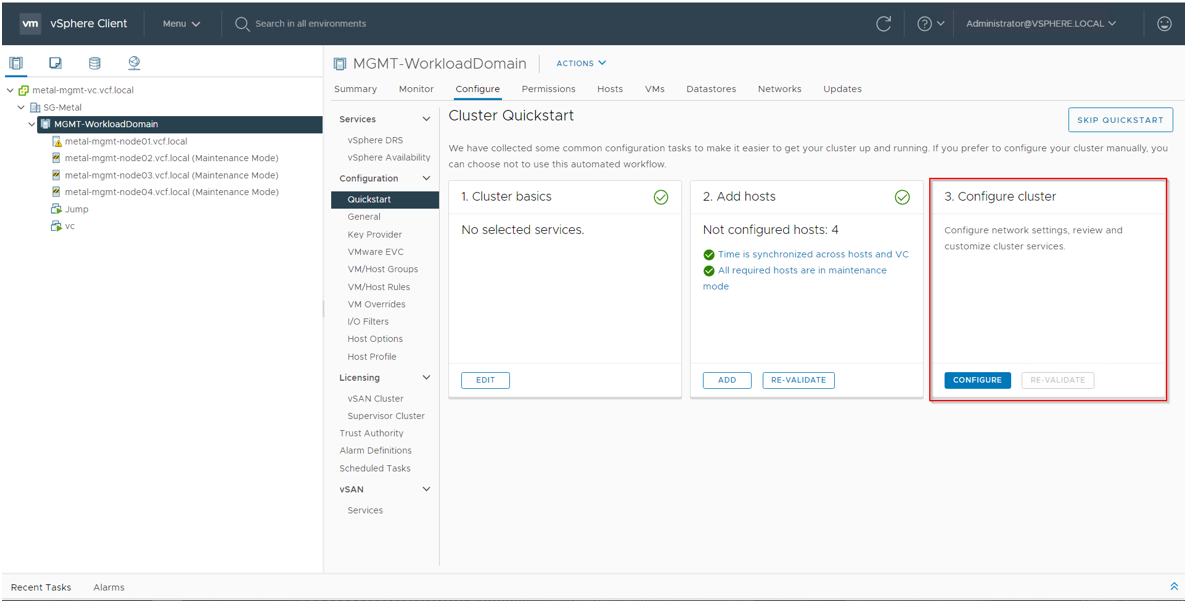
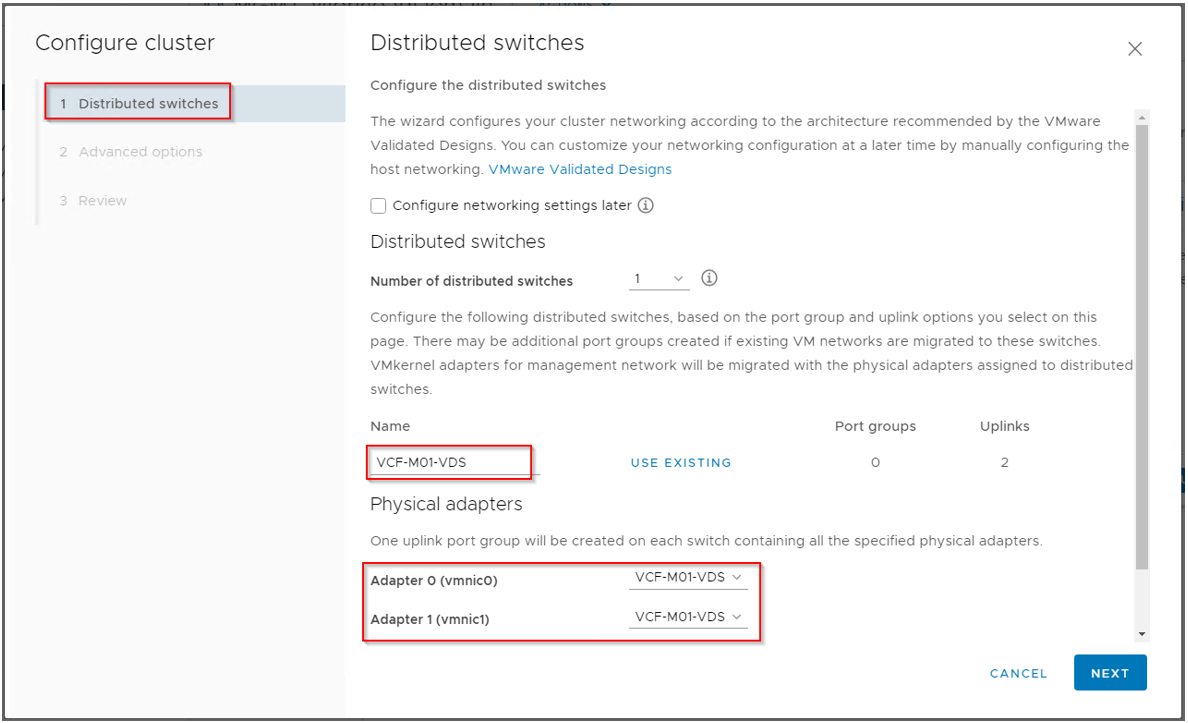
Now, it's time to configure network settings and add Virtual Distributed Switches. Navigate to the Configure tab and select the appropriate options under the Configure cluster section.
Configure the distributed switches by specifying the desired number of switches, assigning names to them, and selecting the number of uplinks.
NOTE: Only vCenter (VCSA) should be powered on and active on the hosts before configuring the Cluster Network settings through the Cluster QuickStart wizard. Any other VM workloads should be powered off during this process.
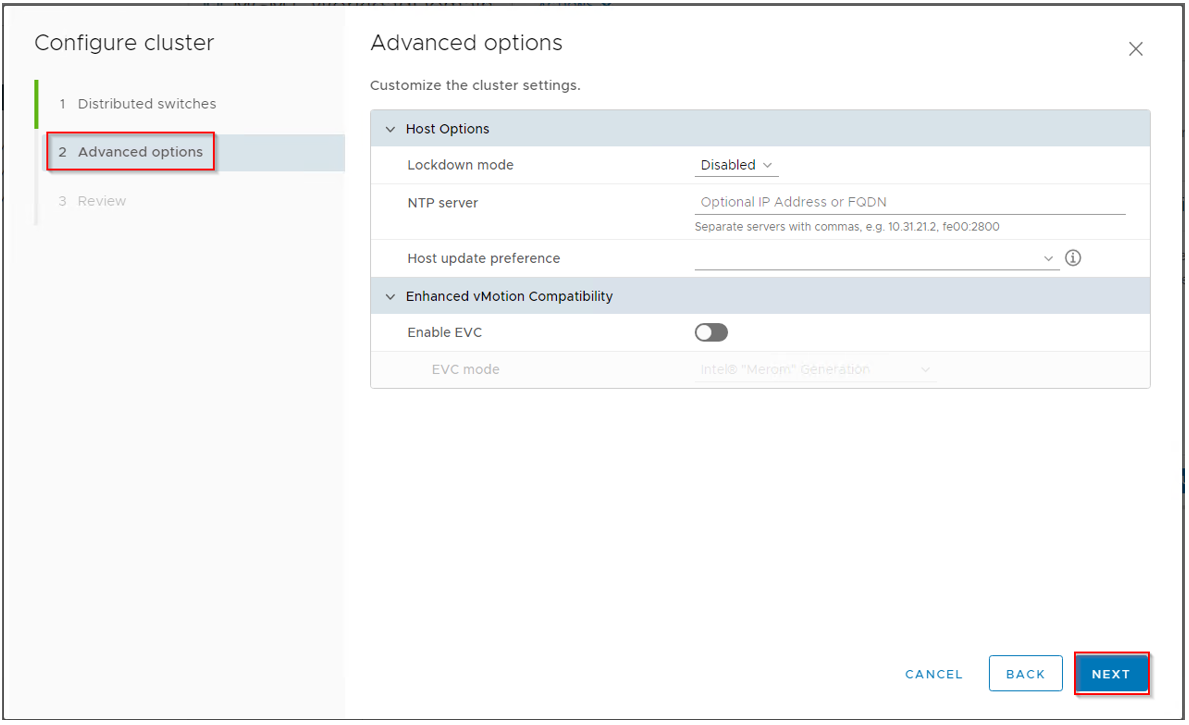
At this stage, you can input the NTP server information for synchronization purposes.
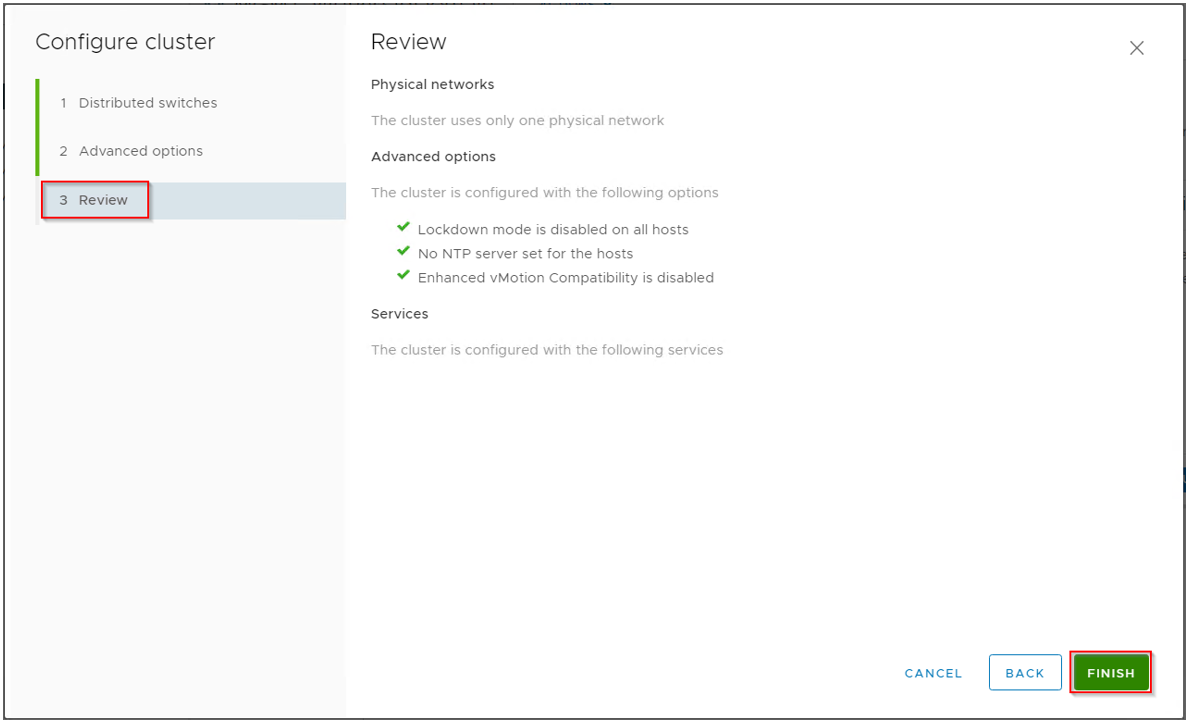
Review the configuration details and complete the task by selecting the Finish option.
The Cluster QuickStart wizard will automatically configure the distributed network switches and migrate the VM workload to the new vDS (Virtual Distributed Switch) port groups.
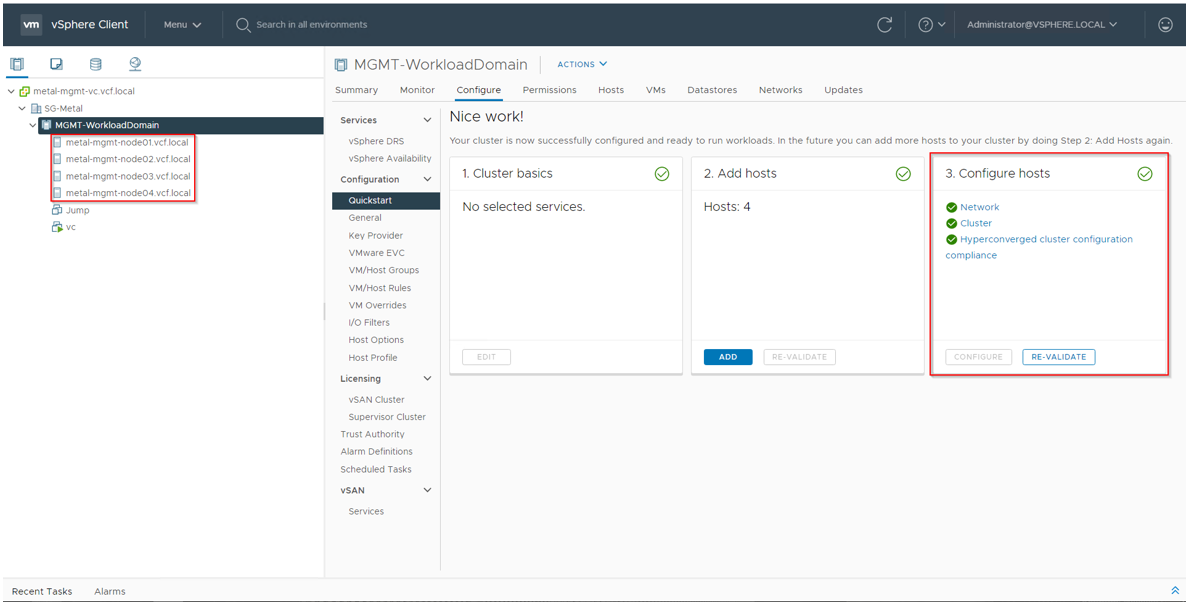
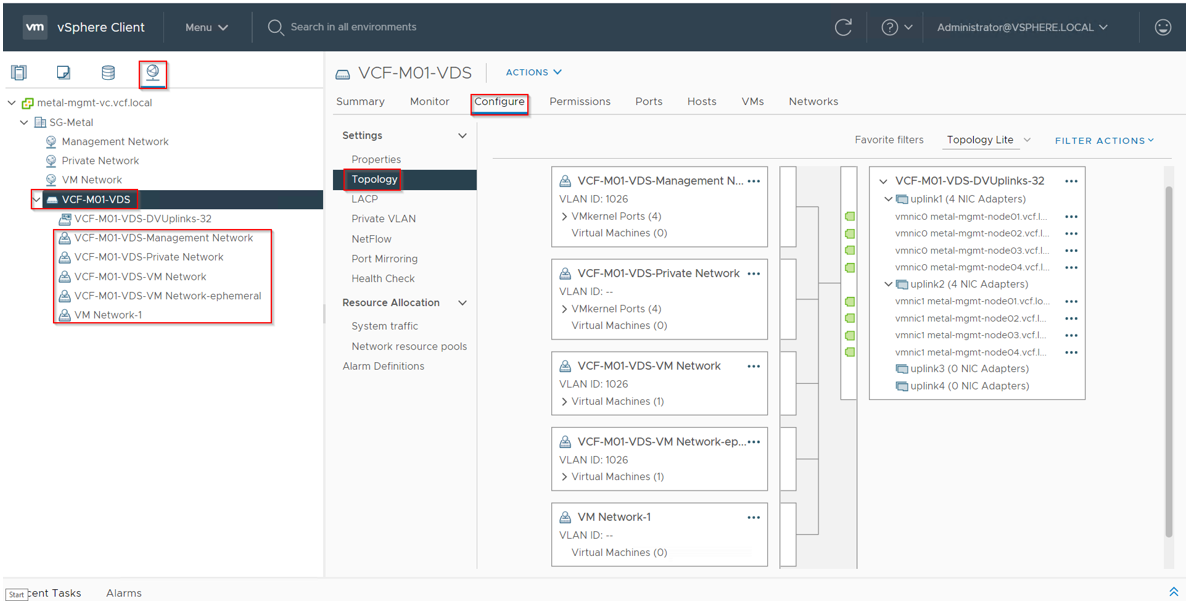
After the successful configuration, you will be able to observe that the Cluster QuickStart wizard has created the distributed switch and port groups. The ESXi hosts are now added and managed within the newly established distributed switch.
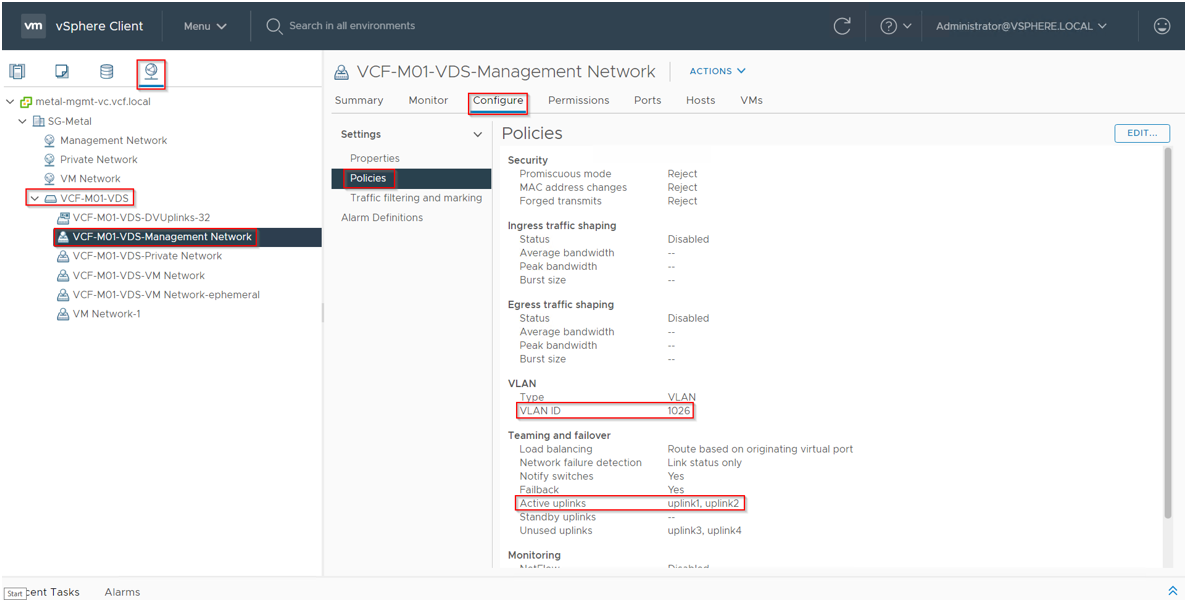
Here is an example of a Management port group within the vDS (Virtual Distributed Switch), displaying the assigned VLANs and the configured Teaming policy.
The active vCenter VM (VCSA) will be automatically moved to the new 'ephemeral' port group within the vDS. If needed, you can modify the VCSA settings and adjust the vNIC network to the required Port Group.
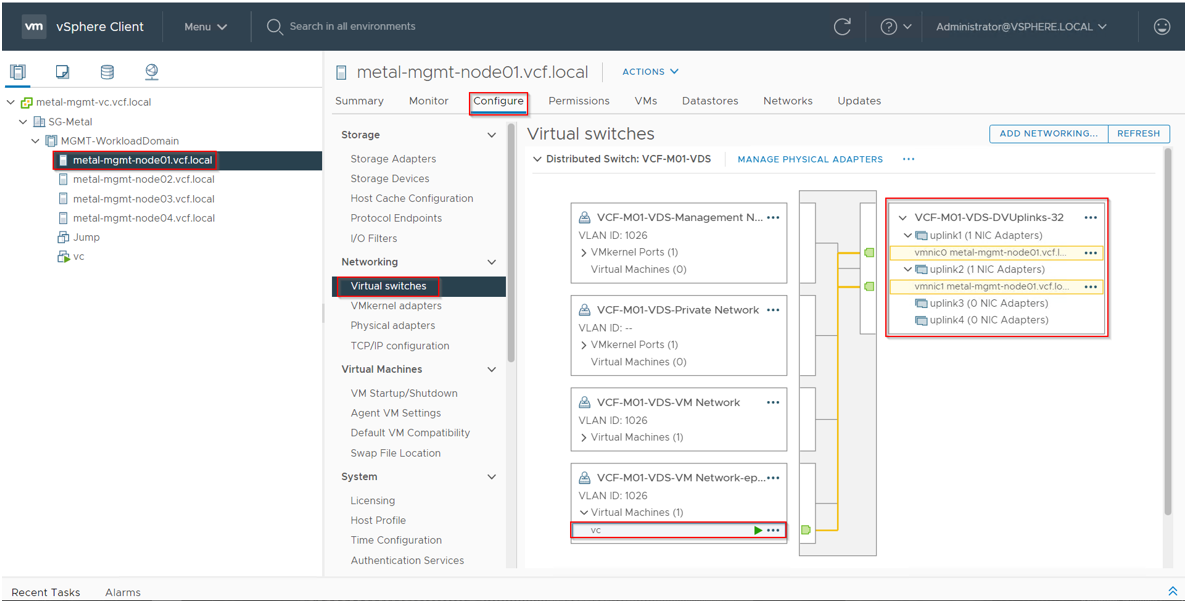
vCenter is now fully operational on the newly configured distributed switch and port group.

Conclusion
In conclusion, the deployment process of Metal servers with VMware VCF Operating System Option on Equinix Metal has been successfully completed.
The procedure involved selecting the desired Metal location site, choosing the server instance type and operating system, and deploying the servers through the Metal Portal. With the new Layer 2 Unbonded trunk mode, VLANs were assigned to both eth0 and eth1 network interfaces. Following the deployment, the servers were accessed through the out-of-band console, allowing the assignment of custom private Management IPs and the rotation of ESXi passwords. VMware vCenter was utilized to create a Datacenter and Cluster, configure network settings, and add Virtual Distributed Switches. The Cluster QuickStart Wizard streamlined the configuration process, resulting in the establishment of distributed network switches and seamless migration of VM workloads.
Overall, this deployment enables the efficient utilization of Equinix Metal servers with VMware VCF, providing a robust and scalable infrastructure for digital businesses.
You may also like
Digger deeper into similar topics in our archives
Configuring BGP with BIRD 1.6 on an Equinix Metal Server
Set up BGP on your Equinix Metal server using BIRD 1.6, covering IP configuration, installation, and neighbor setup to ensure robust routing capabilities between your server and the Equinix...

Configuring BGP with FRR on an Equinix Metal Server
Establish a robust BGP configuration on your Equinix Metal server using FRR, including setting up network interfaces, installing and configuring FRR software, and ensuring secure and efficie...
Crosscloud VPN with Wireguard
Learn to establish secure VPN connections across cloud environments using WireGuard, including detailed setups for site-to-site tunnels and VPN gateways with NAT on Equinix Metal, enhancing...

Deploy Your First Server
Learn the essentials of deploying your first server with Equinix Metal. Set up your project & SSH keys, provision a server and connect it to the internet.

Ready to kick the tires?
Use code DEPLOYNOW for $250 credit