Account and API Key Setup
Workshop progress
Completed 0 of 17 steps
- Introduction
- Account and API Key Setup
- Kubernetes Deployment and Configuration
- Deploying a Demo App
- Conclusion
To run this workshop you will need access to an Equinix Metal Account or create a new one following step 1 below.
Note: You are responsible for the cost of resources created in your Equinix Metal account while running this workshop.
Pre-requisites
The following tools will be needed on your local development environment where you will be running most of the commands in this guide:
- A Unix-like environment (Linux, OSX, Windows WSL)
- git (v2.0.0+)
- metal-cli (v0.9.0+)
- terraform (v1.0.0+)
Steps
1. Create an Equinix Metal account
If you have never used Equinix Metal before, don't worry, you just need 2 minutes to sign-up and create your first organization. If you have any doubt you can watch our Getting Started with Equinix Metal video.
Step 2 of 17
2. Create an API key
API keys in Metal can be tied to your user or to a single project. For this workshop we will need a user-level API key.
Note: Project API keys do not have access to the entirety of the API; some endpoints can only be used by personal API keys.
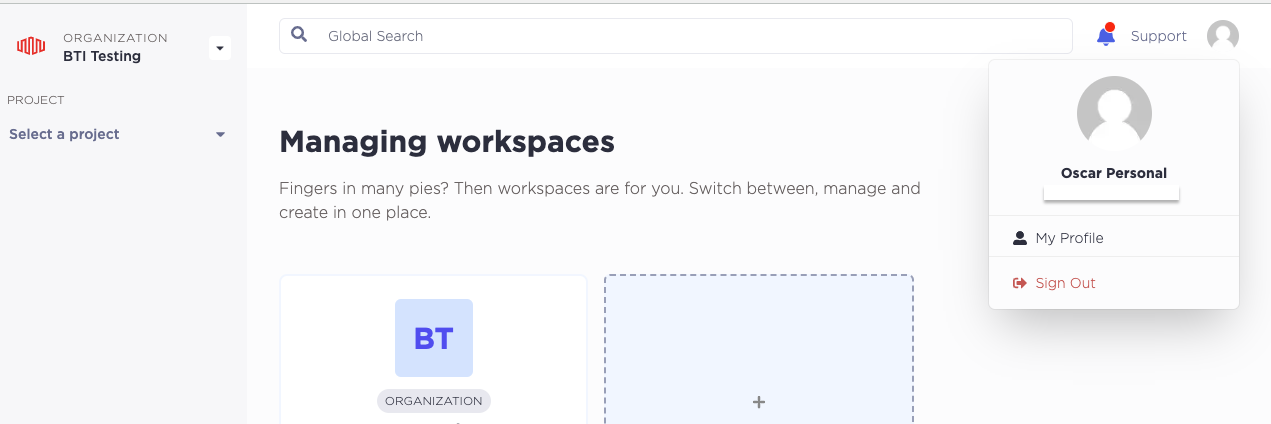
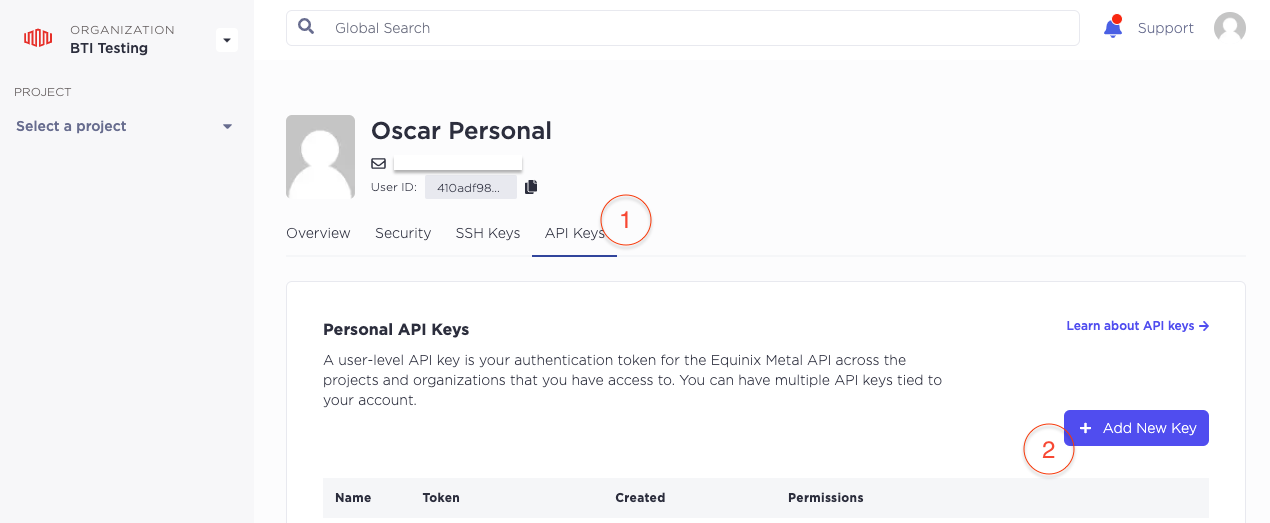
To create a new user API key, access your user Profile in the Equinix Metal console, click on the User Icon, and click My Profile.

- Select the
API Keystab. - Click on
+ Add New Key. - Create a new key with
Read/Writepermissions.

Step 3 of 17
3. Install and Configure Metal CLI
Once you are familiar with the console you may feel more comfortable managing your Equinix Metal resources with the command-line interface tool Metal-cli.
You only need to download a binary to start enjoying Metal-cli, but you may want to check out the different installation options.
Once installed you need to configure your credentials. To do this, execute metal init and provide the requested information.
Expected output:
$ metal init

Equinix Metal API Tokens can be obtained through the portal at https://console.equinix.com/.
See https://metal.equinix.com/developers/docs/accounts/users/ for more details.

Token (hidden):
Organization ID [e83e4455-e7bf-4a2f-95cf-653b56db1939]:
Project ID []:

Writing /Users/Username/.config/equinix/metal.yaml
Step 4 of 17
4. Install Git and Terraform
There are many ways to install git and terraform locally. However, we will use a package manager, homebrew, as an example.
$ brew install git
$ brew install terraform
Step 5 of 17
5. Verify
$ metal organization get

+--------------------------------------+------------------------------+----------------------+
|                  ID                  |             NAME             |       CREATED        |
+--------------------------------------+------------------------------+----------------------+
| e83e4455-e7bf-4a2f-95cf-653b56db1939 | Equinix Metal Kubernetes POC | 2023-01-01T00:00:00Z |
+--------------------------------------+------------------------------+----------------------+

$ git -v
git version 2.40.0

$ terraform -v
Terraform v1.5.6
on darwin_arm64
Step 6 of 17
Discussion
Before proceeding to the next part let's take a few minutes to discuss what we did. Here are some questions to start the discussion.
- Can we create API keys without manually using the portal?
Step 7 of 17
