- Home /
- Resources /
- Learning center /
- Equinix Metal with...
Equinix Metal with PowerShell
This guide walks you through using the Equinix Metal CLI in PowerShell. Learn how to download the CLI binary, add it to your PATH, and spin up some servers using a simple PowerShell script.

On this page
It's not uncommon for technical tutorials to primarily focus on Linux and Mac users. But Windows usage remains dominant in industries like banking, healthcare, and government.
Sure, you can use the Equinix console in any browser---and it's well documented, too,---but for automation and power users, nothing beats the CLI!
In this tutorial, we'll cover how to use the Equinix Metal CLI in PowerShell. Specifically, we'll download the CLI binary for Windows, add the metal command to your PATH, run a few test commands, and provide a PowerShell script to get you started.
Downloading the Equinix Metal CLI Binary for Windows
First, let's download the Equinix Metal CLI for Windows and add it to the PATH so that the metal command can be run from anywhere.
For more information about the Equinix Metal CLI, check out the reference documentation.
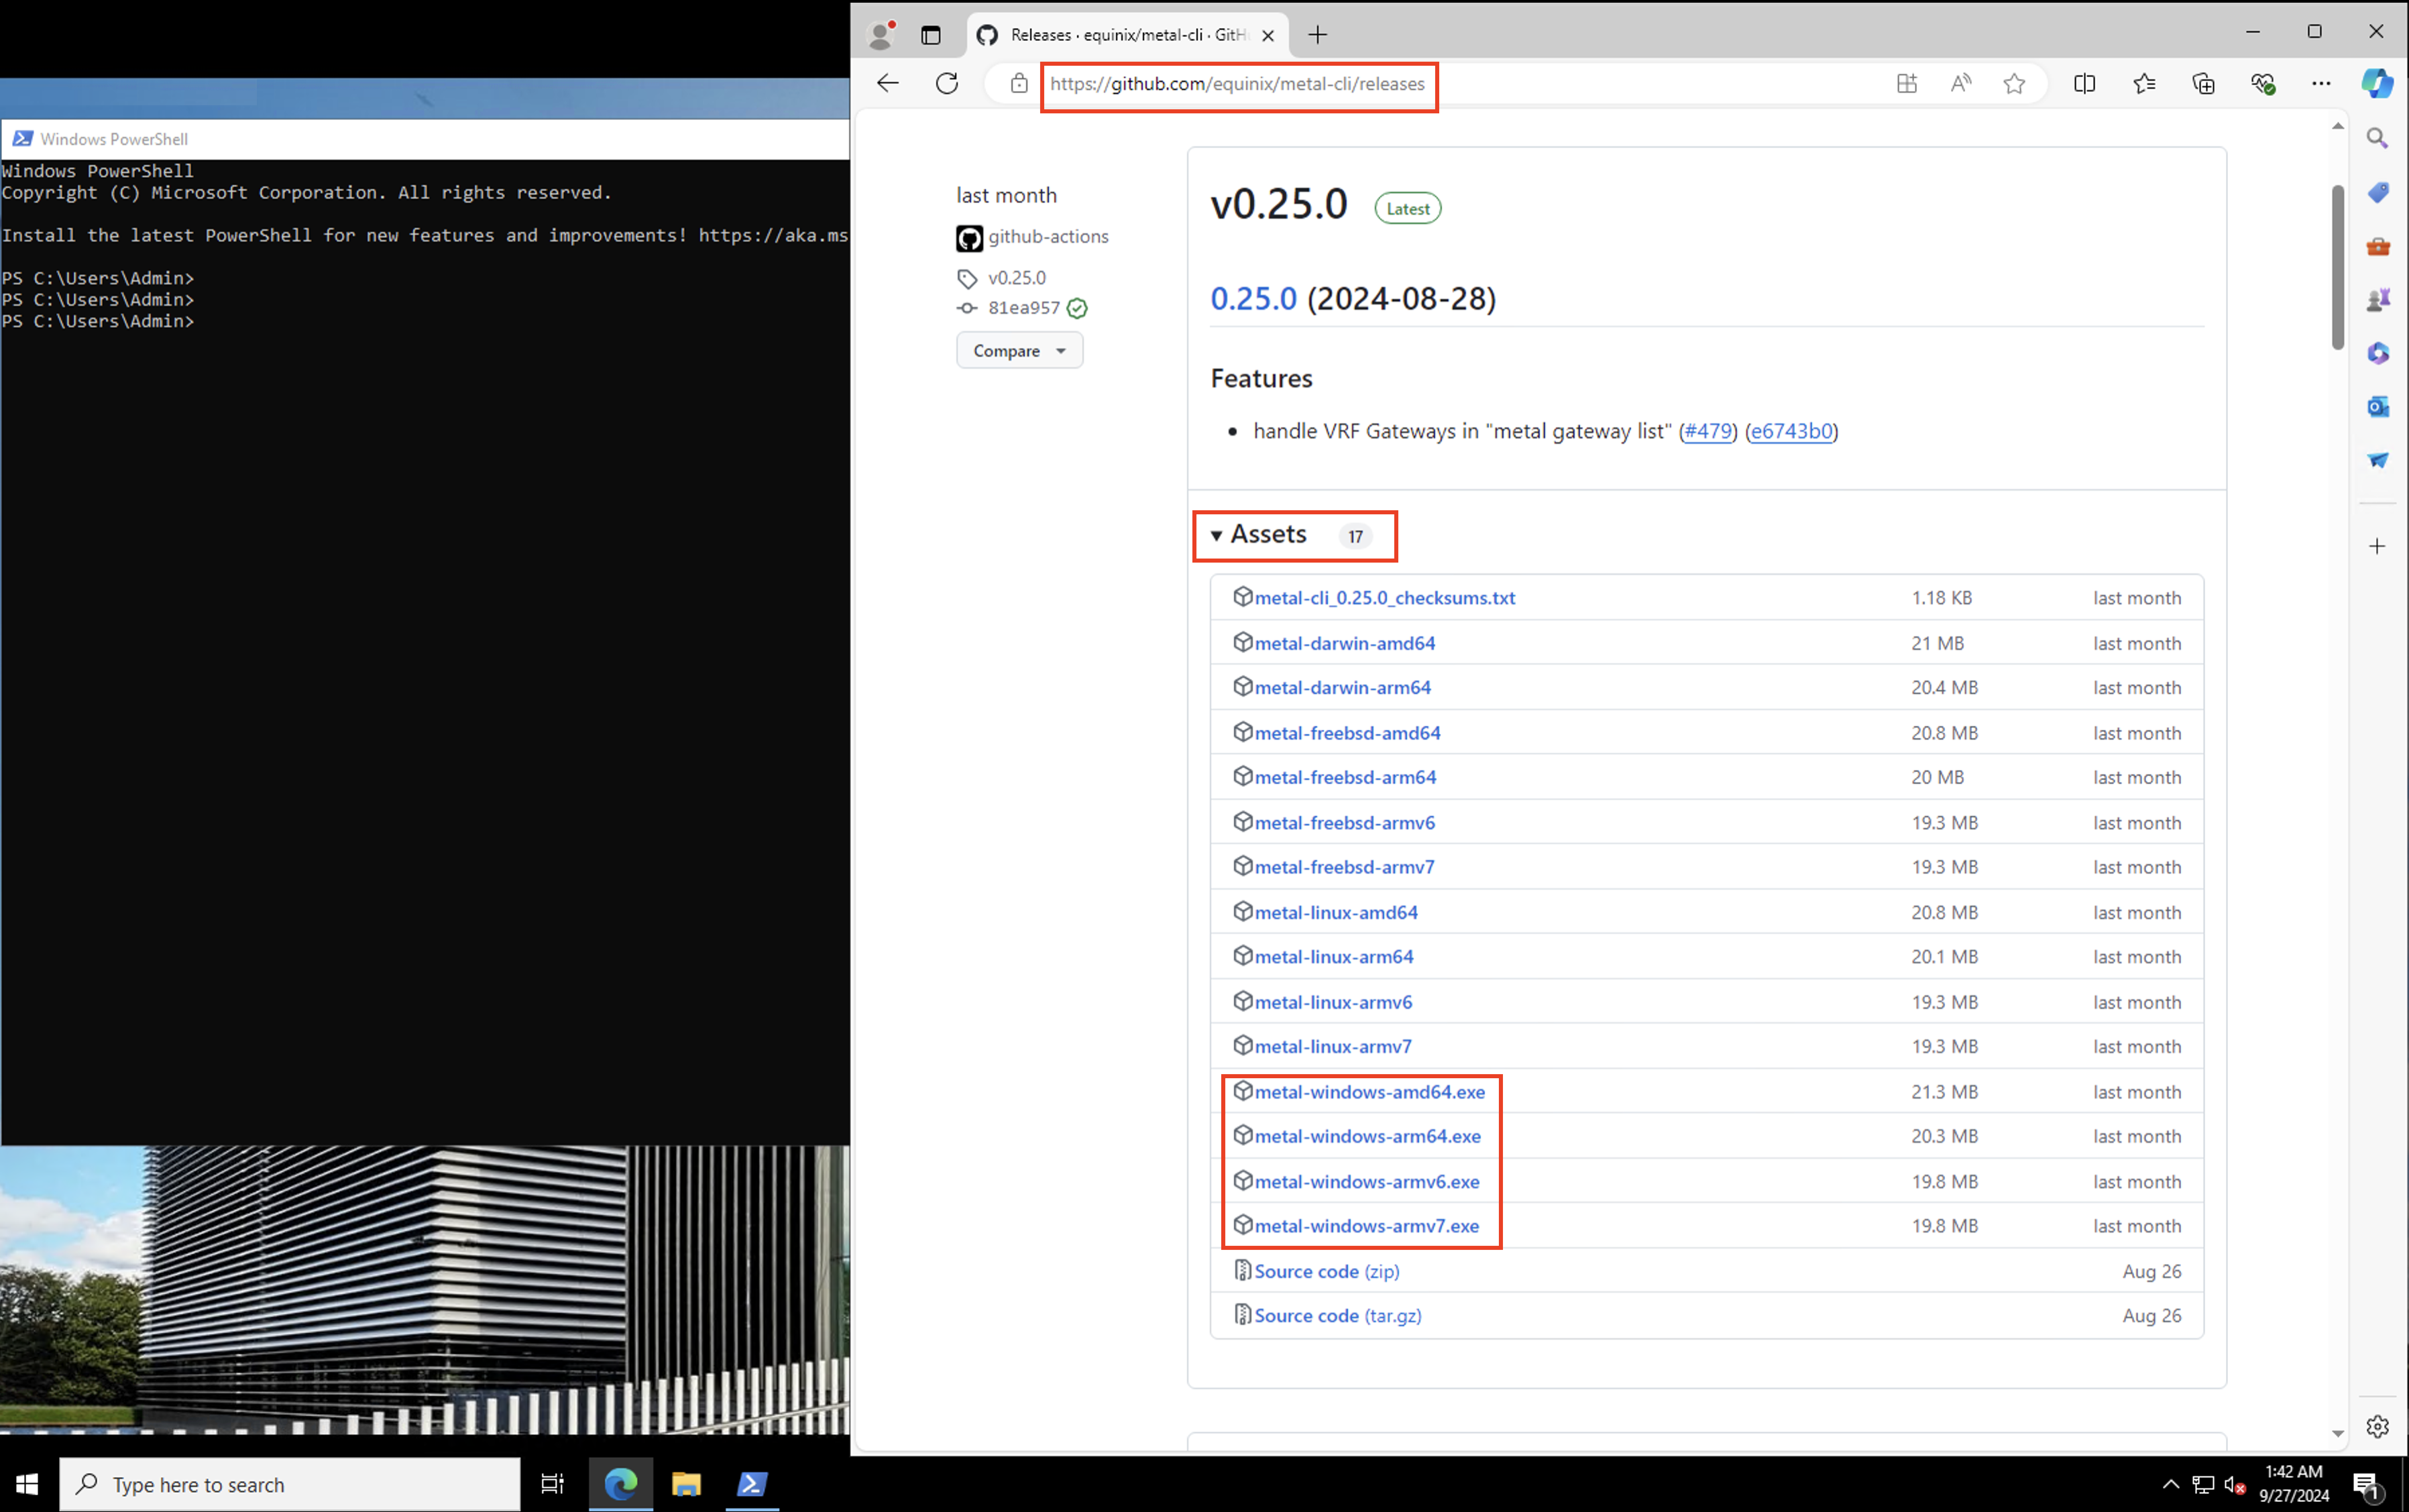
Head to the Equinix CLI GitHub Repo, and on the Releases page, find the latest version. Select Show all assets, and download the appropriate Windows binary (in our case, it's AMD64.exe).
Add the Binary to Your PATH
Now, let's move the downloaded binary to a dedicated folder and add it to the PATH environment variable, so it can be accessed from anywhere.
First, create a new directory to store the CLI:
PS C:\Users\Admin> mkdir C:\metal-cli

    Directory: C:\

Mode                 LastWriteTime         Length Name
----                 -------------         ------ ----
d-----         9/29/2024  11:34 AM                metal-cli

PS C:\Users\Admin> mv .\Downloads\metal-windows-amd64.exe C:\metal-cli\metal.exe
Next, add this directory to your PATH environment variable, which allows you to call the metal command without specifying the full path:
PS C:\Users\Admin> $env:Path += ";c:\metal-cli"
Verify that the binary was added correctly:
PS C:\Users\Admin> echo $env:Path
Make sure the CLI works by running:
PS C:\Users\Admin> metal
Command line interface for Equinix Metal
Initialize the Metal CLI
With the CLI installed, you need to initialize it by configuring your API token, project ID, and organization ID.
PS C:\Users\Admin> metal init
Equinix Metal API Tokens can be obtained through the portal at https://console.equinix.com/profile/api-keys
See https://deploy.equinix.com/developers/docs/metal/identity-access-management/users/ for more details.

User Token (hidden):
Organization ID [ecd6e156-abcd-xyz-abcd-090a055437ee]:
Project ID []: f2a2d7ad-abcd-xyz-abcd-10ebdf49cf84

Writing C:\Users\Admin/.config/equinix/metal.yaml
If you don't have these values, you can generate an API key via the API Key documentation and get your organization details from the Organizations documentation.
Run a PowerShell Script to Automate Deployments
While deploying a single server with the CLI is straightforward, let's go further with a basic PowerShell script that deploys three Ubuntu servers in the Dallas region.
Create a new script with the following code:
PS C:\Users\Admin> notepad testing.ps1
Then paste the following script:
for ($i = 1; $i -le 3; $i++) {
    # Construct the hostname with the loop index
    $hostname = "ubuntu-test-server-$i"

    # Run the command with the dynamic hostname
    metal device create -m da -P c3.small.x86 -H $hostname -O ubuntu_24_04
}
Running the script will provision three Ubuntu servers:
PS C:\Users\Admin> .\testing.ps1
+--------------------------------------+----------------------+------------------+--------+-------------------------------+
|                  ID                  |       HOSTNAME       |        OS        | STATE  |            CREATED            |
+--------------------------------------+----------------------+------------------+--------+-------------------------------+
| 6aa4b0d2-e024-4852-bb2c-b91698372e94 | ubuntu-test-server-1 | Ubuntu 24.04 LTS | queued | 2024-09-29 11:50:41 +0000 UTC |
+--------------------------------------+----------------------+------------------+--------+-------------------------------+
+--------------------------------------+----------------------+------------------+--------+-------------------------------+
|                  ID                  |       HOSTNAME       |        OS        | STATE  |            CREATED            |
+--------------------------------------+----------------------+------------------+--------+-------------------------------+
| b489638a-4a9c-4029-be78-55124cd54071 | ubuntu-test-server-2 | Ubuntu 24.04 LTS | queued | 2024-09-29 11:50:43 +0000 UTC |
+--------------------------------------+----------------------+------------------+--------+-------------------------------+
+--------------------------------------+----------------------+------------------+--------+-------------------------------+
|                  ID                  |       HOSTNAME       |        OS        | STATE  |            CREATED            |
+--------------------------------------+----------------------+------------------+--------+-------------------------------+
| dd335397-214e-4ae8-84af-548079b67875 | ubuntu-test-server-3 | Ubuntu 24.04 LTS | queued | 2024-09-29 11:50:45 +0000 UTC |
+--------------------------------------+----------------------+------------------+--------+-------------------------------+
Using SSH in PowerShell
Before deploying servers, generate an SSH keypair and add it to your Metal account to easily access your new servers. PowerShell supports both ssh and ssh-keygen, making it simple to manage key pairs on Windows.
Conclusion
Congratulations on completing this guide! You've successfully set up the Equinix Metal CLI on PowerShell, added it to your PATH, ran some test commands, and automated server deployment with a PowerShell script. Now that you've unlocked the power of the CLI, the sky's the limit! Explore more commands, create advanced automation scripts, and scale your infrastructure effortlessly.
Last updated
07 January, 2025Category
Tagged
TechnicalYou may also like
Dig deeper into similar topics in our archives
Crosscloud VPN with WireGuard
Learn to establish secure VPN connections across cloud environments using WireGuard, including detailed setups for site-to-site tunnels and VPN gateways with NAT on Equinix Metal, enhancing...

Kubernetes Cluster API
Learn how to provision a Kubernetes cluster with Cluster API

Kubernetes with kubeadm
Learn how to deploy Kubernetes with kubeadm using userdata

OpenStack DevStack
Use DevStack to install and test OpenStack on an Equinix Metal server.