- Home /
- Resources /
- Learning center /
- Initial Setup of N...
Initial Setup of NetApp Storage on Equinix Metal
Step by Step instructions for deploying and configuring a NetApp appliance within the Equinix Metal environment.

On this page
To meet the needs of customers looking for flexible and high performance storage, Equinix metal offers single-tenant hosted NetApp Storage appliances.
A NetApp storage appliance offers a robust, software-defined storage solution that can be deployed in seconds, providing the security, flexibility, and simplicity necessary to support a wide range of applications. With industry-leading data management capabilities and seamless cloud integration, it ensures your organization's data is protected, efficiently managed, and readily available across hybrid cloud environments, making it an ideal choice for businesses with dynamic data storage needs.
Using NetApp storage is a high-touch process that can be very closely adapted to meet your specific use case and requirements, including the ability to use both file and block storage access. This guide is an overview of the steps you need to get up and running with your NetApp Storage appliance.
Ordering an Appliance
NetApp appliances are available in all Metros where Equinix Metal is available.
Ordering, pricing, and fulfillment of NetApp appliances is handled through a sales and hardware reservation process. More information is available on our NetApp solutions page and solutions brief.
When you order an appliance, we will arrange for it to be located in racks physically near to your current Equinix Metal infrastructure. If you are also ordering new servers to connect to the appliance, we will arrange them to be located within the networking requirements.
When your appliance is ready for your use, you will meet with the Equinix team and your NetApp Appliance will be handed over to you along with your IP addresses for access and login credentials.
Equinix Metal Requirements
Before you receive your NetApp appliance, there are some things you will need to do ahead of time, and some things you will need to configure in Equinix Metal.
Firewall
You MUST provide a firewall that allows the NetApp solution outbound internet access via port 443. This is a part of your contract with Equinix Metal for your NetApp appliance. You should have the firewall configured before the handover is scheduled. This is to provide access from the NetApp appliances to the Internet for access to NetApp AutoSupport. Please visit our firewall solutions page to view current firewall offerings.
AutoSupport is a Critical NetApp best practice that every customer should follow. In fact, enabling AutoSupport is not only required by the contract, but enhances security by auditing your existing security risks and warning you about potential attack vectors. You can learn more about AutoSupport in the NetApp documentation
VLANs
You will need to create VLANs in Equinix Metal to connect the NetApp appliance, jump boxes, and servers to.
For this guide, VLAN 1000 is used for the Management VLAN.
To create a VLAN, click Expand the Network pane on the left side of the metal console, then click VLANs, and the blue +Add VLAN button.
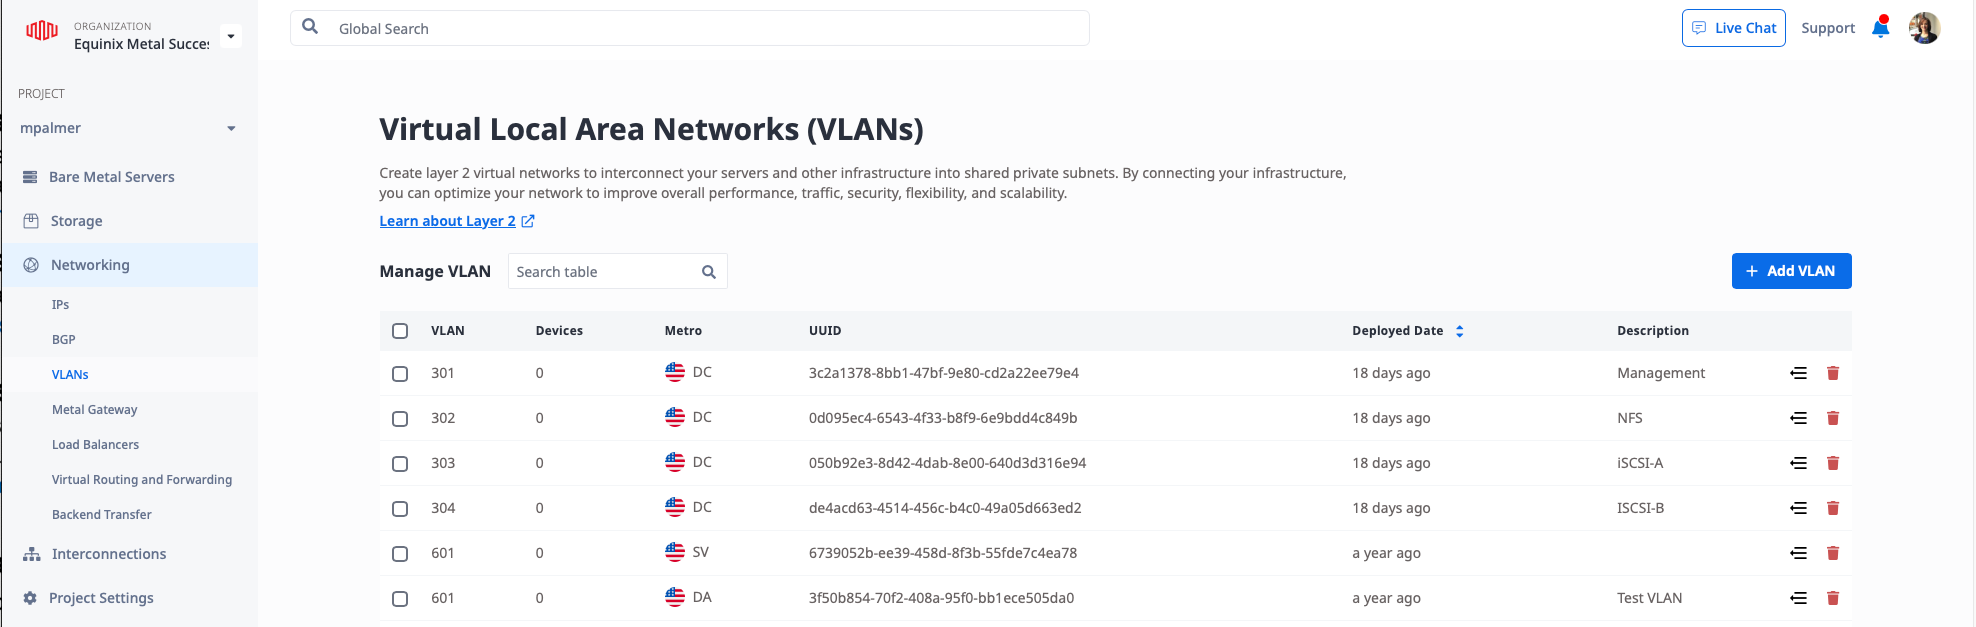
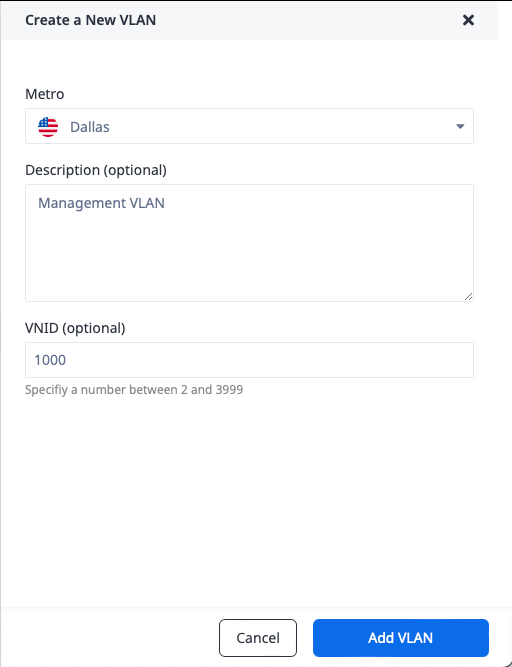
Choose the Metro you would like to create the VLAN in, you may also add a description. Enter the VLAN number you wish to use, and click Add VLAN.
Jump Box / Bastion Host
You will need to have a Jump Box / Bastion Host available to connect to your NetApp appliance cluster for management and provisioning activities. Please note, you will need to use a web browser to access ONTAP System Manager, which is the main administrative tool for the NetApp appliance cluster. We will be using a Windows host for this example.
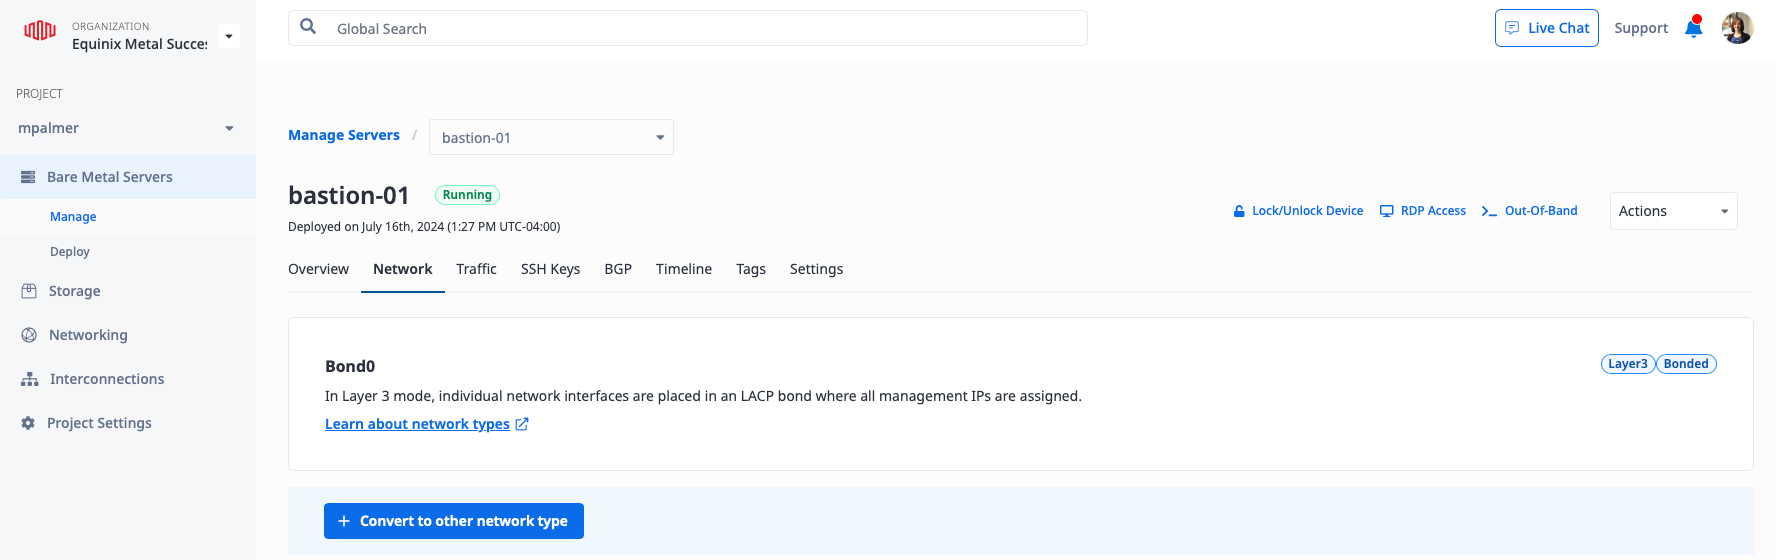
After you have deployed your server, you need to configure the networking in the Equinix Metal console. Navigate to your server by expanding Bare Metal Servers in the left navigation pane and clicking Manage. Click the Hostname of your server in the main area of the console.

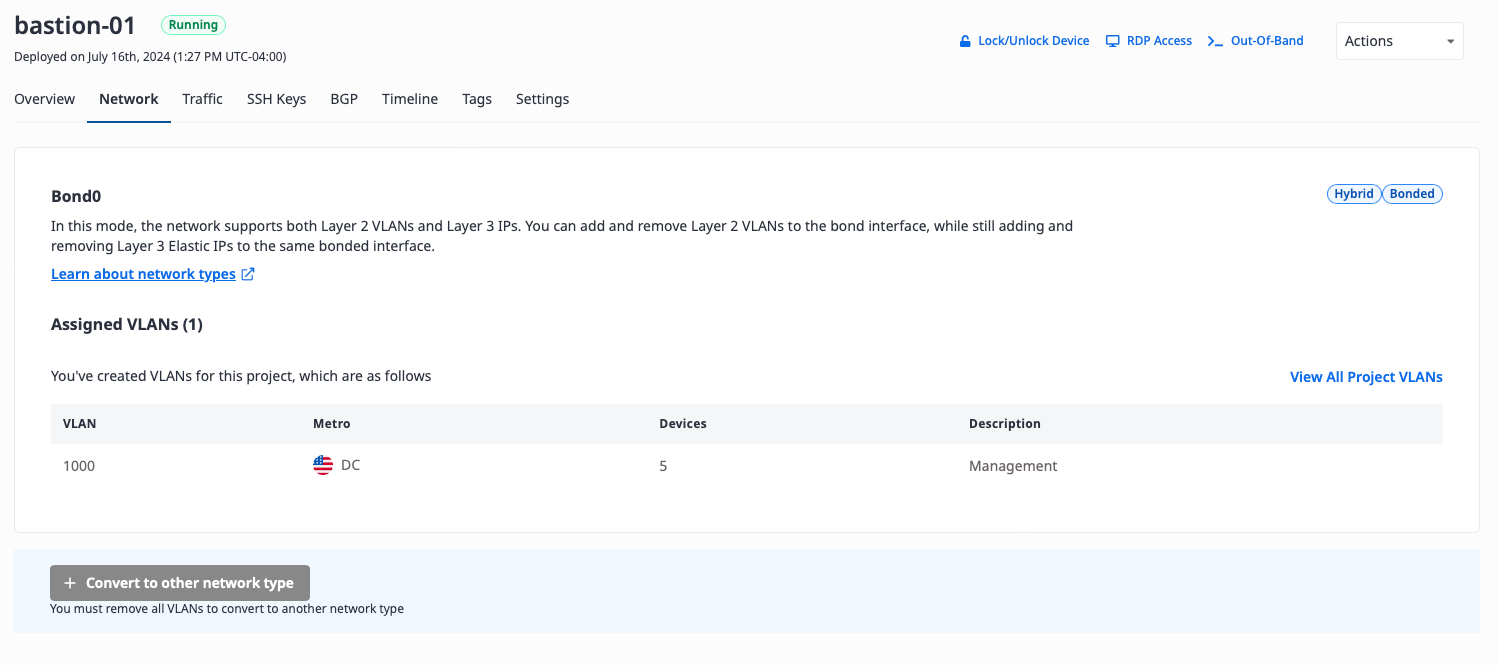
You will now see additional details about your server. Click the Network tab. As we can see, the bonded interface on our server is in Layer 3 mode. We need to switch this to Hybrid Bonded mode so we can access our server remotely over the Internet, and so that once we have connected to it we can also connect to the NetApp appliance cluster. Click the Network tab, then the blue button that says +Convert to other network type.
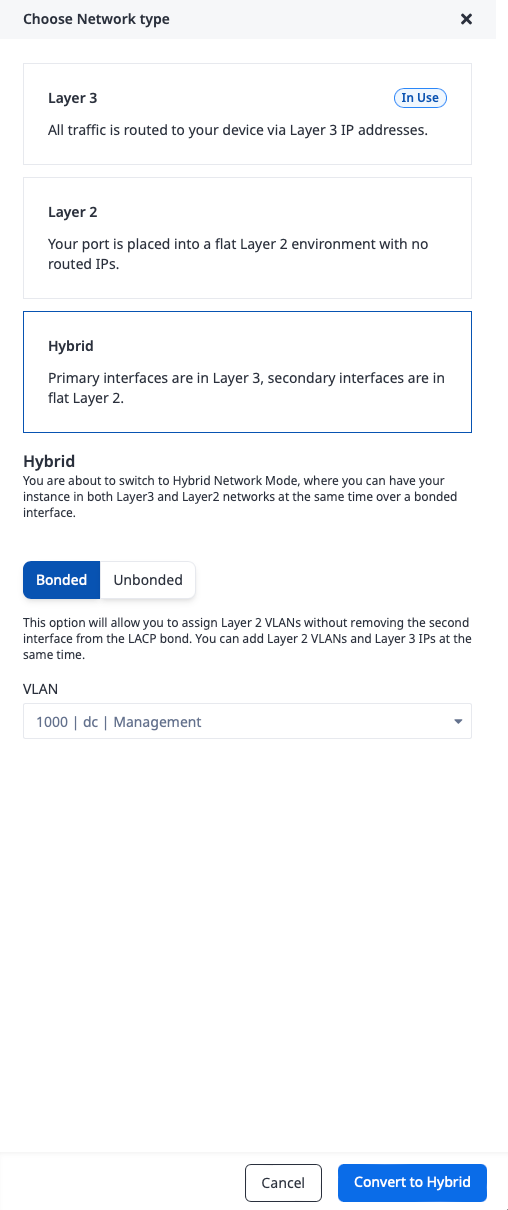
In the Chose Network type menu, selected Hybrid. Ensure Bonded is selected. Then select the VLAN you have previously added for Management in the dropdown menu. Click the Convert to Hybrid button.
After the configuration is complete, you will see Bond0 is now in Hybrid Bonded mode, and the Management VLAN is assigned.
Next, log into your bastion host, and configure a new bonded interface with the Management VLAN.
Please see the Windows Server Setup Guide for a complete configuration.
Metal Configuration After NetApp Handover
Before you can access your NetApp appliance cluster, you will need to add the VLAN to the NetApp management interface in the Equinix Metal console. At this time, you may also add any VLANs you will be using for data access.
To begin your storage configuration, click Storage in the left navigation pane. You will see your NetApp Storage appliances visible.
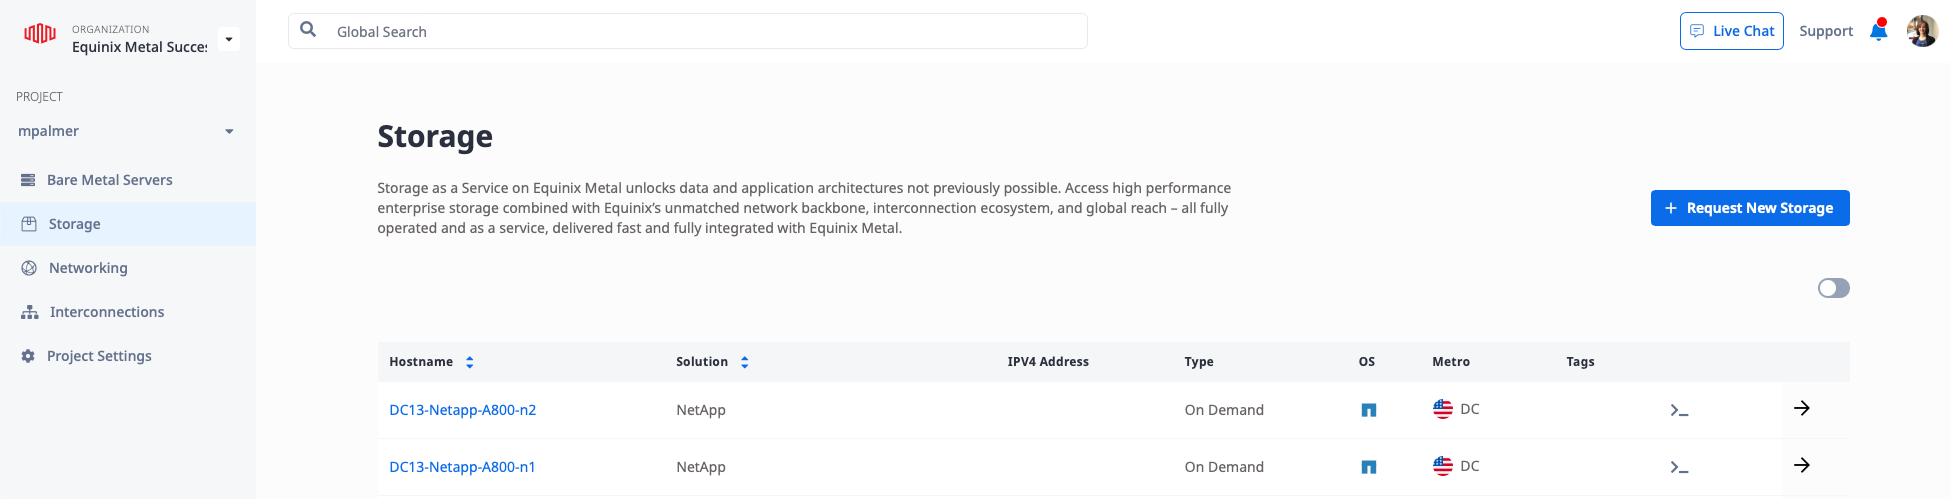
NOTE: NetApp storage appliances are always deployed in pairs. You will need to complete this process for each of the nodes in the NetApp Storage cluster.
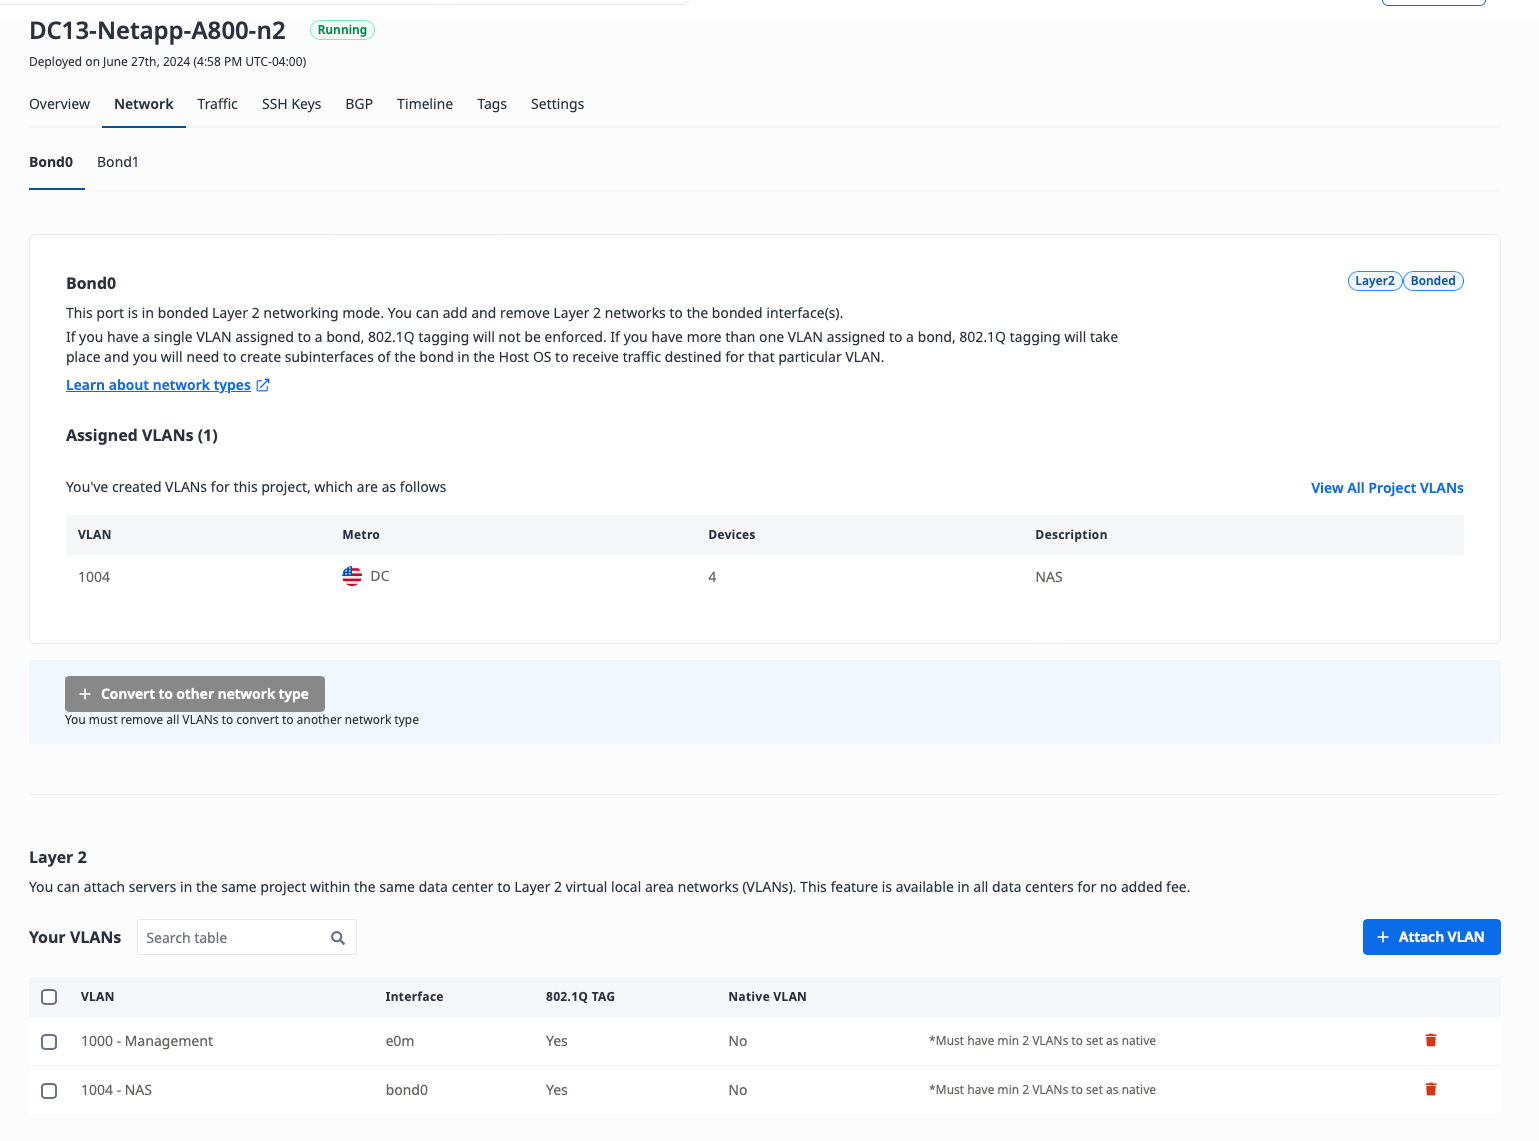
Click on the Hostname of one of the NetApp nodes to view more details, then click the Network tab for more details.
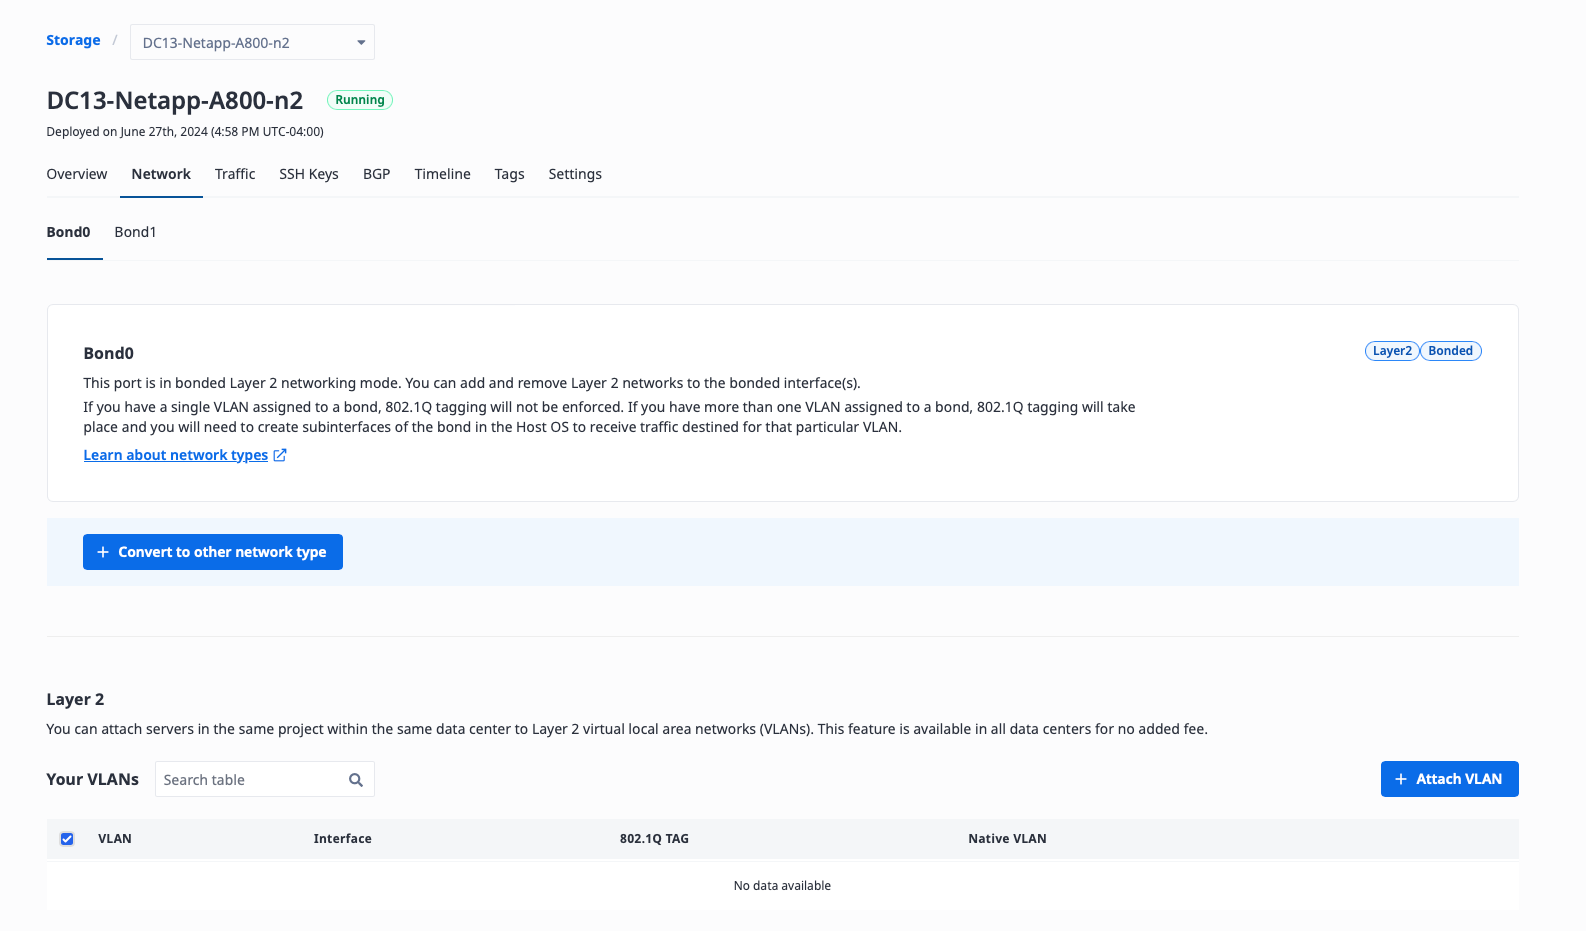
There are at least two interfaces for each node we will need to add VLANs to.
Bond0. Bond0 consists of two 25-GbE ports in a bonded configuration. This is the interface you will serve data over. You will need to add your data VLANs to this interface.
e0M. This is the management interface for each NetApp node. You will need to add your Management VLAN to this interface.
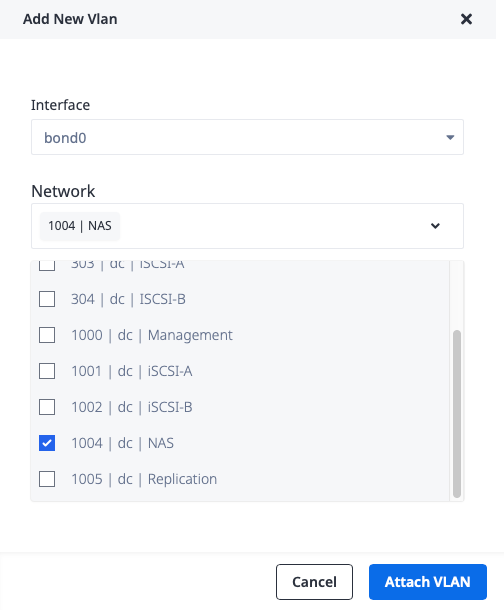
To begin this process, click the + Attach VLAN button.
As you can see, e0m is selected by default. In the Network dropdown menu, check the box next to the Management VLAN, then click Attach VLAN.
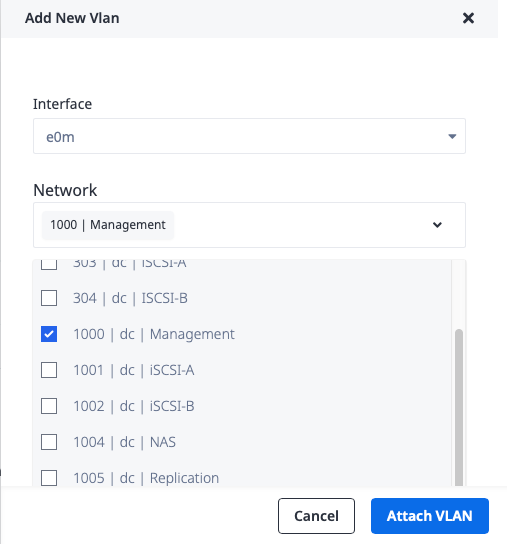
Next, Click the + Attach VLAN button again. Select bond0 from the Interface drop down menu. Then, select the data VLAN you would like to use from the Network dropdown menu. Click Attach VLAN.
Verify the VLANs have been added successfully in the Metal console by viewing the details of bond0.
Repeat this process for each additional NetApp storage node in the cluster.
Connecting to the NetApp Appliance Cluster with ONTAP System Manager
Before the NetApp cluster can server data, there are a few more steps that need to be carried out on the NetApp cluster.
- Storage must be prepared.
- Creating a Link Aggregation Group (LAG) on each node
- Adding data VLAN(s) to each LAG
Each of these steps is done with NetApp ONTAP System Manager, which is a web interface that is the main configuration point for our NetApp cluster.
In this example our IP address details are:
| Host | IP Address |
|---|---|
| cluster_mgmt | 192.168.10.39 |
| netappcl-01_mgmt | 192.168.10.11 |
| netappcl-02_mgmt | 192.168.10.12 |
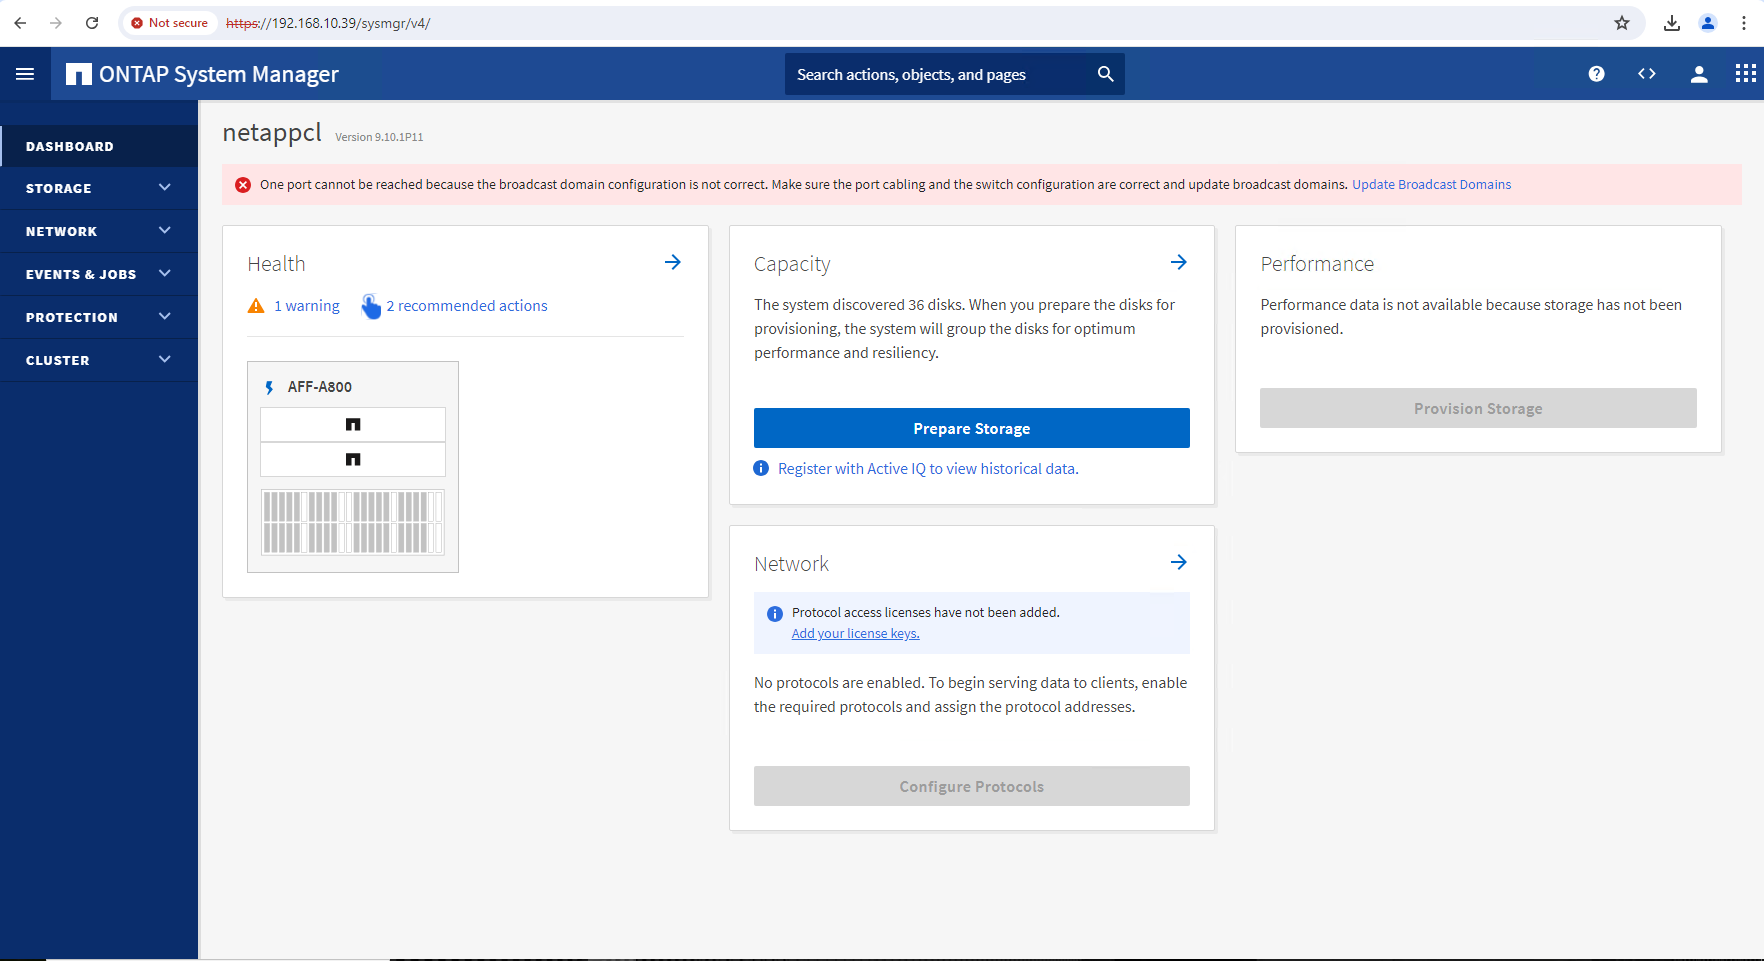
To access ONTAP System Manager, enter the IP address of the cluster in a web browser. Use the credentials you received during the handover to log in.
Note: There is also a more advanced command line management option. For more information, please see Using the ONTAP command-line interface.

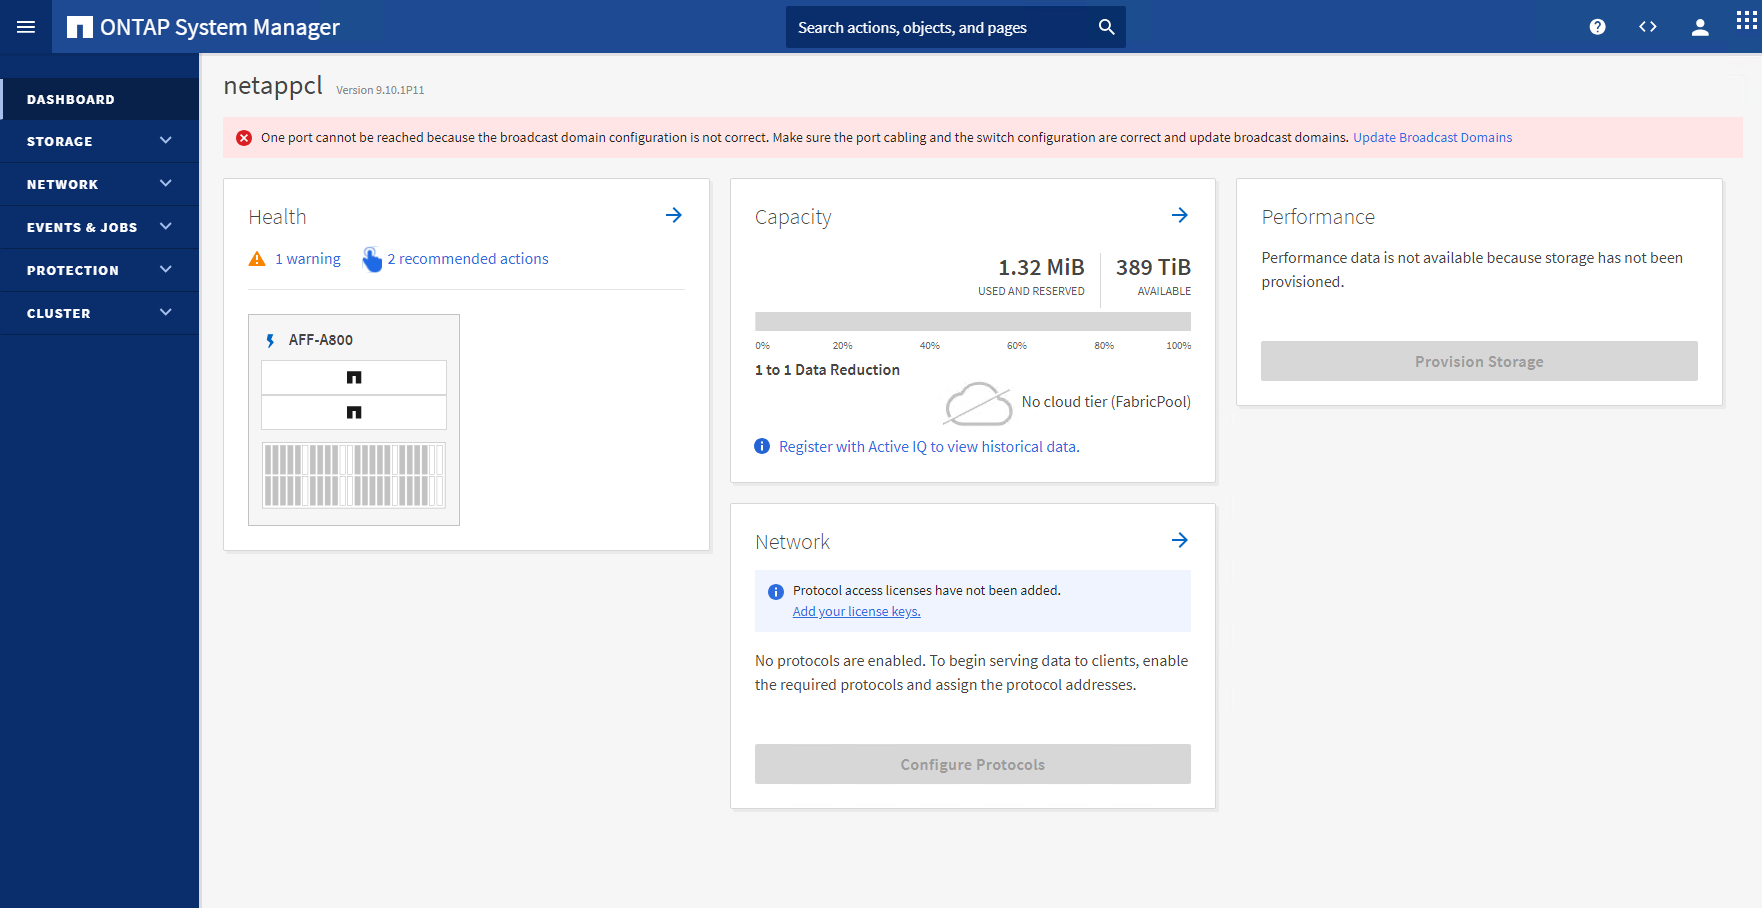
After you successfully authenticate, you will be greeted with the dashboard.
The first thing that needs to be done is to prepare the disks to serve data. Click the Prepare Storage button under Capacity.
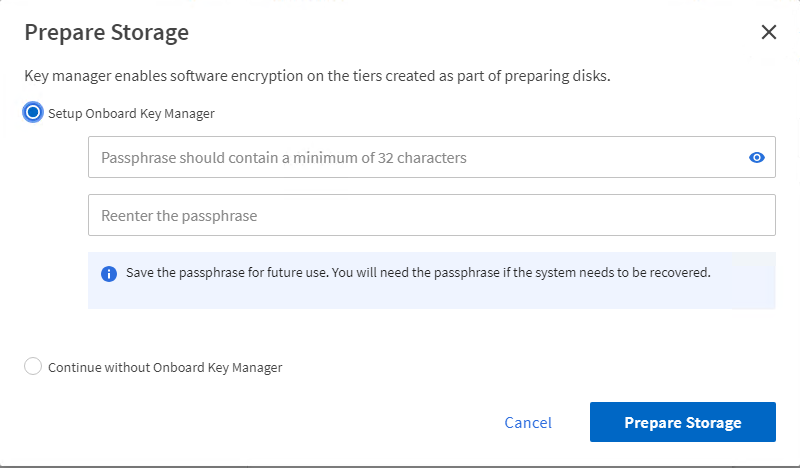
On the next screen, you'll be asked if you'd like to use Onboard Key Manager to encrypt your data. NetApp's Onboard Key Manager is an integrated security feature that provides robust encryption key management directly within the storage system, ensuring your data is securely protected without the need for external key management solutions. For more details, please see Enable onboard key management in ONTAP 9.6 and later from NetApp.
Make your selection, and click Prepare Storage.
Once you make your selection, you will see the status of Preparing the local storage will be shown. This will take a few moments to complete.

After the process has been completed, you will be brought back to the main dashboard. You will now see the available capacity of the storage system.
The next configuration that needs to be completed is LAGs created on each node, and the VLANs added. Both nodes can be configured from ONTAP System Manager.
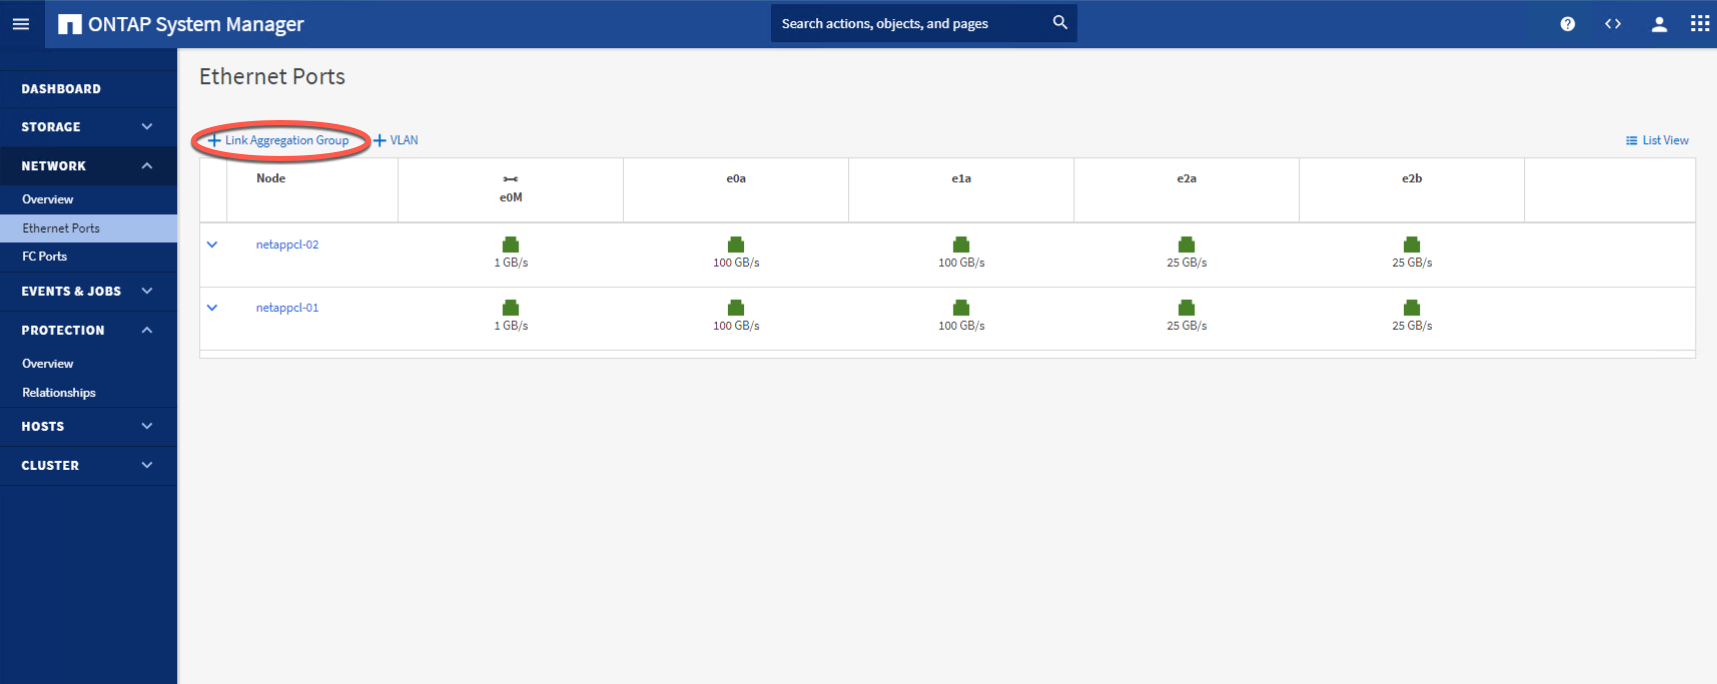
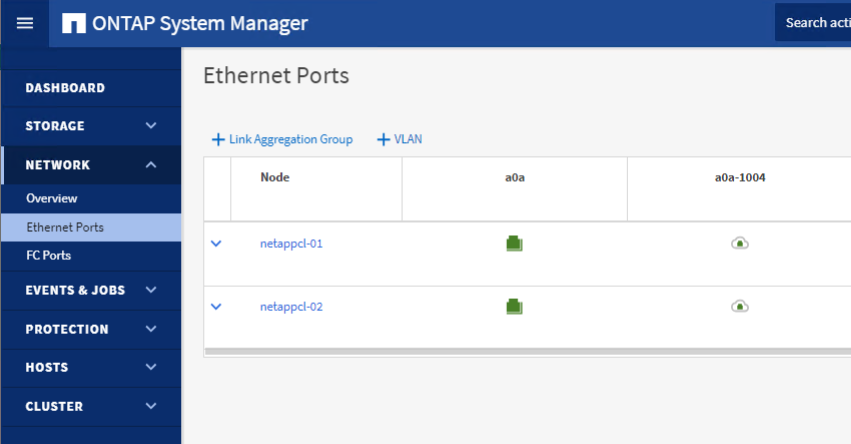
From ONTAP System Manager, Expand Network in the left navigation pane, then click Ethernet Ports. Click + Link Aggregation Group.
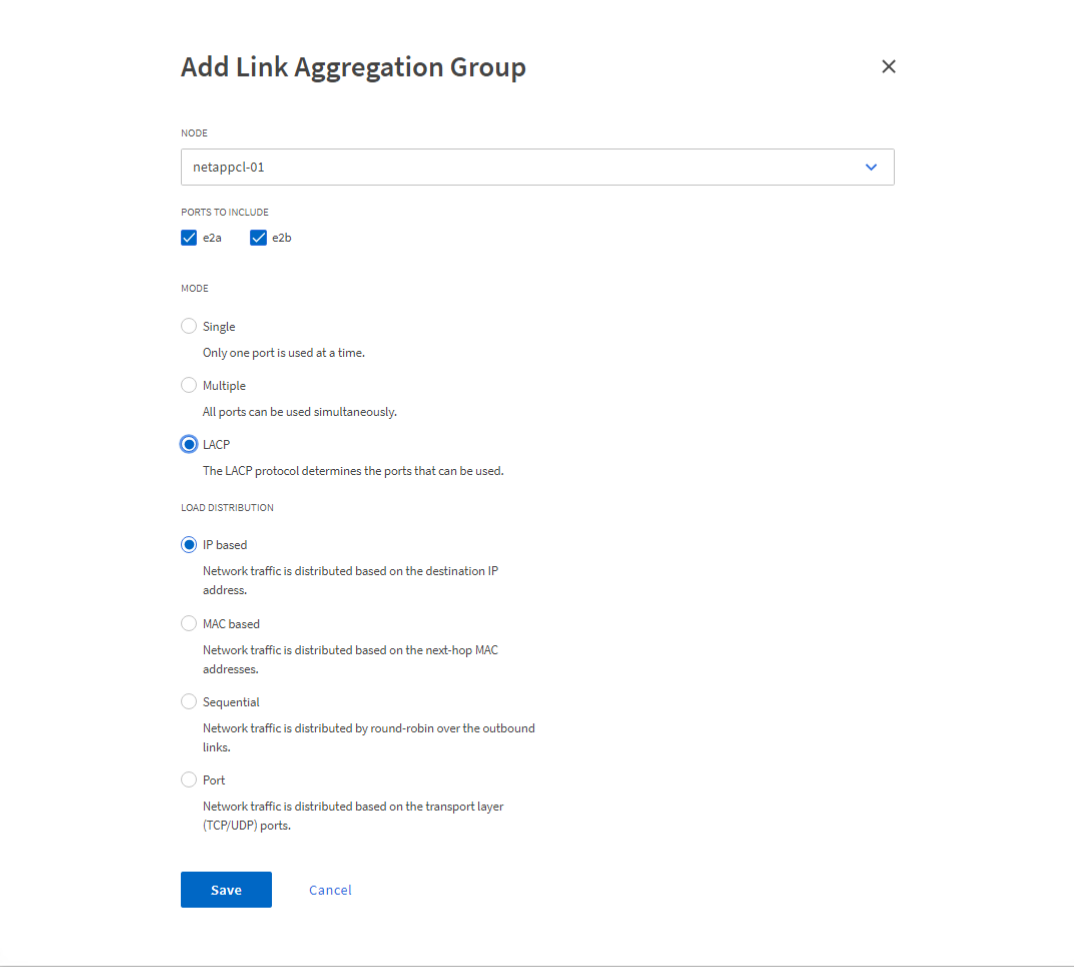
You will notice netappcl-01 has automatically been selected. Click the check boxes next to e2a and e2b. Then select LACP under MODE. Then Click Save.
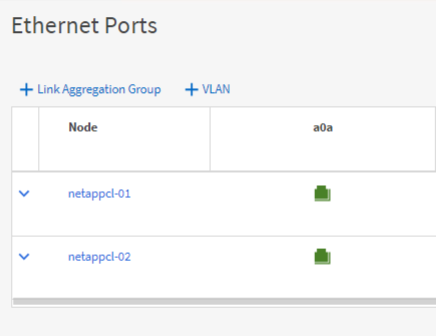
You will notice port a0a has been added on netappcl-01. Initially, the port will have a red icon. Allow a few moments for it to turn green. Repeat the process on each additional node. Both ports will show a green icon after a few moments.
To create the VLAN, click the + VLAN button.
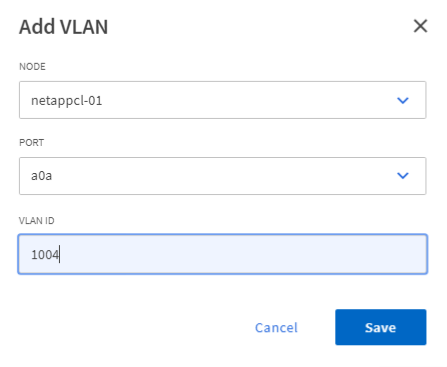
You will see netappcl-01 is selected, as is port a0a. Enter the VLAN number, in this case it 1004. Click Save. Repeat this process for each additional node (netapppcl-02 in our case). If you need to add additional data VLANs, remember they must be added to each node.
You can now see the LAG exists on both nodes, as does VLAN 1004.
At this point, you can now configure the NetApp cluster to serve data.
Serving Data from the NetApp Storage Cluster
To serve data, a Storage VM (SVM) must be created. As part of the SVM creation process, you will also select the protocol you will use to serve data.
From the left navigation pane, expand the storage menu and click Storage VMs. Click the blue +Add button.
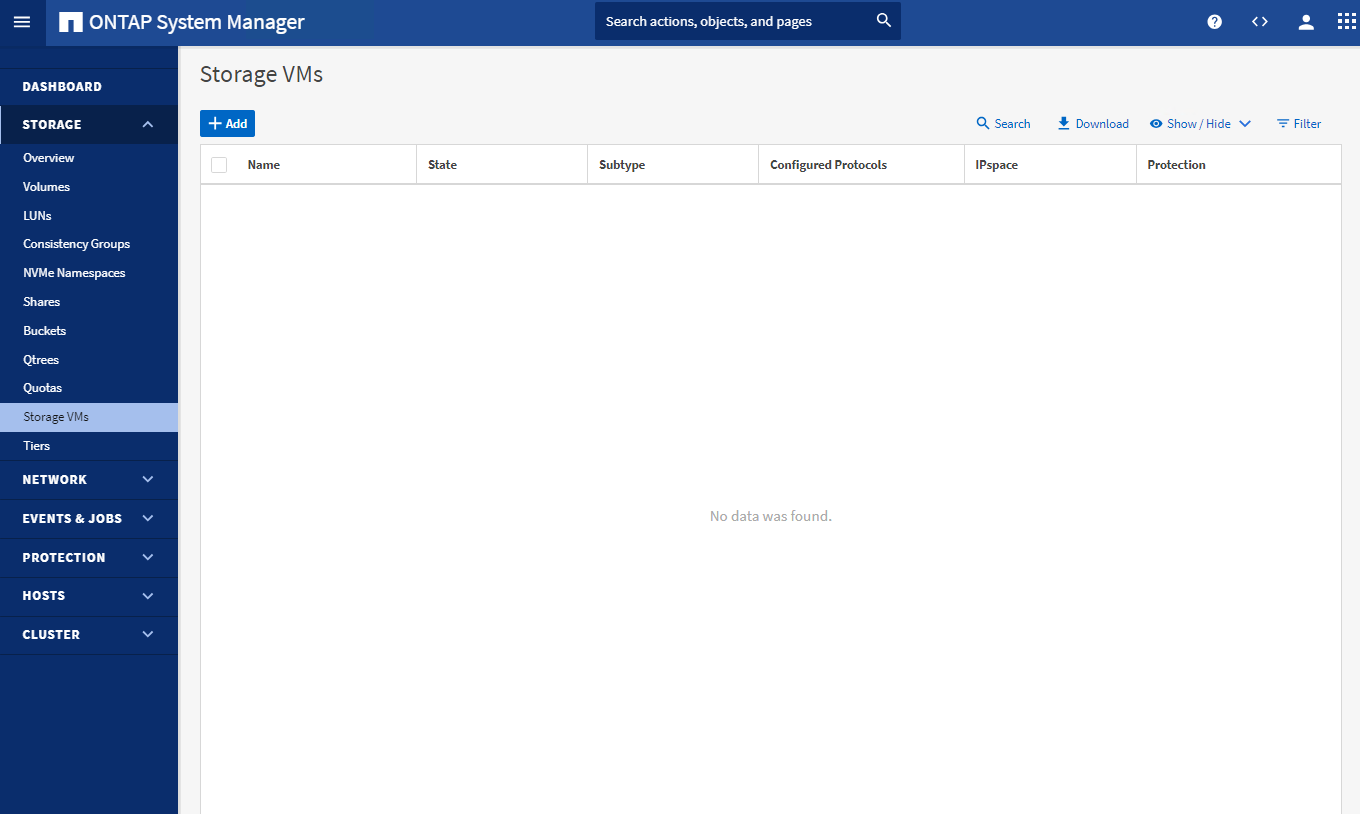
Enter a name for your SVM, and select the protocol you would like to serve data with. SMB/CIFS, NFS, S3, and iSCSI are the supported protocols on the Equinix Metal Platform. Check the box next to the protocol you would like to use, and continue the configuration process.
SMB/CIFS, NFS, S3:
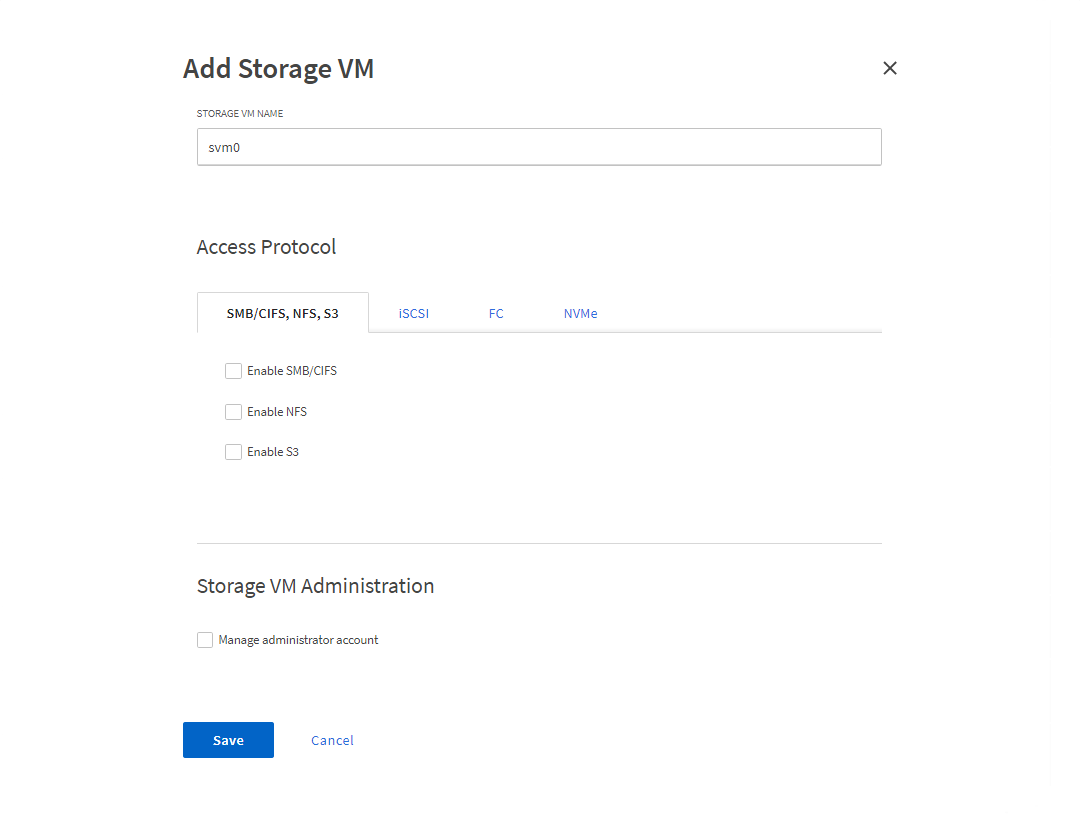
iSCSI:
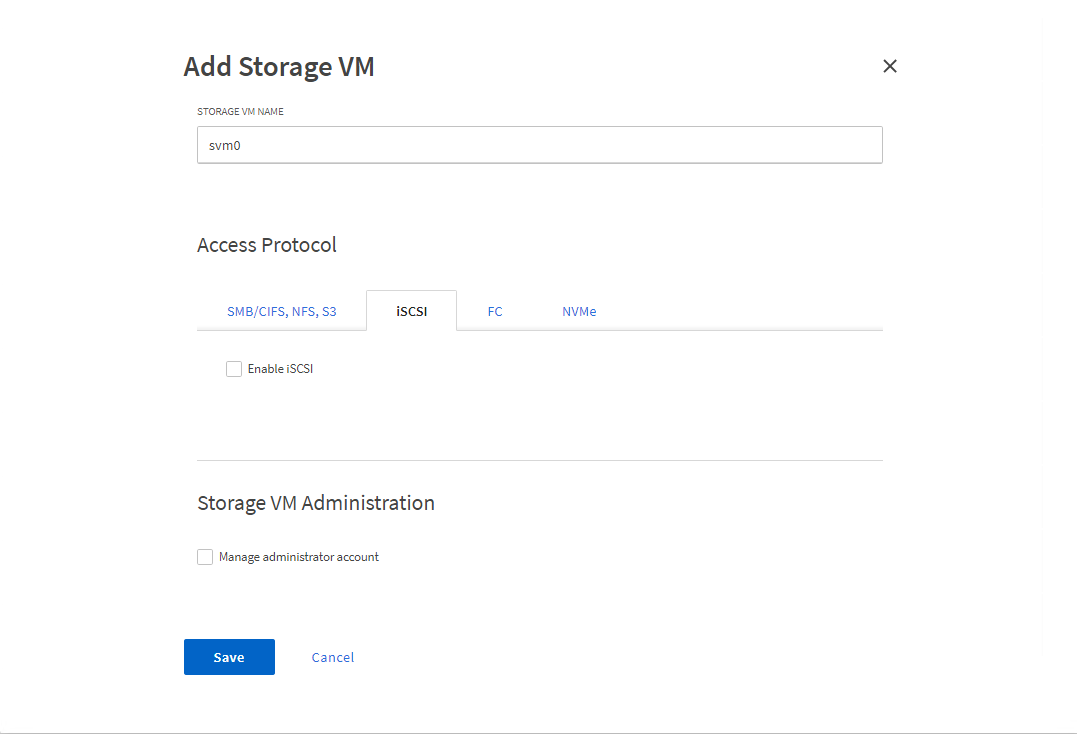
You can now continue the configuration process for the protocol of your choice.
Be sure to add the VLANs you will be using to all NetApp Storage nodes and the client servers in the Equinix Metal console, and on each client server.
Conclusion
This guide has outlined the necessary steps to order, configure, and manage your NetApp storage appliance on Equinix Metal, including VLAN setup and firewall requirements. By following these instructions, you can efficiently deploy and maintain a secure and effective storage solution tailored to your needs.
For more in-depth tutorials and information, check out our other storage guides.
Useful Links
Equinix Resources
NetApp Storage on Equinix Metal Solutions Page
Equinix Storage Appliances Docs
External Resources
Last updated
07 January, 2025Category
You may also like
Dig deeper into similar topics in our archives
Crosscloud VPN with WireGuard
Learn to establish secure VPN connections across cloud environments using WireGuard, including detailed setups for site-to-site tunnels and VPN gateways with NAT on Equinix Metal, enhancing...

Kubernetes Cluster API
Learn how to provision a Kubernetes cluster with Cluster API
Kubernetes with kubeadm
Learn how to deploy Kubernetes with kubeadm using userdata

OpenStack DevStack
Use DevStack to install and test OpenStack on an Equinix Metal server.