- Home /
- Resources /
- Learning center /
- Deploying NFS on D...
Deploying NFS on Dell storage via Equinix Metal
Step-by-step instructions for using Dell Storage with the NFS protocol on Equinix Metal

On this page
This guide explains how to leverage Dell Cloud Adjacent Storage using the NFS protocol on Equinix Metal. It assumes that the initial setup and configuration of the storage appliance have already been completed. This guide covers the necessary steps to serve data with NFS, as well as basic tasks such as adding additional volumes and managing export policies.
For newcomers to Dell, we recommend starting with our Getting Started: Initial Setup of Dell Storage on Equinix Metal guide.
Prerequisites
To successfully serve data with NFS from the Dell Storage, you will need several things.
- A VLAN for NFS traffic in Equinix Metal. If you need to add another VLAN to the Dell Storage cluster, you can find the detailed instructions on how to add it in the Metal Console and the Dell interface in the getting started guide.
- A NFS client that will be using the storage. In this guide, we are using an Ubuntu Linux server. If you have not deployed a server in Equinix Metal before, you can find a detailed guide to Deploying Your First Server here.
- A NAS server and File System configured on the Dell PowerStore. This guide will show you how to accomplish this.
Configuring Dell PowerStore to Serve NFS Data
Through creation of a NAS server and File System, you can serve data with file protocols such as NFS and SMB with your Dell PowerrStore. This guide covers setting up NFS, for more information on how to set up SMB, please see the Dell PowerStore Configuring SMB documentation.
To begin the configuration, enter the IP address of the PowerStore cluster in a Web Browser. You will have received this IP address from Equinix as part of the handover process.
Configuring a NAS Server
The first step in the process is to configure a NAS server.
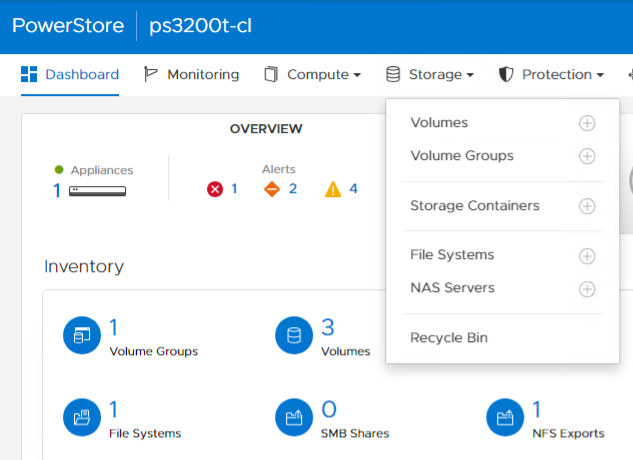
From PowerStore manager, click Storage, and then NAS Servers in the menu.
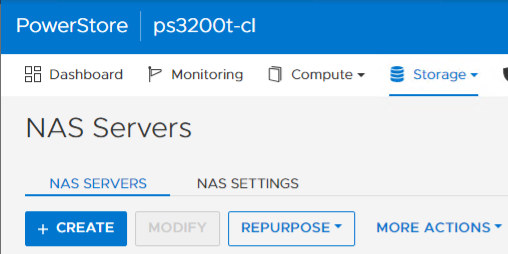
In the NAS Servers pane, click the blue + CREATE button.
To begin, enter the following information:
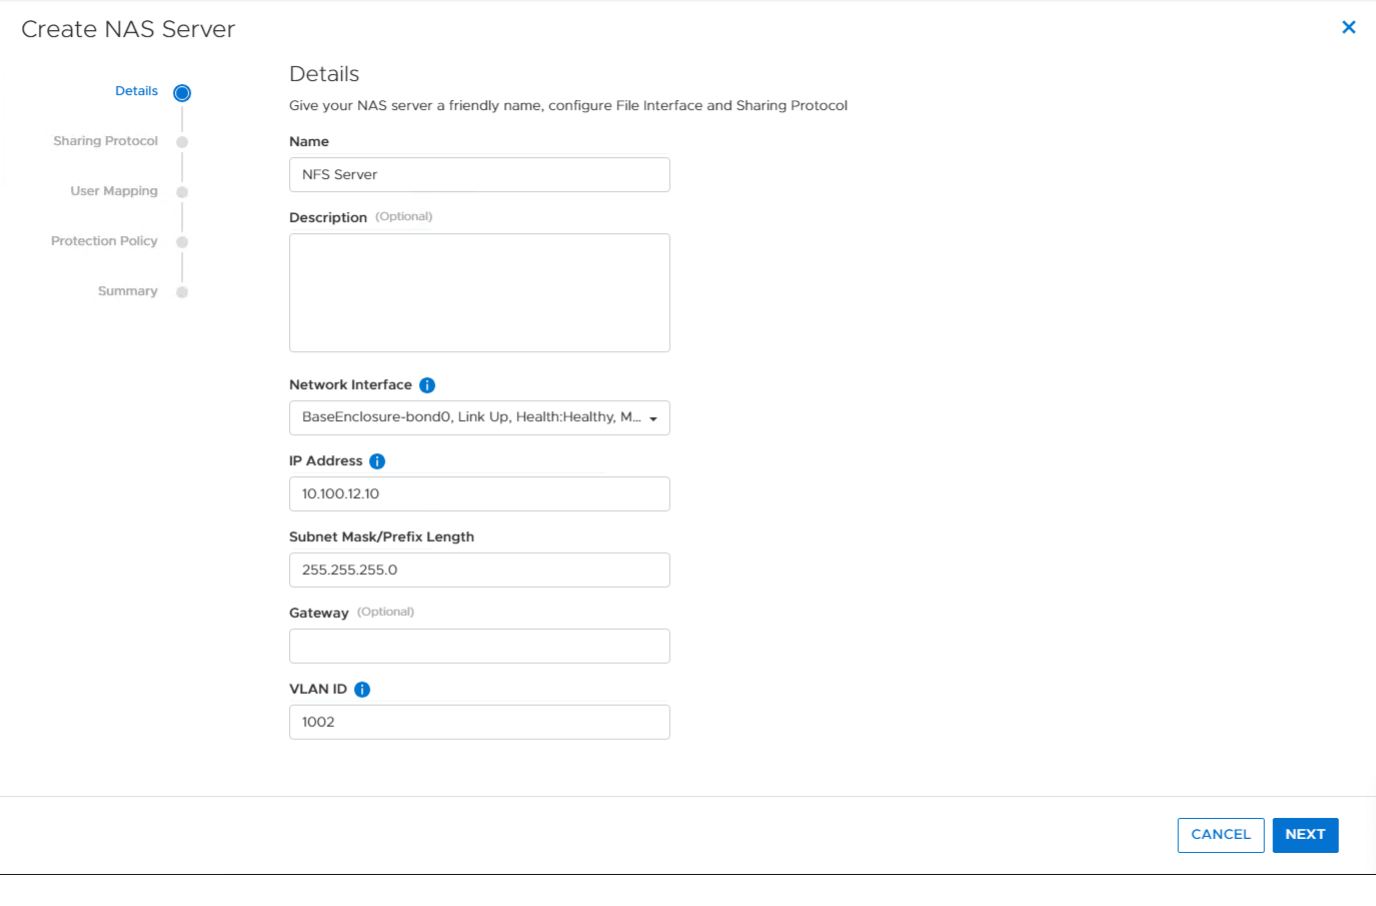
Under Network Interface, we are choosing the bonded interface on the cluster. This is the default option. Click Next.
In the next screen of the wizard, the Sharing Protocol screen, we wll select the protocol. In this case, we will select NFSv4. When using NFS, you may use both NFSv3 and NFSv4 on the same NAS Server. Click Next.
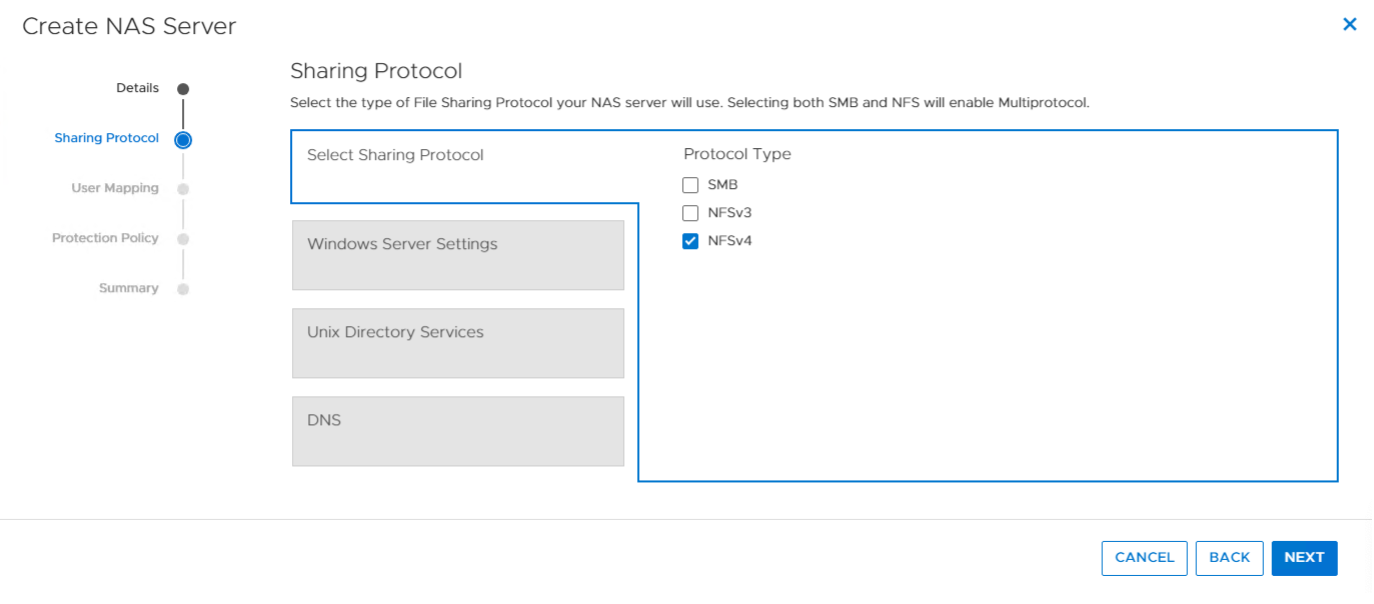
Since we are configuring NFS, the next pane we are brought to is the Unix Directory Services pane.
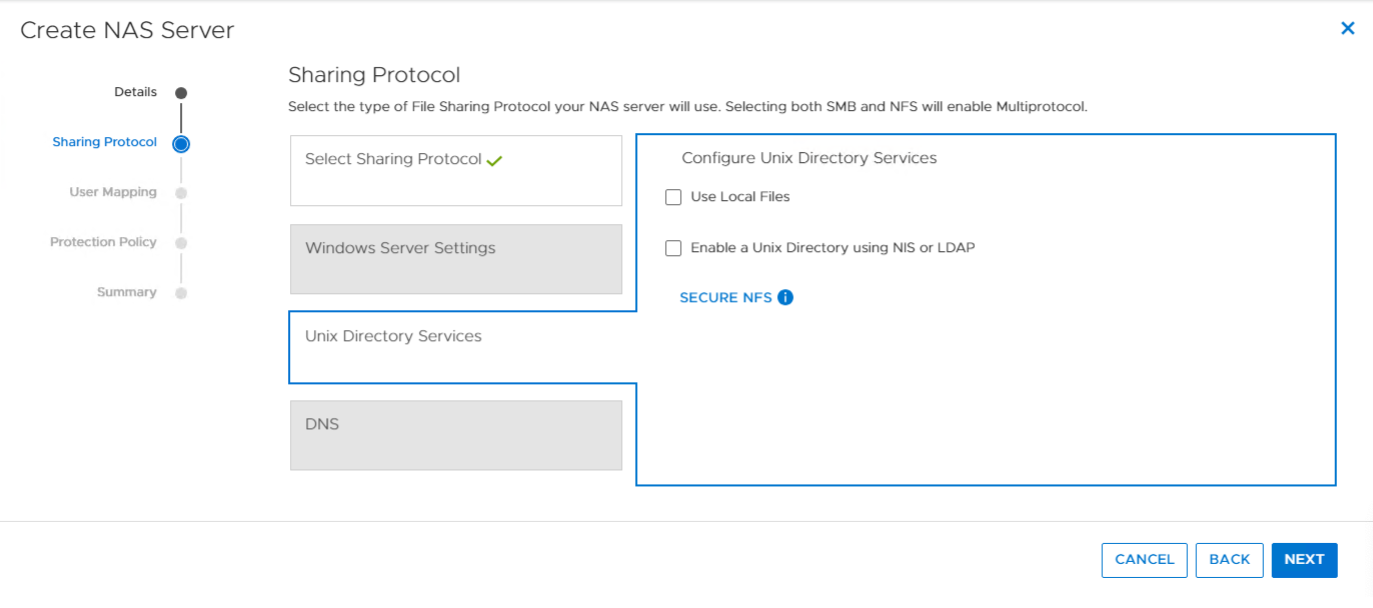
If you are using directory services, select the option you wish to use here. There are two options, Use Local Files or us NIS or LDAP. For more information on these options and instructions for implementation, please see Dell PowerStore Configuring NFS - NAS Server Naming Services.
To learn more about Secure NFS, please see the Dell PowerStore Configuring NFS - Create a NAS server for NFS file systems documentation for more details.
Click Next.
The final pane in the Sharing Protocol screen is DNS. If you wish to use DNS check the box for Enable DNS Server, and enter the information for your DNS server. Pease note, you must use DNS for Secure NFS. Click Next.
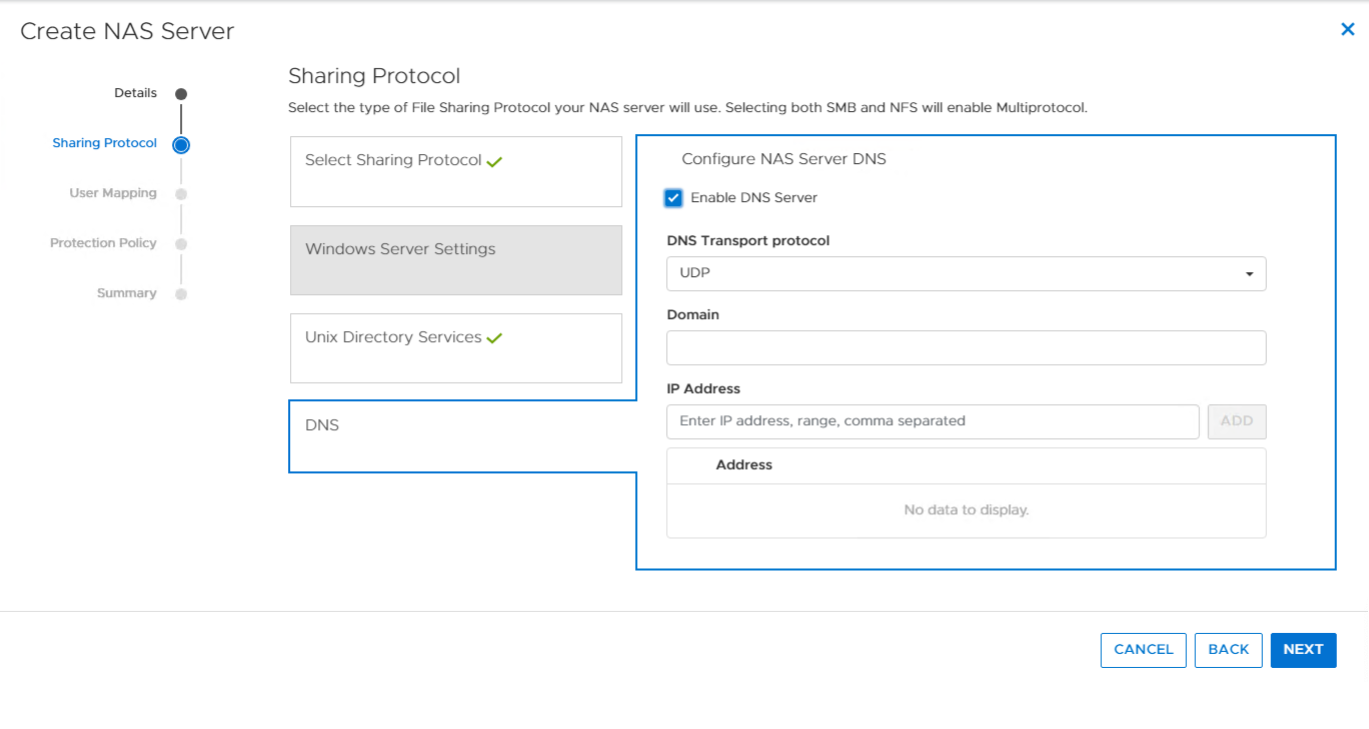
The next stage of the wizard is for User Mapping. User Mapping can be useful to help users authenticate if you have a need for users to access data over multiple protocols, such as over SMB and NFS. In this case we will not be using this feature. To learn more about User Mapping, please see User Mapping - Dell PowerStore: File Sharing Capabilities. Click Next.

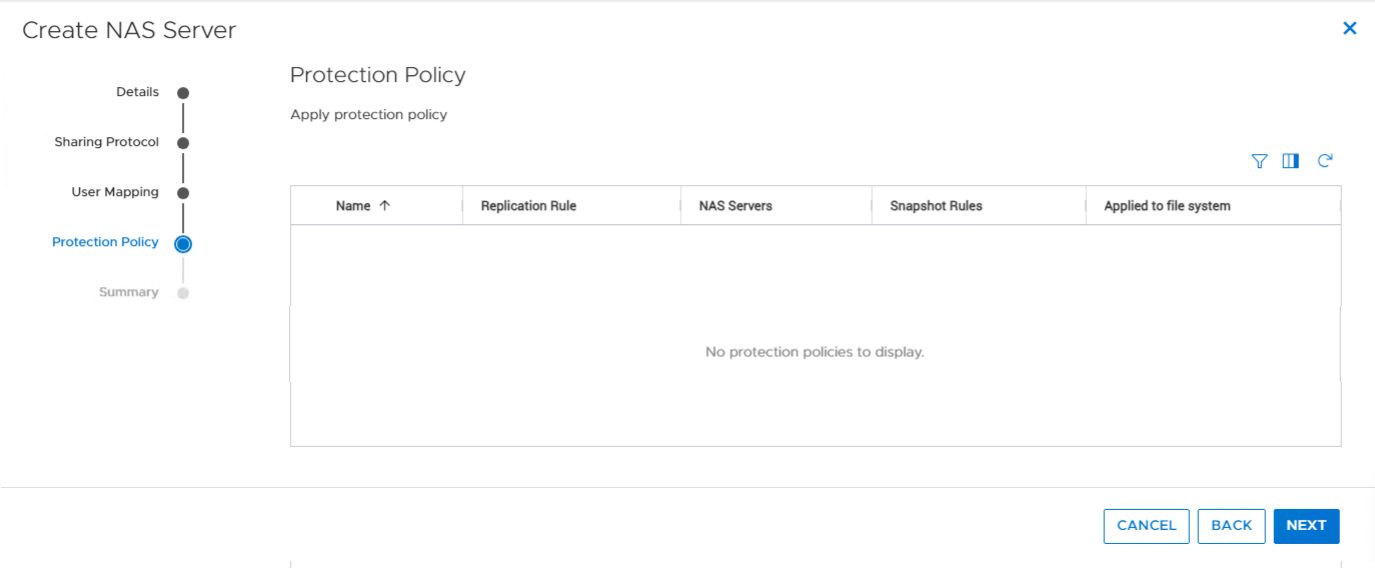
If you have configured a protection policy, you can select it in the next step of the wizard. For more on protection policies, please see the Dell PowerStore Protecting Your Data - Protection policies documentation. Protection policies can be individually tailord to your specific data needs. They may contain one replication rule, one remote backup rule, and up to four snapshot rules. You may set a rule that addresses any combination of these data protection methods. For example, a Replication rule and a Snapshot rule. You may also elect to only use one type of rule, such as Snapshots only.
Next you will see the summary screen. Click the CREATE NAS SERVER button.
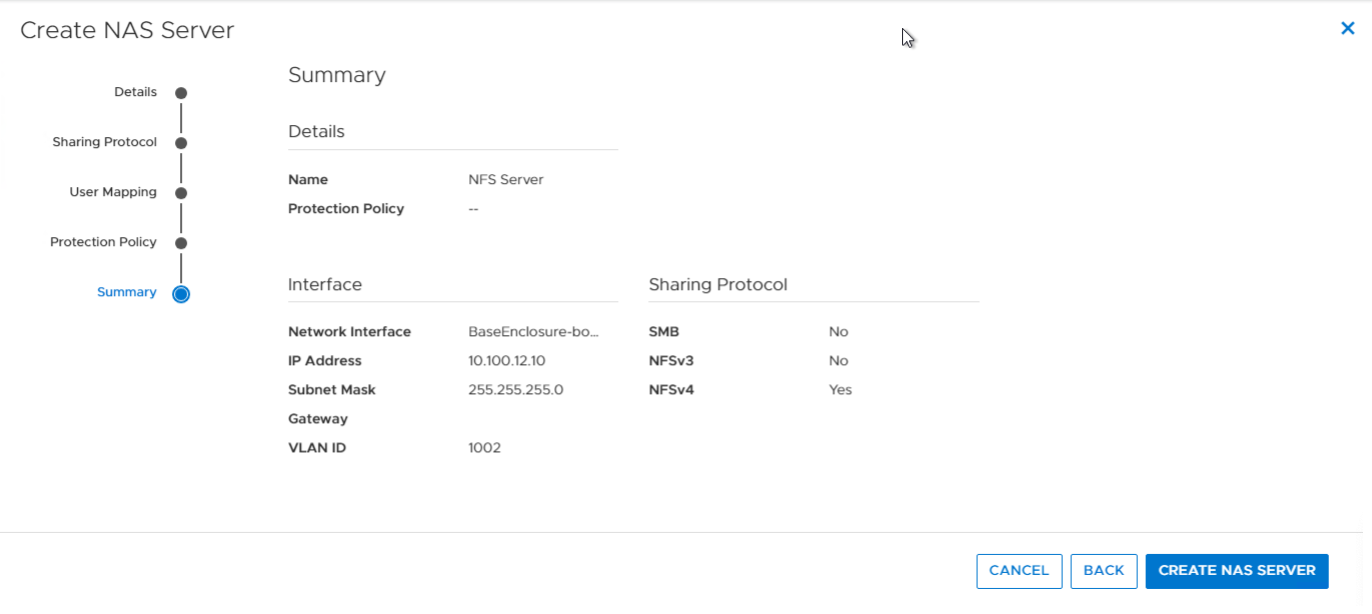
Your NAS Server will now be created. This will take several moments, and the wizard will display a status message during the creation process. After creation, you can see the NAS Server in the NAS Servers pane.
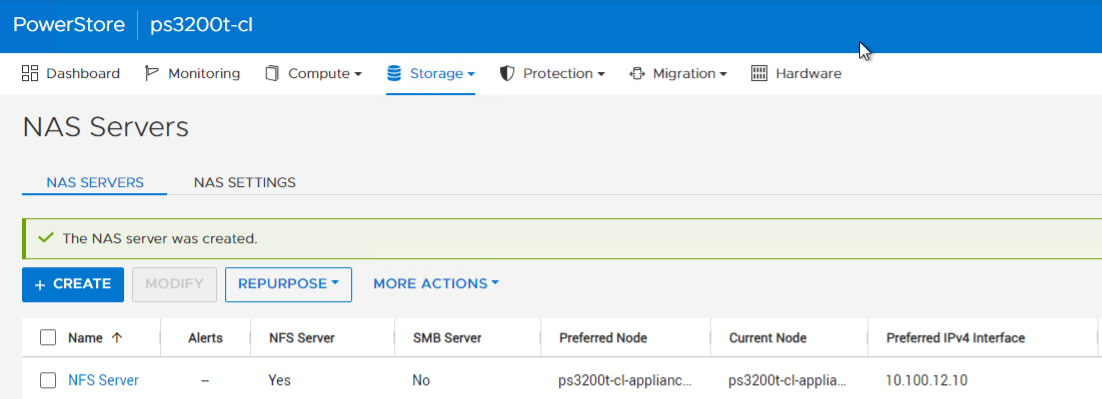
This completes the configuration of the NAS Server.
Configuring a File System
After a NAS server has been configured, then a File System can be configured.
From the top menu bar, select File Systems under Storage.
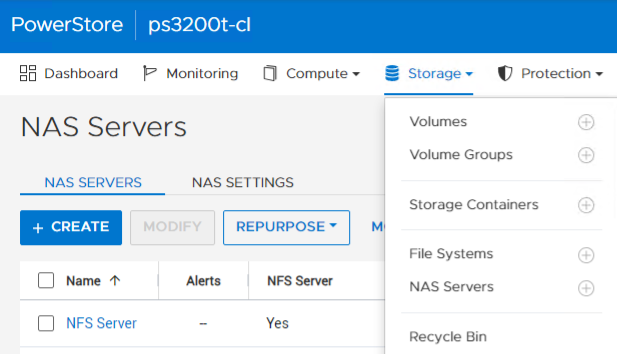
Click the blue + CREATE button.
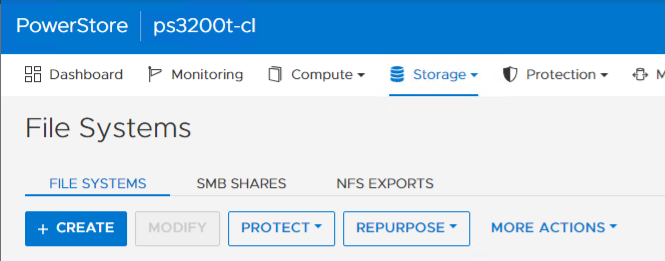
You will now go through the Create File System Wizard.
To begin, select a General file system. Then click Next.
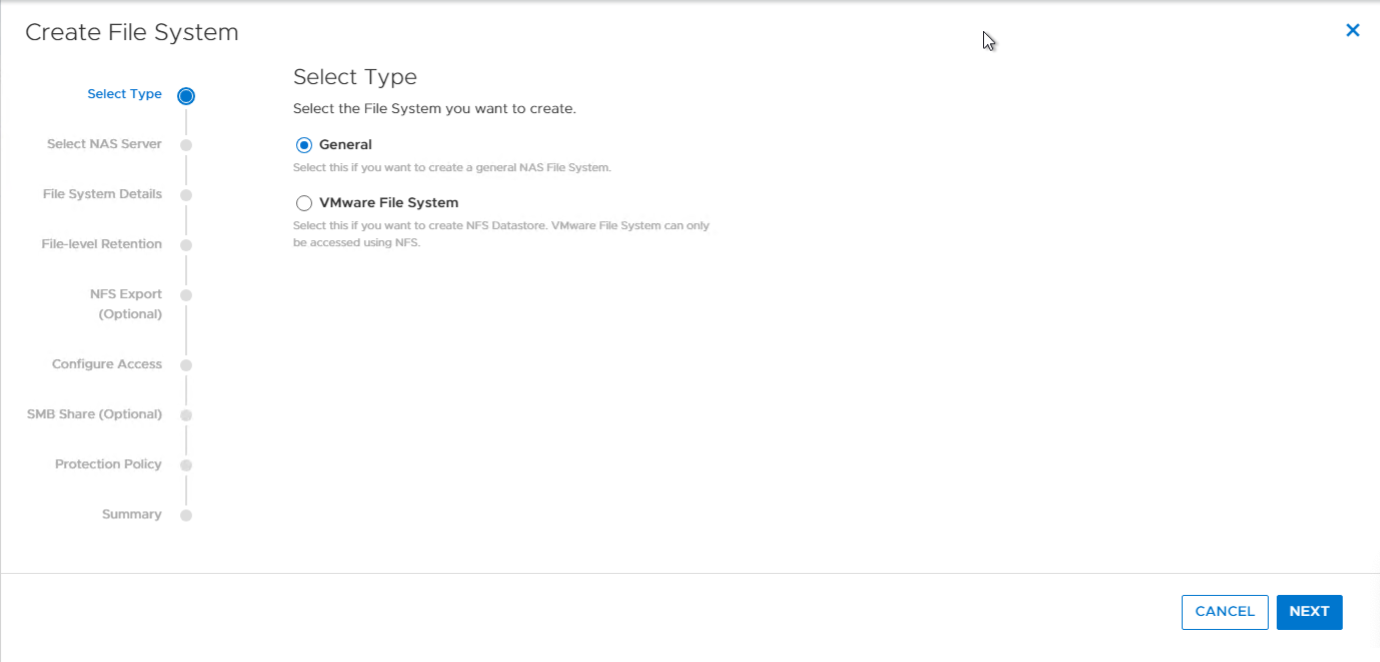
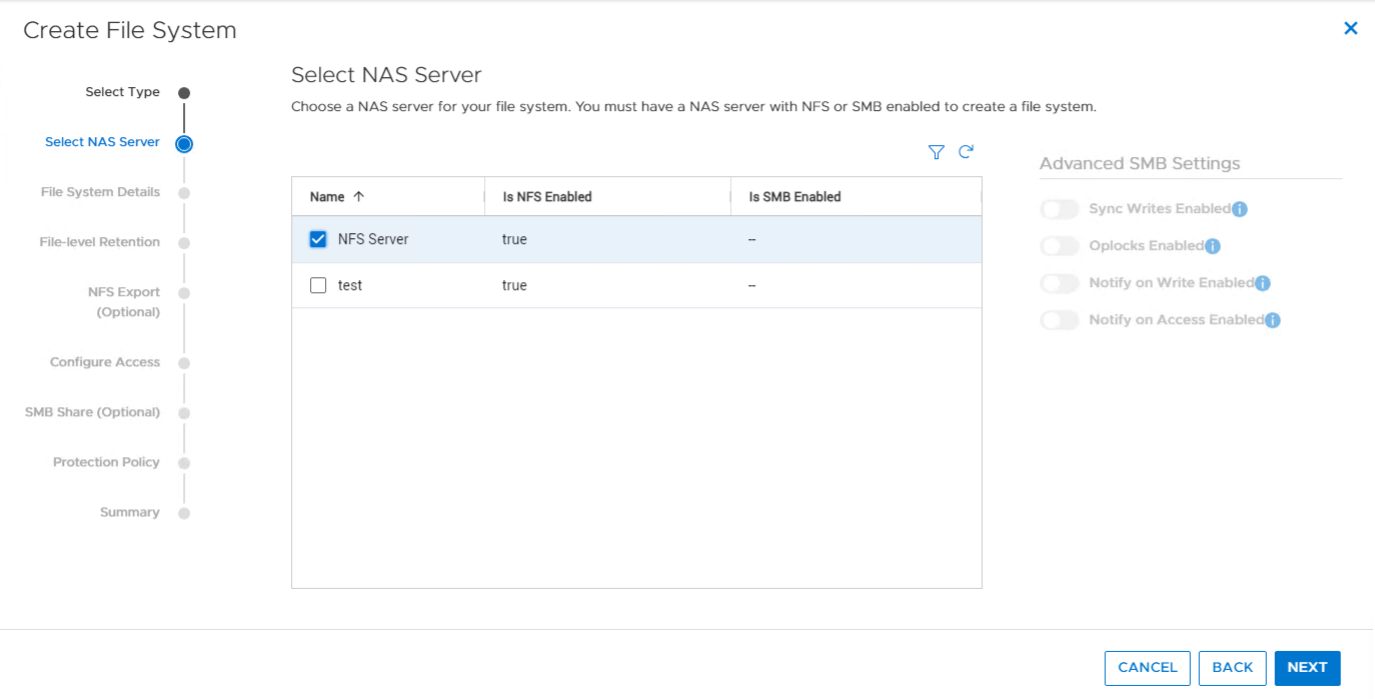
In the Select NAS Server screen, select the NAS Server you previously created. In this case, it is NFS Server. Then click Next.
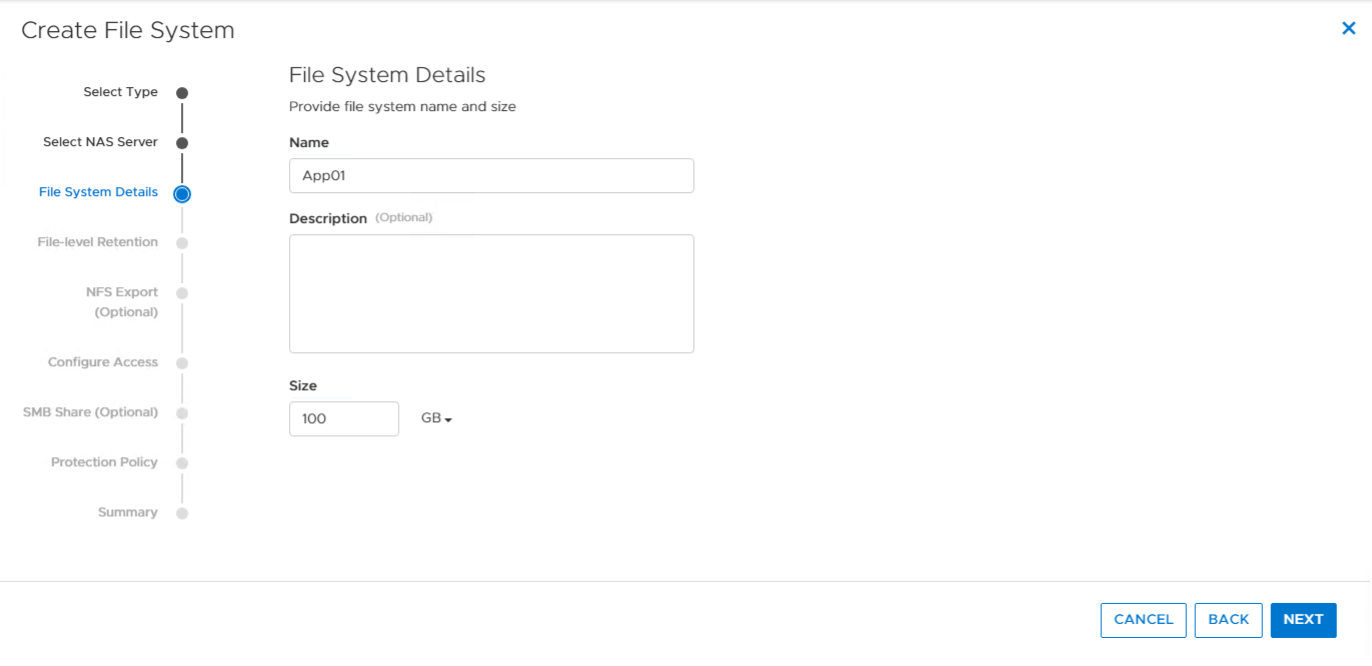
In the File System Details screen give your File System a name, and enter a size. Please note the file system name cannot include spaces or special characters. Click Next.
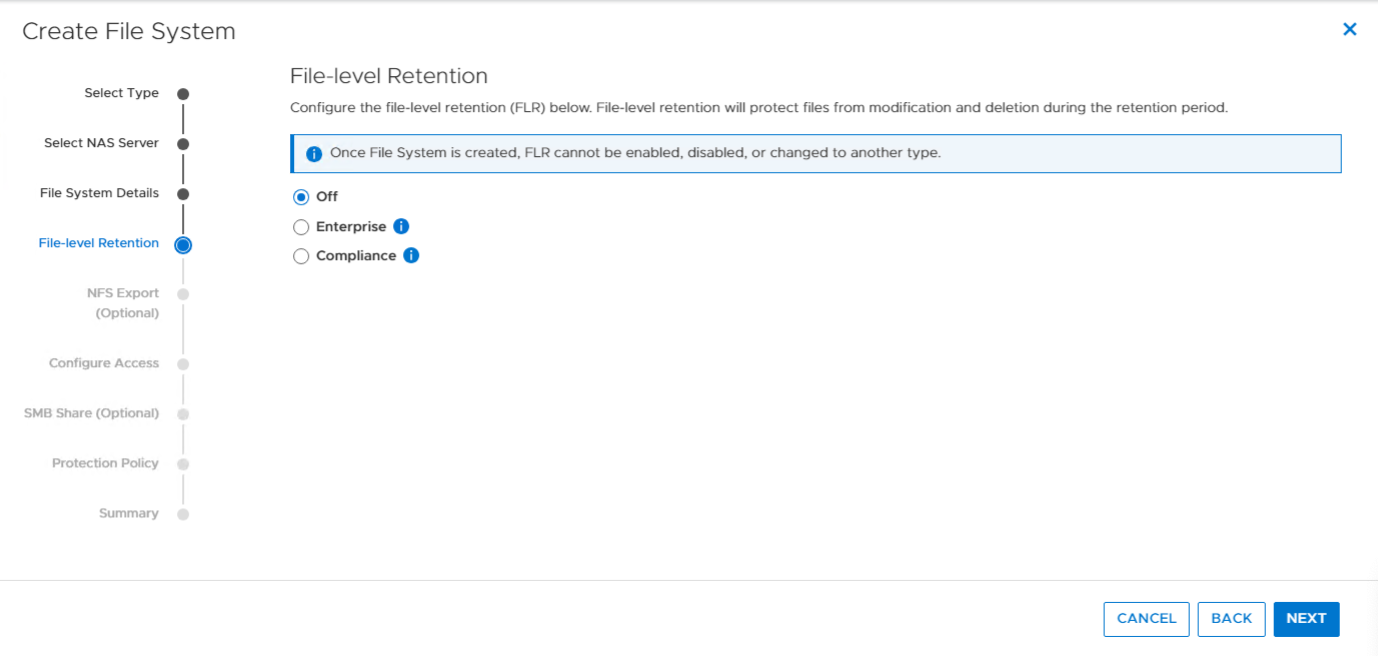
Next is the file-level retention (FLR) screen. Please note, after creation, the FLR cannot be modified. The options are Off, Enterprise, or Compliance. Enterprise protects changes to data made by users, and Compliance protects data from changes against users, administrators, and is compliant with SEC Rule 17a-4(f). For more on FLR, please see File-level retention from the Dell PowerStore Configuring NFS documentation. For this example, we will not be using FLR. Click Next.
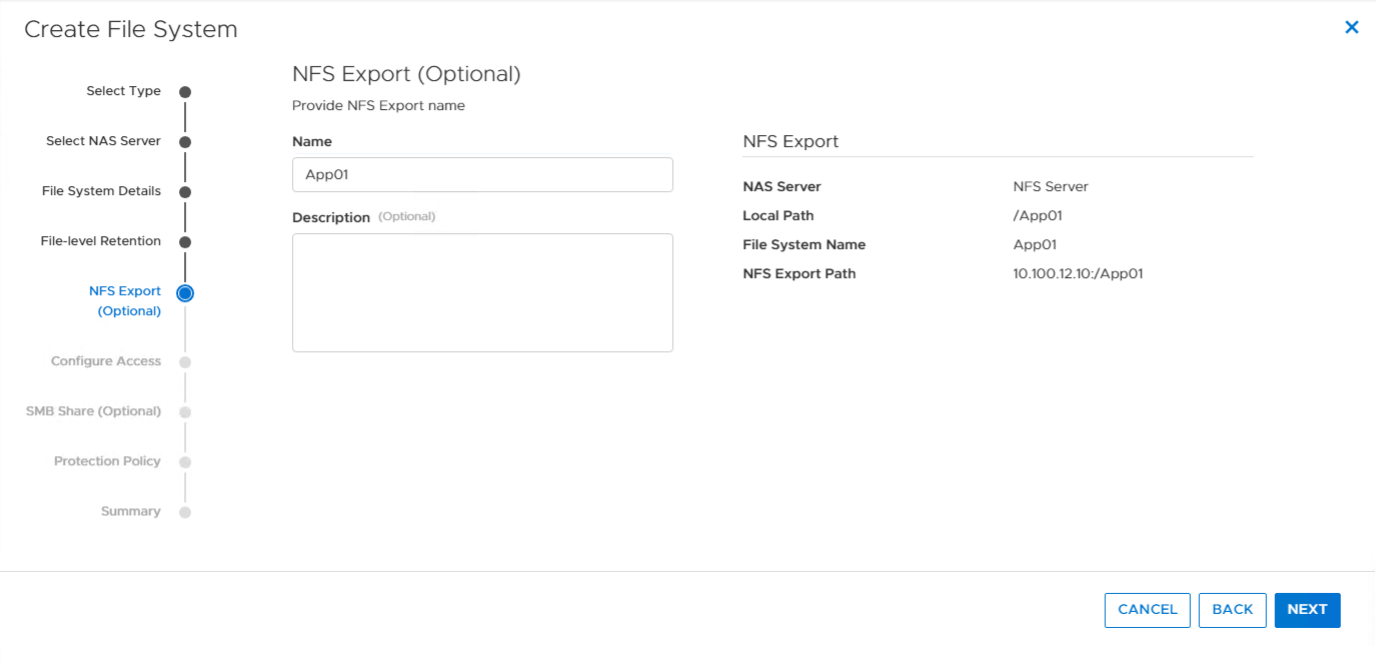
Next, provide a name for the NFS export, which is an optional step. It can be useful to create a name if you will be managing multiple file systems. In this case, we will call the NFS Export App01. Please note the NFS Export Path for later use. Click Next.
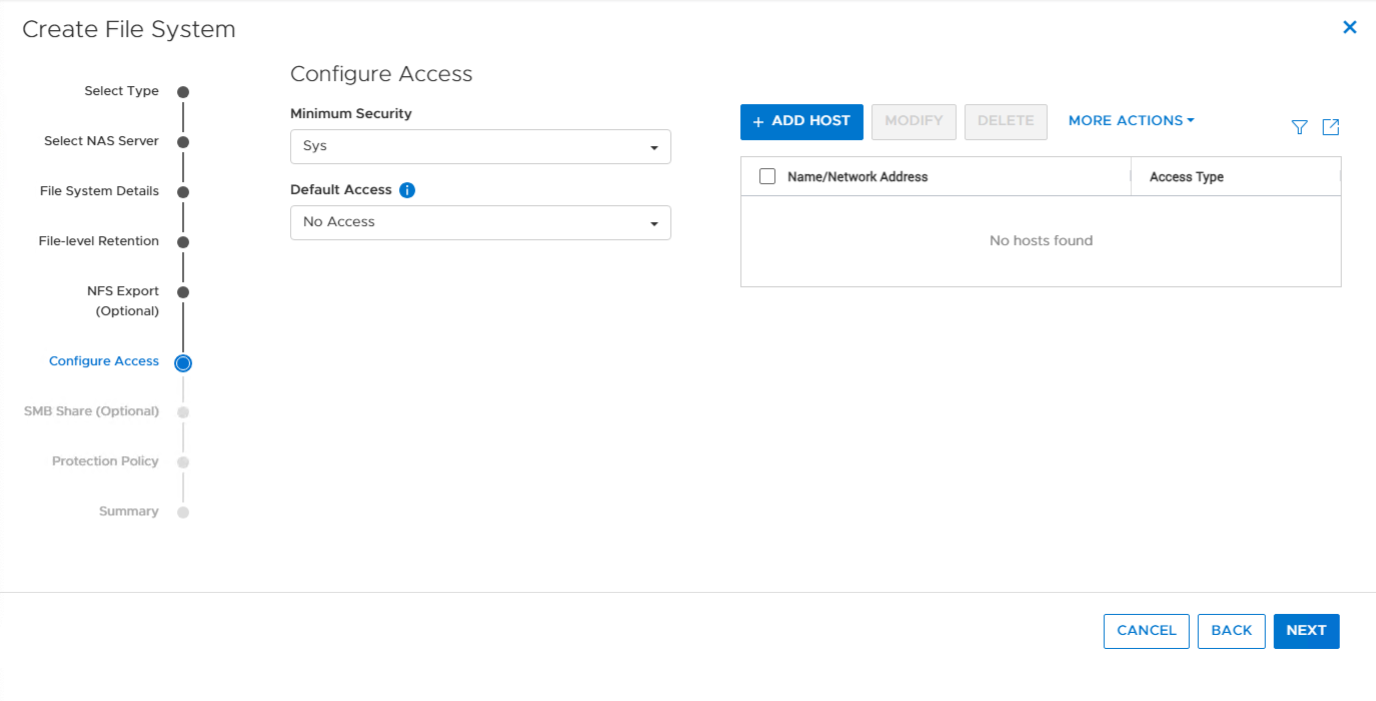
Next is to configure access from the hosts you will be serving data to, to the Dell PowerStore. There are a a few things to pay close attention to on this screen. If your host cannot access the NFS storage, it is likely a mis configuration in this step.
Mininmum Security - The default value is Sys, there are also options for Kerberos if you set up directory services during the configuration of the NAS Server.
Default Access - By default, No Access is selected. It is applied to all hosts, unless you override access for hosts, which is what we are going to do next.
Click the blue + ADD HOST button.
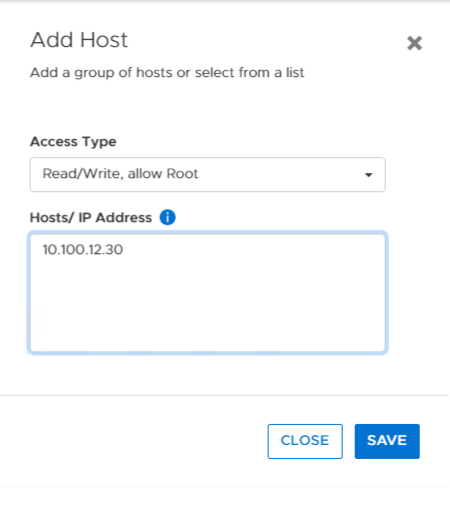
In the Add Host pane, select the type of access you wish to use, then enter the host information. You may enter a host IP address, DNS name (if you have configured DNS), subnet, or domain. In this case, we have entered the IP address of the host we are going to connect from. Click Save.
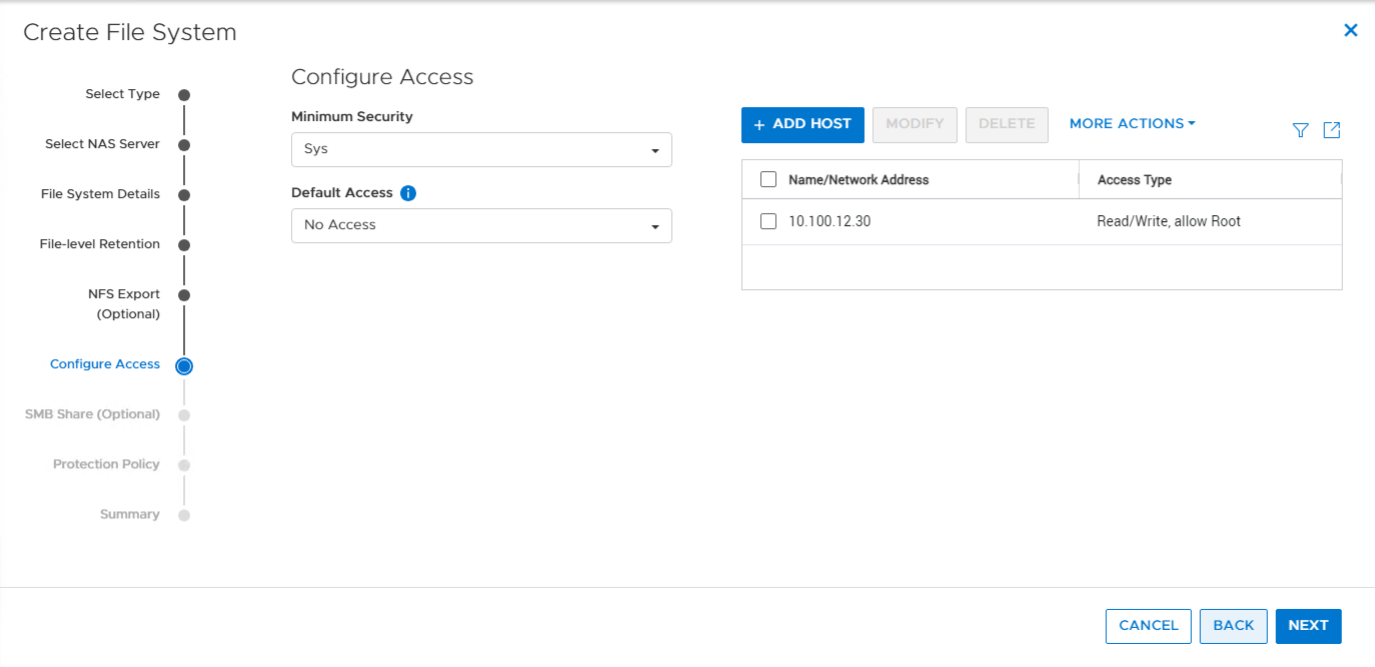
You will now see the rule in the configuration access step. Click Next to continue.
If you have configured a protection policy, it will be visible in the next screen and may be selected. Click Next.
View the summary screen, and click CREATE FILE SYSTEM to create the file system. You will see the NFS Export Path again for later use.
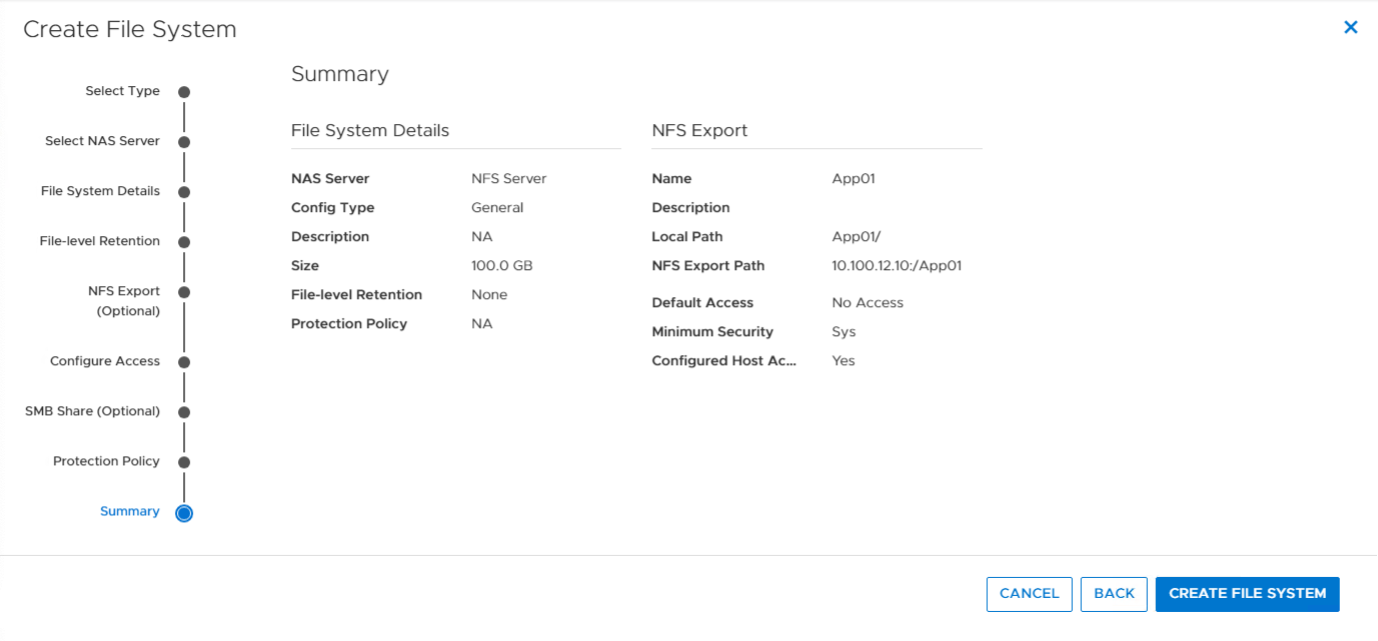
The file system creation process will take a moment. Once creation is complete, you will see it in the File Systems pane.

You are now ready to connect your Metal server to the Dell storage.
Connecting Equinix Metal Clients to the Dell NFS Volume
Before you can connect your Metal server to the Dell Storage using the NFS protocol, there are several things that must be configured.
- The Equinix Metal client must be connected to the same Equinix Metal VLAN the Dell NFS interfaces are on. In this case, it is VLAN 1002.
- The client must have an interface with an IP address in the NFS VLAN's IP range. For more on how to configure your Equinix Metal host's networking , please see the Layer 2 Networking Guide.
- A Dell export policy must have been configured that will grant the client access.
- NFS must be installed on the Linux host.
To connect an Equinix Metal client, you will need the NFS export path from the Dell cluster:
During the filesystem creation process, the NFS export information was shown. You can also view the NFS export information by clicking on Storage, then File Systems. Click the NFS EXPORTS tab to see the NFS export.

You may also click on NFS Exports from the dashboard to be brought to this screen.
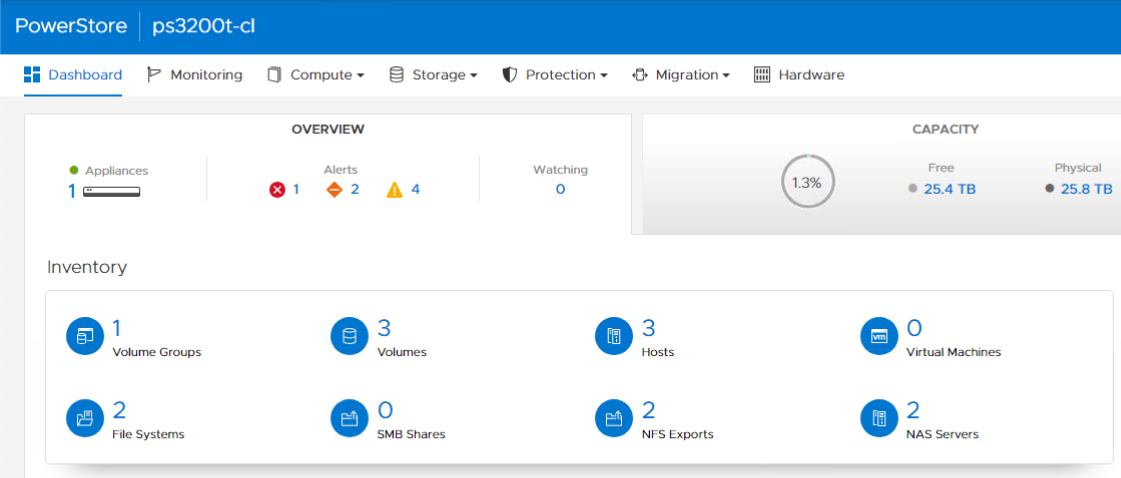
In this case, the export is 10.100.12.10:/App01
You can now mount the NFS share from the client you are using.
To verify if the nfs-common package is installed, enter the command:
apt list -- installed | grep nfs-common

If it is installed, you can continue.
If not, you can install it with the command
apt install nfs-common
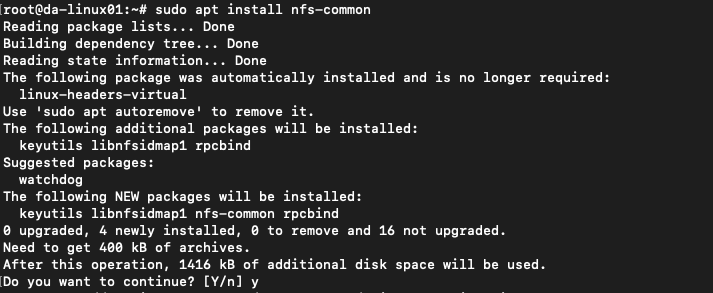
In this case, we are mounting the NFS share from an Ubuntu Linux server with the following commands:
First, make a mount point to mount the NFS file system to.
mkdir /opt/App01
Then, mount the file system with the following command:
mkdir /opt/App01
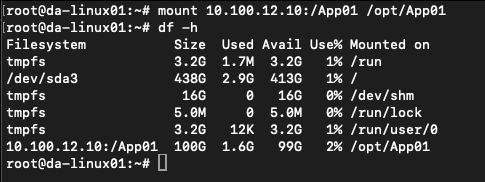
mount 10.100.12.10:/App01 /opt/App01
We can see the mount command has executed without error.
To further verify the storage is mounted, use the following command:
df -h
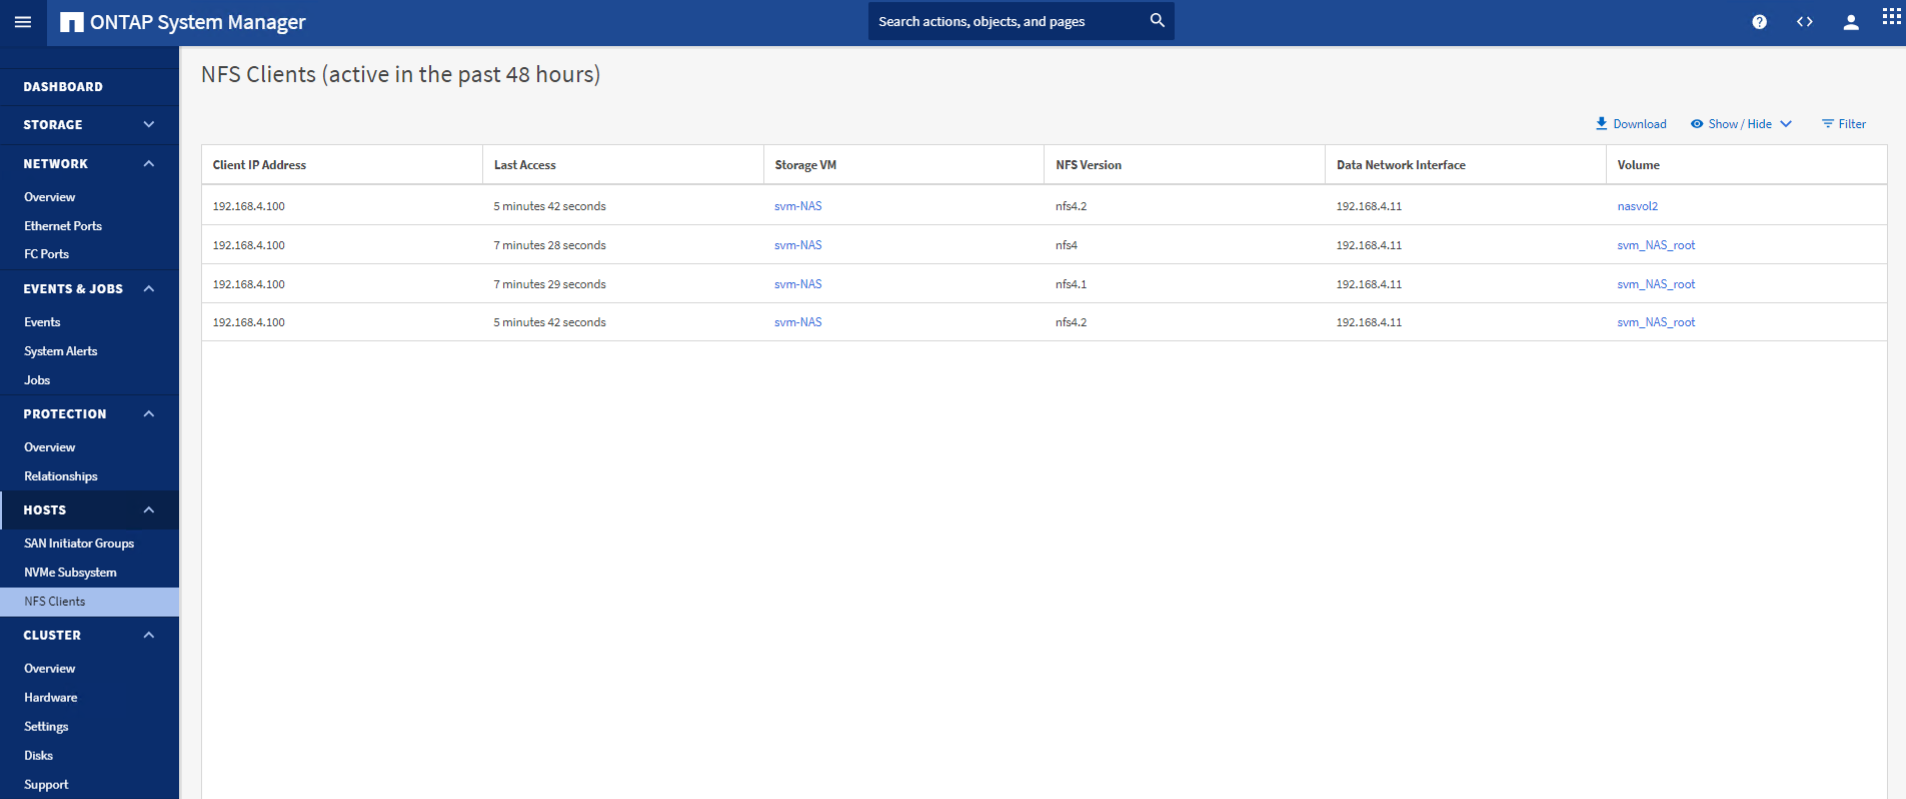
You can also verify the connection by navigating to Hosts in the left navigation pane, expanding the menu, and clicking on NFS Clients.
Follow this process to connect additional Equinix Metal clients to the Dell storage.
Conclusion
By following this guide, you have successfully set up Dell Cloud Adjacent Storage using NFS on Equinix Metal, configured the necessary export policies, and connected your Equinix Metal clients to the storage. For more advanced configurations and additional resources, refer to the Dell documentation linked above or check out one of our other storage guides.
Useful Links
Equinix Resources
- Equinix Learning Center
- Equinix Storage Appliances Docs
- Equinix Community
- Getting Started: Initial Setup of Dell Storage on Equinix Metal
- Deploying Your First Server on Equinix Metal
- Layer 2 Networking Guide
External Resources
Here are additional resources from the Dell documentation that have been consulted during the creation of this guide.
- Dell PowerStore Configuring NFS - Create a NAS server for NFS file systems
- Dell PowerStore Configuring NFS - NAS Server Naming Services
- User Mapping - Dell PowerStore: File Sharing Capabilities
- Dell PowerStore Protecting Your Data - Protection policies File-level retention from the Dell PowerStore Configuring NFS documentation
Last updated
11 November, 2024Category
You may also like
Dig deeper into similar topics in our archives
Configuring BGP with BIRD 2 on Equinix Metal
Set up BGP on your Equinix Metal server using BIRD 2, including IP configuration, installation, and neighbor setup to ensure robust routing capabilities between your server and the Equinix M...

Configuring BGP with FRR on an Equinix Metal Server
Establish a robust BGP configuration on your Equinix Metal server using FRR, including setting up network interfaces, installing and configuring FRR software, and ensuring secure and efficie...

Crosscloud VPN with WireGuard
Learn to establish secure VPN connections across cloud environments using WireGuard, including detailed setups for site-to-site tunnels and VPN gateways with NAT on Equinix Metal, enhancing...

Deploy Your First Server
Learn the essentials of deploying your first server with Equinix Metal. Set up your project & SSH keys, provision a server and connect it to the internet.