- Home /
- Resources /
- Learning center /
- Connecting Multipl...
Connecting Multiple VLANs with Full IP Control
Connect two of your VLANs to each other using a Virtual Routing and Forwarding (VRF) instance

In this guide, you will learn how to connect two of your private layer 2 VLANs on Equinix Metal, when you have complete IP control on both of them. You will connect two Equinix Metal VLANs in the same metro using a Virtual Routing and Forwarding (VRF) instance. This method gives you complete IP control over the VLANs. You select the IP address range to use within the VLANs, and assign the IP addresses to the Metal devices on those VLANs.
Note that these two VLANs must be in the same metro for this methodology to work. If the VLANs are in different metros, you will need to use Equinix Metal Backend Transfer. In that case, refer to our guide Connecting Multiple VLANs Using Equinix Metal Private IP Addressing.
Before we get started, take a look at the architecture of the completed connection:
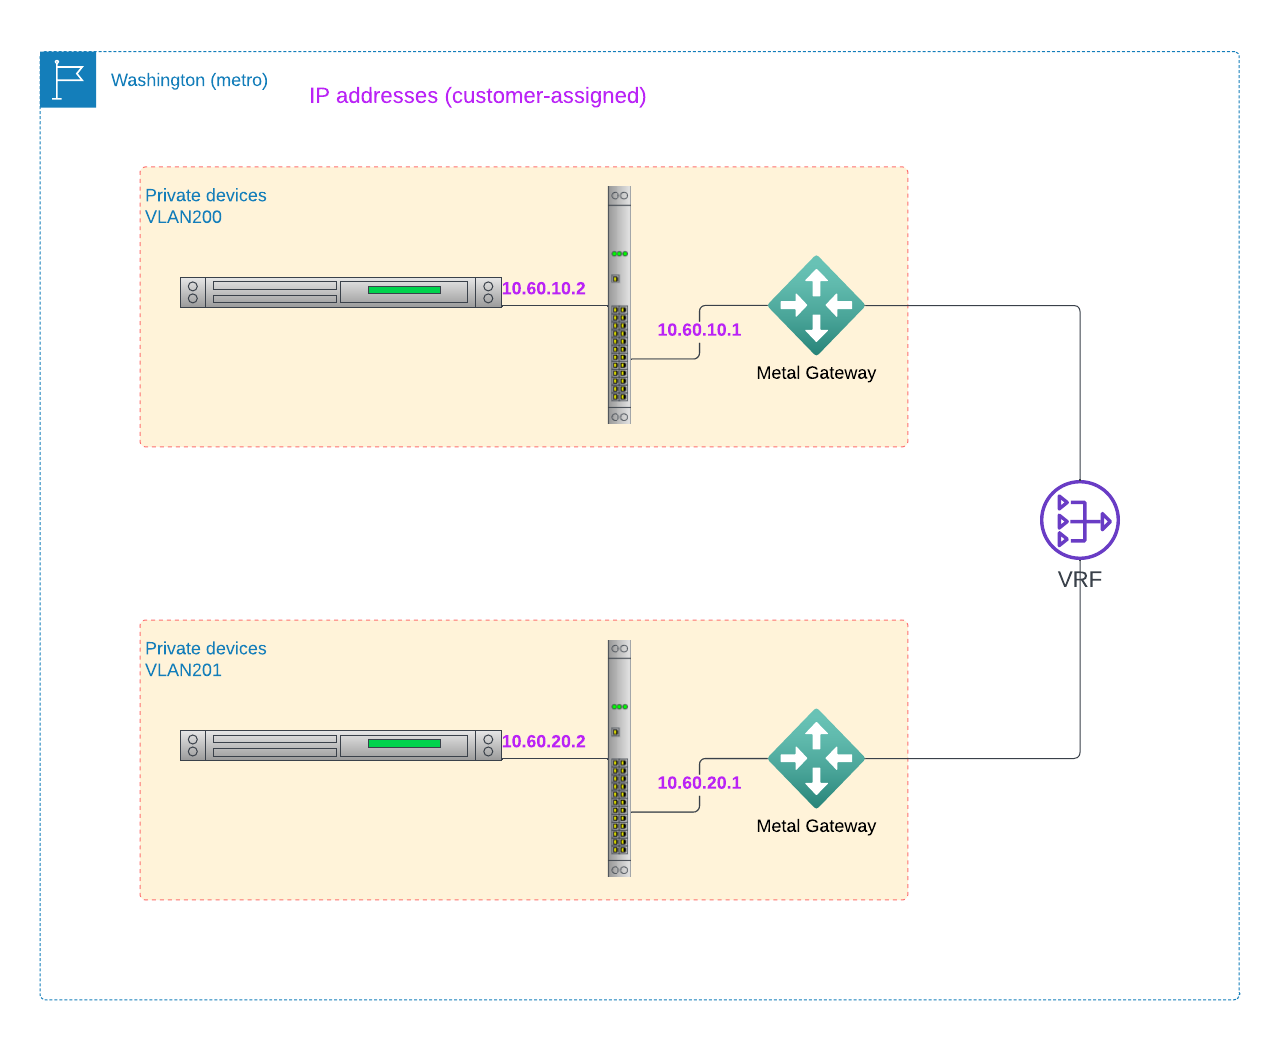
There are two VLANs in a single metro. Each VLAN is connected to an Equinix Metal Gateway, which is connected to a single shared instance of Equinix Metal Virtual Routing and Forwarding (VRF). The VRF functions as the router, both interconnecting the two VLANs and providing routing between the two IP ranges. Each VLAN has its own IP address range selected by you. You then assign each Metal device connected to the VLAN an IP address from your range.
Each VLAN may or may not also connect to standard Equinix Metal Layer 3 networking via an Equinix Metal Gateway.
Note that this VRF is not restricted just to connecting to other VLANs. You can use the same VRF to connect your VLANs to Equinix Fabric, and from there to other cloud providers. We will not cover these scenarios in this guide.
Prerequisites
The prerequisites for connecting your VLANs are:
- An Equinix Metal account, with a project in it
- Two VLANs deployed to your Equinix Metal project in the same metro
- Configuration information
The configuration information for this guide is the following. You may choose to use different configuration information, but you will need to adjust the guide accordingly.
| Item | Purpose | Example Values |
|---|---|---|
| Metal VRF | CIDR range for the VRF | 10.60.0.0/16 |
| Metal VLAN A | CIDR range for the first VLAN, which must be within the VRF range | 10.60.10.0/24 |
| Metal VLAN B | CIDR range for the second VLAN, which must be within the VRF range | 10.60.20.0/24 |
Equinix Metal has guides to help with setting up your account, organization and project, including deploying your first server and an introduction to the Equinix Metal console.
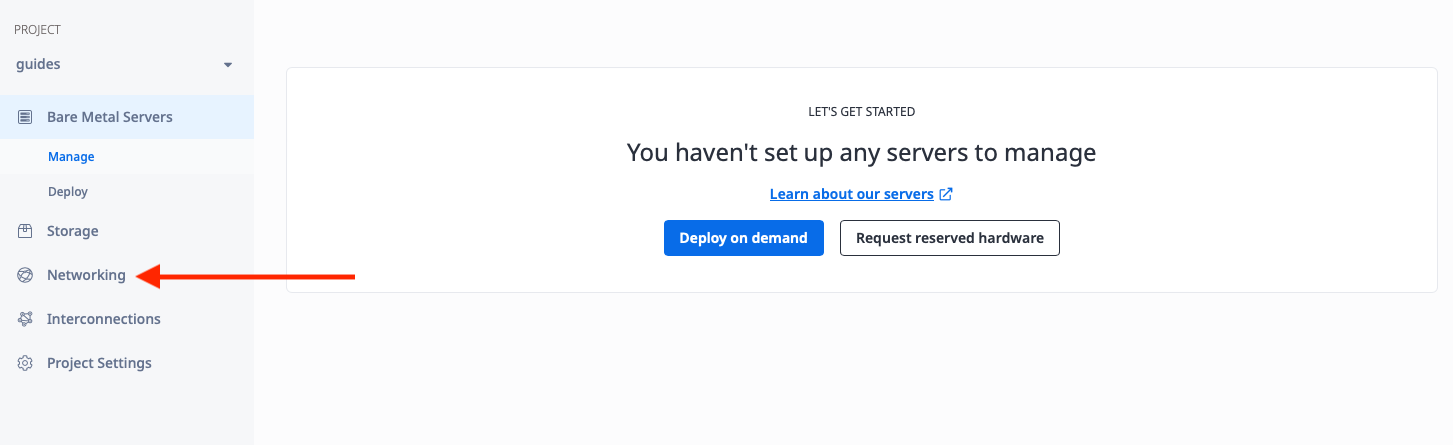
Once you have your project, in the Console select Networking:
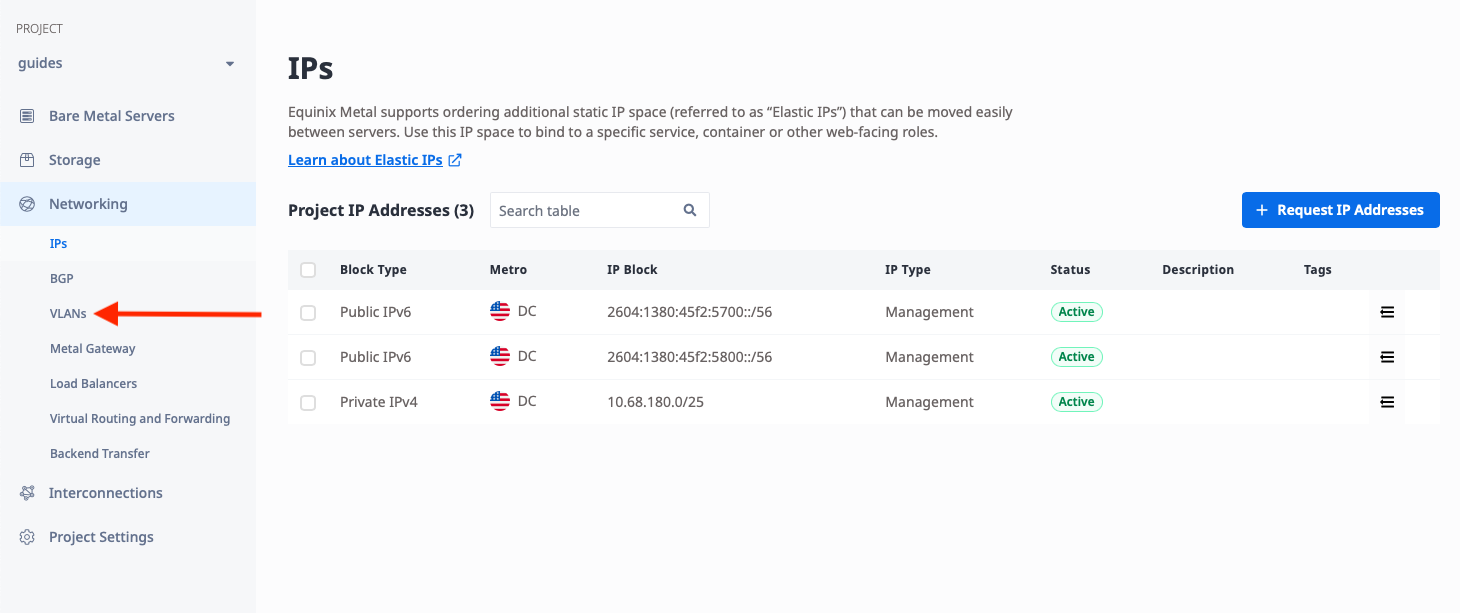
Then select VLAN:
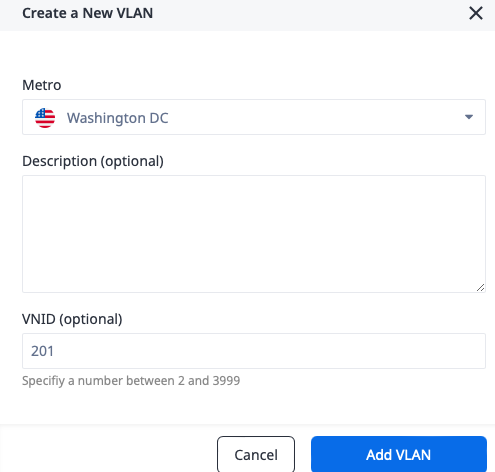
Then click the "Add a VLAN" button:
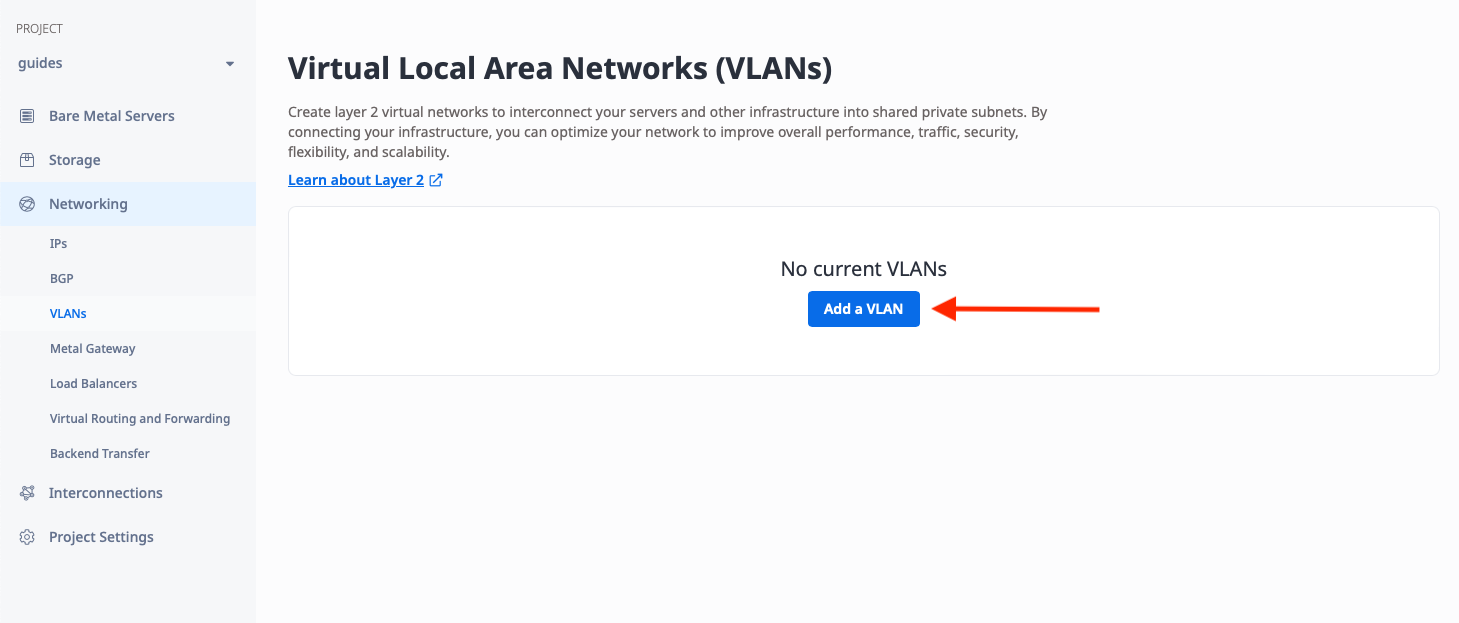
In the dialog that appears, pick a Metro, and any VLAN ID that is convenient for you, or let Metal pick it automatically. For our example, we will use VLAN ID 200 in Washington.

Repeat the process for a second VLAN in the same metro. For our example, we will use VLAN ID 201, also in Washington.
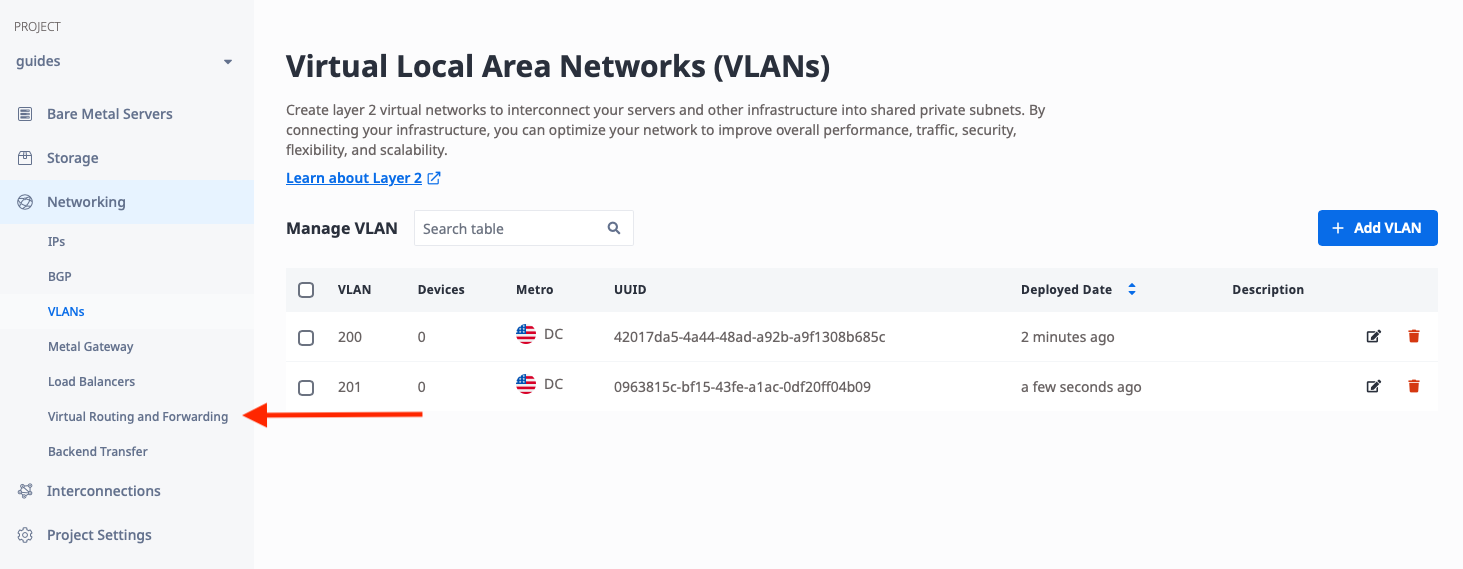
Once complete, you should see two VLANs in the same metro:

Deploy VRF
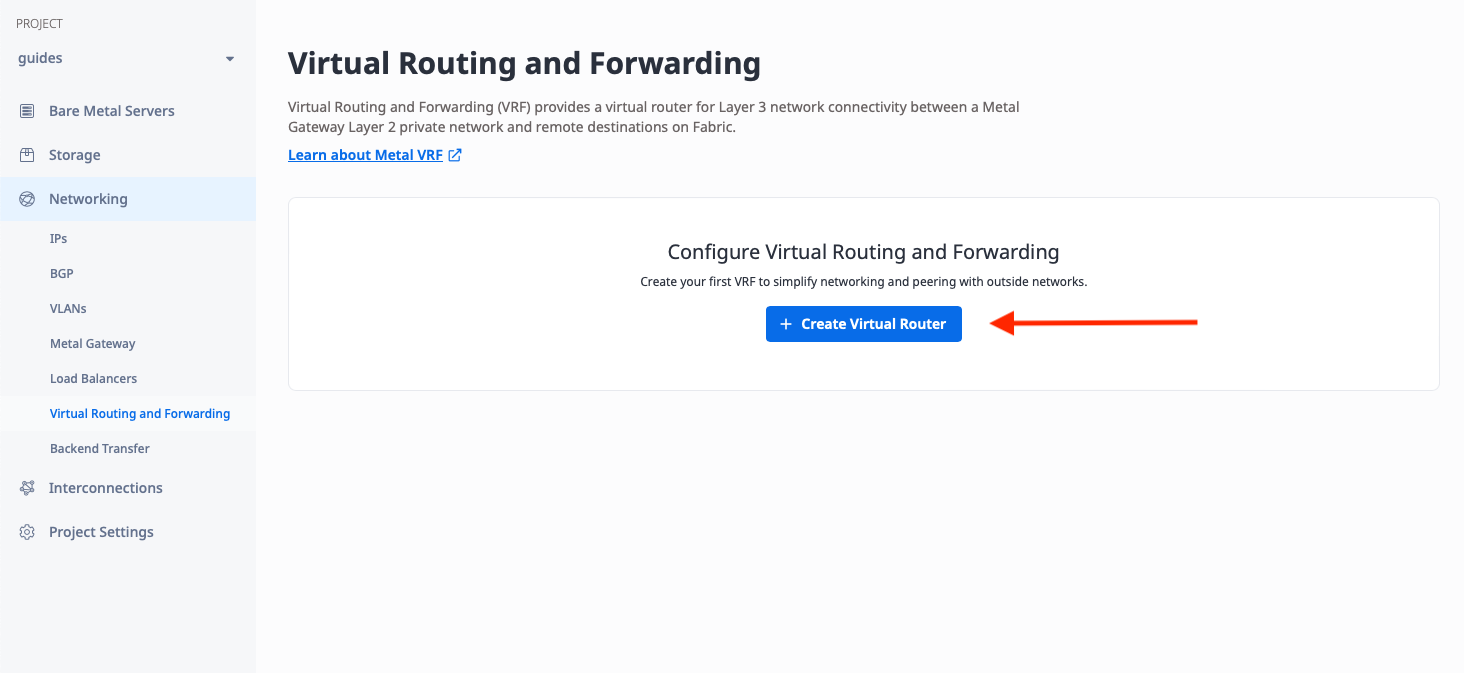
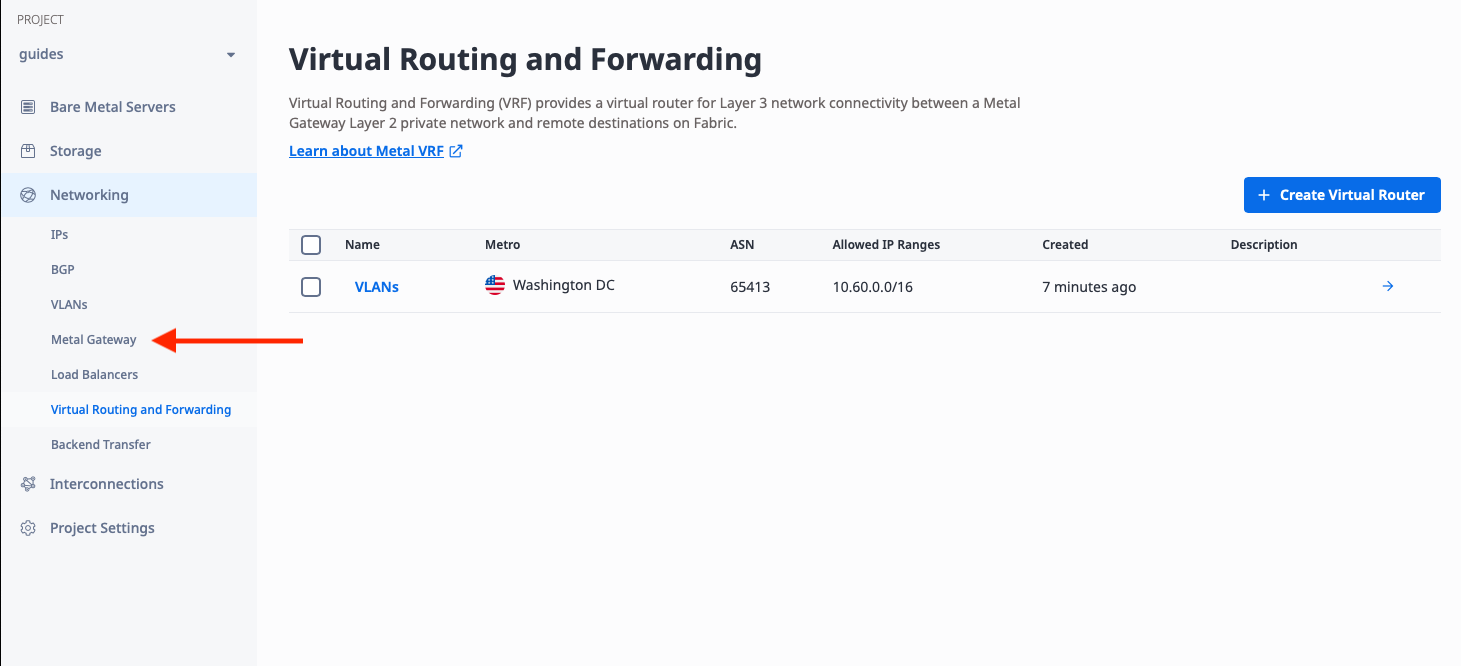
With the VLAN in place, you now need a single VRF that will be used to connect to the two VLANs. The VRF is under "Networking," like "VLANs." Select "Virtual Routing and Forwarding":
Then click "Create Virtual Router":
To create the Virtual Router, you need a few pieces of information:
- A name for the VRF. It doesn't have any inherent meaning; it just needs to be useful to you. We will call it "VLANs".
- The Metro. This must be the same metro as the VLAN you are connecting to. In our case, it is Washington.
- The ASN. This will not be used here, so leave it blank.
- The allowed IP ranges. These are CIDR ranges that will be "behind" the VRF. Whatever ranges you pick here, these are the ranges that the VRF will use to send traffic. Since this VRF only will be used for VLANs, you only need the ranges for those VLANs. We'll use the CIDR range we reserved earlier:
10.60.0.0/16
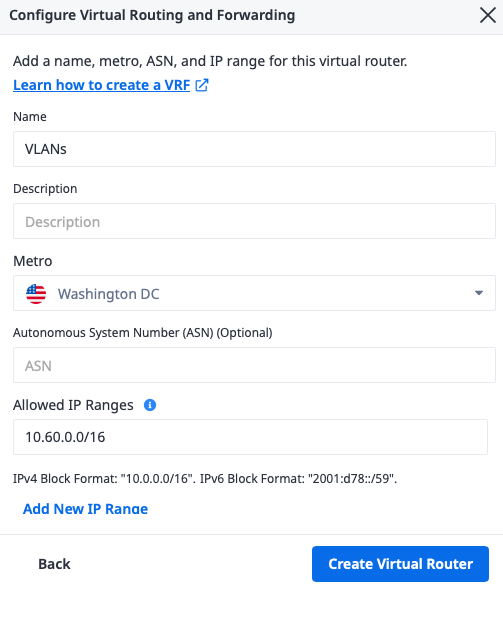
Click the Create Virtual Router button when you're finished.
Once the VRF is created, you need to reserve IP ranges to use from within the larger allowed IP ranges. Specifically, you need to reserve the two ranges described above for the VLANs, 10.60.10.0/24 and 10.60.20.0/24, both of which are within the larger VRF "allowed IP" range.
In the console, click on the VRF:
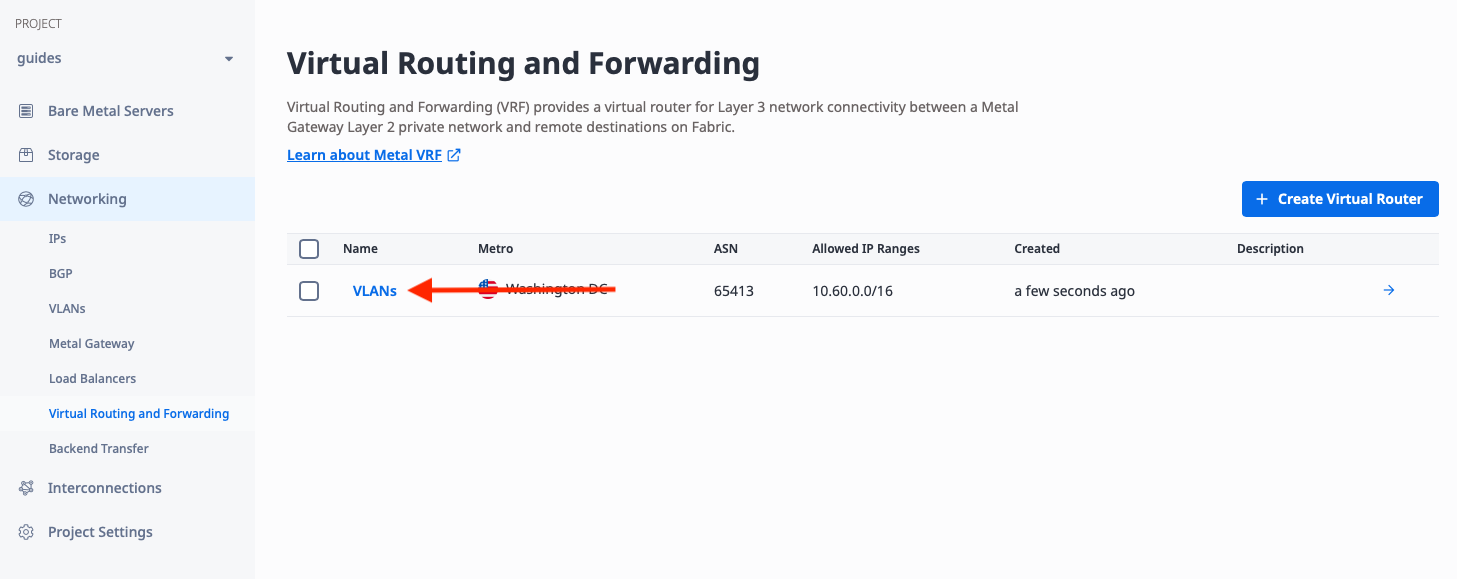
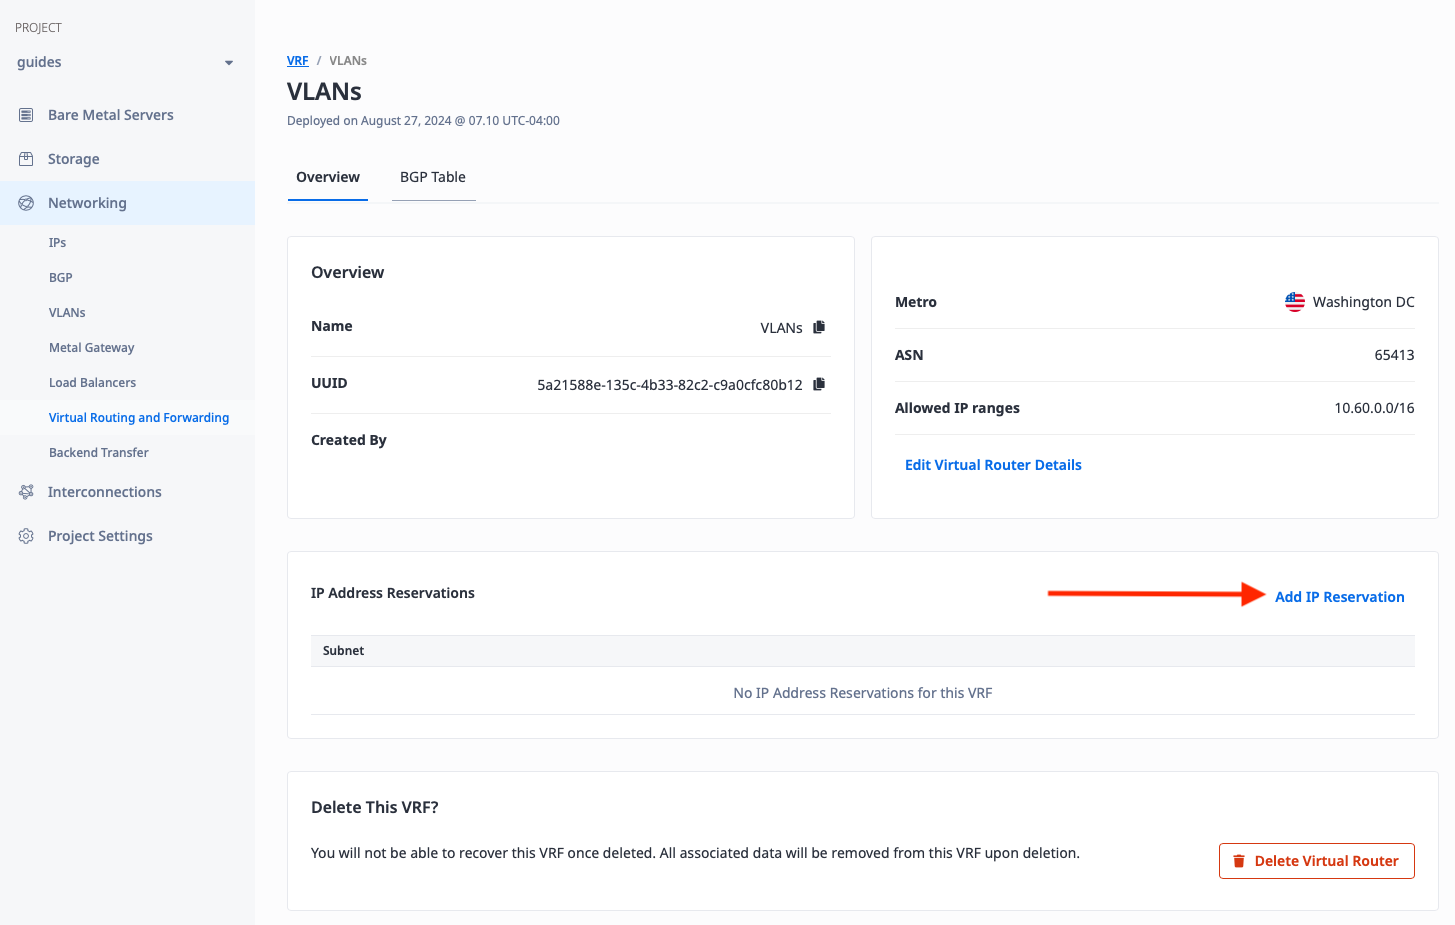
This brings up the VRF details. Click "Add IP Reservation":
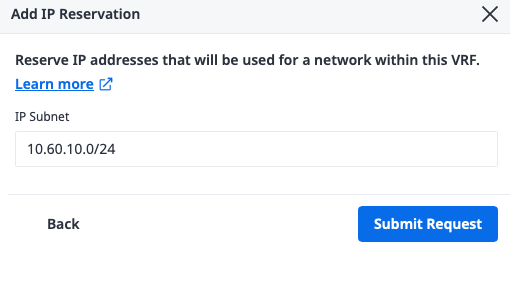
Enter the range we selected above for the first VLAN, 10.60.10.0/24, and click "Submit Request":
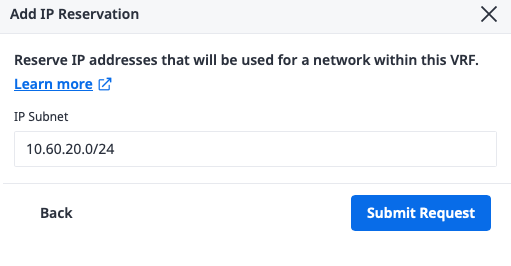
Repeat the process for the range for the second VLAN, 10.60.20.0/24:
When you're done, you should see the two IP reservations in the console:

Deploy Equinix Metal Gateway
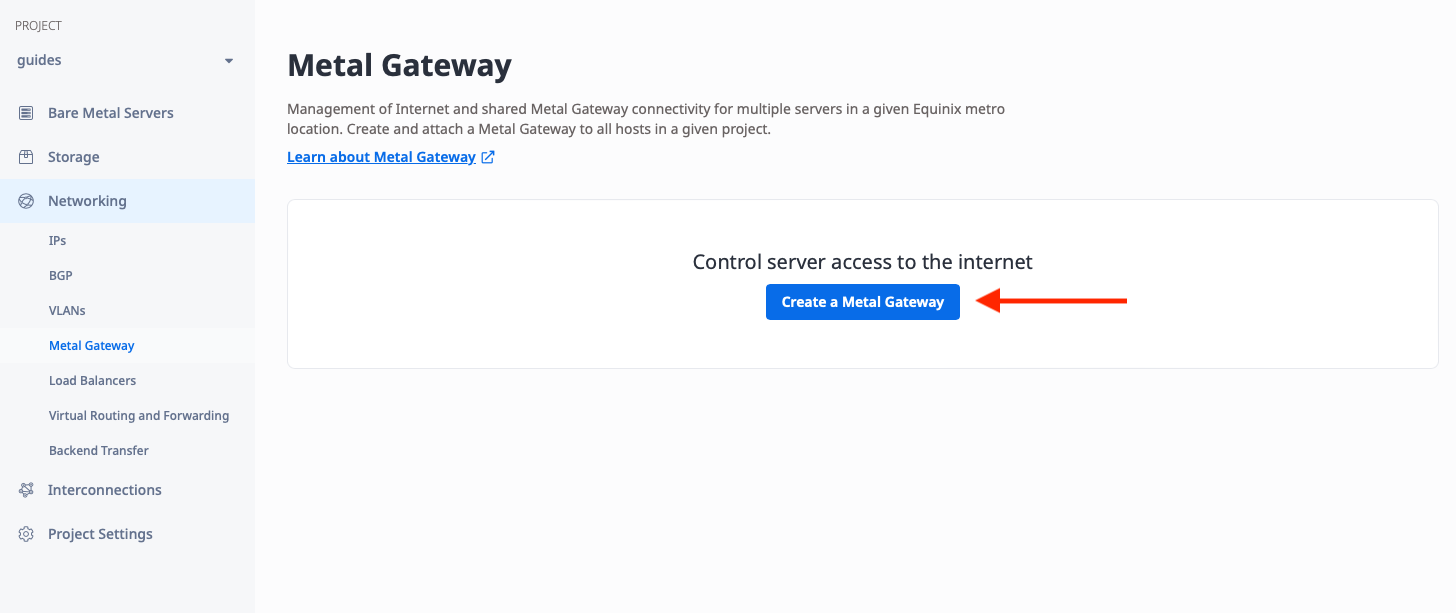
The VLANs and a VRF are created, so the next step is to create a Metal Gateway to link each VLAN to the VRF. "Metal Gateway" is under "Networking," like "VLANs" and "Virtual Routing and Forwarding." Click on "Metal Gateways":
Then click "Create a Metal Gateway":
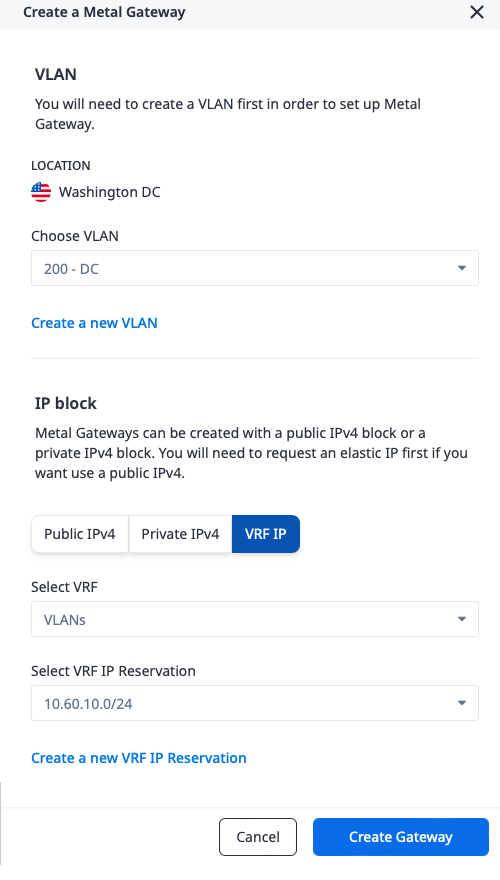
In order to create the Metal Gateway, you need a few pieces of information:
- The Metro. This must be the same metro as the VLAN you are connecting to. In our case, it is Washington.
- The VLAN. This is the VLAN that the Metal Gateway will connect to. We will start with our first VLAN, 200, which we created earlier.
- The IP block. This is one of a reserved public IPv4 range, a private IPv4 range, or a VRF IP range. Since we are connecting to a VRF, we will pick "VRF IP," and then the IP address reservation from the VRF for this VLAN,
10.60.10.0/24
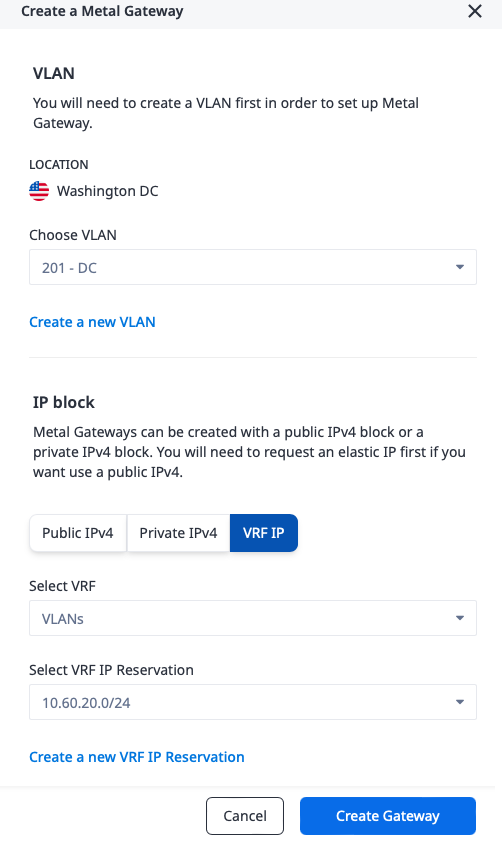
Repeat the process to create a Metal Gateway for the second VLAN:
- The Metro. This must be the same metro as the VLAN you are connecting to. In our case, it is Washington.
- The VLAN. This is the VLAN that the Metal Gateway will connect to. This is our second VLAN, 201, which we created earlier.
- The IP block. This is one of a reserved public IPv4 range, a private IPv4 range, or a VRF IP range. Since we are connecting to a VRF, we will pick "VRF IP", and then the IP address reservation from the VRF for this VLAN,
10.60.20.0/24
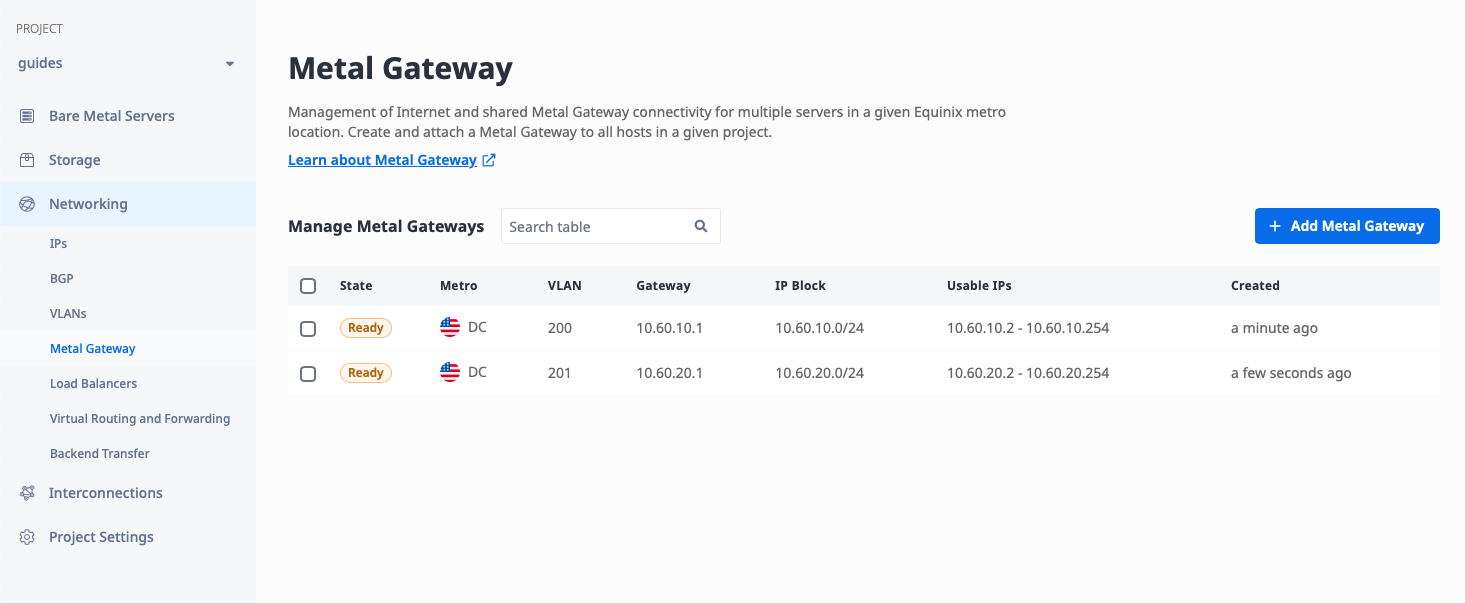
Once complete, you should see both gateways listed in the console. Each should have the correct Metro, VLAN and IP range.
Test Connection
The setup is complete, and now it's time to test the connection. We will deploy one Metal server on each VLAN, assign it an IP in that VLAN, and test it.
Since this is a guide on the connections, and not on deploying Metal servers, we won't give detailed descriptions here. For more information, refer to the Deploy Your First Equinix Metal Server Guide.
There are a few things to keep in mind.
- Deploy each server normally in the Washington metro.
- Switch each server networking type to hybrid bonded, so you can SSH to it from the Internet while also connecting to the VLAN, then attach it to the VLAN and assign an IP address. Use the Equinix Metal hybrid bonded networking documentation for detailed instructions.
- Add the route to the VRF range via the Metal Gateway. The Metal Gateway always takes the first available IP address in the IP address range. In this example:
- The VRF range is
10.60.0.0/16. - The first VLAN has the range
10.60.10.0/24, so the Gateway is at10.60.10.1. We can add the route to all of the address in the VRF via:ip route add 10.60.0.0/16 via 10.60.10.1. - The second VLAN has the range
10.60.20.0/24, so the Gateway is at10.60.20.1. We can add the route to all of the address in the VRF via:ip route add 10.60.0.0/16 via 10.60.20.1.
- The VRF range is
Once the servers are deployed, you need to configure them correctly for VLAN networking, IP addresses and routes.
Configure the first server
SSH into the first server. Use the following commands:
apt-get install vlan                                     # install VLAN support packages
modprobe 8021q                                           # load the 8021q VLAN module into the kernel
echo "8021q" >> /etc/modules                             # ensure the 8021q VLAN modules are loaded on future boots
ip link add link bond0 name bond0.200 type vlan id 200   # create a VLAN interface on bond0 with VLAN ID 200 called bond0.200
ip link set up dev bond0.200                             # bring the VLAN bond0.200 interface up
ip addr add 10.60.10.2/24 dev bond0.200                  # add the IP address to the VLAN bond0.200 interface
Here is what it looks like on the server:
root@c3-small-x86-01:~# apt-get install vlan
Reading package lists... Done
Building dependency tree... Done
Reading state information... Done
The following package was automatically installed and is no longer required:
  grub-pc-bin
Use 'apt autoremove' to remove it.
The following NEW packages will be installed:
  vlan
0 upgraded, 1 newly installed, 0 to remove and 0 not upgraded.
Need to get 10.4 kB of archives.
After this operation, 51.2 kB of additional disk space will be used.
Get:1 http://archive.ubuntu.com/ubuntu jammy/universe amd64 vlan all 2.0.5ubuntu5 [10.4 kB]
Fetched 10.4 kB in 0s (41.5 kB/s)
Selecting previously unselected package vlan.
(Reading database ... 74606 files and directories currently installed.)
Preparing to unpack .../vlan_2.0.5ubuntu5_all.deb ...
Unpacking vlan (2.0.5ubuntu5) ...
Setting up vlan (2.0.5ubuntu5) ...
Processing triggers for man-db (2.10.2-1) ...
Scanning processes...
Scanning processor microcode...
Scanning linux images...

Running kernel seems to be up-to-date.

The processor microcode seems to be up-to-date.

No services need to be restarted.

No containers need to be restarted.

No user sessions are running outdated binaries.

No VM guests are running outdated hypervisor (qemu) binaries on this host.

root@c3-small-x86-01:~# modprobe 8021q

root@c3-small-x86-01:~# echo "8021q" >> /etc/modules

root@c3-small-x86-01:~# ip link add link bond0 name bond0.200 type vlan id 200

root@c3-small-x86-01:~# ip link set up dev bond0.200

root@c3-small-x86-01:~# ip addr add 10.60.10.2/24 dev bond0.200
With the configuration complete, add the route to the VRF range via the local Metal Gateway on the VLAN:
root@c3-small-x86-01:~# ip ro add 10.60.0.0/16 via 10.60.10.1
Configure the second server
Repeat the process on the second server, but using the appropriate addresses and VLAN ID and address for the second VLAN and device. Here are the commands:
apt-get install vlan                                     # install VLAN support packages
modprobe 8021q                                           # load the 8021q VLAN module into the kernel
echo "8021q" >> /etc/modules                             # ensure the 8021q VLAN modules are loaded on future boots
ip link add link bond0 name bond0.201 type vlan id 201   # create a VLAN interface on bond0 with VLAN ID 201 called bond0.201
ip link set up dev bond0.201                             # bring the VLAN bond0.201 interface up
ip addr add 10.60.20.2/24 dev bond0.201                  # add the IP address to the VLAN bond0.201 interface
Here is what it looks like on the server:
root@c3-small-x86-02:~# apt-get install vlan
Reading package lists... Done
Building dependency tree... Done
Reading state information... Done
The following package was automatically installed and is no longer required:
  grub-pc-bin
Use 'apt autoremove' to remove it.
The following NEW packages will be installed:
  vlan
0 upgraded, 1 newly installed, 0 to remove and 0 not upgraded.
Need to get 10.4 kB of archives.
After this operation, 51.2 kB of additional disk space will be used.
Get:1 http://archive.ubuntu.com/ubuntu jammy/universe amd64 vlan all 2.0.5ubuntu5 [10.4 kB]
Fetched 10.4 kB in 0s (41.5 kB/s)
Selecting previously unselected package vlan.
(Reading database ... 74606 files and directories currently installed.)
Preparing to unpack .../vlan_2.0.5ubuntu5_all.deb ...
Unpacking vlan (2.0.5ubuntu5) ...
Setting up vlan (2.0.5ubuntu5) ...
Processing triggers for man-db (2.10.2-1) ...
Scanning processes...
Scanning processor microcode...
Scanning linux images...

Running kernel seems to be up-to-date.

The processor microcode seems to be up-to-date.

No services need to be restarted.

No containers need to be restarted.

No user sessions are running outdated binaries.

No VM guests are running outdated hypervisor (qemu) binaries on this host.

root@c3-small-x86-02:~# modprobe 8021q

root@c3-small-x86-02:~# echo "8021q" >> /etc/modules

root@c3-small-x86-02:~# ip link add link bond0 name bond0.201 type vlan id 201

root@c3-small-x86-01:~# ip link set up dev bond0.201

root@c3-small-x86-02:~# ip addr add 10.60.20.2/24 dev bond0.201
As with the first server, add the route to the VRF range via the local Metal Gateway on our VLAN:
root@c3-small-x86-02:~# ip ro add 10.60.0.0/16 via 10.60.20.1
Test the connection from the first server
Returning to the first server, 10.60.10.2, first try to ping the Metal Gateway attached to the VLAN:
root@c3-small-x86-01:~# ping 10.60.10.1
PING 10.60.10.1 (10.60.10.1) 56(84) bytes of data.
64 bytes from 10.60.10.1: icmp_seq=1 ttl=64 time=0.184 ms
64 bytes from 10.60.10.1: icmp_seq=2 ttl=64 time=0.249 ms
64 bytes from 10.60.10.1: icmp_seq=3 ttl=64 time=0.240 ms
^C
--- 10.60.10.1 ping statistics ---
3 packets transmitted, 3 received, 0% packet loss, time 2043ms
rtt min/avg/max/mdev = 0.184/0.224/0.249/0.028 ms
This is a good result. Next, ping the Metal server on the other VLAN 201:
root@c3-small-x86-01:~# ping 10.60.20.2
PING 10.60.20.2 (10.60.20.2) 56(84) bytes of data.
64 bytes from 10.60.20.2: icmp_seq=1 ttl=62 time=0.556 ms
64 bytes from 10.60.20.2: icmp_seq=2 ttl=62 time=0.626 ms
64 bytes from 10.60.20.2: icmp_seq=3 ttl=62 time=0.627 ms
^C
--- 10.60.20.2 ping statistics ---
3 packets transmitted, 3 received, 0% packet loss, time 2077ms
rtt min/avg/max/mdev = 0.556/0.603/0.627/0.033 ms
This result is good as well.
Test the connection from the second server
Now repeat the exercise from the second server, on VLAN 201.
First, ping the Metal Gateway attached to the VLAN:
root@c3-small-x86-02:~# ping 10.60.20.1
PING 10.60.20.1 (10.60.20.1) 56(84) bytes of data.
64 bytes from 10.60.20.1: icmp_seq=1 ttl=64 time=0.200 ms
64 bytes from 10.60.20.1: icmp_seq=2 ttl=64 time=0.203 ms
64 bytes from 10.60.20.1: icmp_seq=3 ttl=64 time=0.229 ms
^C
--- 10.60.20.1 ping statistics ---
3 packets transmitted, 3 received, 0% packet loss, time 2085ms
rtt min/avg/max/mdev = 0.200/0.210/0.229/0.013 ms
Finally, ping the Metal server on the other VLAN 200:
root@c3-small-x86-02:~# ping 10.60.10.2
PING 10.60.10.2 (10.60.10.2) 56(84) bytes of data.
64 bytes from 10.60.10.2: icmp_seq=1 ttl=62 time=0.395 ms
64 bytes from 10.60.10.2: icmp_seq=2 ttl=62 time=0.613 ms
64 bytes from 10.60.10.2: icmp_seq=3 ttl=62 time=0.627 ms
^C
--- 10.60.10.2 ping statistics ---
3 packets transmitted, 3 received, 0% packet loss, time 2062ms
rtt min/avg/max/mdev = 0.395/0.545/0.627/0.106 ms
Success -- we have connected two VLANs via a VRF.
Conclusion
You have successfully deployed two VLANs in a single metro, each with IP ranges that you selected, and connected them to enable full communications between them. You also tested those communications between devices on the VLANs. You can use this setup to deploy more devices to more VLANs, and connect them with full routing, or even to connect to other networks, cloud providers and service provides via Equinix Fabric.
You may also like
Dig deeper into similar topics in our archives
Crosscloud VPN with WireGuard
Learn to establish secure VPN connections across cloud environments using WireGuard, including detailed setups for site-to-site tunnels and VPN gateways with NAT on Equinix Metal, enhancing...

Kubernetes Cluster API
Learn how to provision a Kubernetes cluster with Cluster API
Kubernetes with kubeadm
Learn how to deploy Kubernetes with kubeadm using userdata

OpenStack DevStack
Use DevStack to install and test OpenStack on an Equinix Metal server.