- Home /
- Resources /
- Learning center /
- Pure Storage on Eq...
Pure Storage on Equinix Metal
Implement high-performance, single-tenant Pure Storage FlashArray appliances on Equinix Metal

On this page
To meet the needs of customers' looking for flexible and high-performance storage, Equinix Metal offers single-tenant, hosted Pure Storage FlashArray appliances.
Using Pure Storage is a high-touch process that can be tailored to meet your specific use case. This guide is an overview of the steps involved in getting up and running with your Pure Storage appliance. Please reach out to support should you have any questions or need help.
Pure Storage appliances are available in all Metros where Equinix Metal is available.
Ordering an Appliance
Ordering, pricing, and fulfillment of Pure Storage appliances is handled through a sales and hardware reservation process. More information is available on our Pure Storage solutions page and solutions brief.
When you order an appliance, we will arrange for it to be located in racks physically near to your current Equinix Metal infrastructure. If you are also ordering new servers to connect to the appliance, we will arrange for them to be located within the networking requirements.
We will also collect some technical information from you in order to pre-configure some of the networking on the appliance. You will be asked to provide six IP addresses in a private subnet range to assign IP addresses to the appliances. Please keep track of these IP addresses, as you will need them to configure the networking between your Equinix Metal server and the appliance.
Provisioning the Appliance
After you've ordered your Pure Storage appliances and the order has been fulfilled, you can provision them by navigating to the Servers tab in the Equinix Metal Console, clicking +Add New Server and selecting Reserved.
The appliances will be labeled Custom Storage Appliance, and will be available for the location you specified in your order. Give your new appliance a Hostname, and select Custom/Manual in the OS field (the only available option)/. Remember that the appliances come in sets of two, so click Add Row to provision the second one, giving it its own Hostname.
Click Deploy Now to start the process.
Server Requirements
Typically, you will need at least one Equinix Metal server to connect to the storage appliances, where you can mount partitions and formatted drives. This can be a server that is already part of your existing infrastructure on Equinix Metal, or one that was set up when you ordered your appliances. The configuration examples in this document are intended to be rather generic, on a single c3.small.x86 server running Ubuntu 20.04.
Pure Storage has a similar set of docs with examples on a cluster of c3.medium.x86 servers running VMware ESXi 7.0.
Setting Up Layer 2 Networking
Connectivity between the Pure Storage appliances and your servers happens over Layer 2. The instructions in this section will help you configure your Layer 2 network.
Creating the VLANs
To connect the server to the storage appliances, you will need to create three VLANs on Equinix Metal, in the same Metro where your server and storage appliances live. One of them will be a management VLAN. The other two VLANs will be used for the iSCSI interfaces, so be sure to label them accordingly at creation time.
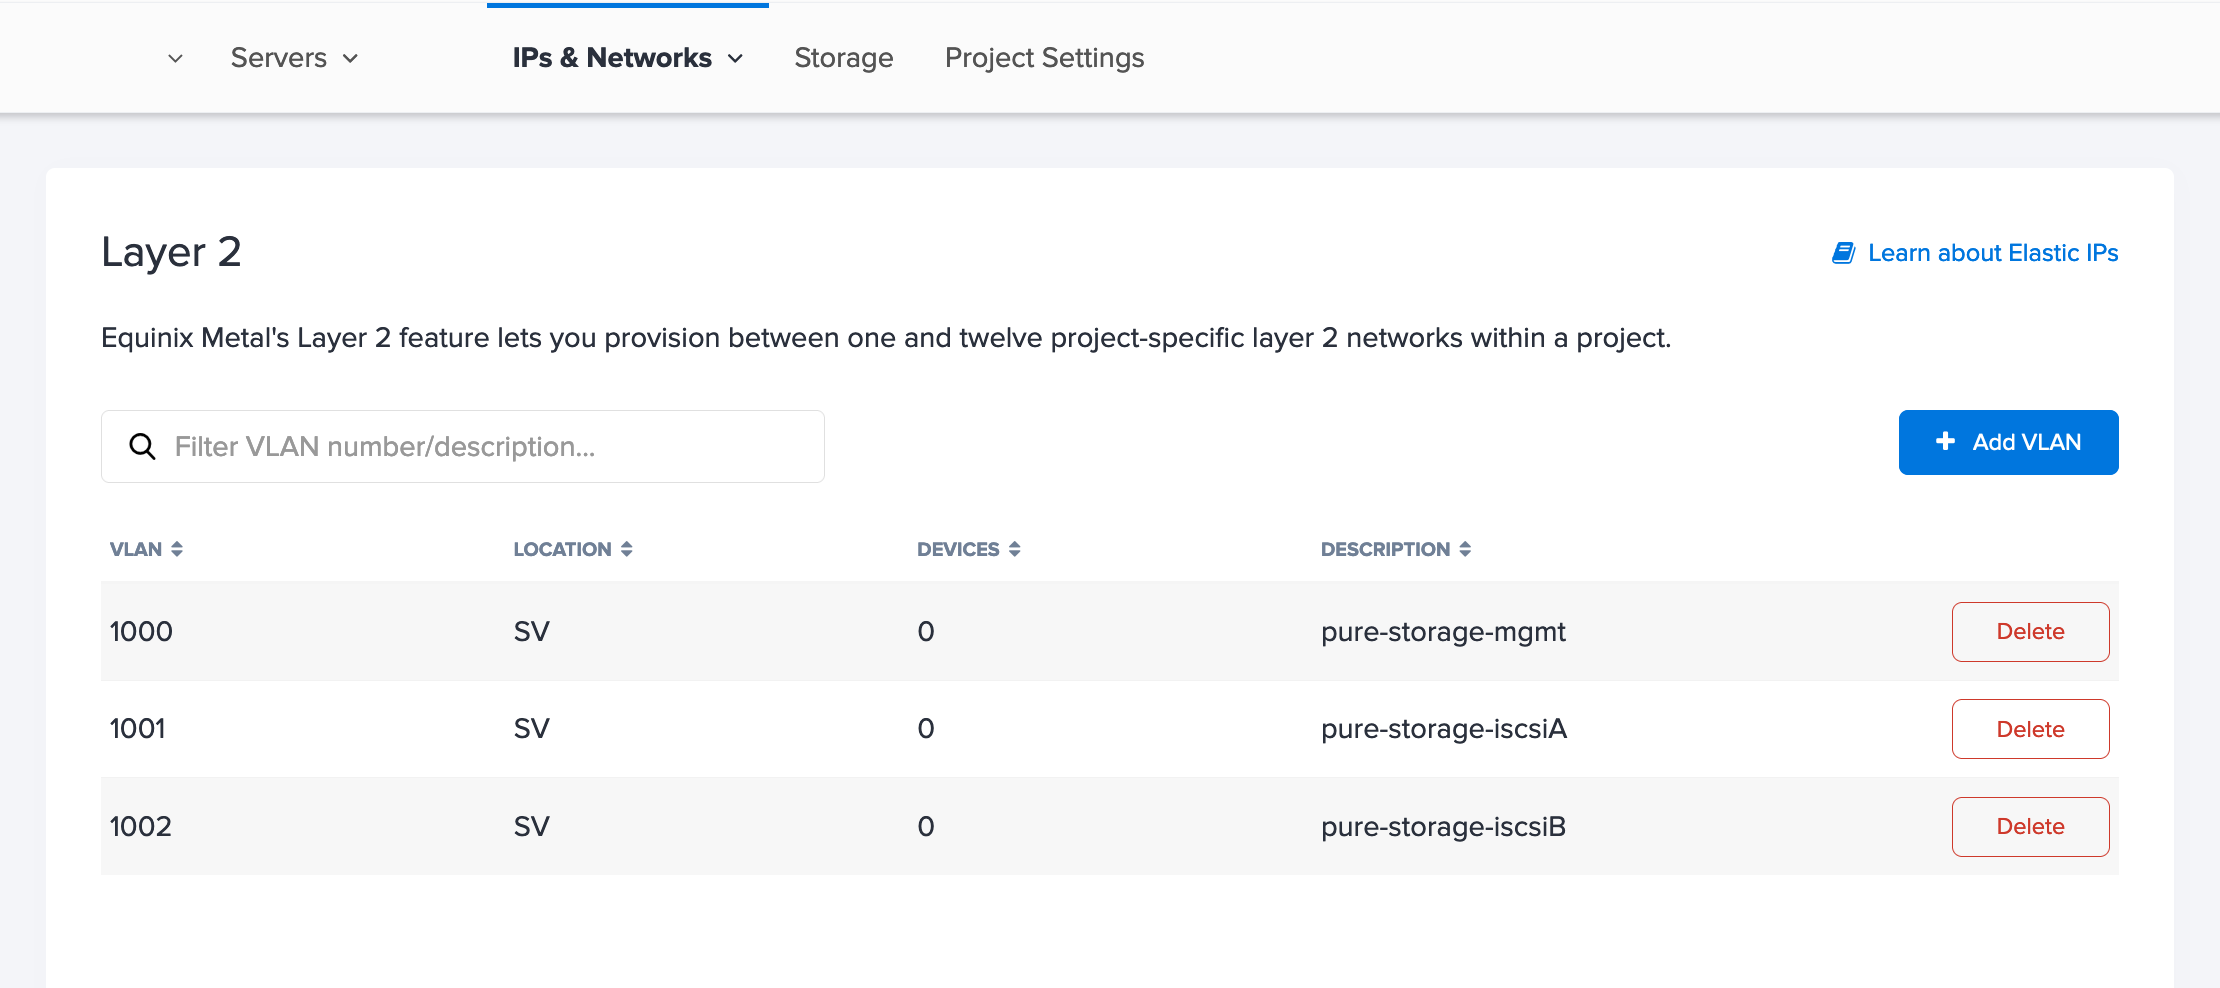
If you create your VLANs through the console, the number is auto-assigned. If you want to specify the VLAN ID, you can by creating the VLANs through the API.
Connecting the VLANs to the Appliances
Each of the appliances are pre-configured in a pure Layer 2 unbonded mode with three ports, eth0, eth4, and eth5. The IP Addresses that you provided when ordering are assigned to each port on each device. The table presents an example configuration for both appliances.
| Appliance 1 | Appliance 2 | ||||
|---|---|---|---|---|---|
| Role | Port | IP Address | Role | Port | IP Address |
mgmt |
eth0 |
192.168.10.10 | mgmt |
eth0 |
192.168.10.11 |
iSCSI_A |
eth4 |
192.168.1.10 | iSCSI_A |
eth4 |
192.168.1.11 |
iSCSI_B |
eth5 |
192.168.2.10 | iSCSI_B |
eth5 |
192.168.2.11 |
For each of the storage appliances, you will need to connect the three VLANs to the three ports, one VLAN on each port. From the Pure Storage appliance's Overview page, go to the Network page. Click +Add a New VLAN and select the port and VLAN to connect to it from the drop-downs.
When you have added all three VLANs to an appliance, the Network page will list the three VLANs and which ports they are connected to.
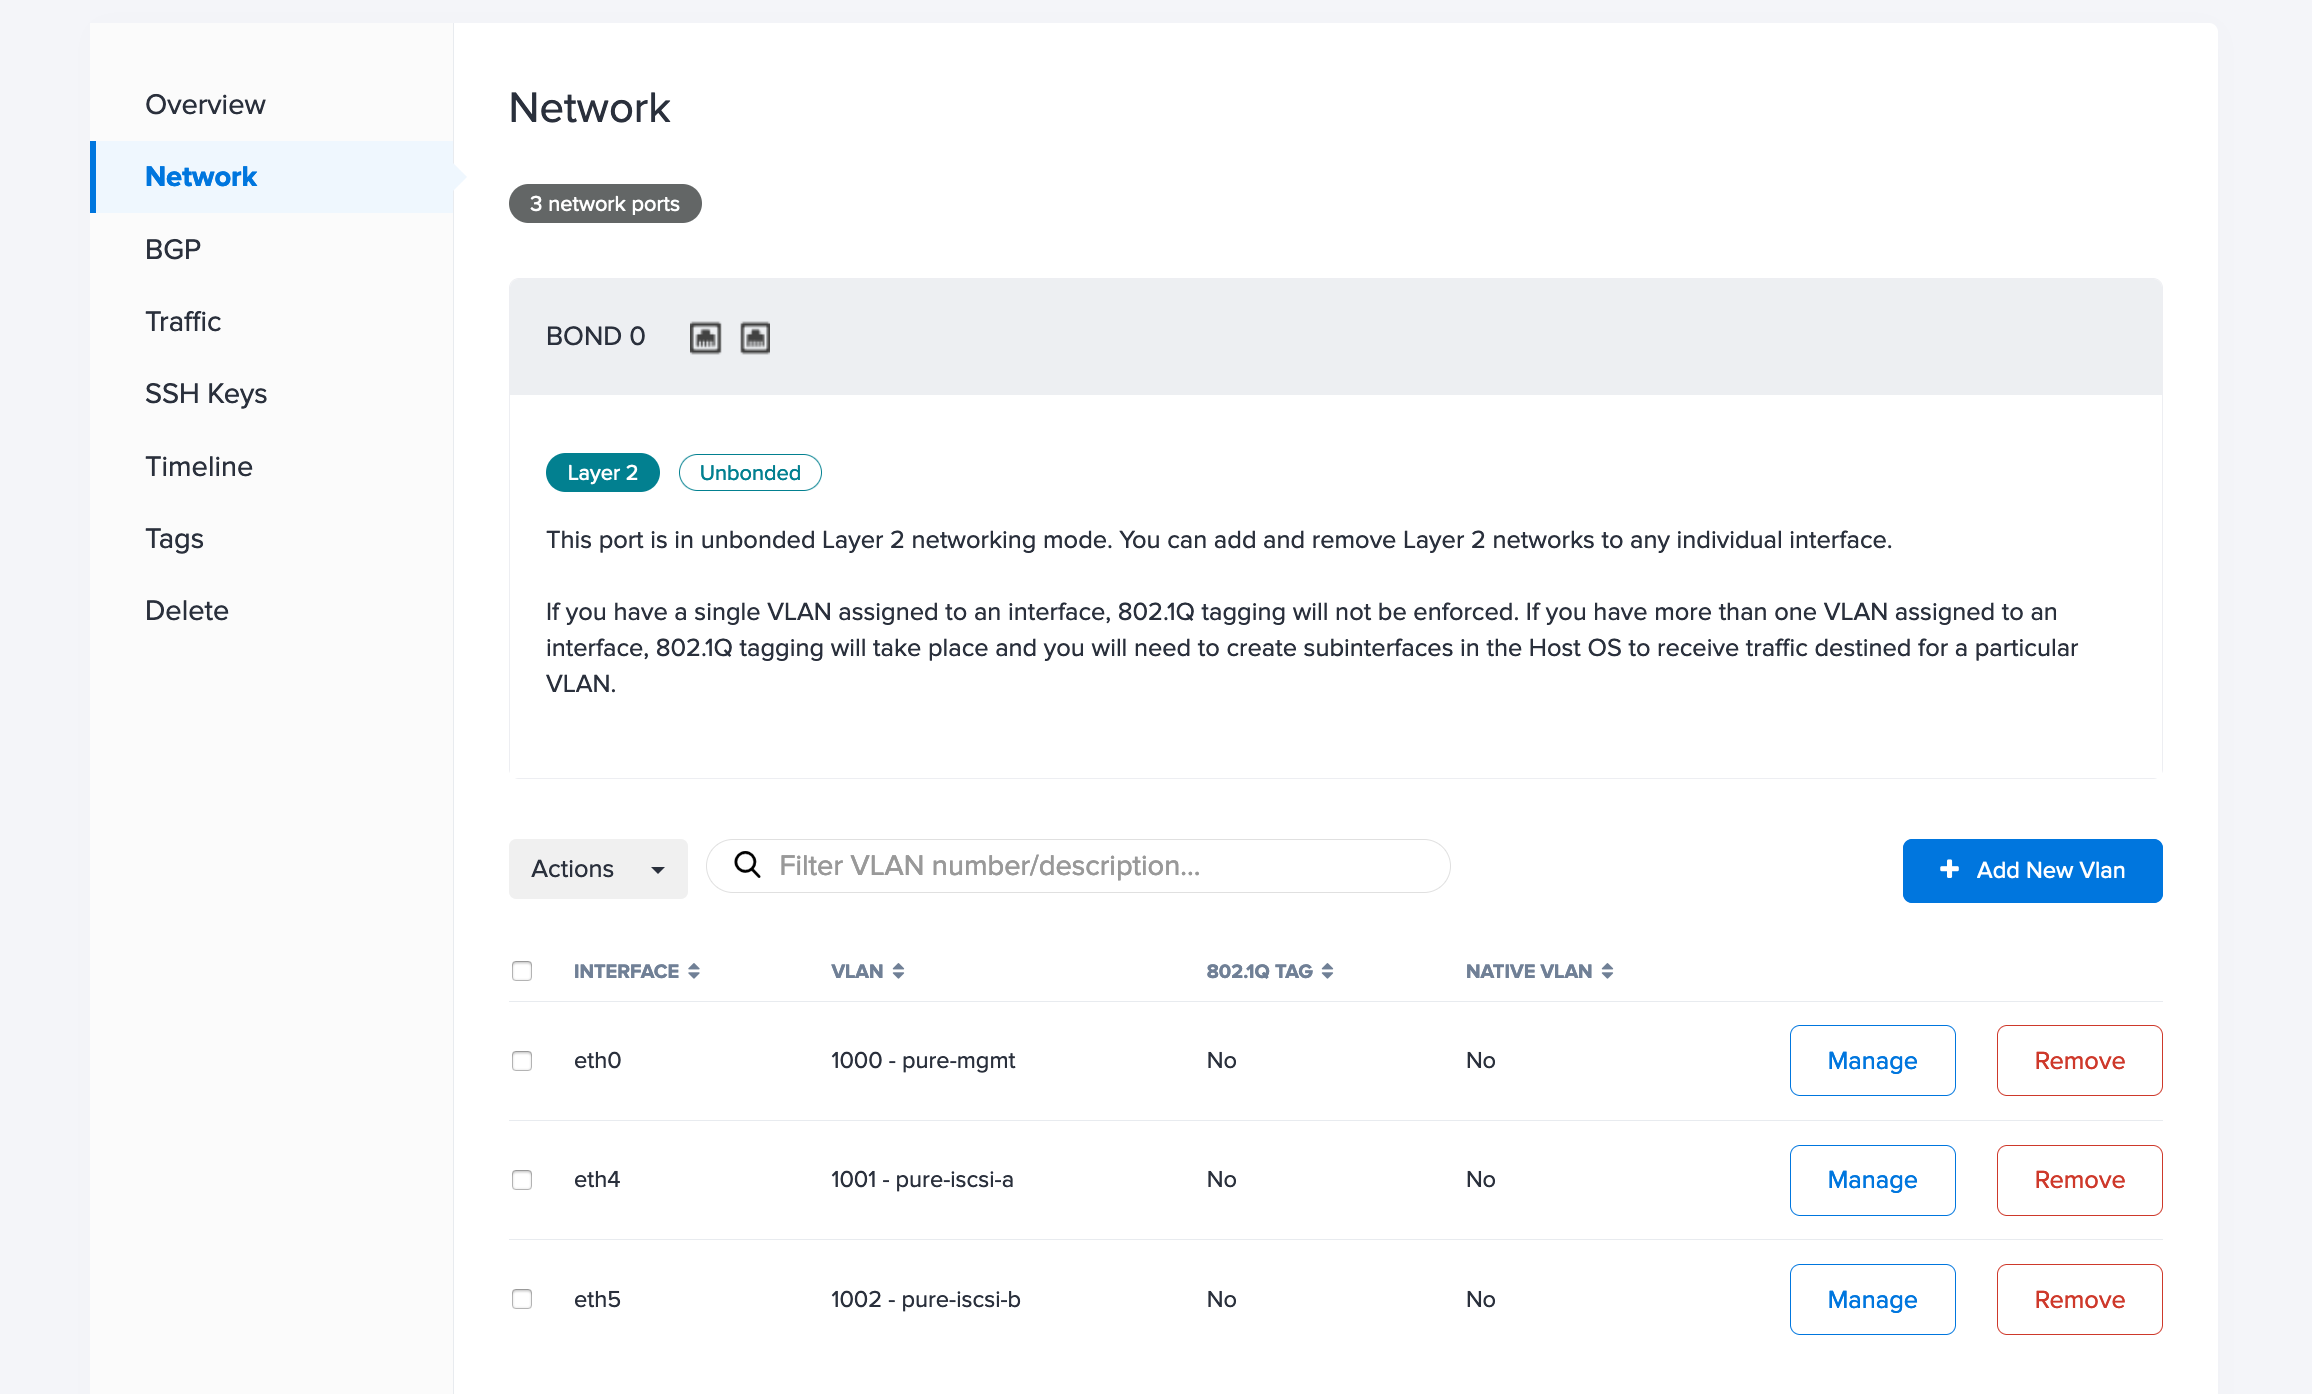
Repeat the process on the other appliance.
Connecting the VLANs to the Server
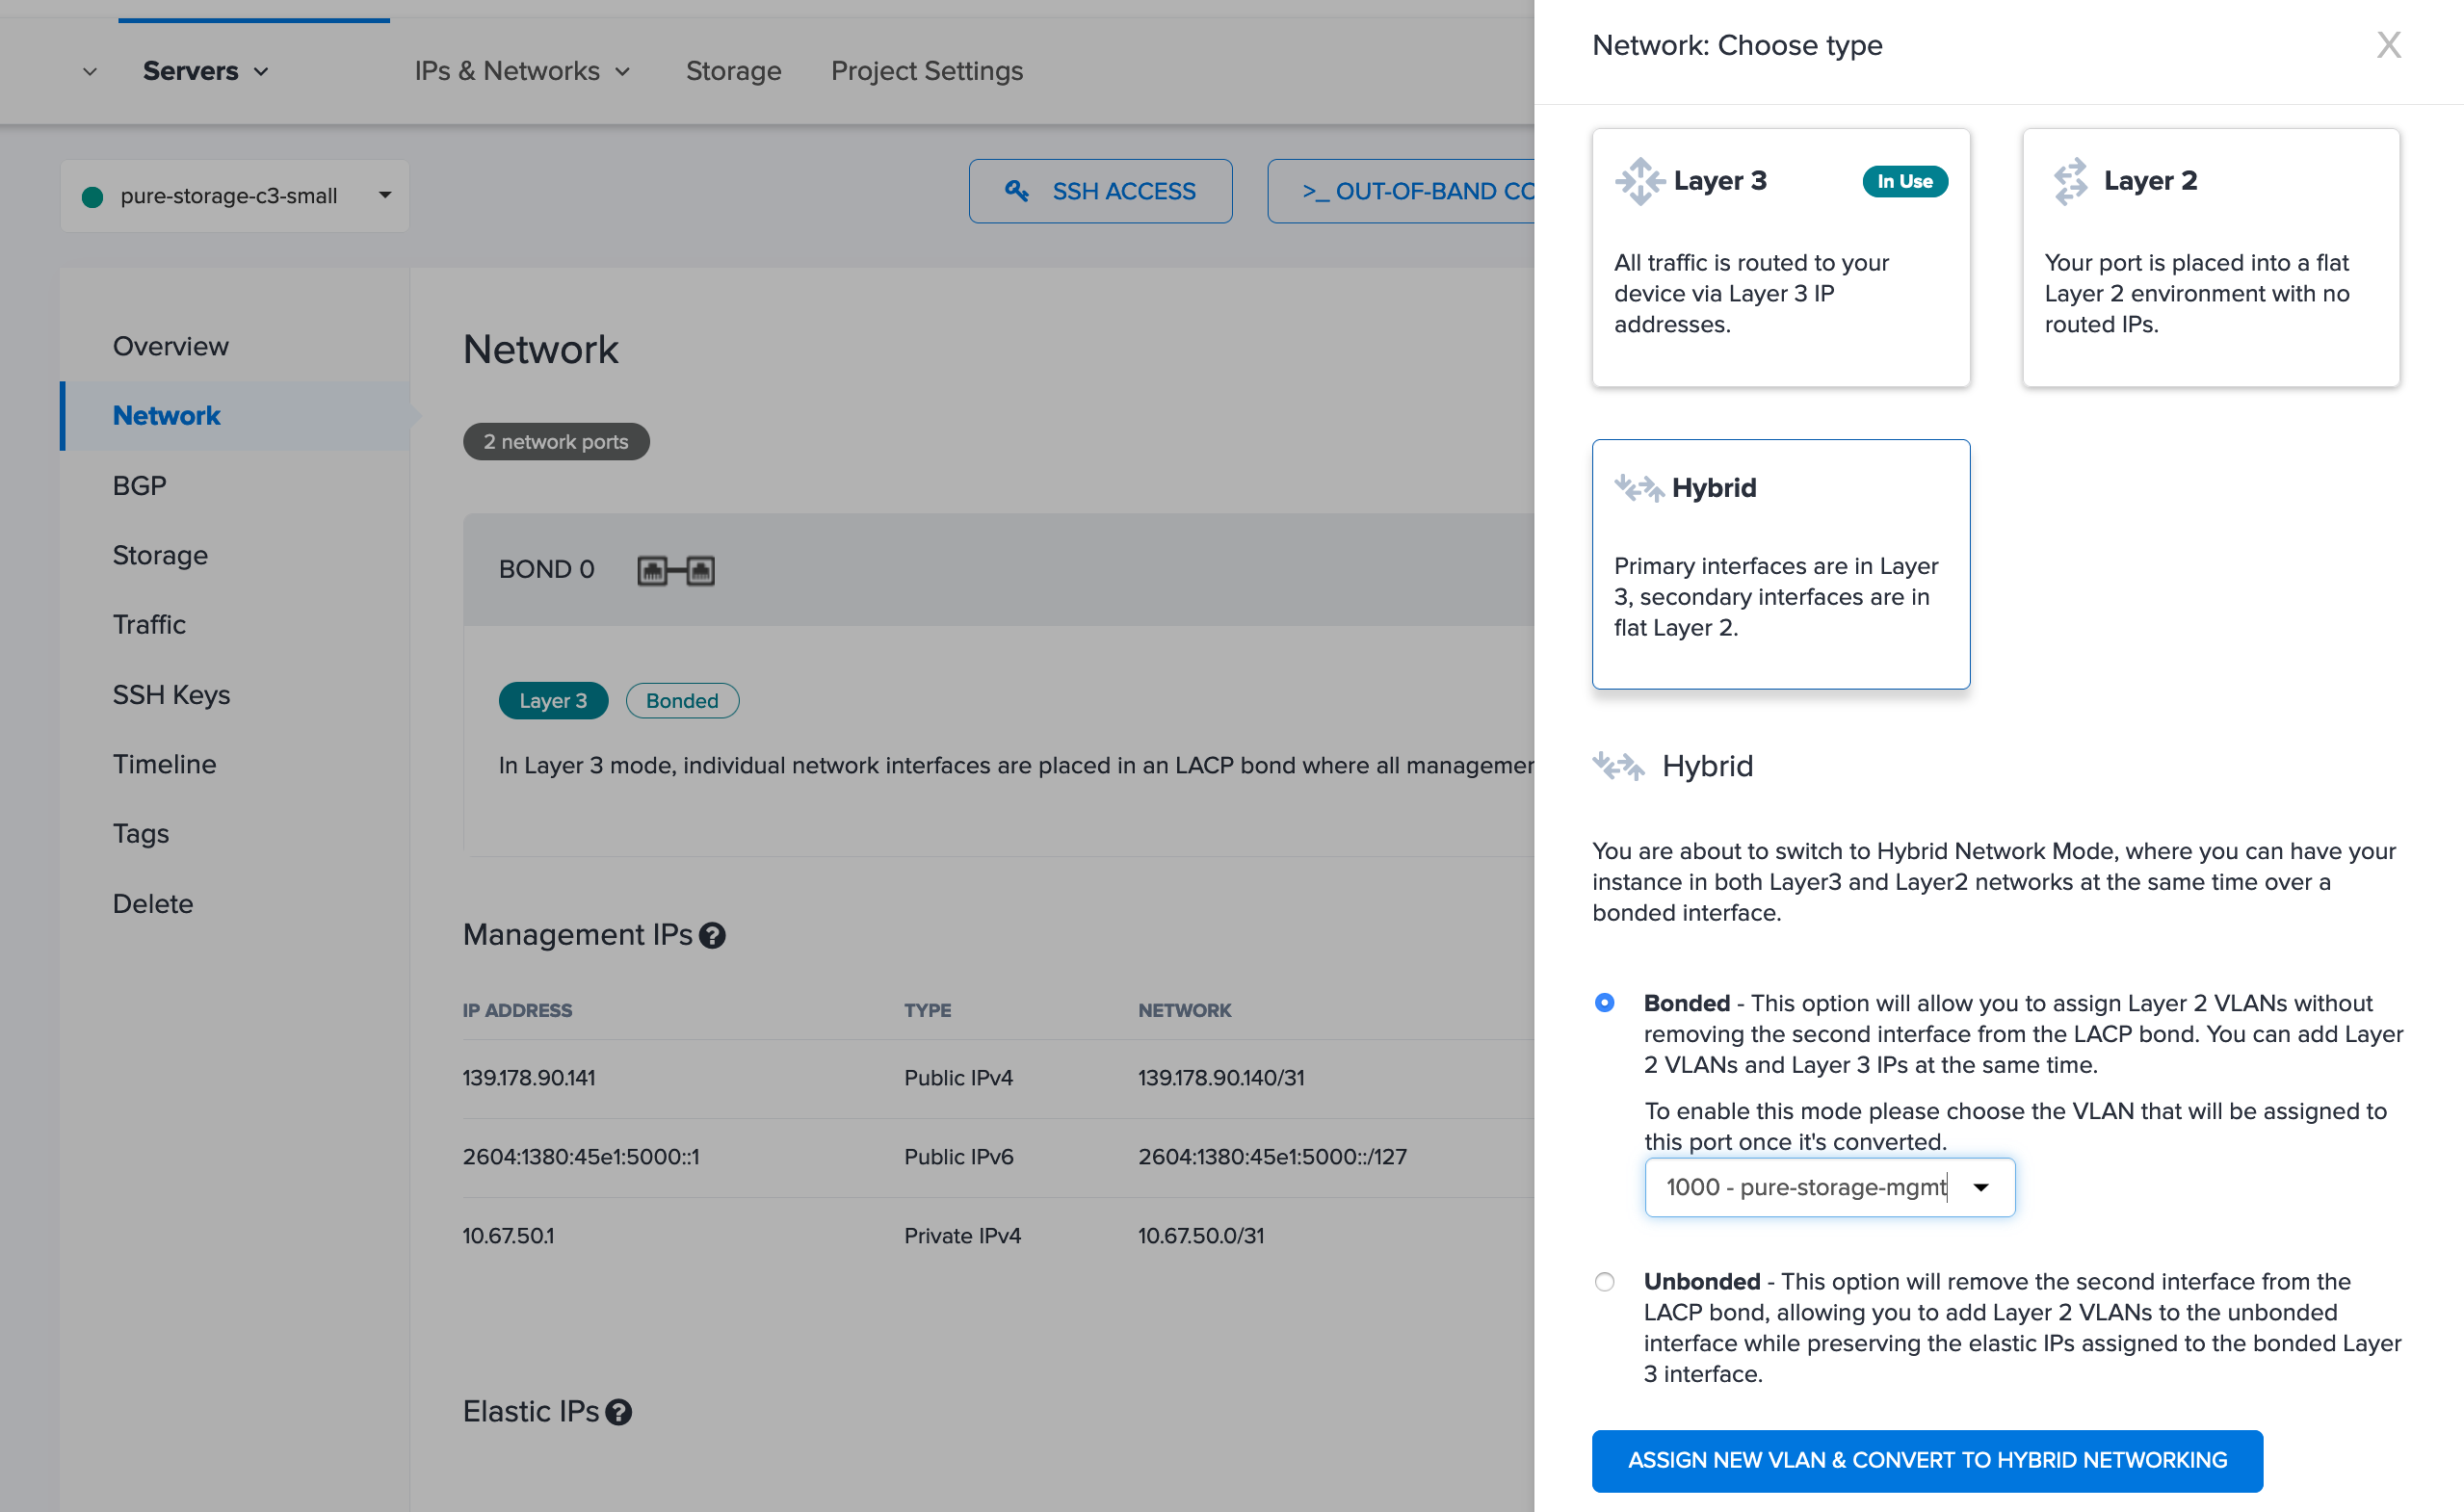
For setting up the Layer 2 networking on the server, use Hybrid Bonded mode and attach all three VLANs to the bond0 interface. General documentation for using Hybrid Bonded mode and configuration is on the Hybrid Bonded documentation page. The example on this page is specific to using Hybrid Bonded mode to connect to a Pure Storage appliance.
First, you need to set the networking mode to Hybrid Bonded mode and attach the management VLAN to the bond0 interface. From the server's Network page, click Convert to Other Network Type, select Hybrid Bonded, and choose to attach the management VLAN to the port.
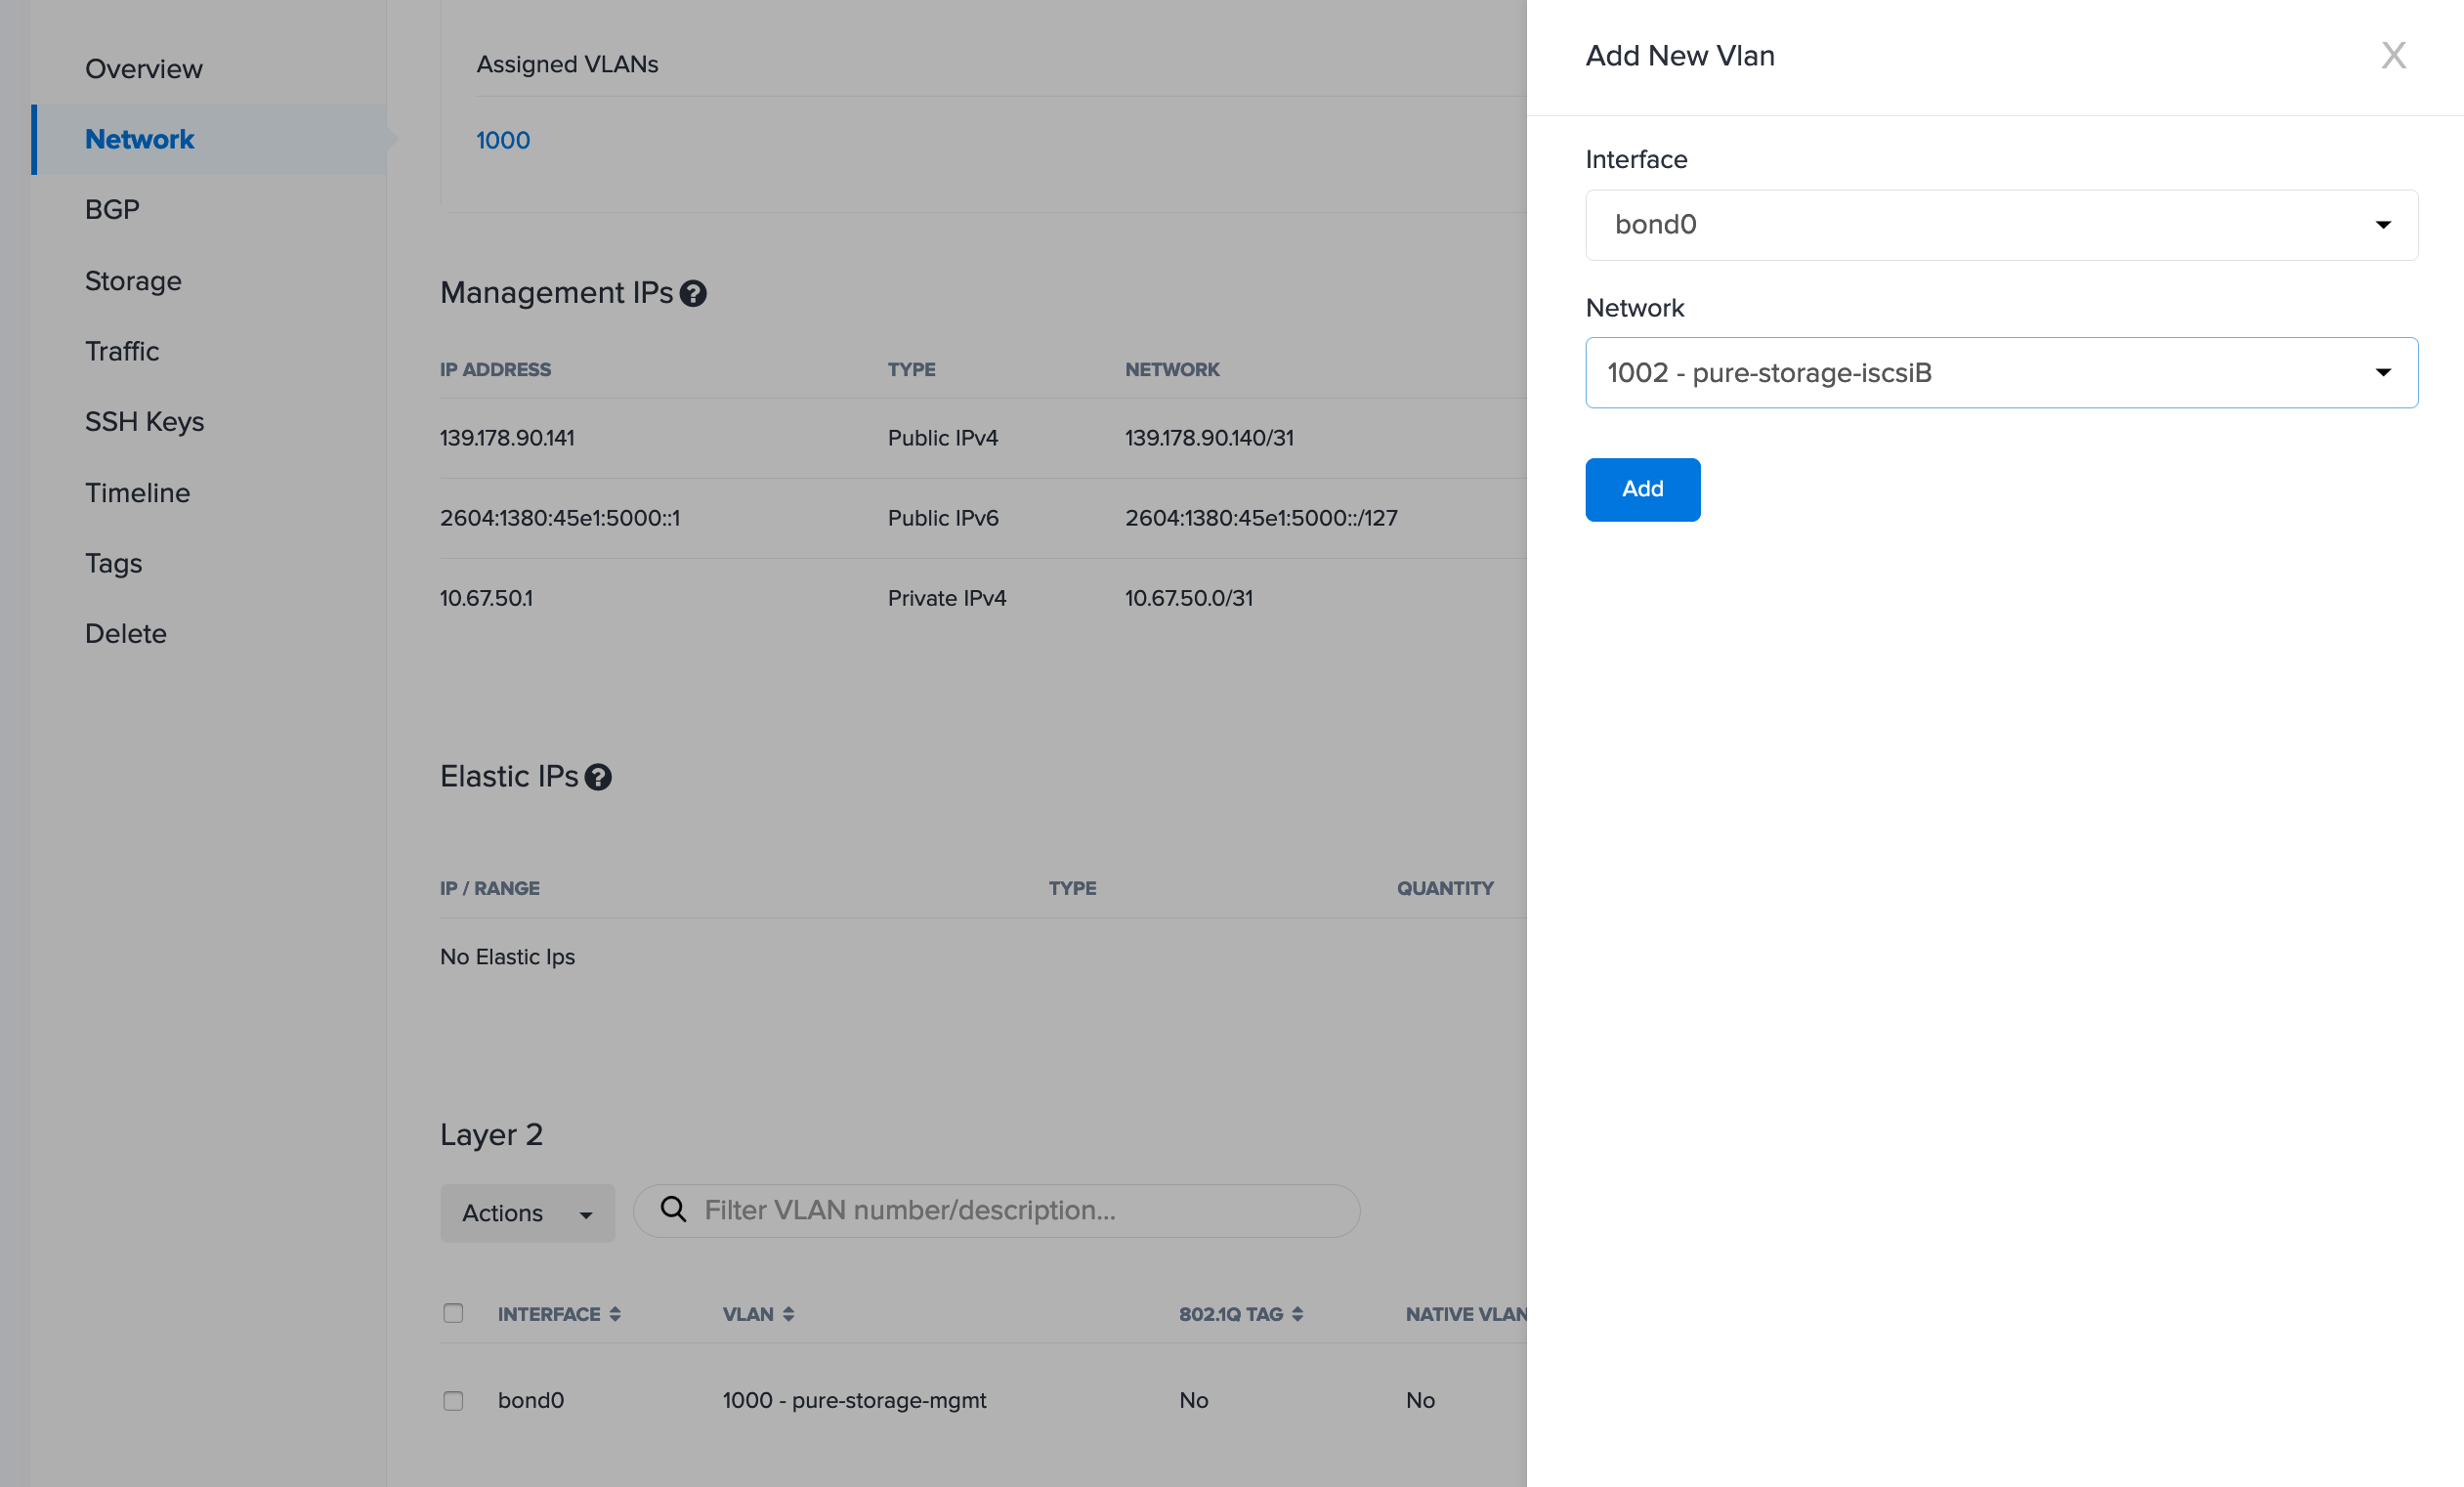
Then, you can attach both the iSCSI VLANs. From the server's Network page, in the Layer 2 section, click Add New VLAN. Add both VLANs to bond0.
Configuring VLANs in the OS
The last piece is configuring the networking in the server's OS, including assigning IP addresses for the server on each VLAN, and tagging each VLANs traffic. The IP address for the server must use the same 192.168.x.x space for the address as the appliances on each VLAN.
For reference, the table presents an example mapping of all the ports and IP addresses across the appliances and server.
| Appliance 1 | Appliance 2 | Server | |||
|---|---|---|---|---|---|
| Role | Port | IP Address | IP Address | Port.VLAN | IP Address |
mgmt |
eth0 |
192.168.10.10 | 192.168.10.11 | bond0.1000 |
192.168.10.15 |
iSCSI_A |
eth4 |
192.168.1.10 | 192.168.1.11 | bond0.1001 |
192.168.1.15 |
iSCSI_B |
eth5 |
192.168.2.10 | 192.168.2.11 | bond0.1002 |
192.168.2.15 |
Once you have all the information mapped out, you will need to add it to your server's networking configuration. To continue with the example server running Ubuntu 20.04, add the IP addresses and tag the VLAN traffic by adding the configuration to /etc/network/interfaces. For example:
auto bond0.1000
iface bond0.1000 inet static
    address 192.168.10.15
    netmask 255.255.255.0

auto bond0.1001
iface bond0.1001 inet static
    address 192.168.1.15
    netmask 255.255.255.0

auto bond0.1002
iface bond0.1002 inet static
    address 192.168.2.15
    netmask 255.255.255.0
Then bring up the interfaces with ifup:
ifup bond0.1000
ifup bond0.1001
ifup bond0.1002
Verifying Connectivity
Once the networking configuration is updated, you should be able to ping the Pure Storage appliances from the server. SSH into the management server, and use fping to ping all six of the IP addresses of the appliances. For example:
ssh root@<server_public_ip>
fping 192.168.10.10 192.168.1.10 192.168.2.10 192.168.10.11 192.168.1.11 192.168.2.11
Connecting to the Pure Storage Interface
The Pure Storage management interface is accessible from either of the appliances' IP addresses on the management VLAN, at port 443. To connect to it, you can set up SSH port forwarding and forward the traffic from one of the management appliance IP addresses to your local machine. For example,
ssh -L 12345:192.168.10.10:443 root@<server_public_ip>
Then, use the browser on your local machine to visit localhost:12345. You should see the Pure Storage login page.
Using Pure Storage
You can now start configuring Pure Storage to meet your storage use-case. If you're interested in sticking with Linux, the Pure Storage documentation has many resources like recommended settings and how to configure Linux for iSCSI in their larger Linux Platform Guide.
There's also a guide on their blog that includes some basic information on using the management interface with Red Hat flavored Linux as the example operating system.
Even More Resources
If you are looking for more, the Pure Storage Solutions documentation has many other platforms and use-cases, including an Equinix Metal + VMware guide with examples on a cluster of c3.medium.x86 servers running VMware ESXi 7.0.
There's also a guide if you're using Windows.
Getting Support
As a final step in the process, Equinix Metal sales and support will help you configure secure external routing for your appliances, which will enable them to call home and receive remote assistance.
From a high level, this process involves:
- Using an Equinix Metal server that you have already provisioned to run a virtual router, or dedicating a new
c3.smallto serve as a virtual router. - Using Equinix Network Edge for Internet connectivity.
- Configuring the router and firewall to allow outgoing messages.
This piece can be very closely tailored to your specific use-case, infrastructure, and security requirements. Please reach out to sales or support if you have any questions or would like to discuss what this might look like for your specific needs.
You may also like
Dig deeper into similar topics in our archives
Crosscloud VPN with WireGuard
Learn to establish secure VPN connections across cloud environments using WireGuard, including detailed setups for site-to-site tunnels and VPN gateways with NAT on Equinix Metal, enhancing...

Kubernetes Cluster API
Learn how to provision a Kubernetes cluster with Cluster API

Kubernetes with kubeadm
Learn how to deploy Kubernetes with kubeadm using userdata

OpenStack DevStack
Use DevStack to install and test OpenStack on an Equinix Metal server.