Intro to Docker for Developers: How to Run your Rails App on Docker
With Docker-mania in full swing, we’ve put together a practical guide to help you dockerize your next Rails app.

It seems that these days, everyone is talking about Docker, and every other startup has added a Docker angle to their pitch, and eager devops gurus are standing in long lines in the rain for a chance to get Solomon Hykes to autograph their laptops….okay not so much the last part, but some days it seems like it!
If you’re a developer that is new to the inner workings of Docker, you might ask yourself: what is all the buzz is about? How does Docker fit into your daily life?
I had the exact same thought about two months ago. So I finally dove into Docker and vowed to get my head around it. My starter project: to “dockerize” a standard Rails app. Here’s how I did it.

Docker in a Nutshell
First of all what is Docker? Let’s chew on the Wikipedia definition to start:
“Docker is an open-source project that automates the deployment of applications inside software containers, by providing an additional layer of abstraction and automation of operating-system-level virtualization on Linux.[2] Docker uses resource isolation features of the Linux kernel such ascgroups and kernel namespaces to allow independent "containers" to run within a single Linux instance, avoiding the overhead of starting and maintaining virtual machines.[3]”
From a developer perspective Docker promises us the opportunity to forget about the “it works in my local environment but not in production” problem as well as the “it works on my Ubuntu machine but not on my buddy’s Mac three feet away” scenario.
Now, with the magic of a definition file, it is super easy to port an app between environments: from local to lab, and later to production. Docker is incredibly fast and thanks to the use of some linux kernel features like namespaces, we have isolation for filesystem, networks and processes.
This consistency is an incredible opportunity for developers, but it’s an especially big win for our users: with Docker we can reduce highly disruptive “environmental issues” to almost zero percent.
Did I just say the word disruptive? Oh right, container revolution, blah blah. :)
Step #1: Prepare Your Infrastructure / Server Environment
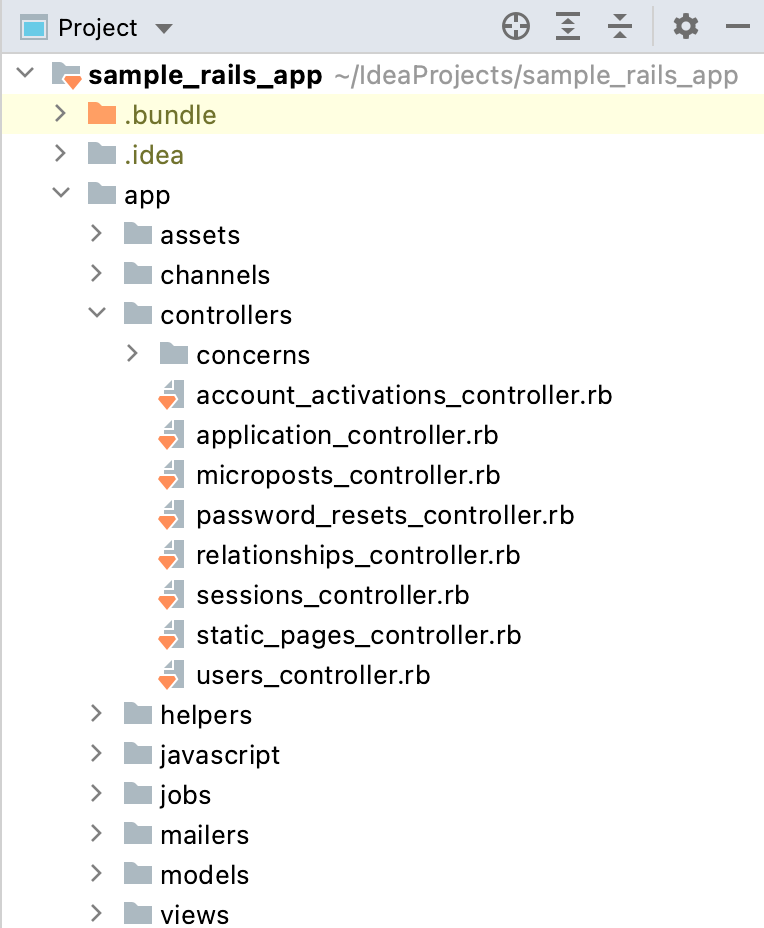
Let’s “dockerize” a basic Rails app. This is what the app looks like. It was created using “Rails new Rails-App” (if you don’t have Rails you can just follow the installation instructions here)
First, you need to have Docker running. To do so, you can just check the docker documentation, which is really quite easy to follow. Choose your platform, follow the instructions, and voilà!
Once installed, check that the Docker daemon is running properly by typing:
$ docker -v
Docker version 1.7.0, build 0baf609 (this will probably change based on the installation type/platform you have chosen)
Step #2: Build Your Image
Next up we need to build our Rails image.
Docker uses a definition file to describe what the environment will contain. Usually it’s named Dockerfile (you can use a different name also), so for simplicity let’s create a file in our app directory called “Dockerfile” and add a few lines in there (gist):
# Base image
FROM ruby:latest

ENV HOME /home/rails/webapp

# Install PGsql dependencies and js engine
RUN apt-get update -qq && apt-get install -y build-essential libpq-dev nodejs

WORKDIR $HOME

# Install gems
ADD Gemfile* $HOME/
RUN bundle install

# Add the app code
ADD . $HOME

# Default command
CMD ["rails", "server", "--binding", "0.0.0.0”]
Okay...so what’s a “Docker image” for real?
An image is a read-only template that Docker uses to run your code through a container. It contains a complete environment definition: it has the OS binaries, libraries, dependencies and all the applications that you need to run your code or application. All the magic is stuffed into it, so pay attention!
Images contain layers (I won’t explain much about them here, since it’s a big topic that requires its own blog post). Every instruction creates a new layer in the filesystem. And thanks to the use of a union filesystem, those layers are “combined” into a single filesystem. Neat and tidy.
An image can be built and pushed into a registry, like Docker Hub, or Quay.io (or even a custom one), just like you would do with GitHub. You can even have public or private repositories, so others can leverage your image / template, or you can re-use for other purposes.
Digging into your Dockerfile
To help us understand how this all works, let’s examine our freshly baked Rails Dockerfile.
-
FROM ruby:latest - This is the first instruction you have to have in your Dockerfile, with this instruction we are defining the base image. In our case, it will use this base image https://registry.hub.docker.com/u/library/ruby/, which actually has an interesting hierarchy:
-
Ruby is based on buildpack-deps:jessie which is based on buildpack-deps:jessie-scm which is based on buildpack-deps:jessie-curl, which is finally (!) based on debian:jessie.
-
As you can see, between images there exist some kind of “inheritance” concept where you can “extend” your images from others. It’s a great thing since you can build your environments based on trusted/stable (if you find them! and still be careful) images.
-
-
ENV HOME /home/rails/webapp - Just defining an environment variable.
-
RUN apt-get update -qq && apt-get install -y build-essential nodejs
-
The RUN instruction executes a command in the docker container. So the “apt-get …” command will update the OS packages list and will install some libraries among nodejs.
-
-
WORKDIR $HOME - The WORKDIR instruction sets the working directory for any RUN, CMD, ENTRYPOINT, COPY and ADD instructions.
-
ADD Gemfile* $HOME/
RUN bundle install-
Copy all the gem files definitions into the filesystem in the container and execute the command to install the gems. (I’ll explain why I’m doing this, in the next “Using Cache in Docker” post :) )
-
-
ADD . $HOME - Copy all the website files into the container.
-
CMD ["rails", "server", "--binding", "0.0.0.0"] - Specify the default command for when the container runs.
Step #3 - Build and Run Your Web App
Now that we have a better idea of our Dockerfile, let’s get our hands dirty! We need to build and run the web app:
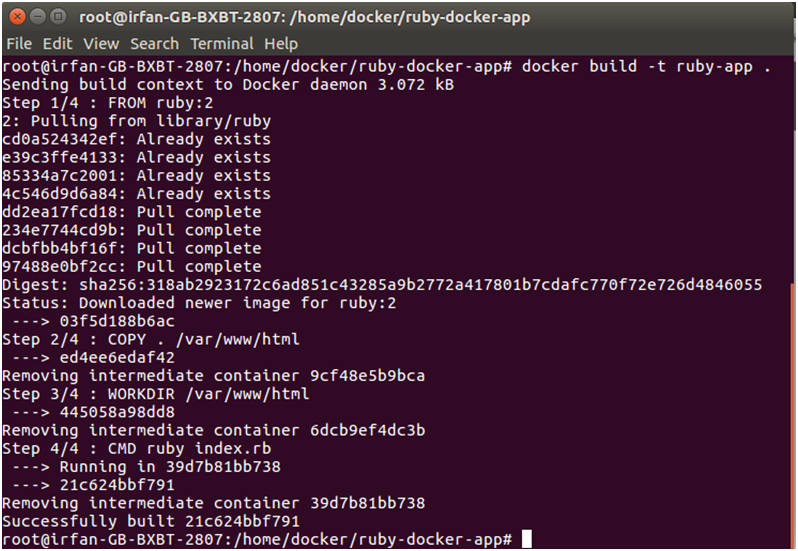
$ docker build -t ruby-app .
Since we don’t have a Ruby image downloaded yet, it will pull the latest from Docker Hub and then run all the instructions from the Dockerfile. You should end up with something like this:
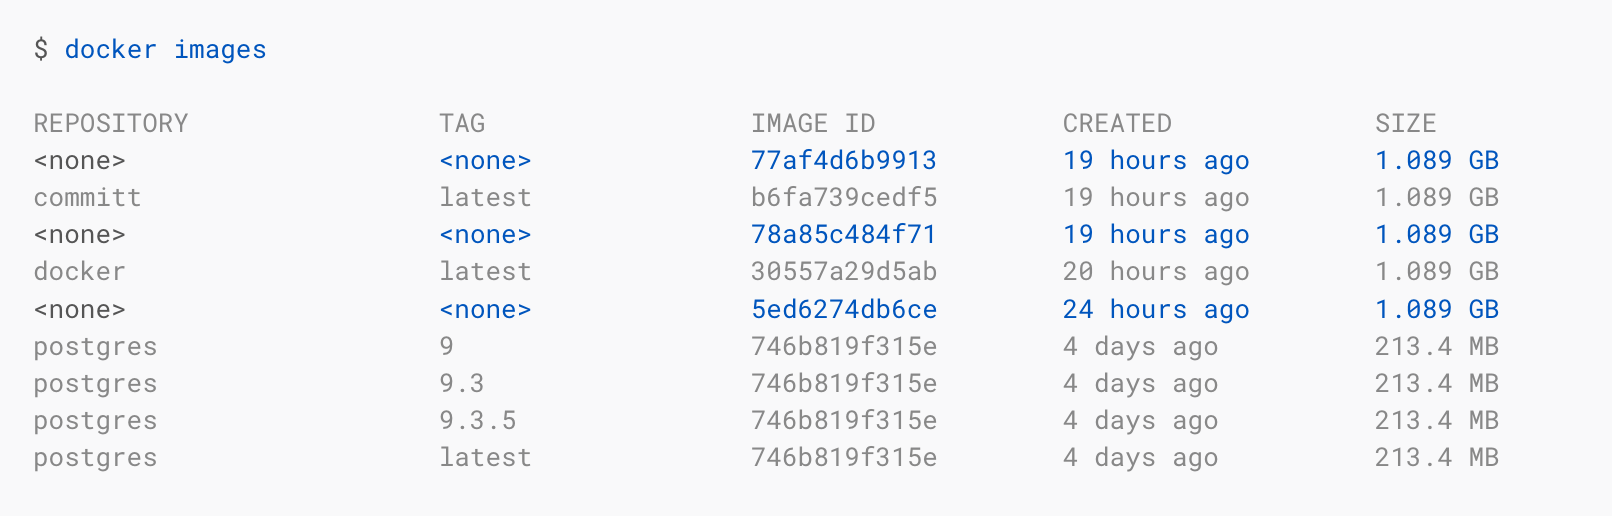
Later we can check the image using:
$ docker images
Let’s create a container and run the app.
$ docker run -d -p 3000:3000 rails-app
You can just open your browser at: https://www.localhost3000.org/ or you can get the container IP:
docker inspect 8f4fec2497f5 | grep IPAddress
(you can also run docker inspect --format '{{.NetworkSettings.IPAddress}}' 8f4fec2497f5 )
In my case it is: "IPAddress": "172.17.0.2"
So, just open the browser and point it to http://172.17.0.2:3000 and you will see the rails app running :)
One last interesting command about the run command we used is the -p flag.
docker run -d -p 3000:3000 ruby-app
When using the -p flag docker let us choose a port binding between the host and the container. Without this flag we could get into the rails app from outside the container. We could even choose a different port like:
docker run -d -p 5000:3000 ruby-app
Or let docker choose a random port like
docker run -d -p 3000 ruby-app
To see what port docker has chosen, we can run “docker ps”
And in the port column you will see that the assigned port is 32769.
Also you could do:
$docker port 284bb5e37f44
Result: 3000/tcp -> 0.0.0.0:32769
Conclusion
There are still a lot of things to talk about like connecting your web app to another service (such as a Postgres database) as well as great opportunities like utilizing caching techniques when building your images, Docker compose, and more!
Check back soon and we’ll dive a bit further down the Docker rabbit hole.

Ready to kick the tires?
Use code DEPLOYNOW for $300 credit