- Home /
- Resources /
- Learning center /
- Configuring Micros...
Configuring Microsoft Entra ID for Equinix Federated SSO
Manage users automatically from your Entra ID user directory

On this page
Integrating services with Identity Providers (IdPs) has become an industry best practice for businesses seeking to optimize their security posture and streamline user access management. Equinix support for SAML-based SSO (using your own IdP to login to Equinix) is generally available, and to accompany it, we are happy to announce a beta release of the newest feature of our identity platform - support for SCIM-based user provisioning and deprovisioning. This means that your IdP will not just be a part of the login flow, but will be directly responsible for creating and removing Equinix user accounts.
Automating user management comes with several benefits for your business - including a streamlined experience, reduced IT burden, reduced rate of mistakes, and increased ability to enforce compliance with security policies. This guide will walk you through automating user provisioning in Equinix with Microsoft Entra ID (formerly Azure Active Directory) using the SCIM protocol.
Prerequisites
This guide assumes you have completed SSO onboarding at the Equinix Federated SSO site. The SSO onboarding process will provide you with an integration URL and token, which will be referenced in this guide.
If you have an existing Entra ID Enterprise Application for logging in to Equinix with SAML, we assume it uses the user.mail attribute as its Unique User Identifier.
Creating the Enterprise Application
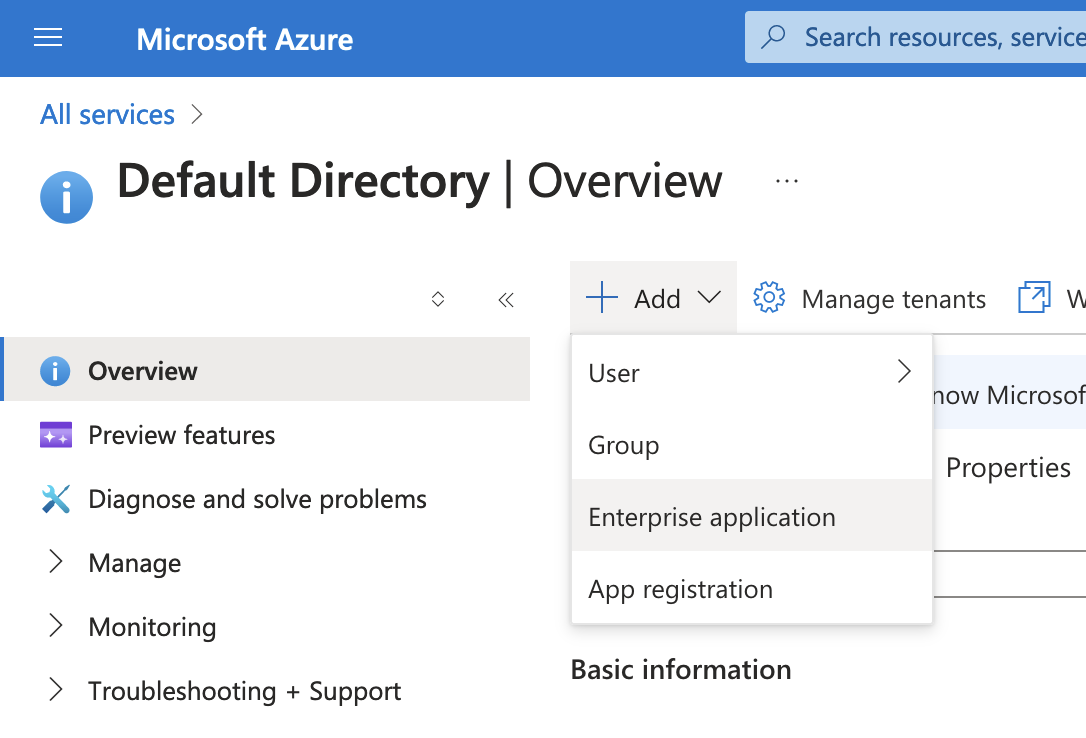
The provisioner will be configured using an Entra ID Enterprise application. To configure this application, open the Azure portal and navigate to Microsoft Entra ID (you may need to expand All Services). There is an Add button at the top of the portal, which opens a dropdown, from which you can select Enterprise application.
Azure will prompt you to select the application you'd like to integrate with, and present you with a gallery. While in beta, Equinix's SCIM service is not integrated with the Equinix Federation App gallery application, so you will need to click Create your own application at the top of the page, and select Non-gallery from the modal dialog. The application name may be anything that meaningfully distinguishes the application's purpose, such as "Equinix SCIM" or "Equinix Provisioning." Click the button to create the application.
Configuring Single Sign-On Attributes
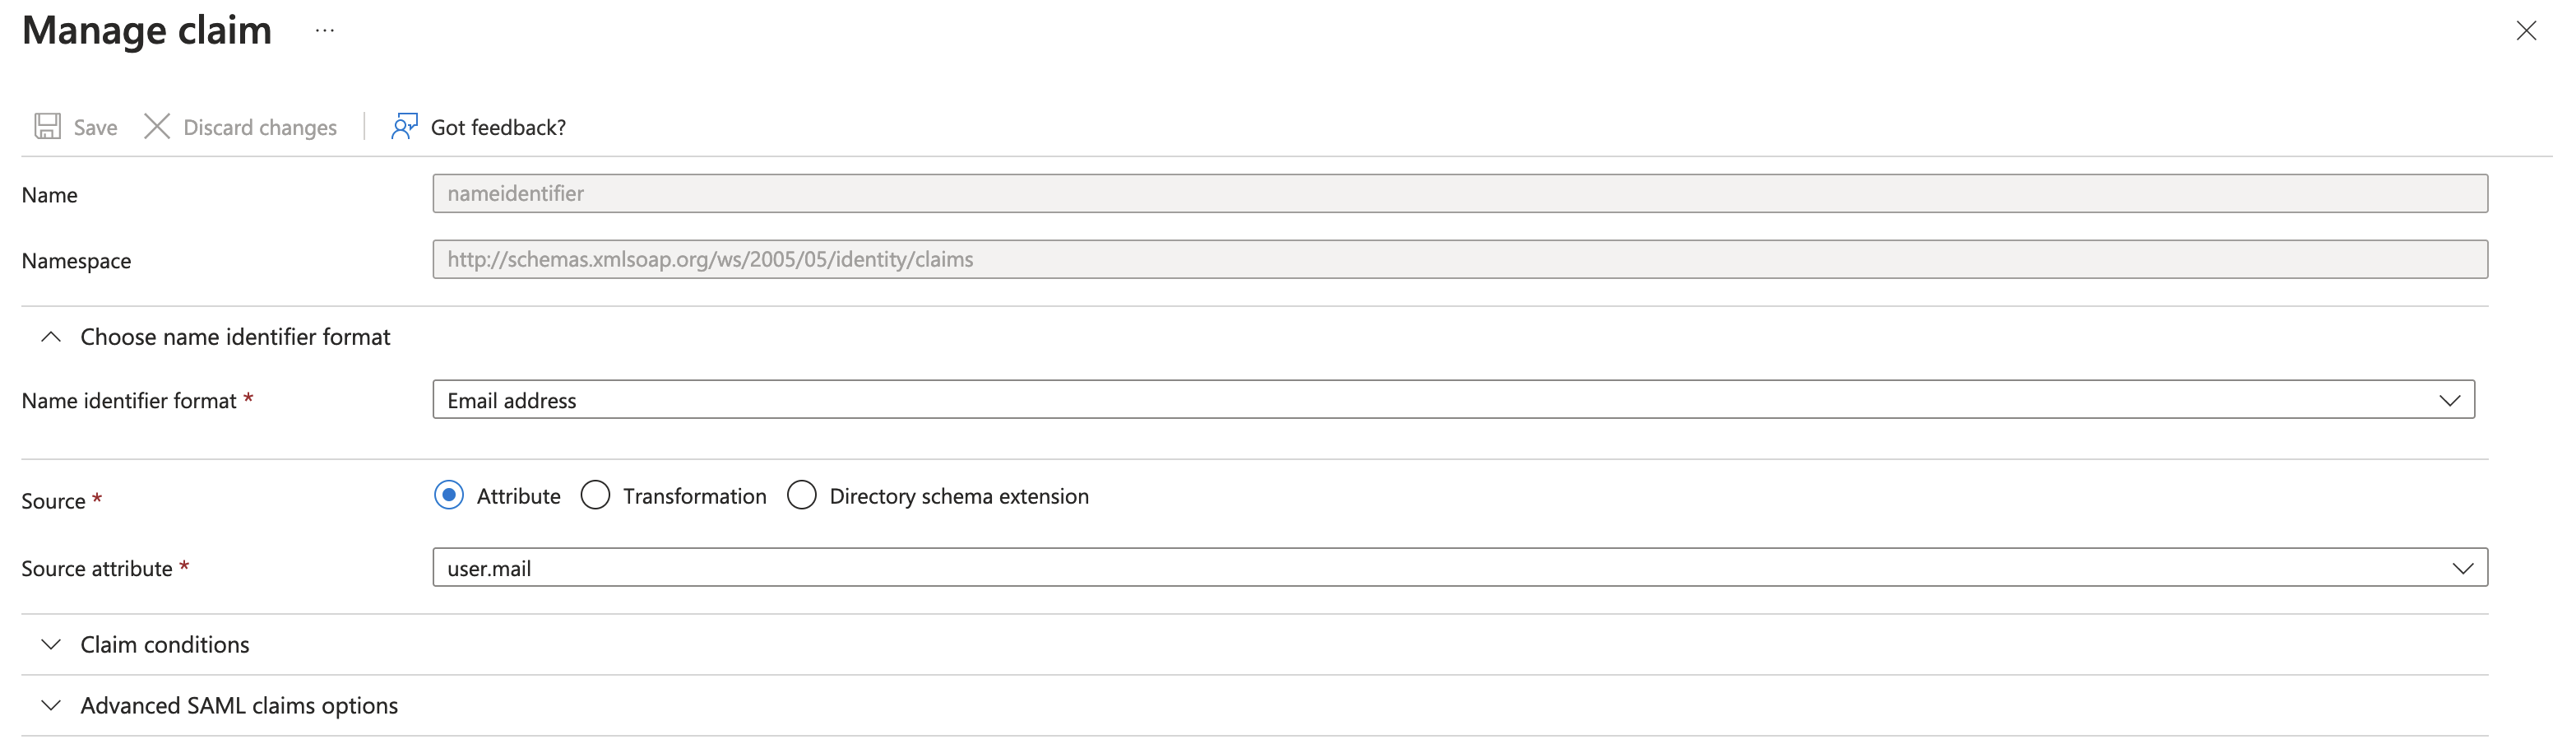
Any identity providers that integrate with Equinix using SAML must pass the user's email address as their SAML NameID value. This can be configured in Entra ID by navigating to Manage, Single Sign-On and clicking Edit in the box for Attributes & Claims. The Unique User Identifier (Name ID) field must be set to user.email with a Name identifier format of Email address.
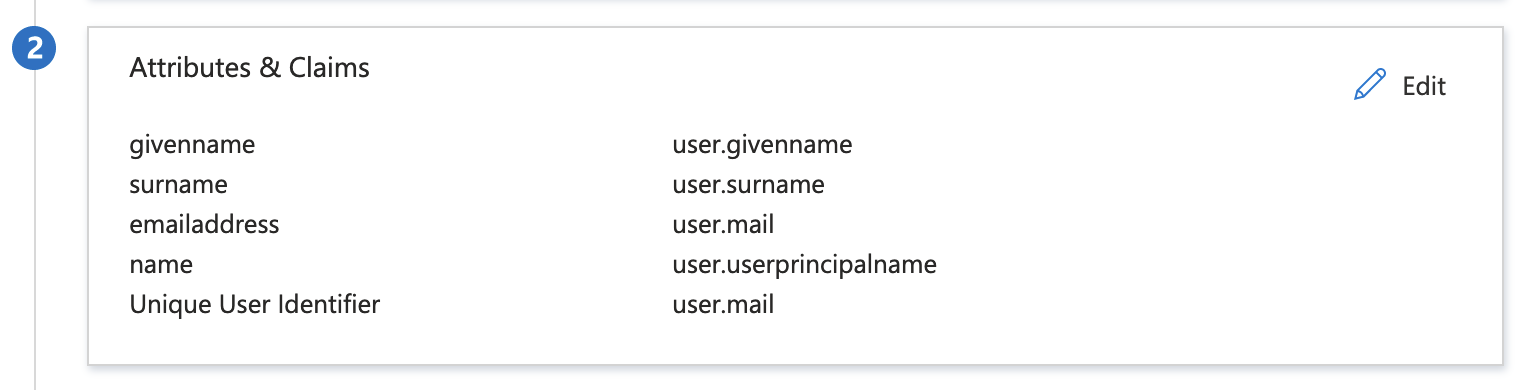
The Attributes & Claims section of your Single Sign-On panel should match the following example.
Enabling Provisioning
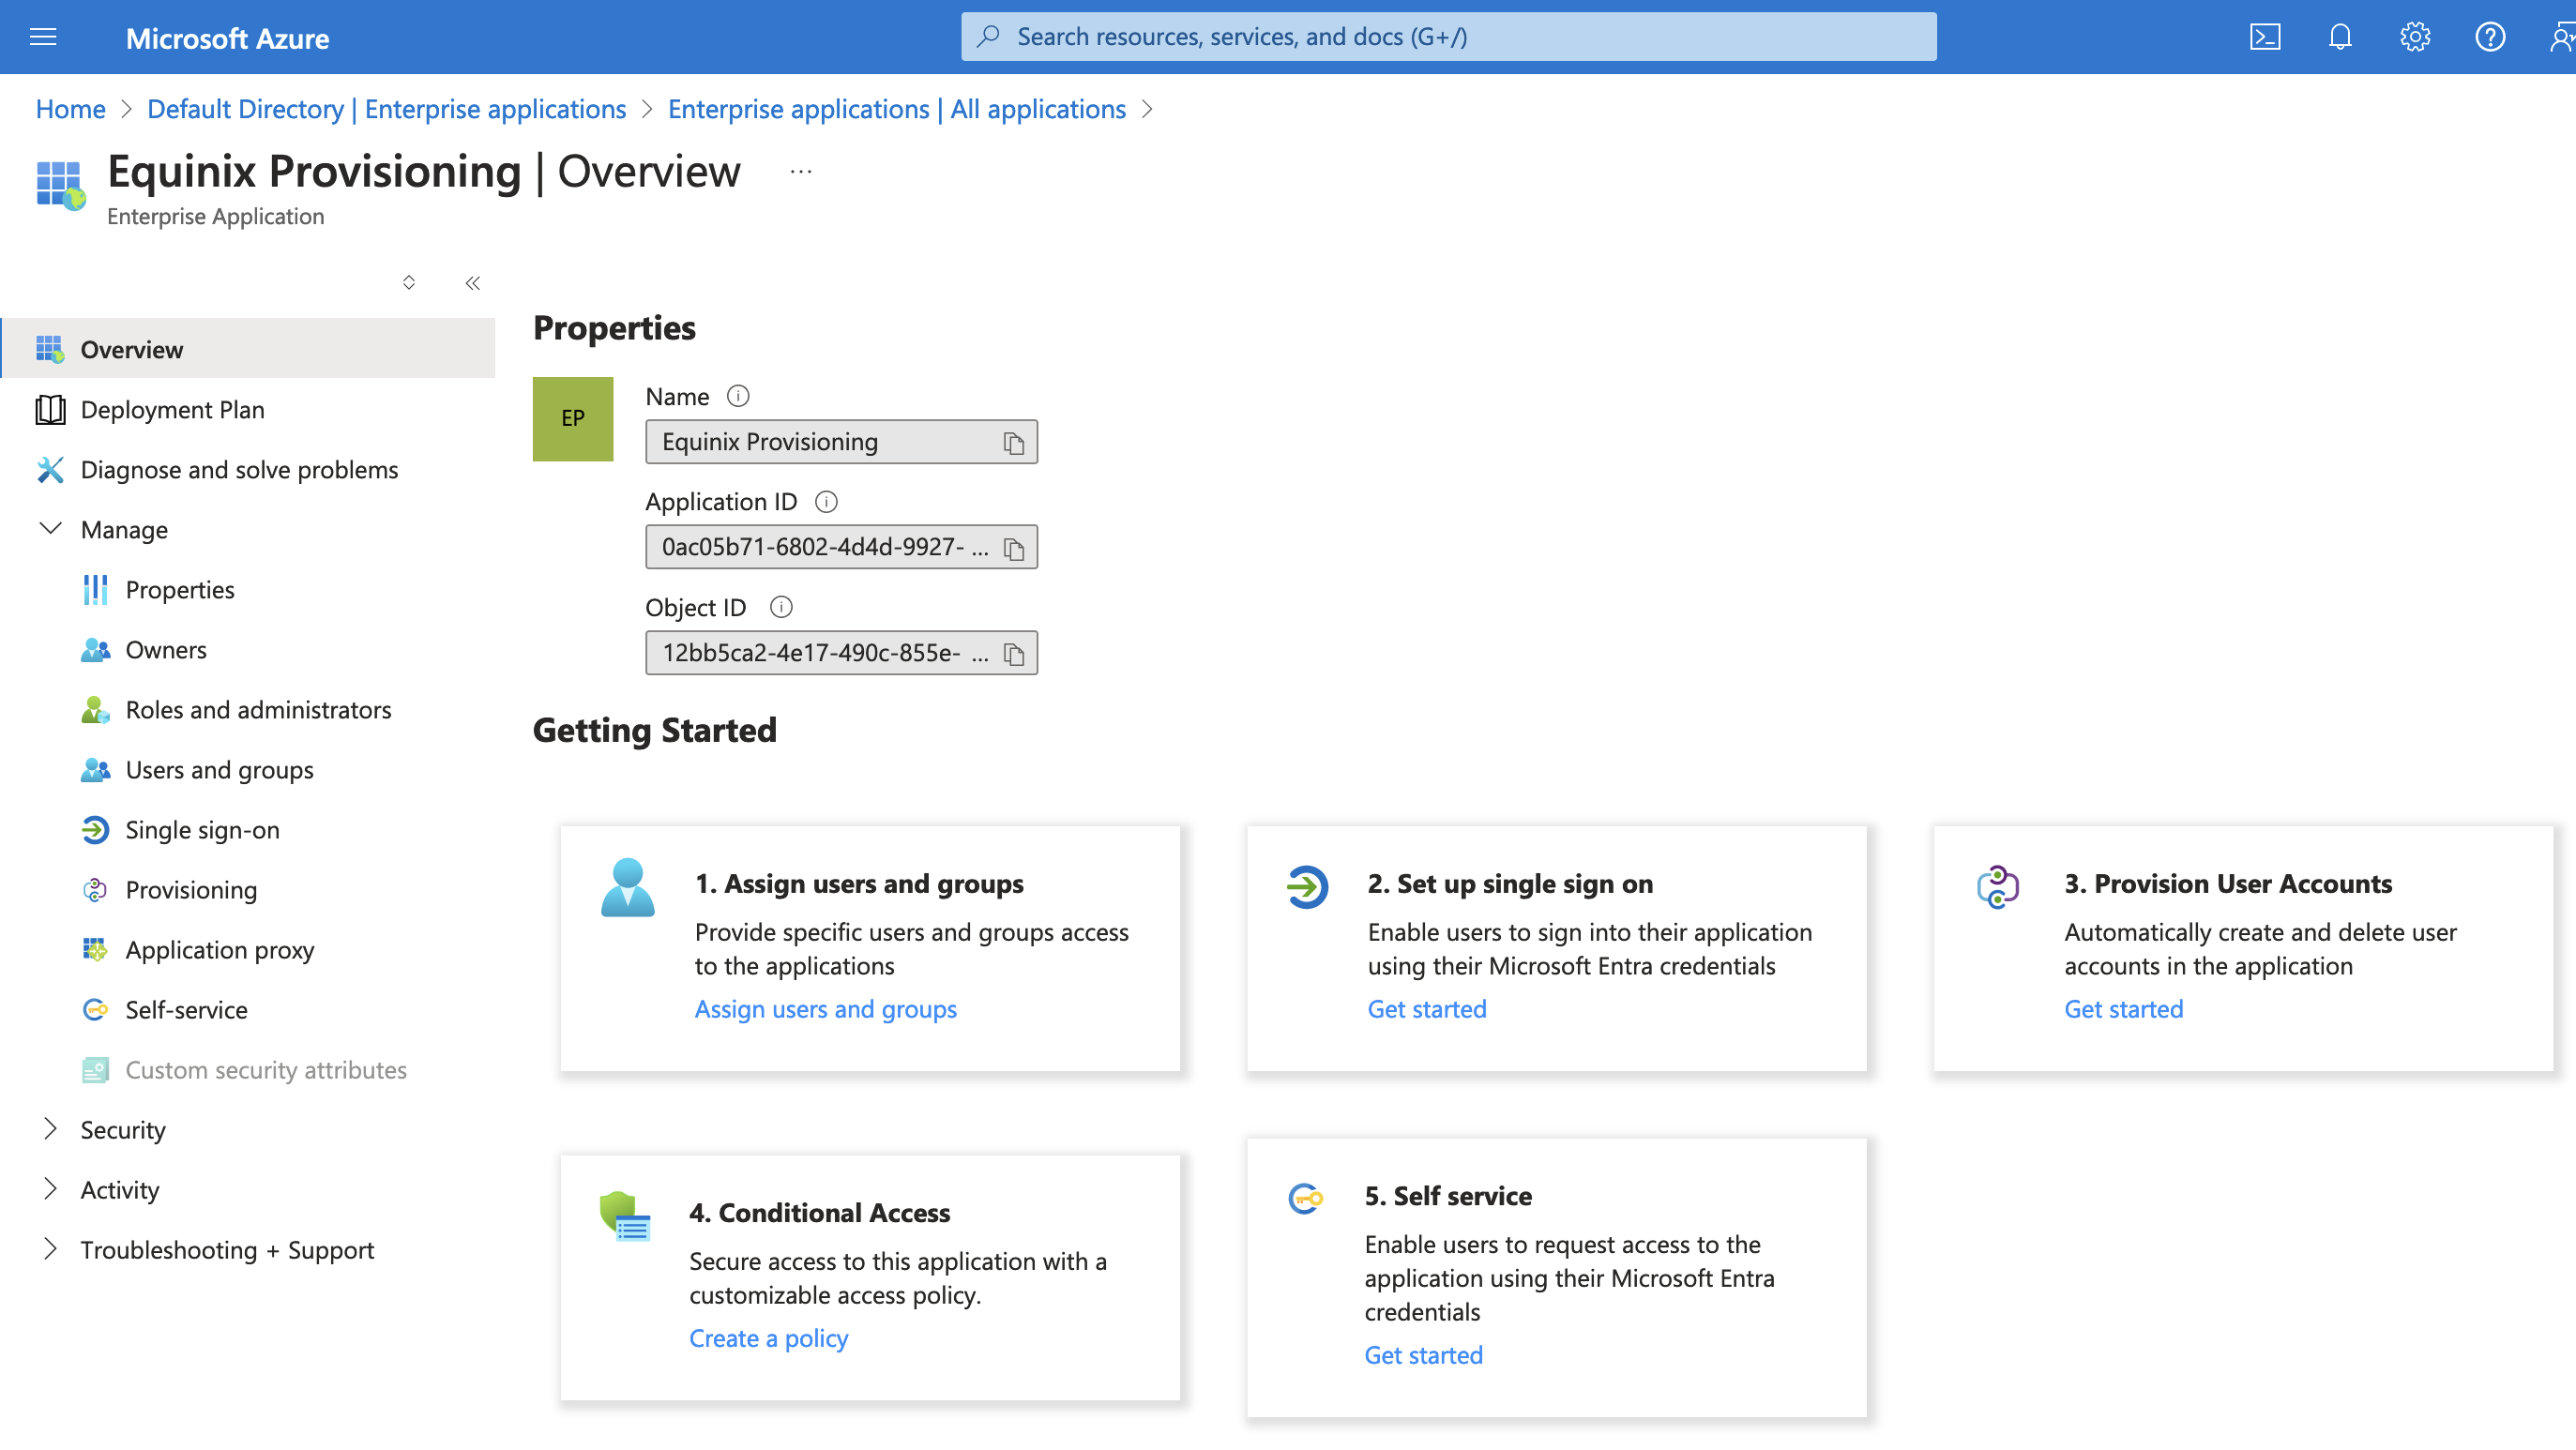
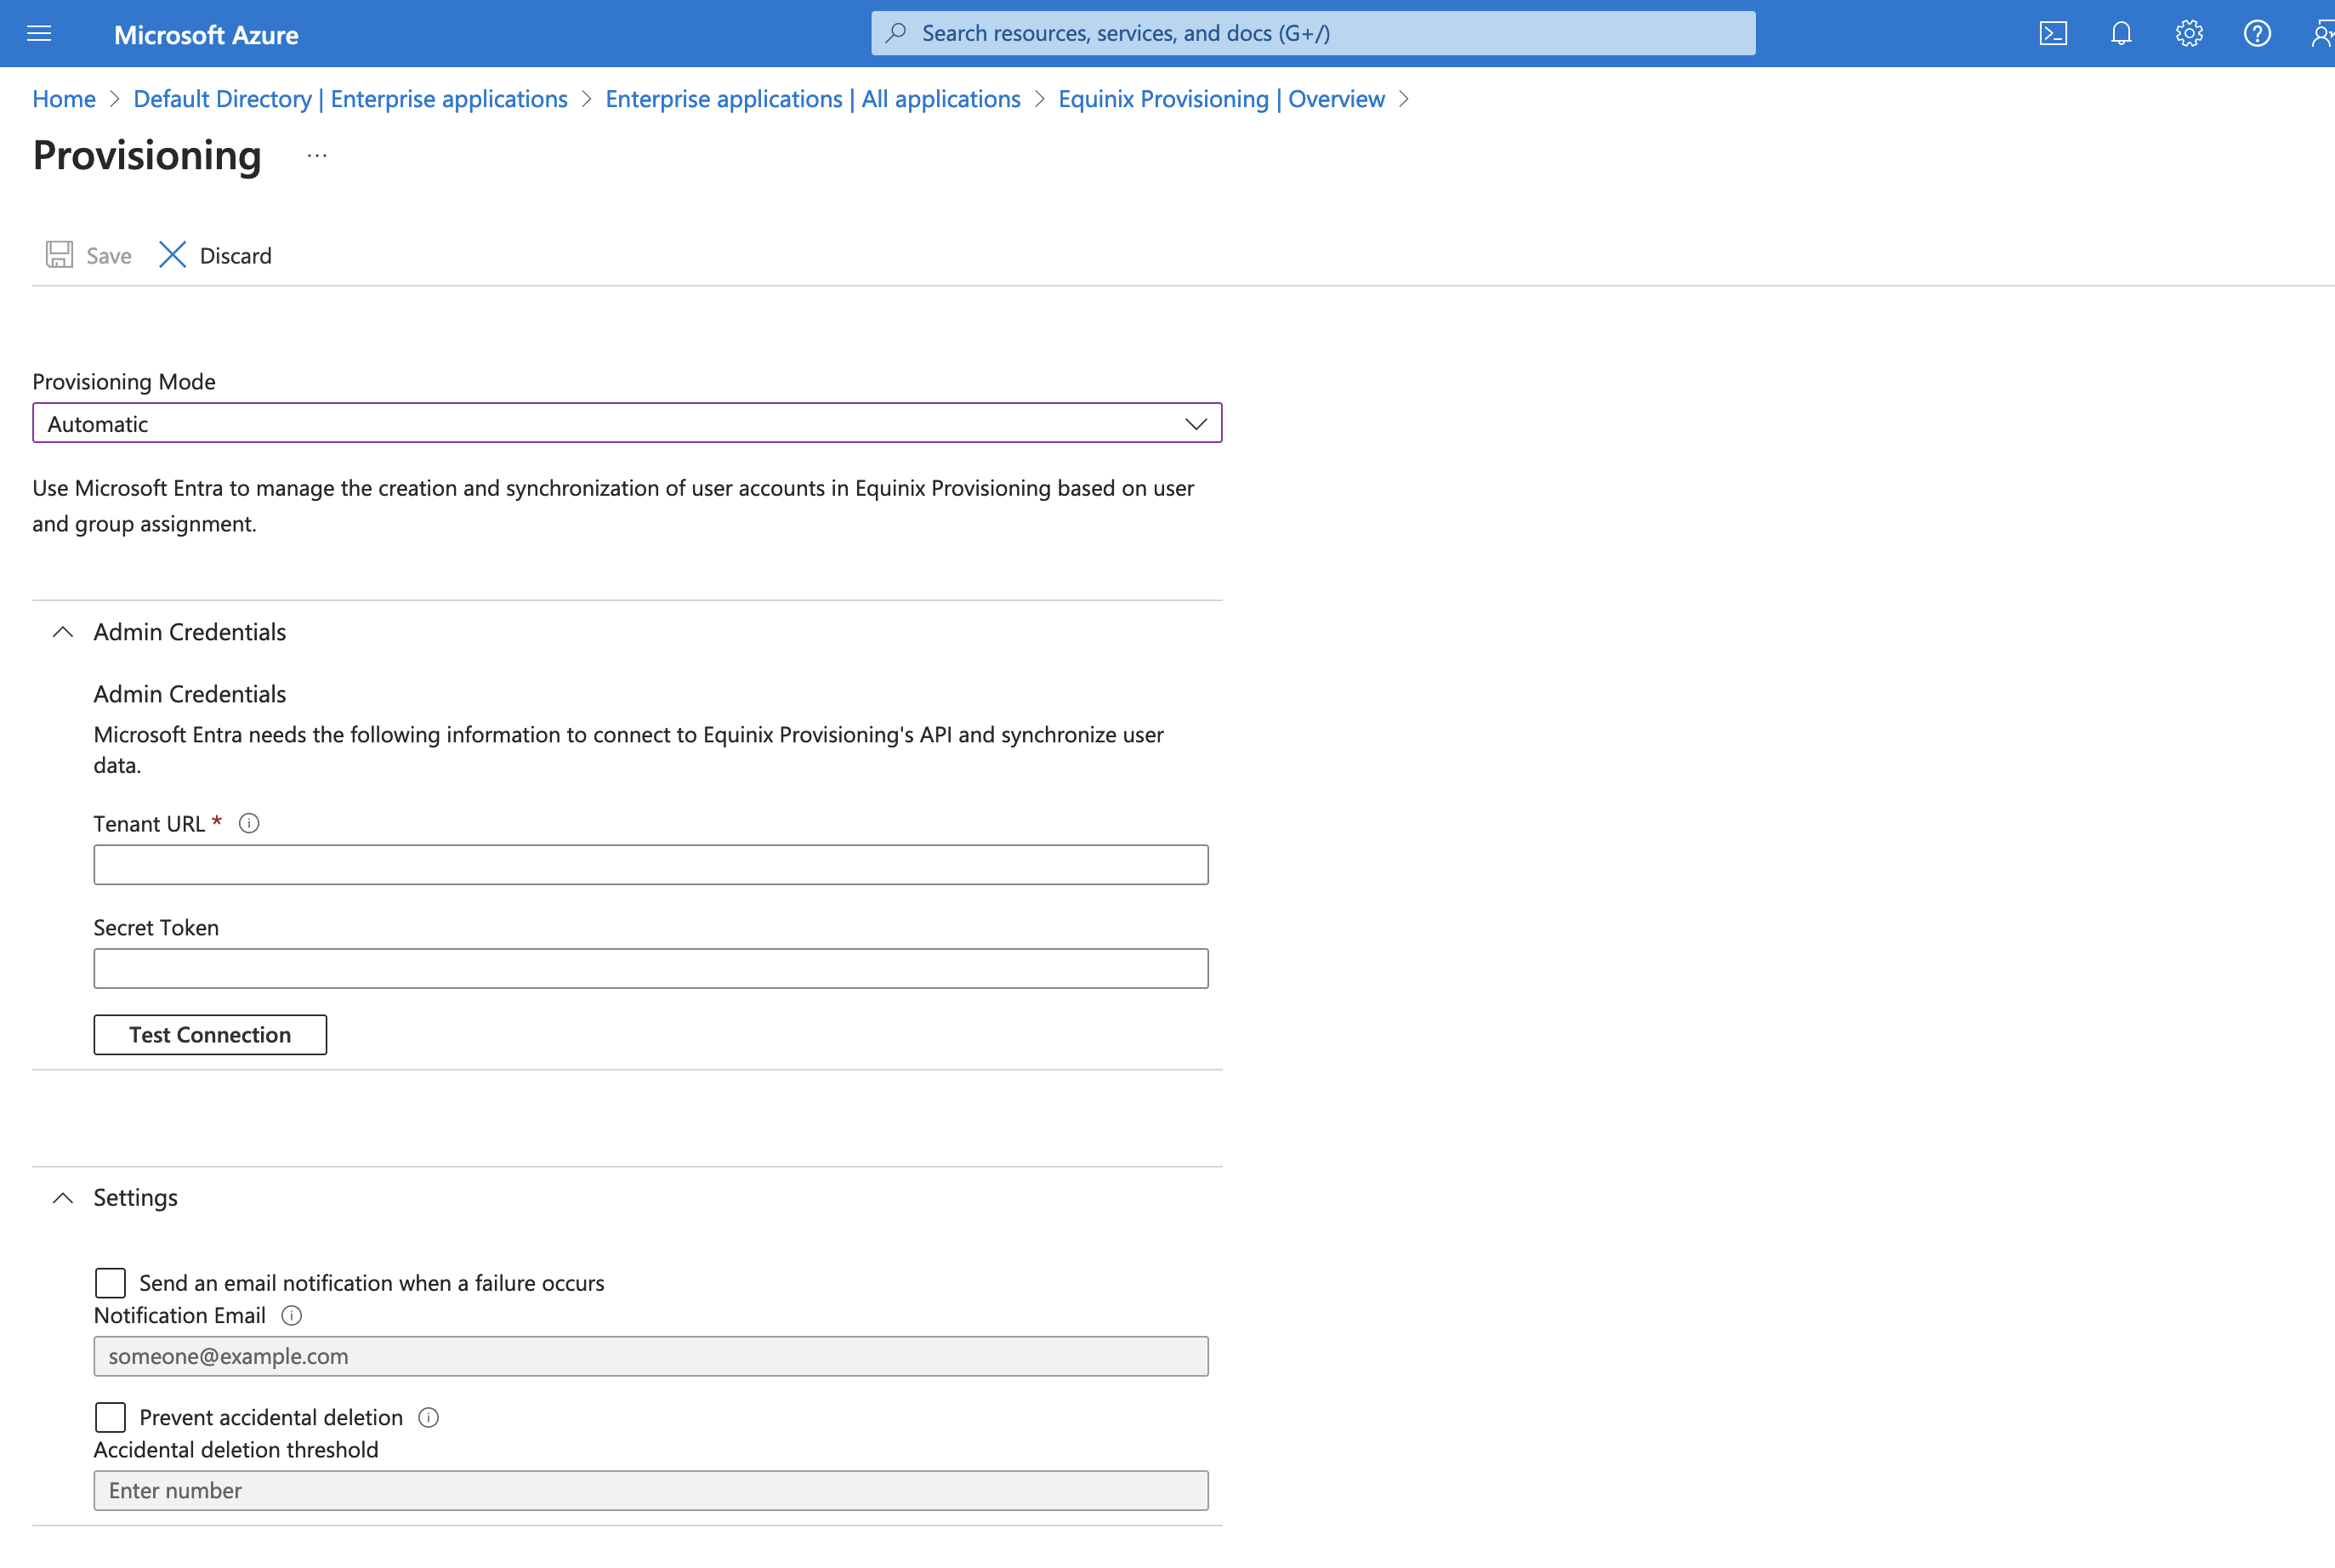
After creating the application, you should be at the application's Overview page, with several options available in a navigation sidebar. Expand the Manage dropdown, open Provisioning, and select Get Started.
Entra ID will prompt you for a Provisioning Mode, which defaults to Manual. Change it to Automatic.
Expand the Admin Credentials panel, and enter the URL and token provided to you by federation.equinix.com. Use the Test Connection function to verify that the connection information between Entra ID and Equinix is configured correctly. You may also wish to expand the Settings panel on this same page if you'd like to configure email alerts for any provisioning issues or enable Entra ID's accidental deletion prevention feature. Save the settings and return to the applications's Overview page.
Configuring Attribute Mappings
In the sidebar, click Manage, then Provisioning once again. There will be a new panel, called Mappings. Open Provision Microsoft Entra ID Groups, switch off the Enabled toggle, and save the settings (Equinix group functionality is coming in a future SCIM update). Open Provision Microsoft Entra ID Users, and configure the mappings as shown:
| Custom App Attribute | Microsoft Entra ID Attribute | Matching precedence |
|---|---|---|
| userName | 1 | |
| active | Switch([IsSoftDeleted], , "False", "True", "True", "False") | |
| displayName | displayName | |
| externalId | mailNickname | |
| name.familyName | surname | |
| name.givenName | givenName | |
| phoneNumbers[type eq "work"].value | telephoneNumber (or 'mobile', depending on your environment) | |
| locale | preferredLanguage |
Additional default mappings should be deleted.
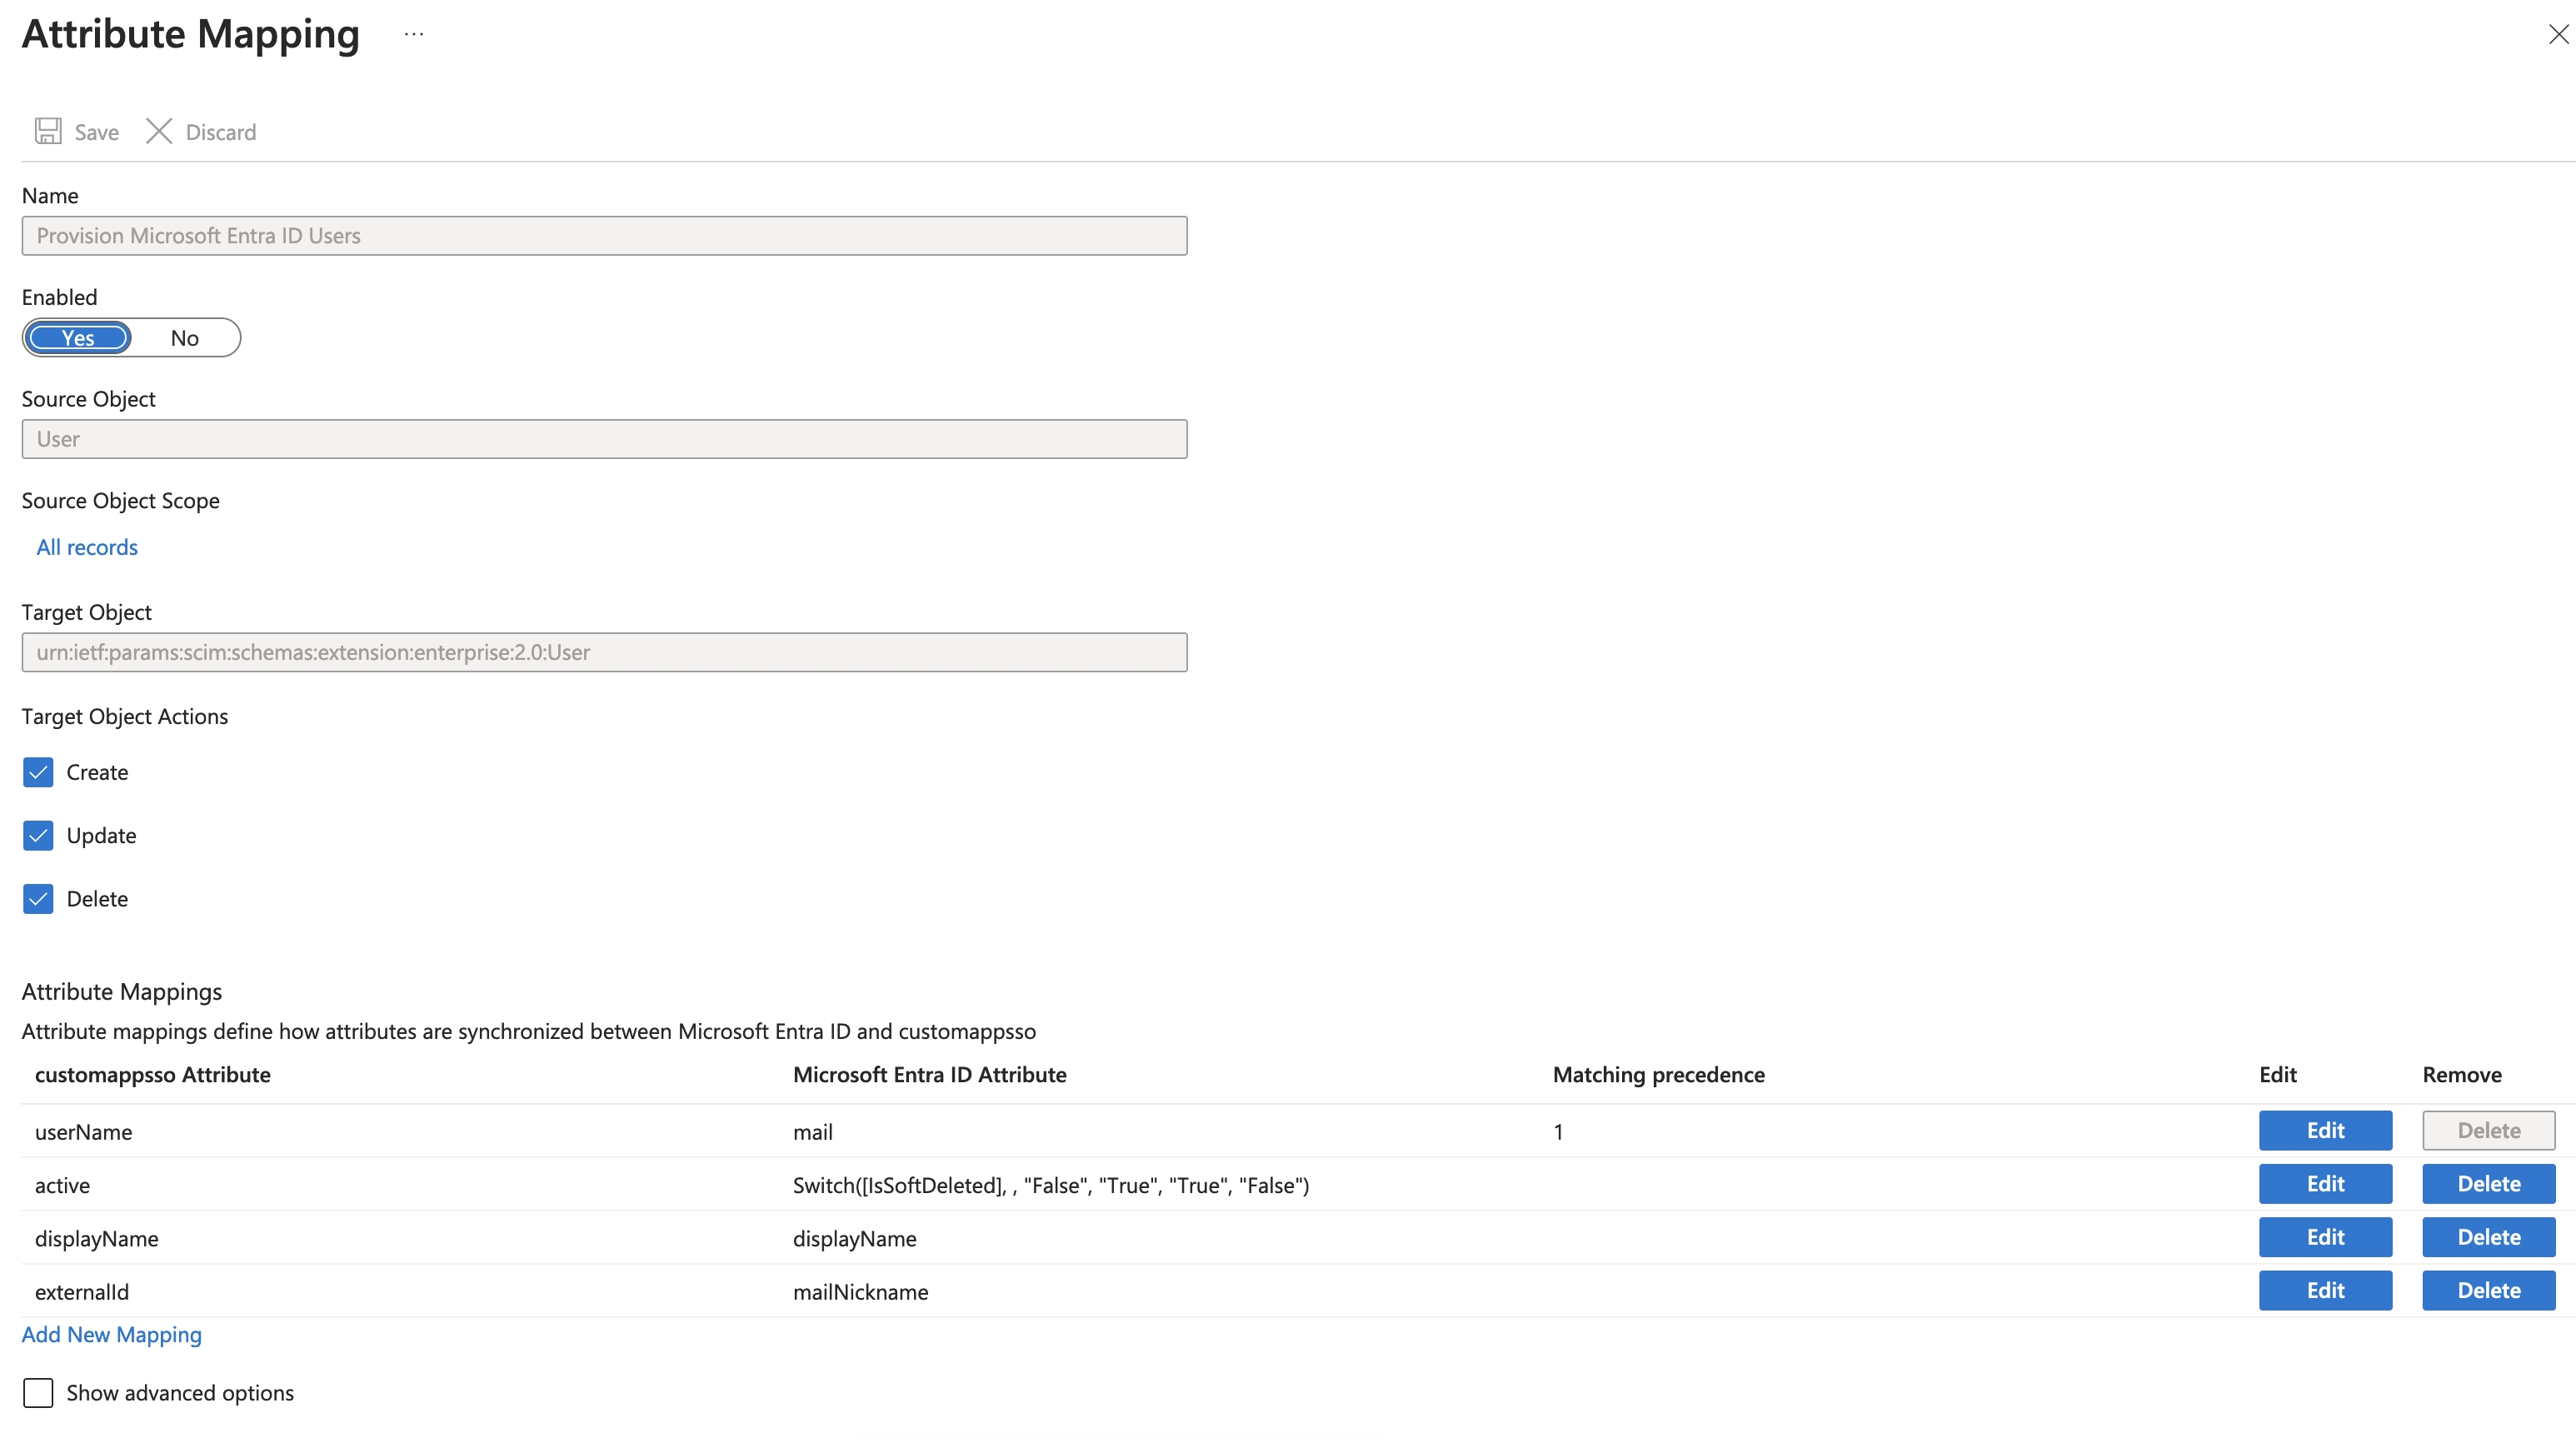
You can unselect Create, Update, or Delete if you don't wish for Entra ID to take all of those actions on Equinix users automatically -- if you only wish to provision users but not automatically deprovision them, for example. Save the changes.
Finally, with the connection established and the attribute mappings set, you can return to Manage, Provisioning and switch Provisioning Status to on.
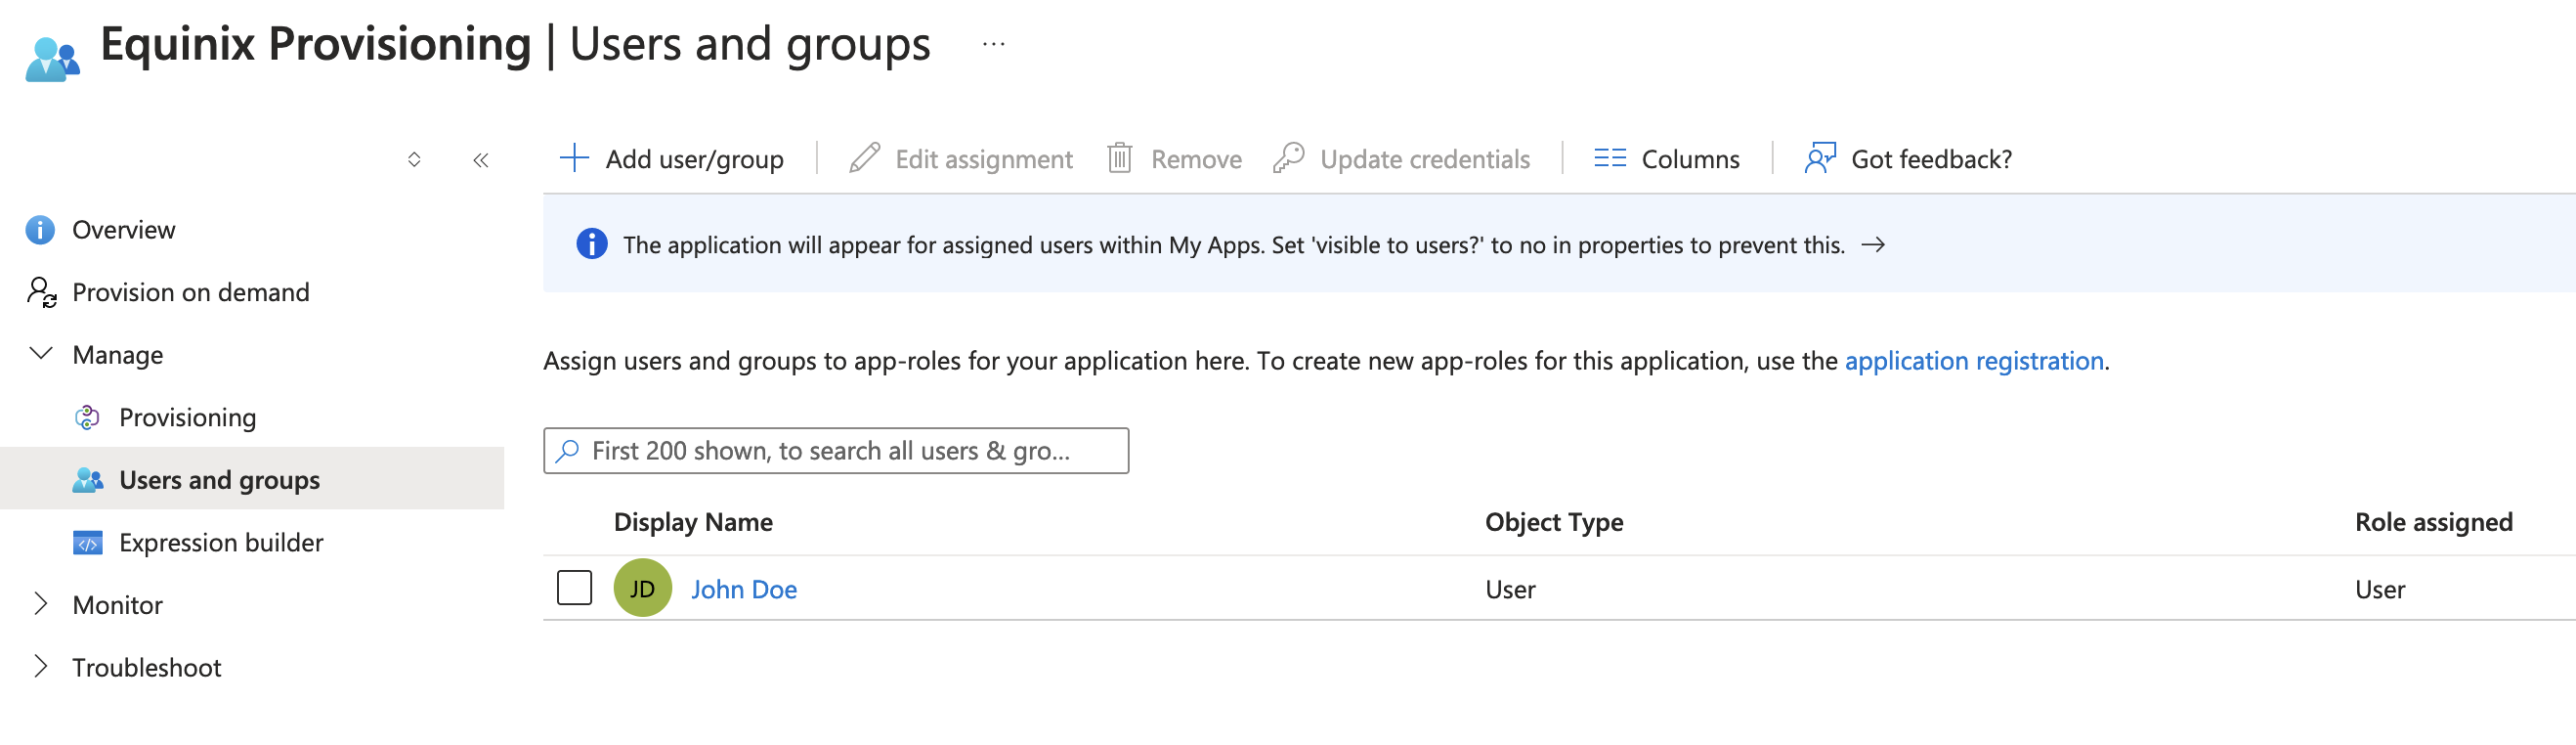
Adding Users and Groups for Provisioning
Unless you opted to sync all directory users in an advanced setting on the application, users will first need to be assigned to the application in order to be provisioned in Equinix. This assignment is made in Manage, Users and groups. Users can either be assigned individually, or by group (depending on your Azure subscription tier).
Verifying Successful Provisioning
At this point, Entra ID should have all of the configuration necessary to provision and deprovision users in Equinix. You can return to the overview page. After some time, Entra ID will attempt to provision the assigned users. On first provision, you may wish to examine the logs to ensure that this process performed as expected.
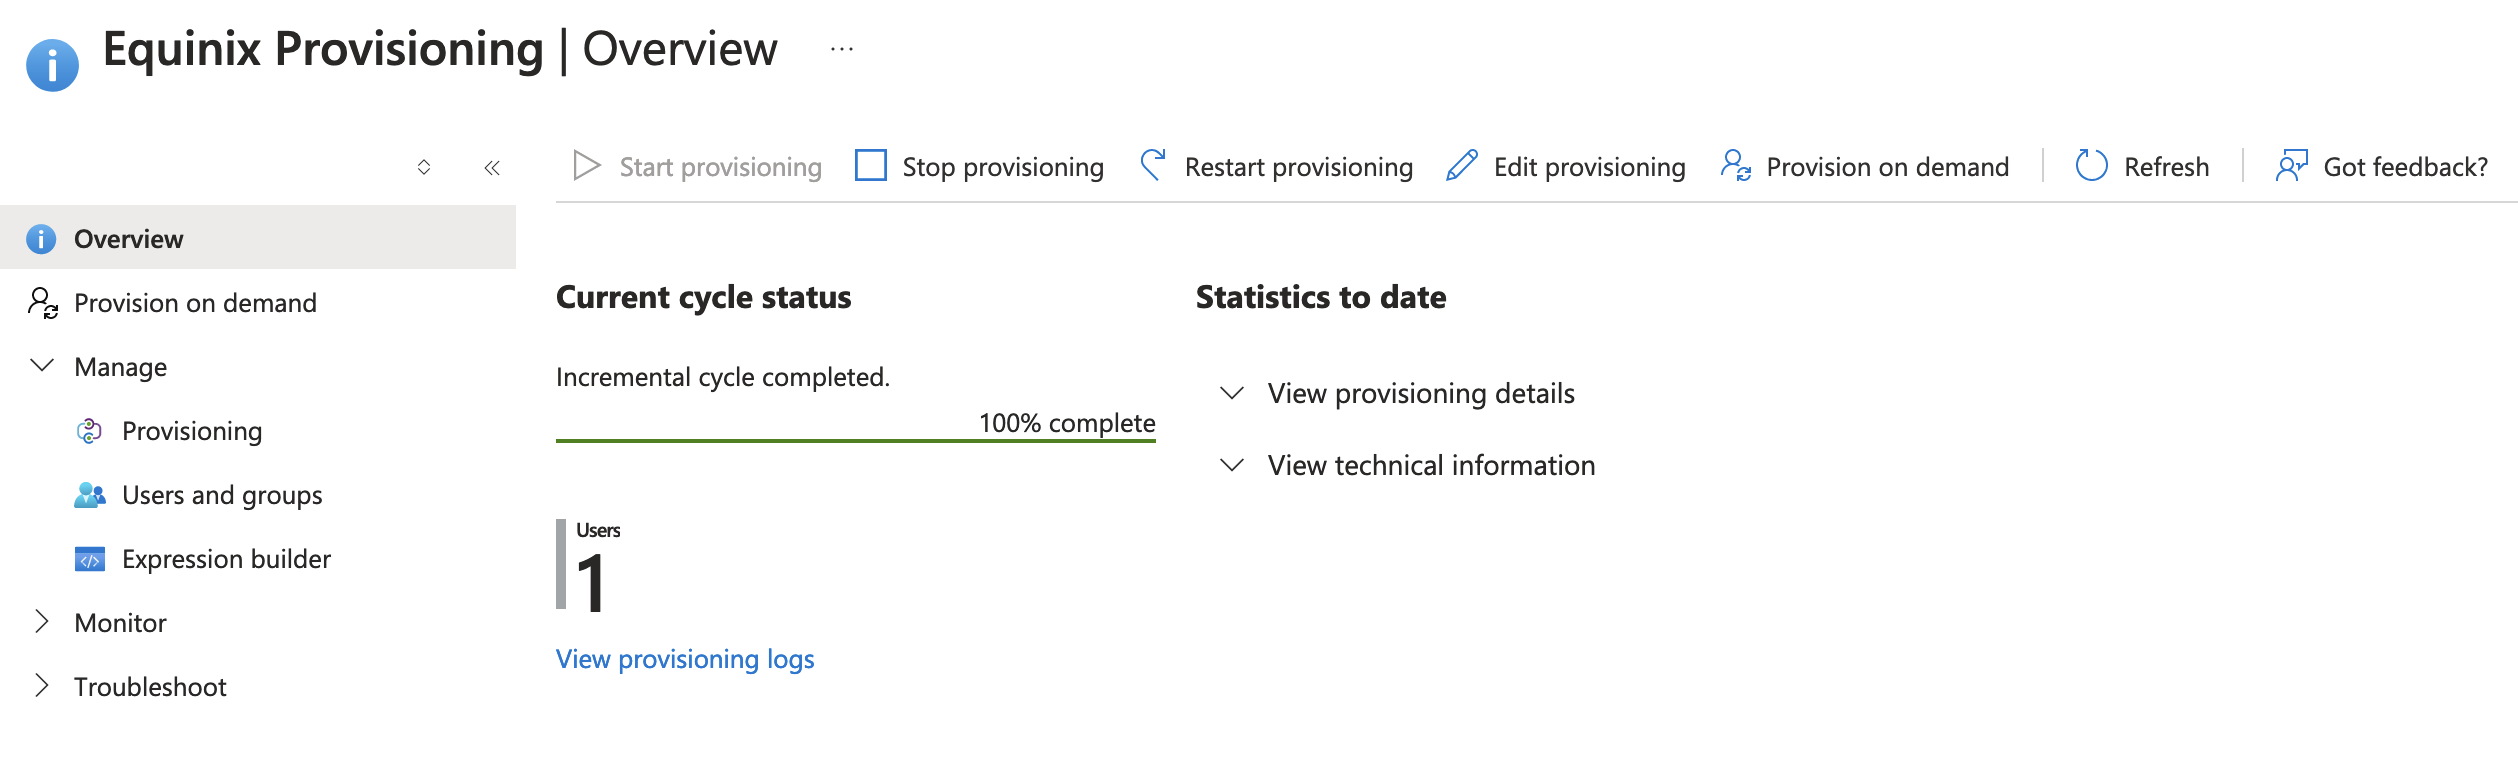
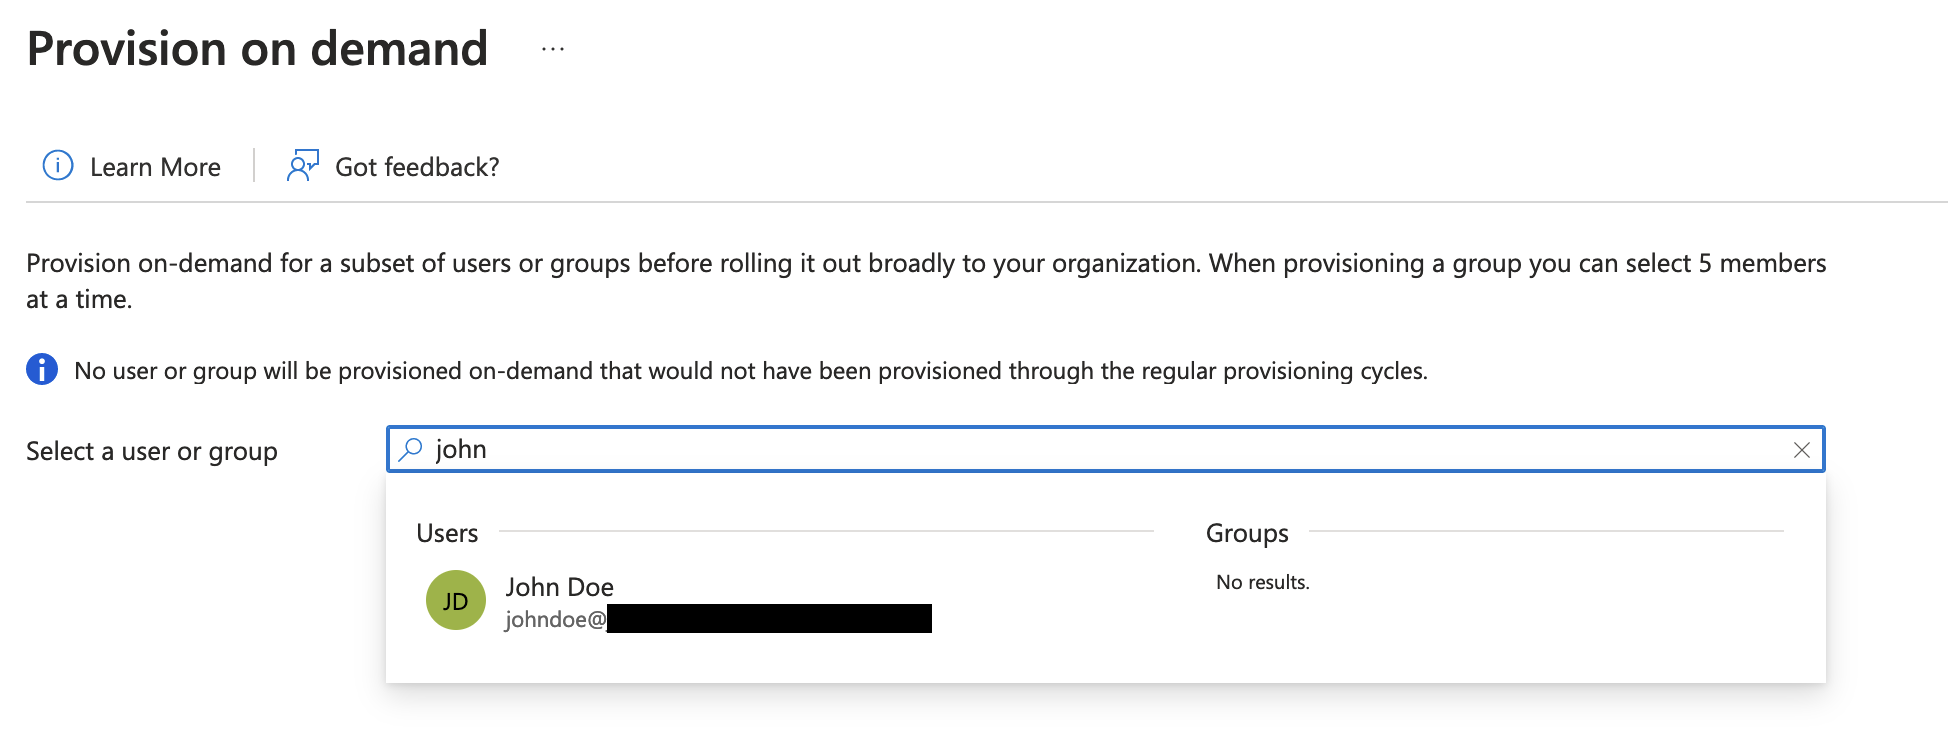
Entra ID does not synchronize users immediately -- it operates as a periodic job ("every 20-40 minutes, depending on the number of users and groups in the application", according to Microsoft). This is not configurable by Equinix. If you would like to run a provisioning test sooner than the periodic interval, or otherwise need a change to occur immediately, you can use Entra ID's Provision on demand feature from the application's Overview page. Provision on demand runs any actions that would occur for a given user (provision or deprovision) immediately, and also provides additional details as to the actions it performed and their success.
Conclusion
You've configured Entra ID to automate your user management tasks with the SCIM protocol. This will streamline your login flow, and enhance security by keeping the identity management within the identity provider.
Last updated
07 January, 2025Category
Tagged
TechnicalYou may also like
Dig deeper into similar topics in our archives
Crosscloud VPN with WireGuard
Learn to establish secure VPN connections across cloud environments using WireGuard, including detailed setups for site-to-site tunnels and VPN gateways with NAT on Equinix Metal, enhancing...

Kubernetes Cluster API
Learn how to provision a Kubernetes cluster with Cluster API

Kubernetes with kubeadm
Learn how to deploy Kubernetes with kubeadm using userdata

OpenStack DevStack
Use DevStack to install and test OpenStack on an Equinix Metal server.