
Deploy Prism Central
Workshop progress
Completed 0 of 31 steps
Many of the more powerful capabilities of Nutanix are only unlocked after configuring Prism Central. In this part of the workshop, we will deploy Prism Central on our Nutanix cluster.
Steps
1. Open Prism UI
Let's return to the Prism UI from your computer at https://localhost:9440. Note that the Prism UI ships with a self-signed TLS certificate, so most browsers will display a security warning. This security warning is unavoidable. If your browser will allow you to ignore the warning and load the site, do that; if not, try a different browser.
Step 18 of 31
2. Set up Virtual IP, ISCSI IP, and NTP for the Cluster
Prism Central requires an iSCSI IP address for the cluster. This address is used to provide storage to the Prism Central service.
In the next part we'll be installing a service that requires the cluster have a virtual IP as well as NTP configured, so we'll be configuring that now as well.
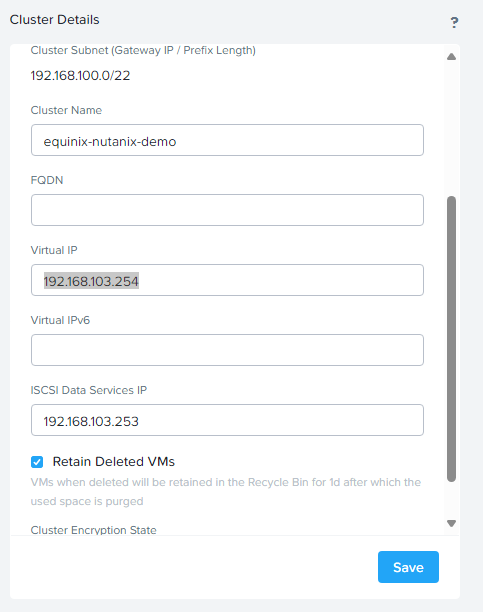
Click on the gear icon in the upper right corner of the Prism UI. Then choose Cluster Details and enter 192.168.103.254 for the Virtual IP and 192.168.103.253 for the ISCSI Data Services IP and and click Save.
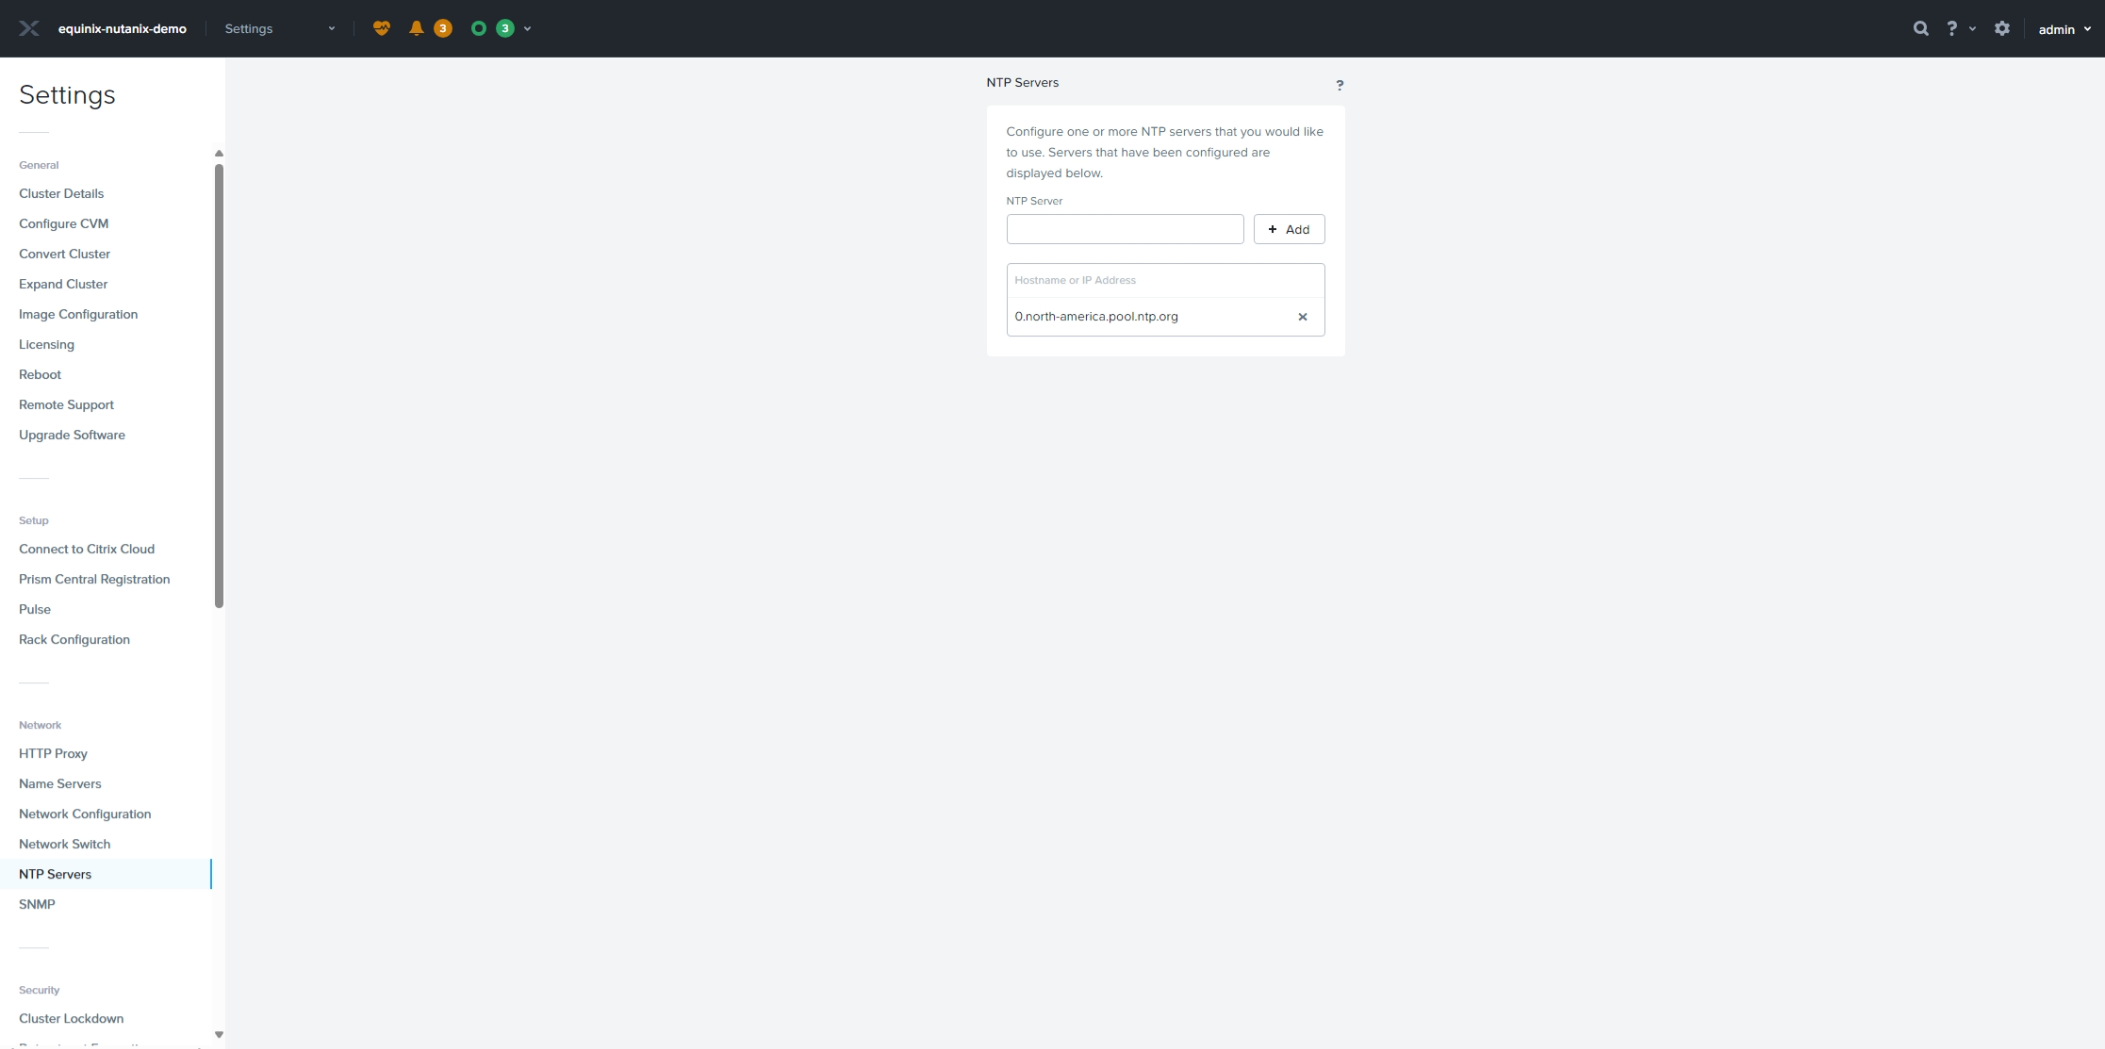
We also need to configure NTP for the cluster. Click on the gear icon in the upper right corner of the Prism UI and select NTP Servers from the settings menu on the left. Then add a local NTP pool server for the region you deployed Nutanix into. We'll use 0.north-america.pool.ntp.org
Step 19 of 31
3. Deploy Prism Central
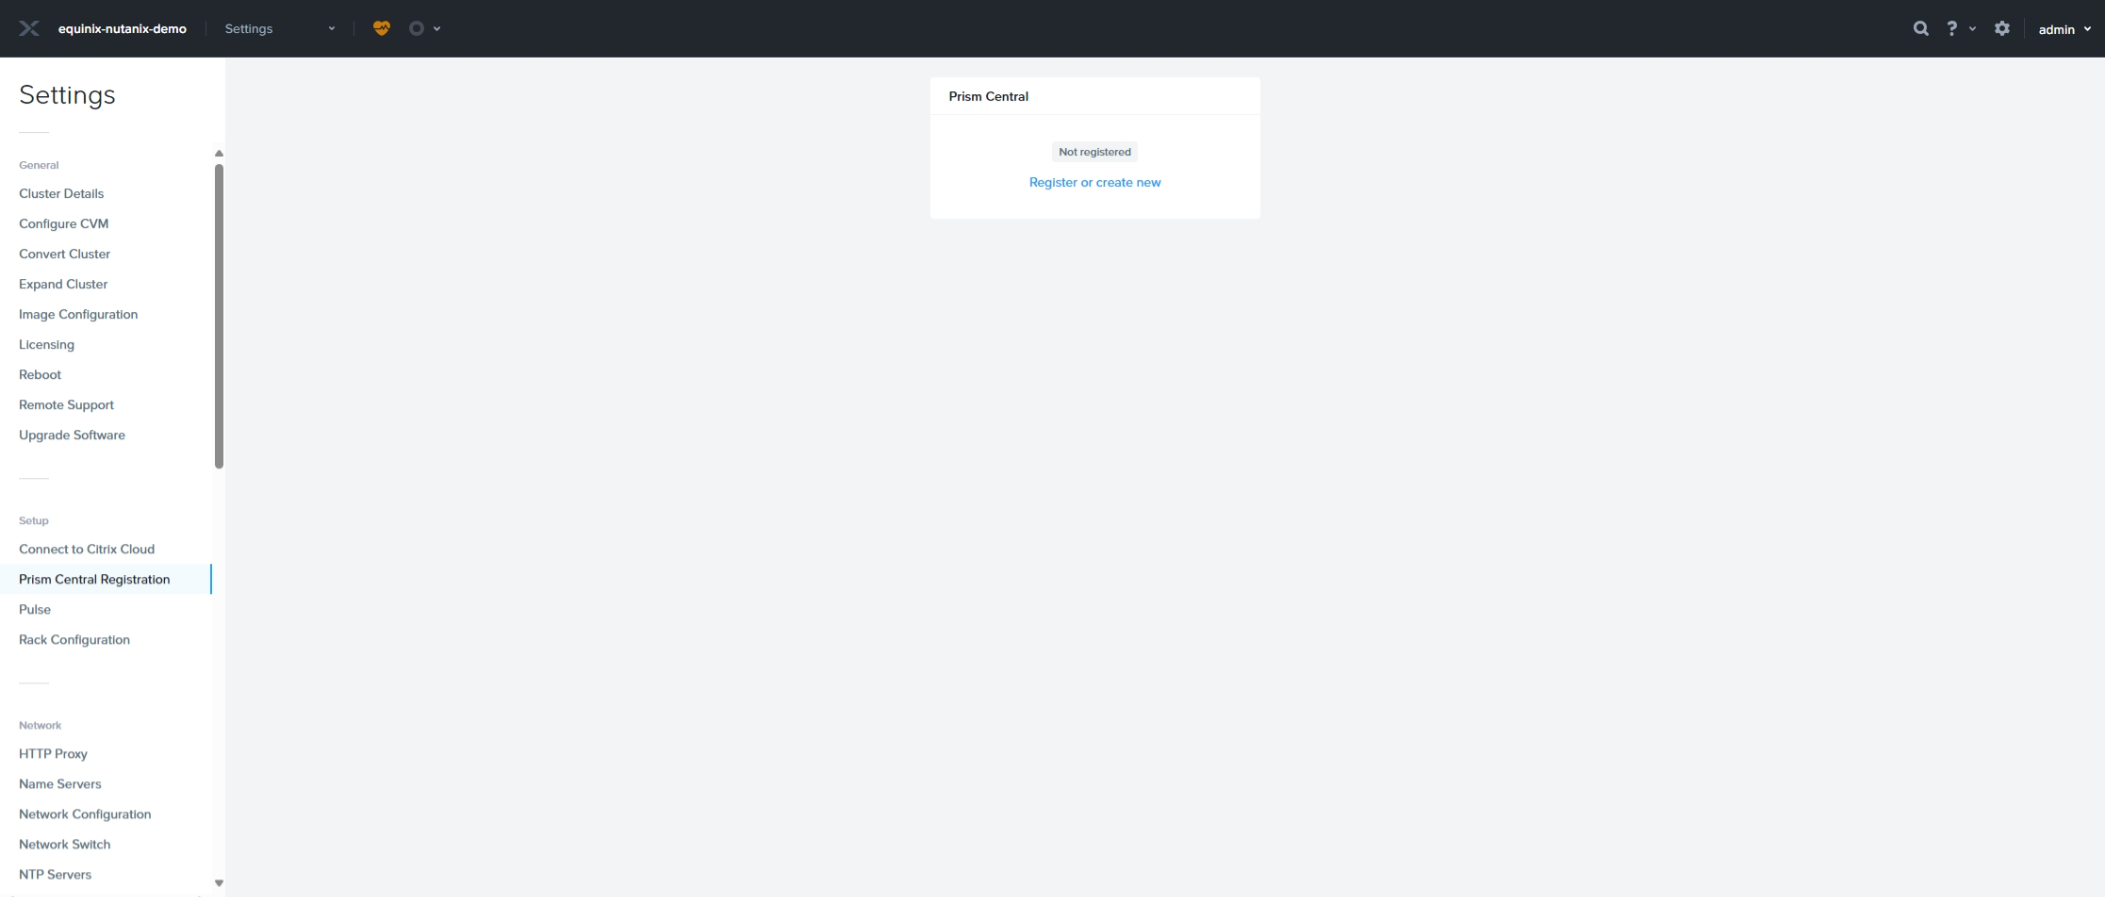
Next, choose Prism Central Registration and select Register or create new.
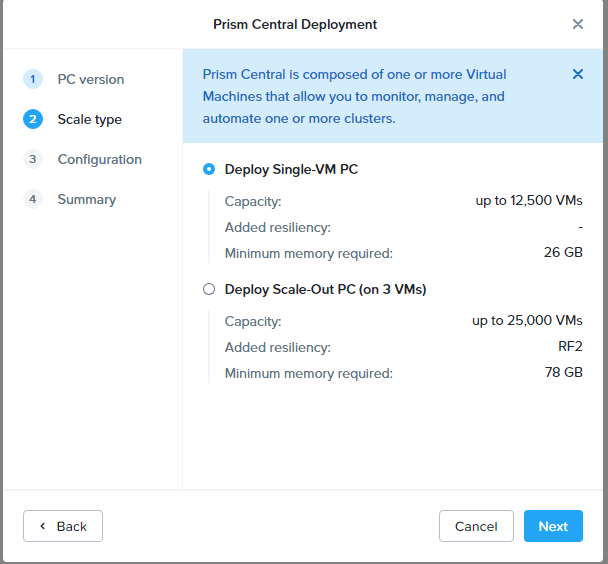
Choose Deploy, pick whatever version it offers you and click Next.

and then Deploy Single-VM PC and click Next.
Then choose Small and choose Create Network from the Network drop down.
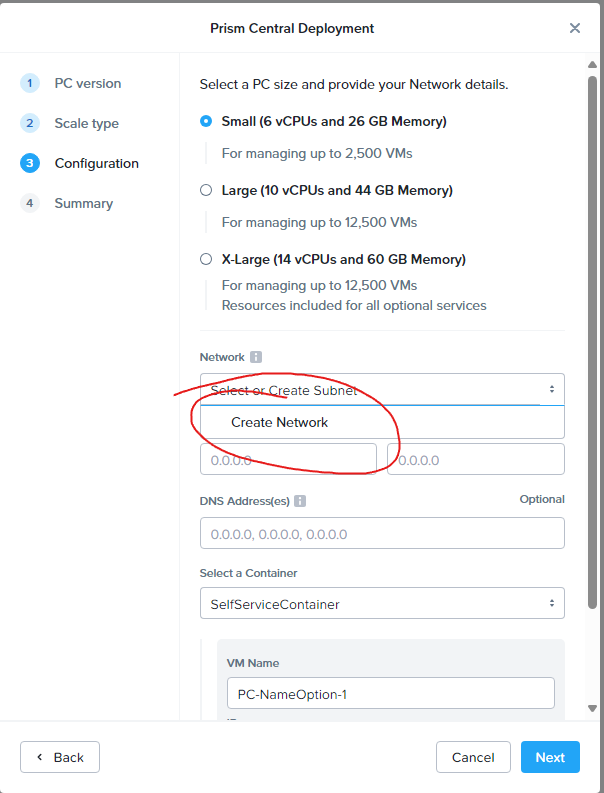
Enter VM Network and VLAN ID 0 and click Save.

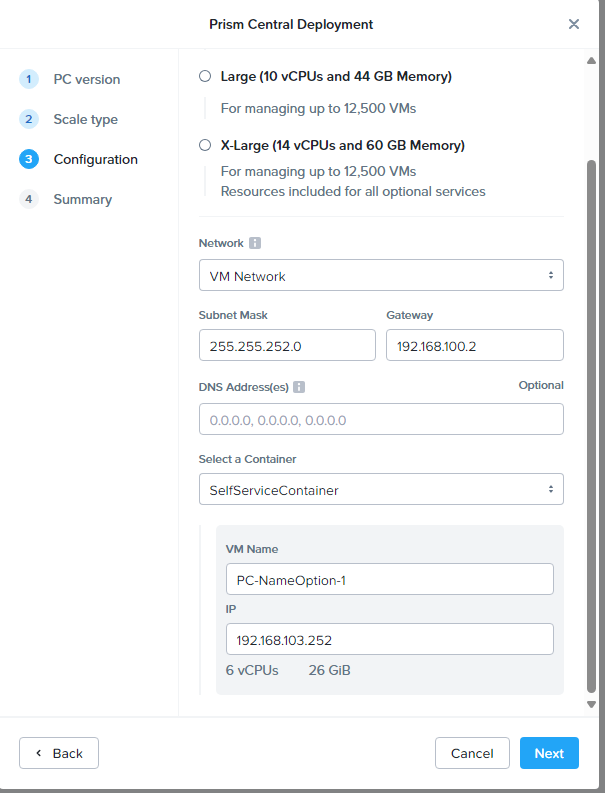
Now enter 255.255.252.0 for the Subnet Mask and 192.168.100.2 for the Gateway, and 192.168.103.252 for the VM IP and click Next followed by Deploy.
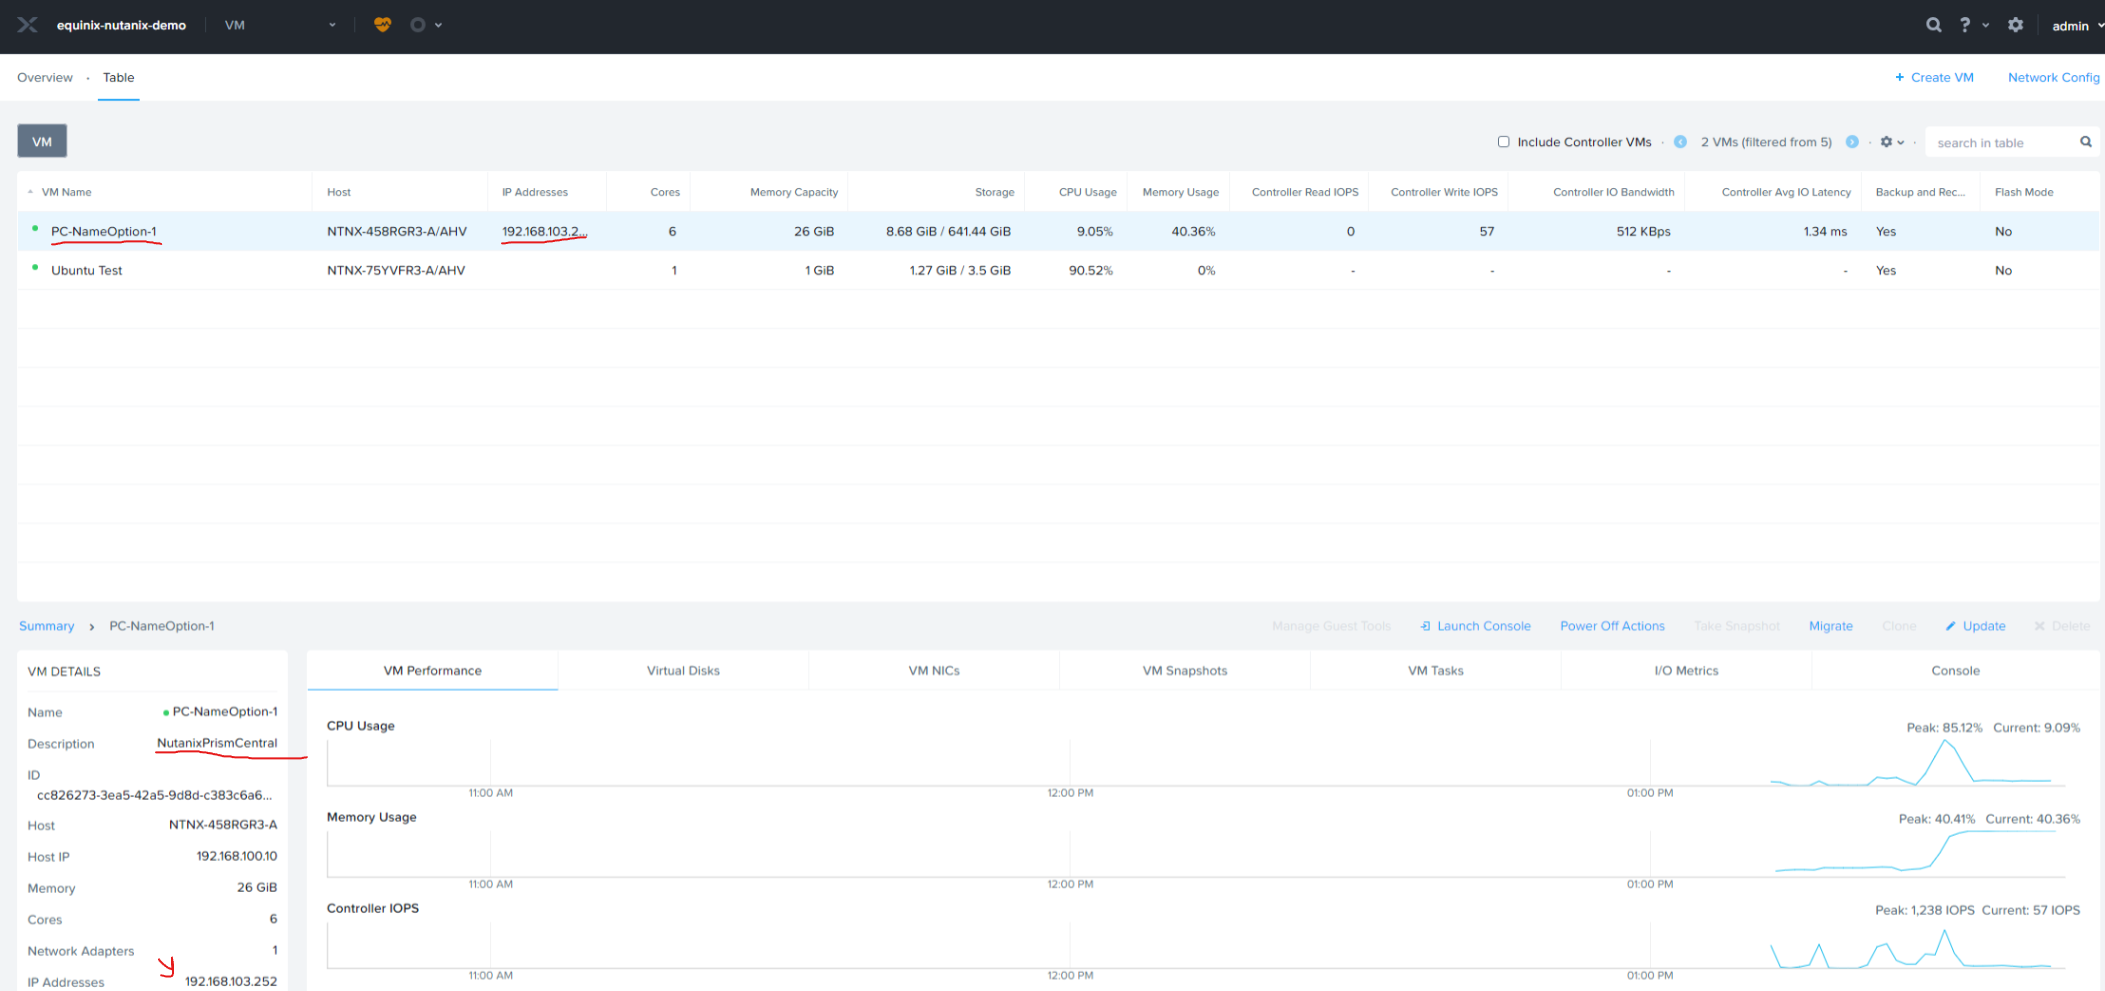
Now be patient while Prism Central installs. This can take a while. When finished, you'll be back at the Register or create new screen again. That's normal. Let's verify Prism Central is installed by checking the VM tab and looking for the Prism Central VM. This screenshot has highlighted ways to identify the VM.
Step 20 of 31
4. Log in to Prism Central and Change its Password
Now we need to login to Prism Central. We recommend doing this in a separate web browser or a Private/Incognito window. You can access the Prism Central UI from your computer at https://localhost:19440. Note that the Prism Central UI ships with a self-signed TLS certificate, so most browsers will display a security warning. This security warning is unavoidable. If your browser will allow you to ignore the warning and load the site, do that; if not, try a different browser.
Log in to the Prism UI using the default credentials found here on the Nutanix Support Portal. You will be forced to change the password when you first log in. After changing the password, you will be automatically logged out.
Step 21 of 31
5. Register the Prism Central VM
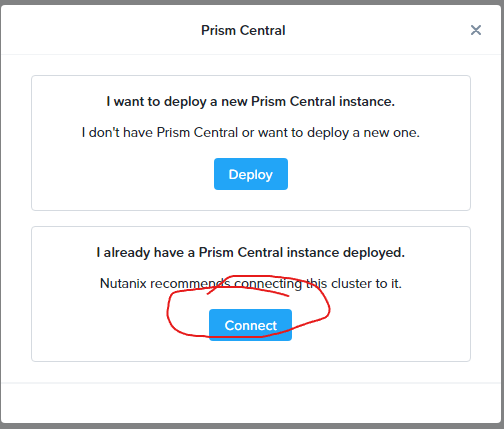
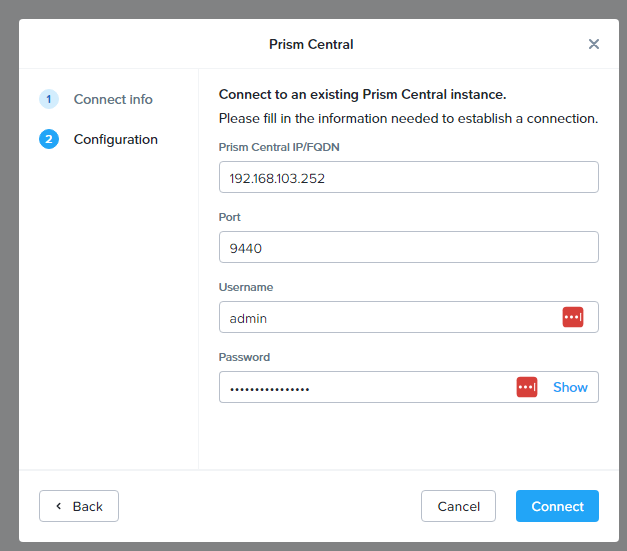
Now that Prism Central is deployed, we need to register the cluster to it. Go back to the original Prism window and click on the gear icon in the upper right corner of the Prism UI and select Prism Central Registration. Click Register or create new and then click Connect under I already have a Prism Central instance deployed.
Click Next on the Connect Info page and then put in the Prism Central IP address 192.168.103.252, port of 9440, and the admin username and password you just set up for Prism Central.
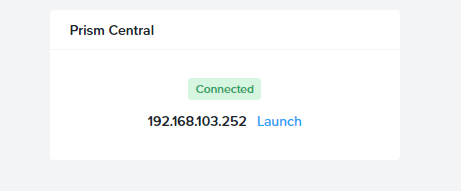
After a few seconds, registration will complete. You will need to refresh the page to see the updated registration status. Now we can go login to Prism Central.
Step 22 of 31
6. Configure Prism Central
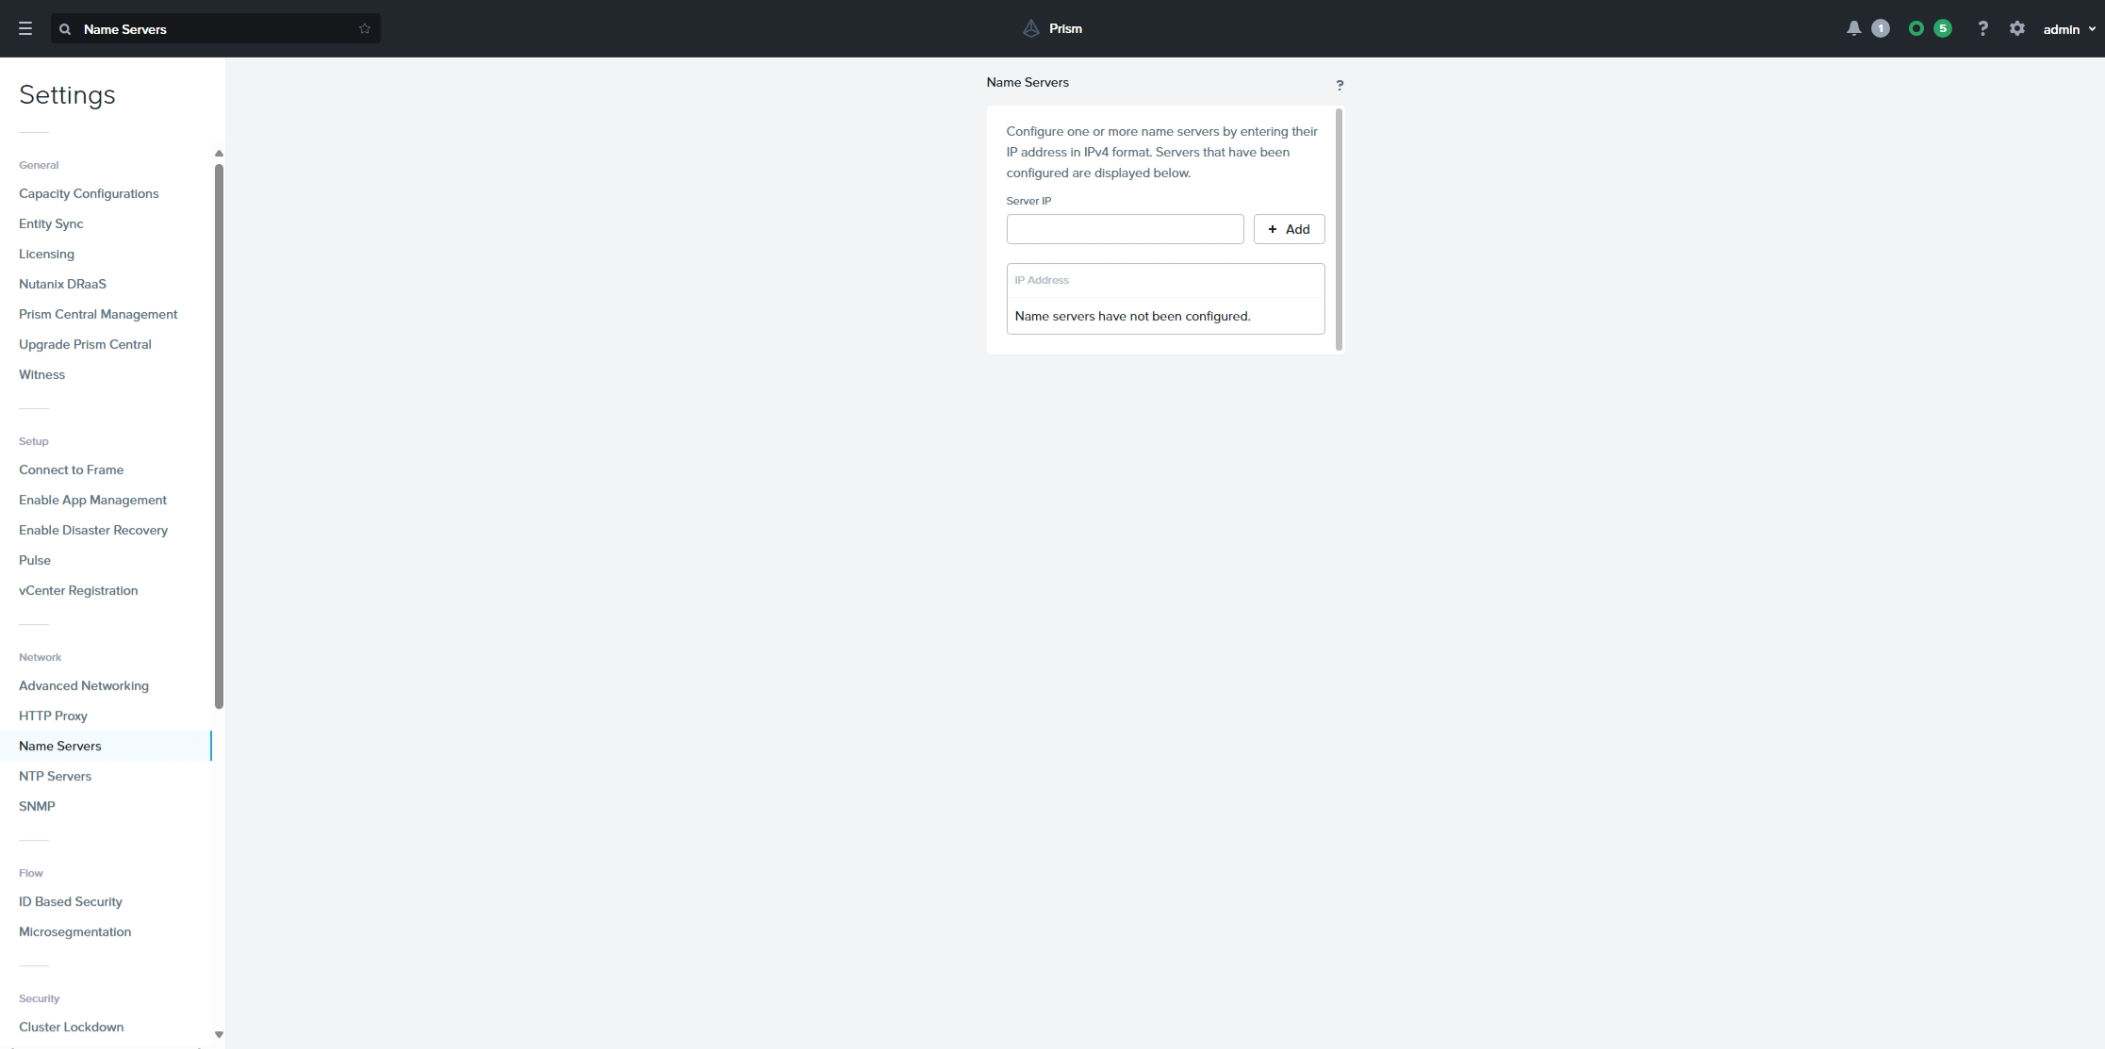
Let's start setting up some basic settings in Prism Central. So let's go back to the Prism Central window. Start by clicking the gear icon in the upper right corner of the Prism Central UI and selecting Name Servers from the settings menu on the left. Then add some public DNS servers to the list, we'll use 1.1.1.1 and 8.8.8.8.
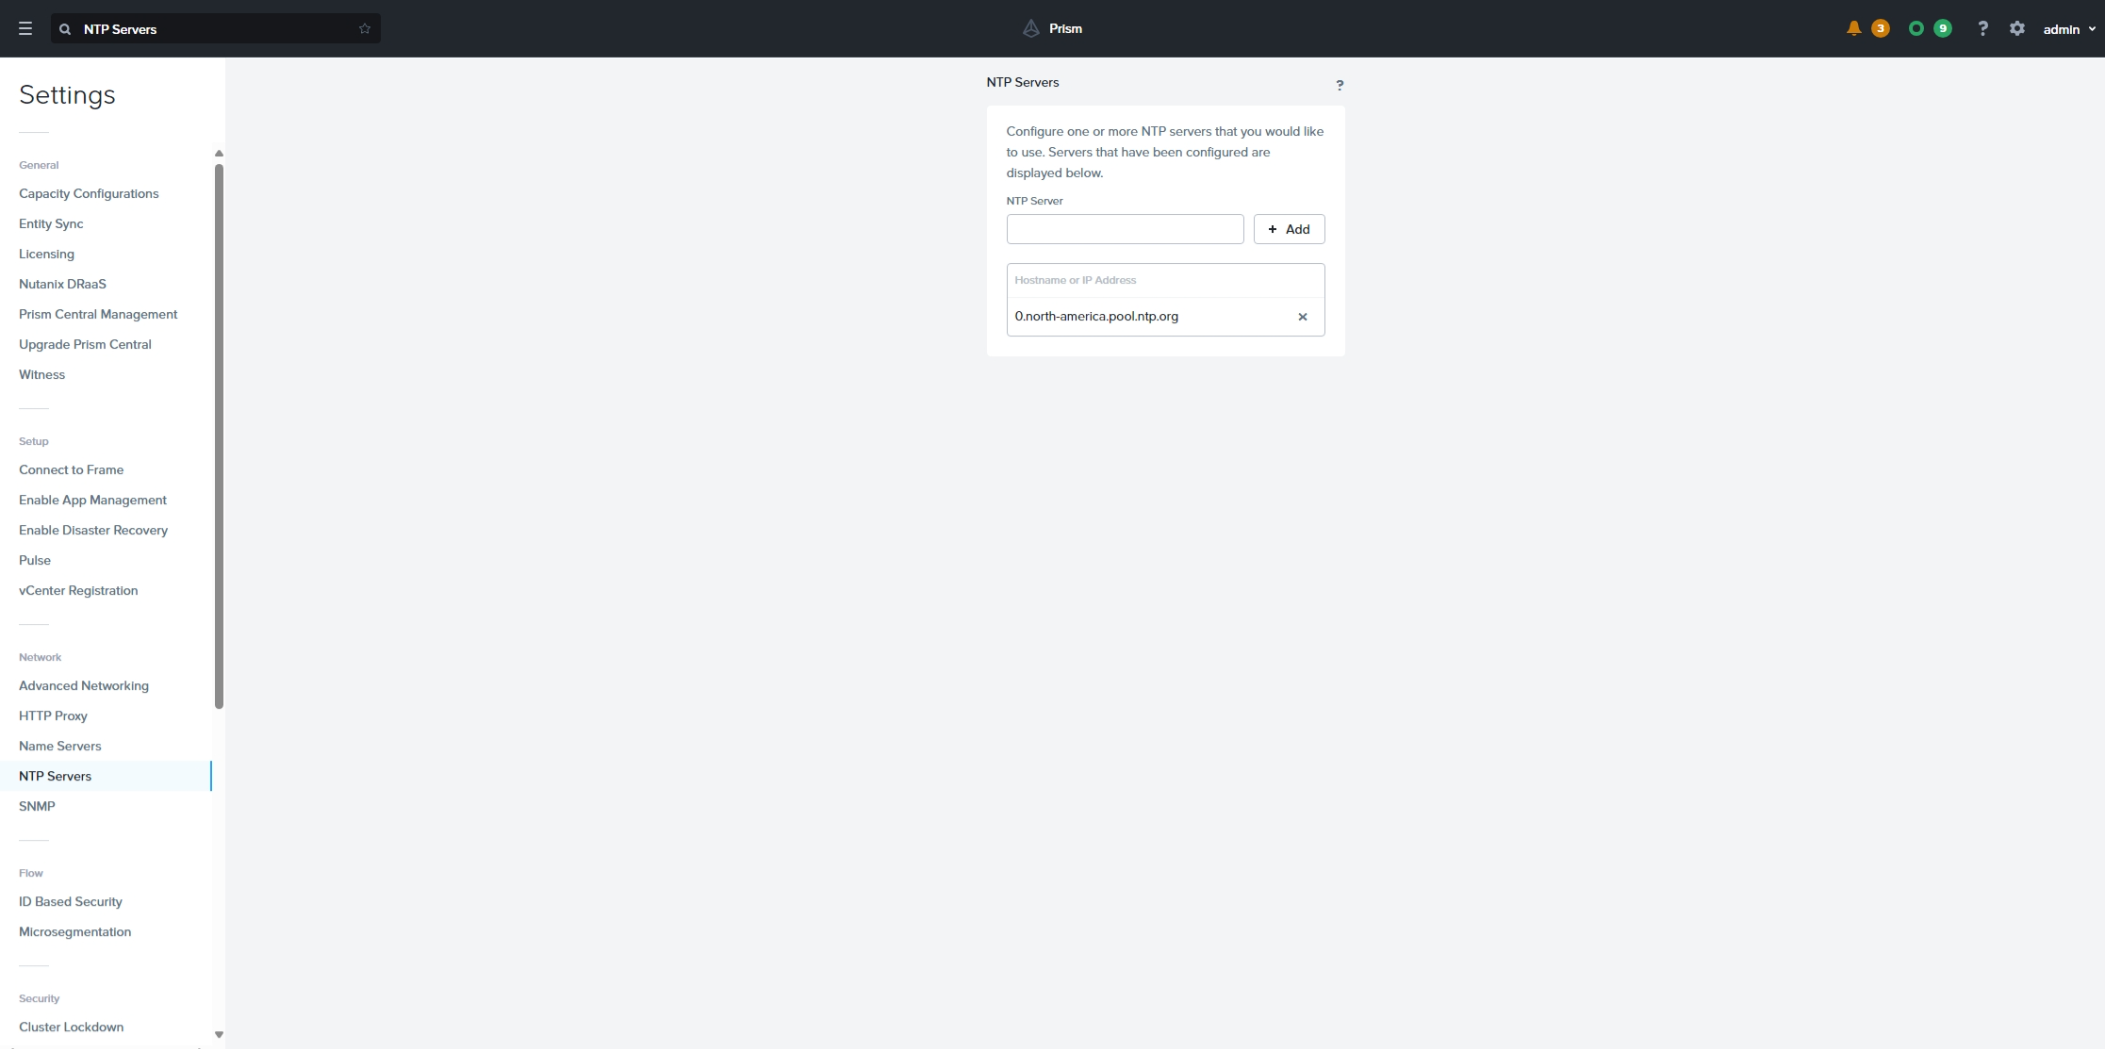
Next click on NTP Servers on the left and add a local NTP pool server for the region you deployed Nutanix into. We'll use 0.north-america.pool.ntp.org
In the next part we'll deploy another piece of the Nutanix stack onto the cluster.
Step 23 of 31
Discussion
Before proceeding to the next part let's take a few minutes to discuss what we did. Here are some questions to start the discussion.
- What is Prism Central?
- What can you do with Prism Central that you couldn't do with just Prism?
Step 24 of 31