- Home /
- Resources /
- Learning center /
- Choosing a CSI for...
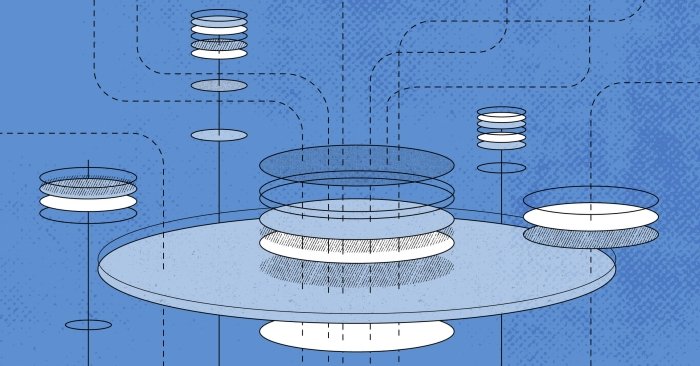
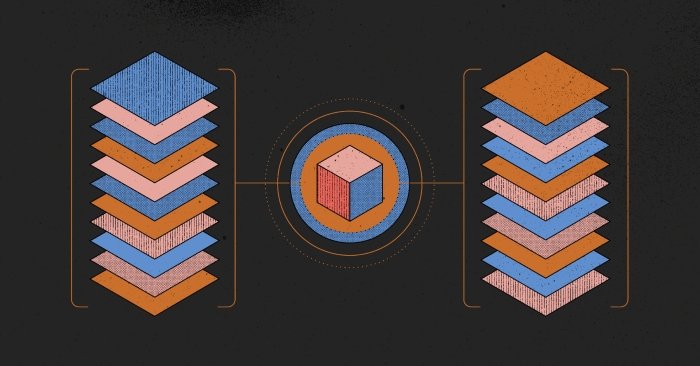
Choosing a CSI for Kubernetes
In this article, we'll help make selecting a CSI for your next cluster an easier choice.

On this page
Running your own Kubernetes cluster on Equinix Metal can be a fun but challenging endeavour. Even after you've written all your Infrastructure as Code and run kubeadm init on your first device ... you're presented with a choice.
Which Container Storage Interface (CSI) should I adopt?
Fortunately and unfortunately, Kubernetes isn't too opinionated and we can very quickly get decision fatigue. In this article, we'll help make selecting a CSI for your next cluster an easier choice.
We're going to cover and discuss just a few of the options available. For a more complete list, checkout the Kubernetes CSI drivers list.
Easy Mode - Pure Storage
If you're reading this guide and you just want to know what the "easy" solution is, then look no further than the Equinix Metal integration with Pure Storage.
Of course, nothing easy comes for free. This is a paid add-on, but delivered as a complete and fully managed service; so you don't need to read any further.
Of course, if "Enquire within" as a price tag scares you, let's continue.
Tried & Tested - Ceph
When it comes to bare metal storage, there's nothing more battle tested than Ceph. With use-cases published by universities and the United States Air Force, you can be sure that Ceph works well and can scale to whatever requirements you have.
Ceph has been developed and supported by RedHat for the last 10 years, and provides a complete CSI implementation: block storage, object storage (S3 compatible), and file storage.
Ceph works by installing object-store daemons (OSDs) to each of your nodes that are made available to the cluster via the Reliable Autonomic Distributed Object Store (RADOS) service.
When it comes to Kubernetes, Ceph is deployed and managed by a CNCF graduated project, Rook.
This guide will show you how to get started with Ceph on Kubernetes with Rook.
Why Rook? Rook handles the installation and configuration of the Ceph cluster for you; and provides a Kubernetes native API for tweaking that configuration.
Before we dive into deploying Rook and Ceph, there are a few prerequisites:
- Firstly, Kubernetes >= v1.22 is required. This shouldn't be a problem, as this release was from August, 2021. Still, better to call it out.
- Next, Rook relies on Kubernetes admission control and as such you'll need cert-manager available in the cluster.
- If you wish to enable encryption, you'll also need to ensure
lvm2is installed on your nodes. - Finally, you'll need to ensure your kernel has the
rbdmodule. You can check this with modprobe rbd and as long as it doesn't yell at you with "not found", you're good to go. Most modern Linux distributions ship with this by default.
Installing Rook
To install Rook, we need to install the Rook Operator. The easiest way to do this is with the Helm chart.
helm repo add rook-release https://charts.rook.io/release
helm install --create-namespace --namespace rook-ceph rook-ceph rook-release/rook-ceph
Provisioning a Ceph Cluster
Once the Rook Operator is available within your cluster, you then need to create a CephCluster CR to have a working storage implementation.
First, let's show you the full CR. We'll go through each option below.
#################################################################################################################
# Define the settings for the rook-ceph cluster with common settings for a production cluster.
# All nodes with available raw devices will be used for the Ceph cluster. At least three nodes are required
# in this example. See the documentation for more details on storage settings available.

# For example, to create the cluster:
#   kubectl create -f crds.yaml -f common.yaml -f operator.yaml
#   kubectl create -f cluster.yaml
#################################################################################################################

apiVersion: ceph.rook.io/v1
kind: CephCluster
metadata:
  name: rook-ceph
  namespace: rook-ceph # namespace:cluster
spec:
  cephVersion:
    # The container image used to launch the Ceph daemon pods (mon, mgr, osd, mds, rgw).
    # v16 is Pacific, and v17 is Quincy.
    # RECOMMENDATION: In production, use a specific version tag instead of the general v17 flag, which pulls the latest release and could result in different
    # versions running within the cluster. See tags available at https://hub.docker.com/r/ceph/ceph/tags/.
    # If you want to be more precise, you can always use a timestamp tag such quay.io/ceph/ceph:v17.2.6-20230410
    # This tag might not contain a new Ceph version, just security fixes from the underlying operating system, which will reduce vulnerabilities
    image: quay.io/ceph/ceph:v17.2.6
    # Whether to allow unsupported versions of Ceph. Currently `pacific` and `quincy` are supported.
    # Future versions such as `reef` (v18) would require this to be set to `true`.
    # Do not set to true in production.
    allowUnsupported: false
  # The path on the host where configuration files will be persisted. Must be specified.
  # Important: if you reinstall the cluster, make sure you delete this directory from each host or else the mons will fail to start on the new cluster.
  # In Minikube, the '/data' directory is configured to persist across reboots. Use "/data/rook" in Minikube environment.
  dataDirHostPath: /var/lib/rook
  # Whether or not upgrade should continue even if a check fails
  # This means Ceph's status could be degraded and we don't recommend upgrading but you might decide otherwise
  # Use at your OWN risk
  # To understand Rook's upgrade process of Ceph, read https://rook.io/docs/rook/latest/ceph-upgrade.html#ceph-version-upgrades
  skipUpgradeChecks: false
  # Whether or not continue if PGs are not clean during an upgrade
  continueUpgradeAfterChecksEvenIfNotHealthy: false
  # WaitTimeoutForHealthyOSDInMinutes defines the time (in minutes) the operator would wait before an OSD can be stopped for upgrade or restart.
  # If the timeout exceeds and OSD is not ok to stop, then the operator would skip upgrade for the current OSD and proceed with the next one
  # if `continueUpgradeAfterChecksEvenIfNotHealthy` is `false`. If `continueUpgradeAfterChecksEvenIfNotHealthy` is `true`, then operator would
  # continue with the upgrade of an OSD even if its not ok to stop after the timeout. This timeout won't be applied if `skipUpgradeChecks` is `true`.
  # The default wait timeout is 10 minutes.
  waitTimeoutForHealthyOSDInMinutes: 10
  mon:
    # Set the number of mons to be started. Generally recommended to be 3.
    # For highest availability, an odd number of mons should be specified.
    count: 3
    # The mons should be on unique nodes. For production, at least 3 nodes are recommended for this reason.
    # Mons should only be allowed on the same node for test environments where data loss is acceptable.
    allowMultiplePerNode: false
  mgr:
    # When higher availability of the mgr is needed, increase the count to 2.
    # In that case, one mgr will be active and one in standby. When Ceph updates which
    # mgr is active, Rook will update the mgr services to match the active mgr.
    count: 2
    allowMultiplePerNode: false
    modules:
      # Several modules should not need to be included in this list. The "dashboard" and "monitoring" modules
      # are already enabled by other settings in the cluster CR.
      - name: pg_autoscaler
        enabled: true
  # enable the ceph dashboard for viewing cluster status
  dashboard:
    enabled: true
    # serve the dashboard under a subpath (useful when you are accessing the dashboard via a reverse proxy)
    # urlPrefix: /ceph-dashboard
    # serve the dashboard at the given port.
    # port: 8443
    # serve the dashboard using SSL
    ssl: true
  # enable prometheus alerting for cluster
  monitoring:
    # requires Prometheus to be pre-installed
    enabled: false
    # Whether to disable the metrics reported by Ceph. If false, the prometheus mgr module and Ceph exporter are enabled.
    # If true, the prometheus mgr module and Ceph exporter are both disabled. Default is false.
    metricsDisabled: false
  network:
    connections:
      # Whether to encrypt the data in transit across the wire to prevent eavesdropping the data on the network.
      # The default is false. When encryption is enabled, all communication between clients and Ceph daemons, or between Ceph daemons will be encrypted.
      # When encryption is not enabled, clients still establish a strong initial authentication and data integrity is still validated with a crc check.
      # IMPORTANT: Encryption requires the 5.11 kernel for the latest nbd and cephfs drivers. Alternatively for testing only,
      # you can set the "mounter: rbd-nbd" in the rbd storage class, or "mounter: fuse" in the cephfs storage class.
      # The nbd and fuse drivers are *not* recommended in production since restarting the csi driver pod will disconnect the volumes.
      encryption:
        enabled: false
      # Whether to compress the data in transit across the wire. The default is false.
      # Requires Ceph Quincy (v17) or newer. Also see the kernel requirements above for encryption.
      compression:
        enabled: false
      # Whether to require communication over msgr2. If true, the msgr v1 port (6789) will be disabled
      # and clients will be required to connect to the Ceph cluster with the v2 port (3300).
      # Requires a kernel that supports msgr v2 (kernel 5.11 or CentOS 8.4 or newer).
      requireMsgr2: false
    # enable host networking
    #provider: host
    # enable the Multus network provider
    #provider: multus
    #selectors:
    #  The selector keys are required to be `public` and `cluster`.
    #  Based on the configuration, the operator will do the following:
    #    1. if only the `public` selector key is specified both public_network and cluster_network Ceph settings will listen on that interface
    #    2. if both `public` and `cluster` selector keys are specified the first one will point to 'public_network' flag and the second one to 'cluster_network'
    #
    #  In order to work, each selector value must match a NetworkAttachmentDefinition object in Multus
    #
    #  public: public-conf --> NetworkAttachmentDefinition object name in Multus
    #  cluster: cluster-conf --> NetworkAttachmentDefinition object name in Multus
    # Provide internet protocol version. IPv6, IPv4 or empty string are valid options. Empty string would mean IPv4
    #ipFamily: "IPv6"
    # Ceph daemons to listen on both IPv4 and Ipv6 networks
    #dualStack: false
    # Enable multiClusterService to export the mon and OSD services to peer cluster.
    # This is useful to support RBD mirroring between two clusters having overlapping CIDRs.
    # Ensure that peer clusters are connected using an MCS API compatible application, like Globalnet Submariner.
    #multiClusterService:
    #  enabled: false

  # enable the crash collector for ceph daemon crash collection
  crashCollector:
    disable: false
    # Uncomment daysToRetain to prune ceph crash entries older than the
    # specified number of days.
    #daysToRetain: 30
  # enable log collector, daemons will log on files and rotate
  logCollector:
    enabled: true
    periodicity: daily # one of: hourly, daily, weekly, monthly
    maxLogSize: 500M # SUFFIX may be 'M' or 'G'. Must be at least 1M.
  # automate [data cleanup process](https://github.com/rook/rook/blob/master/Documentation/Storage-Configuration/ceph-teardown.md#delete-the-data-on-hosts) in cluster destruction.
  cleanupPolicy:
    # Since cluster cleanup is destructive to data, confirmation is required.
    # To destroy all Rook data on hosts during uninstall, confirmation must be set to "yes-really-destroy-data".
    # This value should only be set when the cluster is about to be deleted. After the confirmation is set,
    # Rook will immediately stop configuring the cluster and only wait for the delete command.
    # If the empty string is set, Rook will not destroy any data on hosts during uninstall.
    confirmation: ""
    # sanitizeDisks represents settings for sanitizing OSD disks on cluster deletion
    sanitizeDisks:
      # method indicates if the entire disk should be sanitized or simply ceph's metadata
      # in both case, re-install is possible
      # possible choices are 'complete' or 'quick' (default)
      method: quick
      # dataSource indicate where to get random bytes from to write on the disk
      # possible choices are 'zero' (default) or 'random'
      # using random sources will consume entropy from the system and will take much more time then the zero source
      dataSource: zero
      # iteration overwrite N times instead of the default (1)
      # takes an integer value
      iteration: 1
    # allowUninstallWithVolumes defines how the uninstall should be performed
    # If set to true, cephCluster deletion does not wait for the PVs to be deleted.
    allowUninstallWithVolumes: false
  # To control where various services will be scheduled by kubernetes, use the placement configuration sections below.
  # The example under 'all' would have all services scheduled on kubernetes nodes labeled with 'role=storage-node' and
  # tolerate taints with a key of 'storage-node'.
  # placement:
  #   all:
  #     nodeAffinity:
  #       requiredDuringSchedulingIgnoredDuringExecution:
  #         nodeSelectorTerms:
  #         - matchExpressions:
  #           - key: role
  #             operator: In
  #             values:
  #             - storage-node
  #     podAffinity:
  #     podAntiAffinity:
  #     topologySpreadConstraints:
  #     tolerations:
  #     - key: storage-node
  #       operator: Exists
  # The above placement information can also be specified for mon, osd, and mgr components
  #   mon:
  # Monitor deployments may contain an anti-affinity rule for avoiding monitor
  # collocation on the same node. This is a required rule when host network is used
  # or when AllowMultiplePerNode is false. Otherwise this anti-affinity rule is a
  # preferred rule with weight: 50.
  #   osd:
  #    prepareosd:
  #    mgr:
  #    cleanup:
  annotations:
  #   all:
  #   mon:
  #   osd:
  #   cleanup:
  #   prepareosd:
  # clusterMetadata annotations will be applied to only `rook-ceph-mon-endpoints` configmap and the `rook-ceph-mon` and `rook-ceph-admin-keyring` secrets.
  # And clusterMetadata annotations will not be merged with `all` annotations.
  #    clusterMetadata:
  #       kubed.appscode.com/sync: "true"
  # If no mgr annotations are set, prometheus scrape annotations will be set by default.
  #   mgr:
  labels:
  #   all:
  #   mon:
  #   osd:
  #   cleanup:
  #   mgr:
  #   prepareosd:
  # monitoring is a list of key-value pairs. It is injected into all the monitoring resources created by operator.
  # These labels can be passed as LabelSelector to Prometheus
  #   monitoring:
  #   crashcollector:
  resources:
  #The requests and limits set here, allow the mgr pod to use half of one CPU core and 1 gigabyte of memory
  #   mgr:
  #     limits:
  #       cpu: "500m"
  #       memory: "1024Mi"
  #     requests:
  #       cpu: "500m"
  #       memory: "1024Mi"
  # The above example requests/limits can also be added to the other components
  #   mon:
  #   osd:
  # For OSD it also is a possible to specify requests/limits based on device class
  #   osd-hdd:
  #   osd-ssd:
  #   osd-nvme:
  #   prepareosd:
  #   mgr-sidecar:
  #   crashcollector:
  #   logcollector:
  #   cleanup:
  #   exporter:
  # The option to automatically remove OSDs that are out and are safe to destroy.
  removeOSDsIfOutAndSafeToRemove: false
  priorityClassNames:
    #all: rook-ceph-default-priority-class
    mon: system-node-critical
    osd: system-node-critical
    mgr: system-cluster-critical
    #crashcollector: rook-ceph-crashcollector-priority-class
  storage: # cluster level storage configuration and selection
    useAllNodes: true
    useAllDevices: true
    #deviceFilter:
    config:
      # crushRoot: "custom-root" # specify a non-default root label for the CRUSH map
      # metadataDevice: "md0" # specify a non-rotational storage so ceph-volume will use it as block db device of bluestore.
      # databaseSizeMB: "1024" # uncomment if the disks are smaller than 100 GB
      # osdsPerDevice: "1" # this value can be overridden at the node or device level
      # encryptedDevice: "true" # the default value for this option is "false"
    # Individual nodes and their config can be specified as well, but 'useAllNodes' above must be set to false. Then, only the named
    # nodes below will be used as storage resources.  Each node's 'name' field should match their 'kubernetes.io/hostname' label.
    # nodes:
    #   - name: "172.17.4.201"
    #     devices: # specific devices to use for storage can be specified for each node
    #       - name: "sdb"
    #       - name: "nvme01" # multiple osds can be created on high performance devices
    #         config:
    #           osdsPerDevice: "5"
    #       - name: "/dev/disk/by-id/ata-ST4000DM004-XXXX" # devices can be specified using full udev paths
    #     config: # configuration can be specified at the node level which overrides the cluster level config
    #   - name: "172.17.4.301"
    #     deviceFilter: "^sd."
    # when onlyApplyOSDPlacement is false, will merge both placement.All() and placement.osd
    onlyApplyOSDPlacement: false
  # The section for configuring management of daemon disruptions during upgrade or fencing.
  disruptionManagement:
    # If true, the operator will create and manage PodDisruptionBudgets for OSD, Mon, RGW, and MDS daemons. OSD PDBs are managed dynamically
    # via the strategy outlined in the [design](https://github.com/rook/rook/blob/master/design/ceph/ceph-managed-disruptionbudgets.md). The operator will
    # block eviction of OSDs by default and unblock them safely when drains are detected.
    managePodBudgets: true
    # A duration in minutes that determines how long an entire failureDomain like `region/zone/host` will be held in `noout` (in addition to the
    # default DOWN/OUT interval) when it is draining. This is only relevant when  `managePodBudgets` is `true`. The default value is `30` minutes.
    osdMaintenanceTimeout: 30
    # A duration in minutes that the operator will wait for the placement groups to become healthy (active+clean) after a drain was completed and OSDs came back up.
    # Operator will continue with the next drain if the timeout exceeds. It only works if `managePodBudgets` is `true`.
    # No values or 0 means that the operator will wait until the placement groups are healthy before unblocking the next drain.
    pgHealthCheckTimeout: 0

  # healthChecks
  # Valid values for daemons are 'mon', 'osd', 'status'
  healthCheck:
    daemonHealth:
      mon:
        disabled: false
        interval: 45s
      osd:
        disabled: false
        interval: 60s
      status:
        disabled: false
        interval: 60s
    # Change pod liveness probe timing or threshold values. Works for all mon,mgr,osd daemons.
    livenessProbe:
      mon:
        disabled: false
      mgr:
        disabled: false
      osd:
        disabled: false
    # Change pod startup probe timing or threshold values. Works for all mon,mgr,osd daemons.
    startupProbe:
      mon:
        disabled: false
      mgr:
        disabled: false
      osd:
        disabled: false
So that's a rather chunky piece of YAML, so let's cover some of the finer details.
ceph-mon
The Ceph monitors are critical to having a successful Ceph cluster. ceph-mon is the cluster monitor daemon. Typically deployed as 3 instances, they form a Paxos parliament (consensus) cluster. This provides the foundation for distributed configuration, membership, and the state of your Ceph cluster.
mon:
  count: 3
  allowMultiplePerNode: false
Like all distributed systems, it's recommended to have an odd number of monitors and to avoid them running on the same node; so it's unlikely that you'll want to tweak these values. However, RedHat does recommend that if you have 5 or more nodes in your cluster to run 5 monitors. You must always ensure allowMultiplePerNode remains false, to avoid more than one monitor being deployed to a given node.
If you're deploying Rook / Ceph to a test cluster and you don't have 3 nodes, you MUST set this count to 1 or allowMultiplePerNode to true.
ceph-mgr
The Ceph manager, since Ceph 12.x, is a mandatory component of a Ceph cluster. Previously, this was optional; but please take note: your cluster will not function correctly without it. The manager provides the dashboard and the Prometheus integration, allowing you to monitor your Ceph cluster.
mgr:
  count: 2
  allowMultiplePerNode: false
If you're deploying Rook / Ceph to a test cluster and you don't have 2 nodes, you MUST set this count to 1 or allowMultiplePerNode to true.
Dashboard & Monitoring
Ceph ships with a pretty nice dashboard that can provide a great overview of your OSDs and the storage usage of your cluster. We'd recommend that you leave this one. We also encourage you to leave monitoring enabled and metrics, which will allow you to get some vital information into your Prometheus, or other, monitoring setup.
dashboard:
  enabled: true
  ssl: true
monitoring:
  enabled: true
  metricsDisabled: false
Storage
The easiest way to get started is to allow Ceph to use all the nodes and all the devices for your storage cluster. I mean, it's there - might as well use it.
storage:
  useAllNodes: true
  useAllDevices: true
If you do wish to use a subnet, you'll need to set one, or both, of the values above to false.
To use all nodes, but specific devices:
useAllNodes: true
useAllDevices: true
deviceFilter: "nvme."
To use a subnet of your nodes and a device filter:
# Filter Example
nodes:
- name: "bare-metal-ssd-01"
  deviceFilter: "^nvme."

# Explicit Example
- name: "bare-metal-slow-02"
  devices:
  - name: "sda"
Block Storage
To provide block storage to your applications, you'll need to create a customer resource for CephBlockPool.
The configuration below will create a block pool with a replication of 3. This means that any PVC using this pool will have its data replicated 3 times. The distribution of that replication is defined by the failureDomain. When set to host, the data will be replicated to 3 different nodes in your cluster.
apiVersion: ceph.rook.io/v1
kind: CephBlockPool
metadata:
  name: replicapool
  namespace: rook-ceph
spec:
  failureDomain: host
  replicated:
    size: 3
  deviceClass: hdd
If you wish to use a more sophisticated failure domain, then you'll need to ensure your nodes are annotated with the topology information.
topology.kubernetes.io/region
topology.kubernetes.io/zone
topology.rook.io/datacenter
topology.rook.io/room
topology.rook.io/pod
topology.rook.io/pdu
topology.rook.io/row
topology.rook.io/rack
topology.rook.io/chassis
If you wish to check the topology of your OSDs, you can run the following command from a Ceph pod:
ceph osd tree
Now that we have a CephBlockPool, we need to make it available to the storage system via a StorageClass.
apiVersion: storage.k8s.io/v1
kind: StorageClass
metadata:
  name: rook-ceph-block-storage
provisioner: rook-ceph.rbd.csi.ceph.com
parameters:
  clusterID: rook-ceph
  pool: replicapool
reclaimPolicy: Delete
allowVolumeExpansion: true
Finally, you can request a PersistentVolumeClaim (PVC).
apiVersion: v1
kind: PersistentVolumeClaim
metadata:
  name: my-amazing-app
  labels:
    app: my-amazing-app
spec:
  storageClassName: rook-ceph-block-storage
  accessModes:
    - ReadWriteOnce
  resources:
    requests:
      storage: 5Gi
Object Store & Filesystems
Much like block store, you need to create a CR for both object storage and file systems, which can then be made available to applications with a StorageClass. We're not going to go into details with these, as they're much the same.
You can learn more about object storage and file systems by clicking these links.
Needless to say, Ceph is a fantastic option for bare metal storage; but is it the only decision? Far from it.
Future Facing - Mayastor
If you want a CSI implementation that's got unparalleled performance due to leveraging state of the art Linux kernel modules and drivers, then Mayastor is for you. Of course, it's also not generally available yet; though it is used in production by some major players.
What sets Mayastor apart from the others?
It is built on top of the Storage Performance Development Kit (SPDK). SPDK provides a set of tools and libraries for writing high performance, user-mode, applications. Utilising libaio and io_uring (Linux kernel async IO) and NVMe-oF (NVMe over Fabric); this truly is the future of storage at unprecedented performance.
Much like Ceph, Mayastor requires a bunch of controllers / managers to run within the cluster.
One of the main components of Mayastor is the io-engine which runs on all the nodes you wish to consume for the storage cluster. This is typically deployed as a DaemonSet with a nodeSelector, tolerations, or affinities.
There's also the csi-node controller, which must be available on all worker nodes that you want workloads to use PersistentVolumes; again typically deployed as a DaemonSet.
One key difference from Ceph is that Mayastor uses etcd for it's configuration, and as such you'll need to deploy a cluster too.
We'll cover all of this in the installation instructions, but first: the prerequisites.
Prerequisites
As you'd imagine, with a future facing solution there are some constraints on where this can be deployed.
Firstly, Mayastor can ONLY be installed on x86/amd64 machines with SSE4.2 instruction support.
You can check for support with cat /proc/cpuinfo | grep -i sse4_2. If you see no output, it's not supported. All of Equinix Metal's AMD64 devices support this instruction set, so you should be good.
You'll also need a Linux kernel >= 5.13, with 5.15 recommended. Which also needs the following modules enabled. Ubuntu 22 on Equinix Metal ships with Linux 5.15 by default.
modprobe nvme-tcp ext4
# Optionally add
xfs
Next, you'll need worker nodes that can set aside 1GiB of RAM AND TWO CORES EXCLUSIVELY for the io-engine pod, with huge pages enabled: minimum of 2GiB with 2MiB-sized pages.
You can check your huge pages configuration with:
grep HugePages /proc/meminfo
If your HugePages_Total is 0 or less than 1024, you can configure them correctly with:
echo vm.nr_hugepages = 1024 | sudo tee -a /etc/sysctl.conf
sysctl --system
Lastly, before we install Mayastor we need to label the nodes we wish to run Mayastor on.
kubectl label node <node_name> openebs.io/engine=mayastor
Installation
Unlike the prerequisites, the installation is pretty straightforward.
helm repo add mayastor https://openebs.github.io/mayastor-extensions/
helm install mayastor mayastor/mayastor -n mayastor --create-namespace --version 2.3.0
Finally, an easy bit!
Storage
Now we can make our futuristic space age storage available to our workloads. This is done by creating DiskPool CRs.
apiVersion: "openebs.io/v1alpha1"
kind: DiskPool
metadata:
  name: my-disk-pool
  namespace: mayastor
spec:
  node: hostname
  disks: ["/dev/disk/by-uuid/UUID"]
Mayastor doesn't have the ability to consume all your disks, so there's a bit more configuration required and you need to be very explicit about what devices are used.
We can then expose this to workloads with the following StorageClass:
cat <<EOF | kubectl create -f -

apiVersion: storage.k8s.io/v1
kind: StorageClass
metadata:
  name: mayastor
provisioner: io.openebs.csi-mayastor
parameters:
  ioTimeout: "30"
  protocol: nvmf
  repl: "3"
Object Storage
Mayastor doesn't provide object storage. As such, if you go with Mayastor for your CSI provider and you want to provide object stores to your workloads, you'll need to deploy one of the following:
- MinIO
- SeaweedFS
Simple Yet Effective - Local Static Provisioner
If you've read all of this and you're thinking "That's wild, do I really need to do all this?" ... well the answer is no. Ceph and Mayastor provide a storage substrate that is resilient and redundant to failures. If you want to manage your disks manually, potentially RAID them up, you can do that too. The Kubernetes storage SIG provides a local provisioner that will expose the partitions you provide to your Kubernetes cluster.
To get started, create a directory and mount your partitions inside of it.
   mkdir /mnt/disks
   mount -t tmpfs /dev/disk/by-label/data1 /mnt/disks/data1
   mount -t tmpfs /dev/disk/by-label/data2 /mnt/disks/data2
Then create a StorageClass:
apiVersion: storage.k8s.io/v1
kind: StorageClass
metadata:
  name: nvme-go-brrrr
provisioner: kubernetes.io/no-provisioner
volumeBindingMode: WaitForFirstConsumer
reclaimPolicy: Delete
Installation
Installing the provisioner is a little cumbersome, as you'll need to clone the Helm chart locally:
git clone --depth=1 https://github.com/kubernetes-sigs/sig-storage-local-static-provisioner.git
From here, we can create our values.yaml. The only value you need is to define your storage-classes.
classes:
  - name: nvme-go-brrrr
    hostDir: /mnt/disks
    volumeMode: Filesystem
    fsType: ext4
    namePattern: "*"
Then template and deploy:
helm template ./helm/provisioner -f values.yaml --name local-volume-provisioner local-volume-provisioner.generated.yaml
kubectl create -f local-volume-provisioner.generated.yaml
The Others
We've covered a small selection of the available CSI drivers available. There are of course others and they may well fit your needs. Always remember to do your due diligence and test them out. We recommend also reading and learning about:
CSI Bare Metal
This is a generally available, production ready, implementation that works with local disks; much like the local provisioner. It's not by the Kubernetes Storage SIG though, it's from Dell.
Longhorn
Originally developer by Rancher, now SUSE; Longhorn is a CNCF Incubating project that aims to be a Cloud Native storage solution.
Conclusion
If you don't want to worry about storage, we can't recommend Pure Storage enough. Get more sleep and take the easy road. However, if you want to take matters into your own hands, it's hard to not consider Ceph the leader in Kubernetes storage. While Mayastor is certainly something we encourage people to experiment with, it's still pretty early. That being said, if you need the performance guarantees, take the risk and enjoy the thrill.
You may also like
Digger deeper into similar topics in our archives
Configuring BGP with BIRD 1.6 on an Equinix Metal Server
Set up BGP on your Equinix Metal server using BIRD 1.6, covering IP configuration, installation, and neighbor setup to ensure robust routing capabilities between your server and the Equinix Metal network.
Configuring BGP with FRR on an Equinix Metal Server
Establish a robust BGP configuration on your Equinix Metal server using FRR, including setting up network interfaces, installing and configuring FRR software, and ensuring secure and efficient IP address announcement.
Crosscloud VPN with Wireguard
Learn to establish secure VPN connections across cloud environments using WireGuard, including detailed setups for site-to-site tunnels and VPN gateways with NAT on Equinix Metal, enhancing cross-platform security and connectivity.

Deploy Your First Server
Learn the essentials of deploying your first server with Equinix Metal. Set up your project & SSH keys, provision a server and connect it to the internet.

Ready to kick the tires?
Use code DEPLOYNOW for $250 credit